#
Findings in the NetSPI Platform
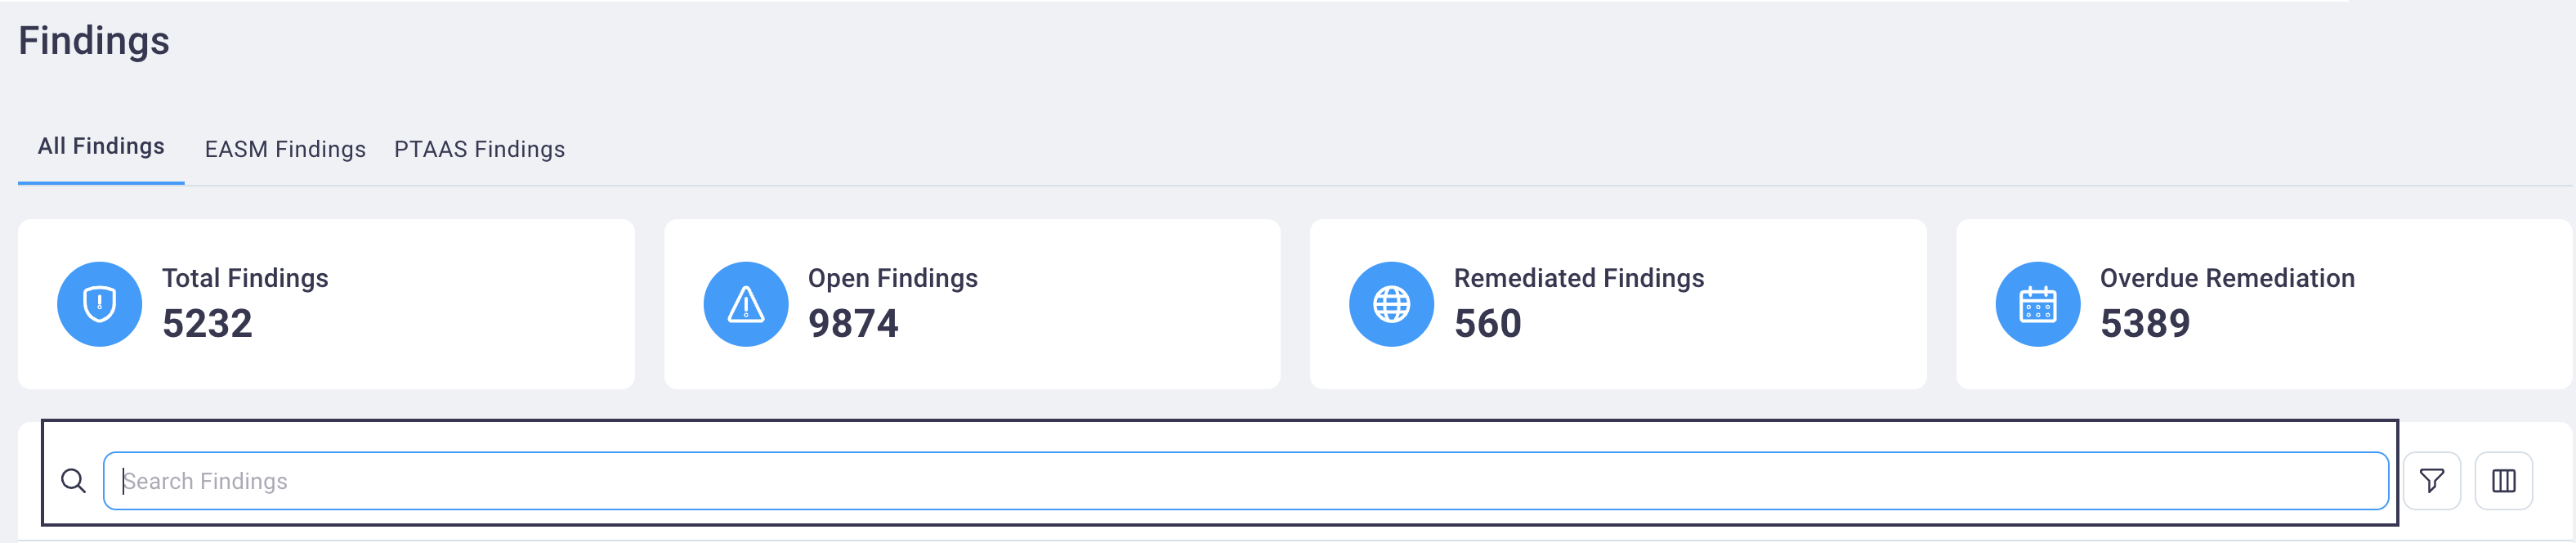
The Findings page displays all of your organization's findings on the All Findings tab, combining PTaaS, EASM, and CAASM-sourced findings when you are subscribed to all three both modules.
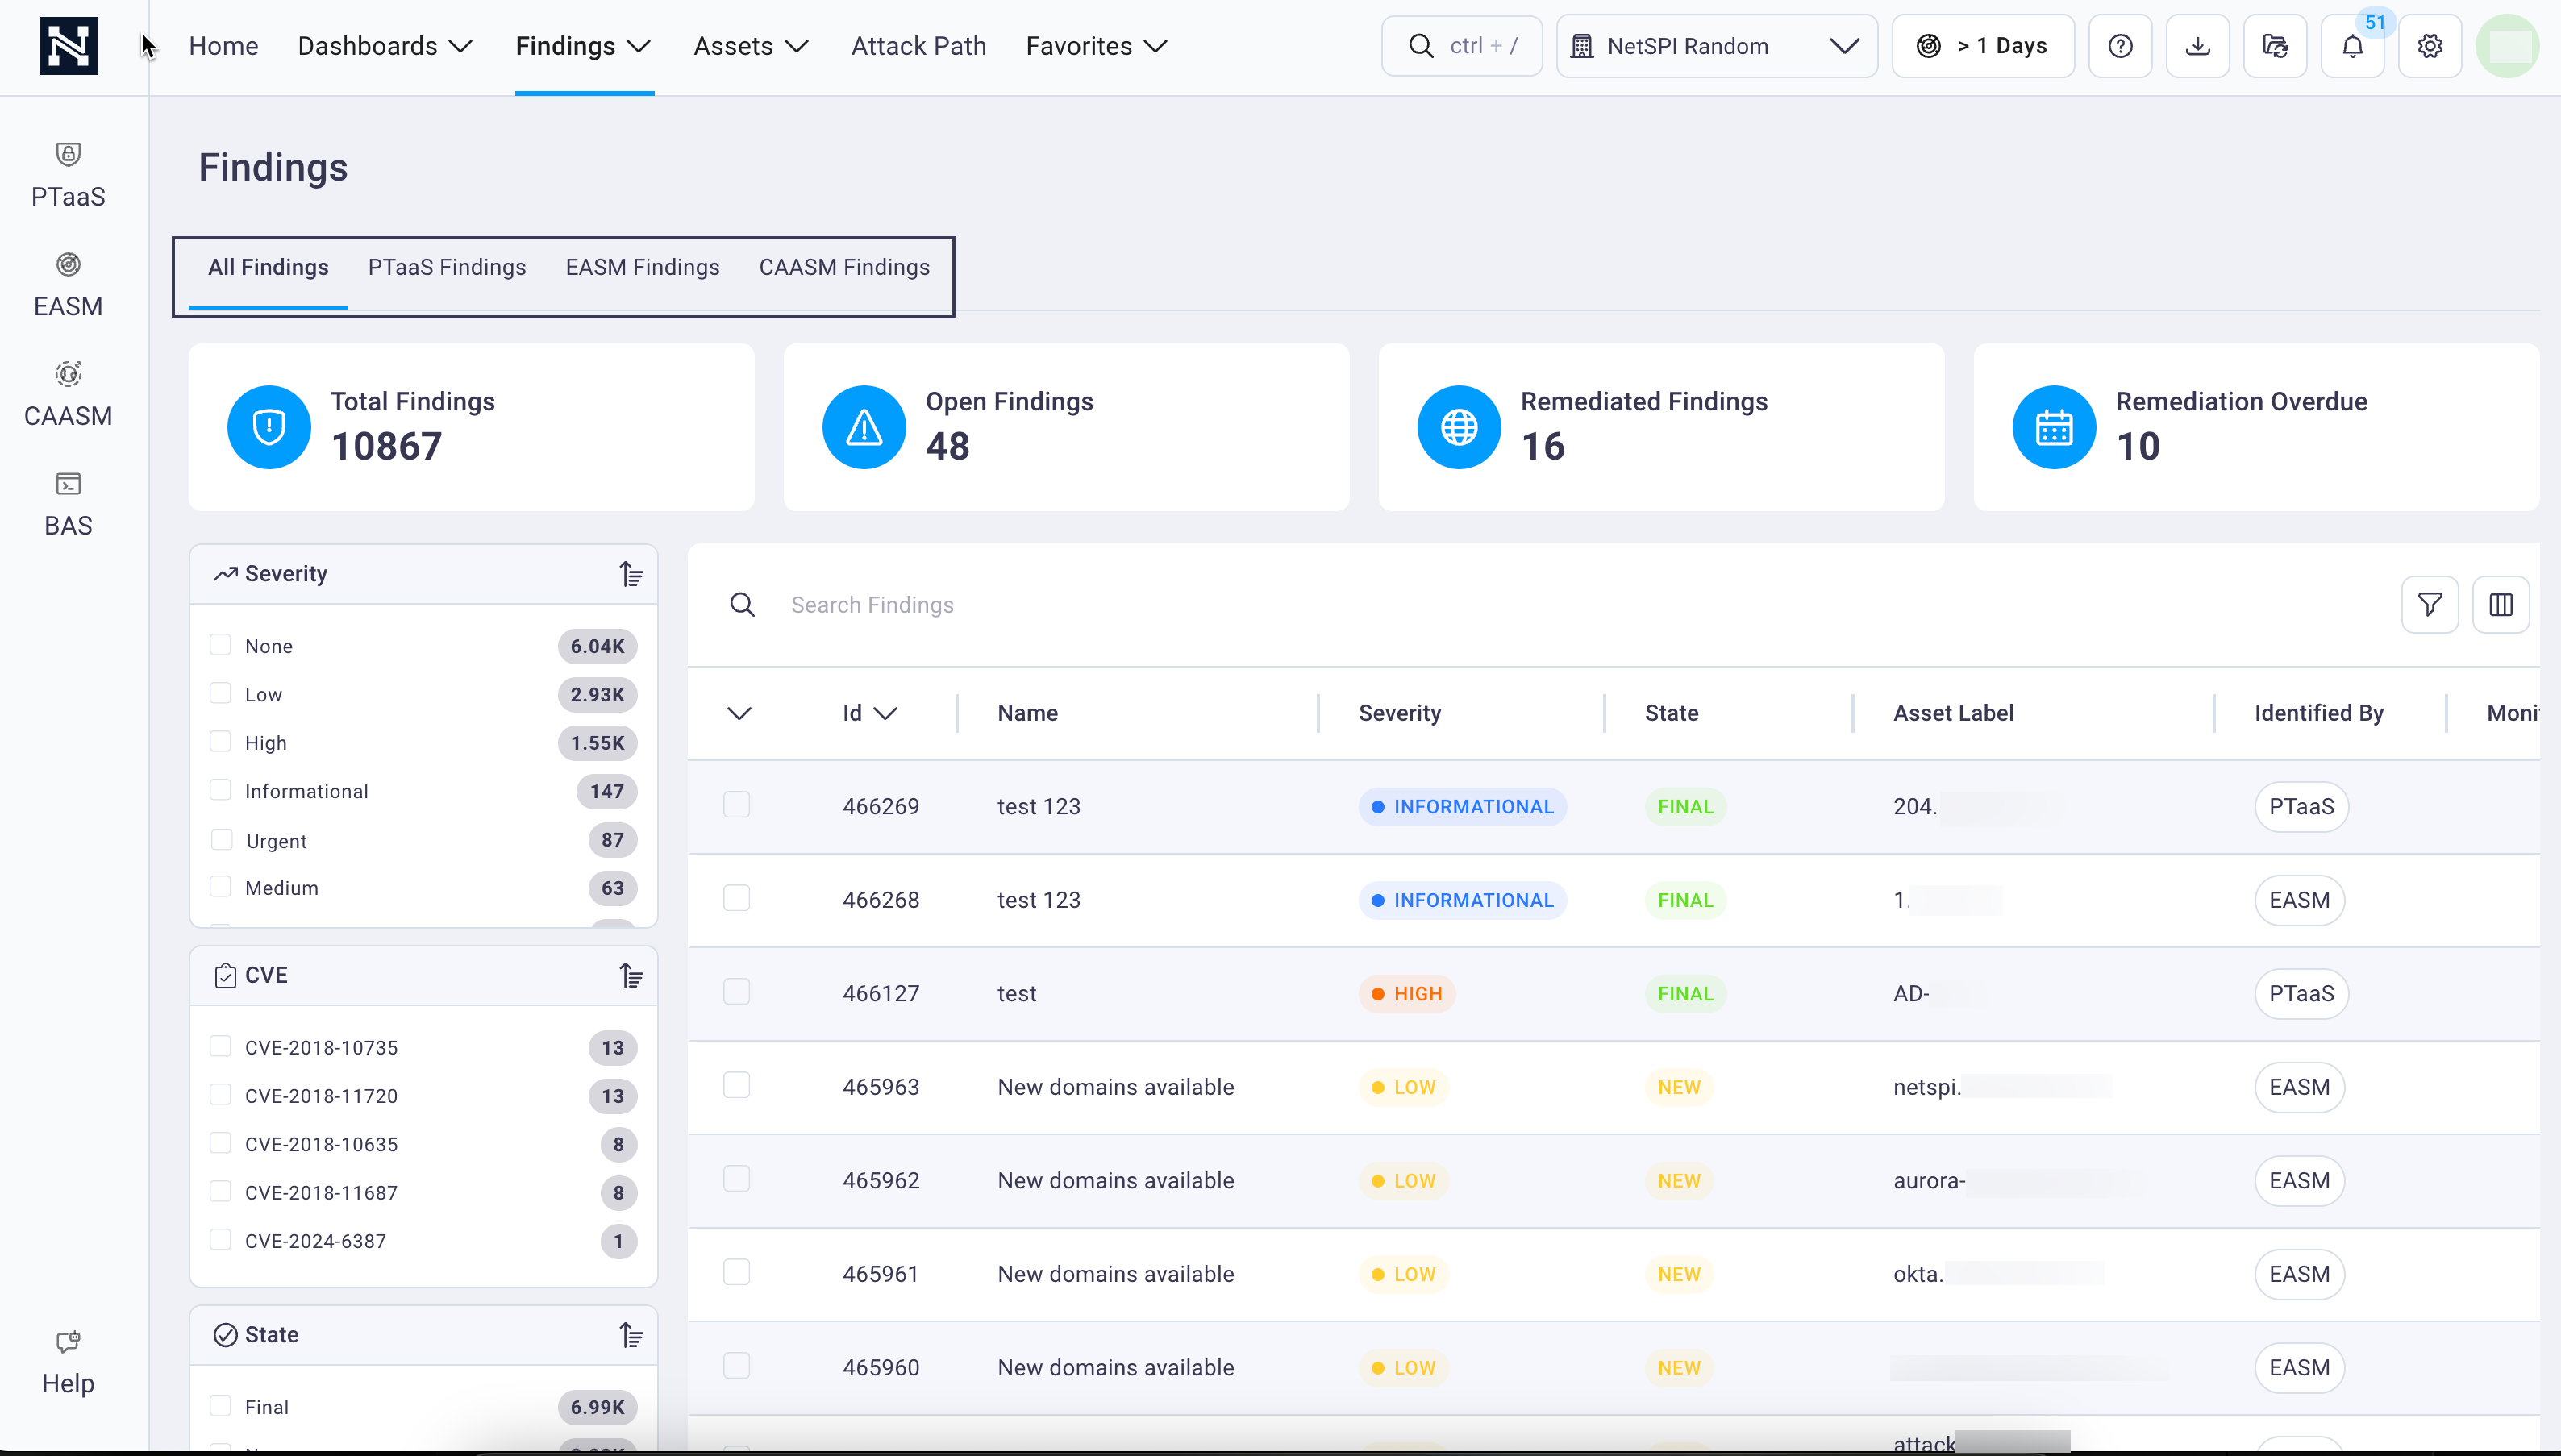
Select the PTAAS Findings, EASM Findings, or CAASM Findings tabs to view findings discovered from each of those module sources.
#
Accessing findings
From the top menu, select Findings, and then All Findings, PTaaS Findings, EASM Findings, or CAASM Findings.

This displays the Findgins page for your organization, with the All Findings tab as the default display.
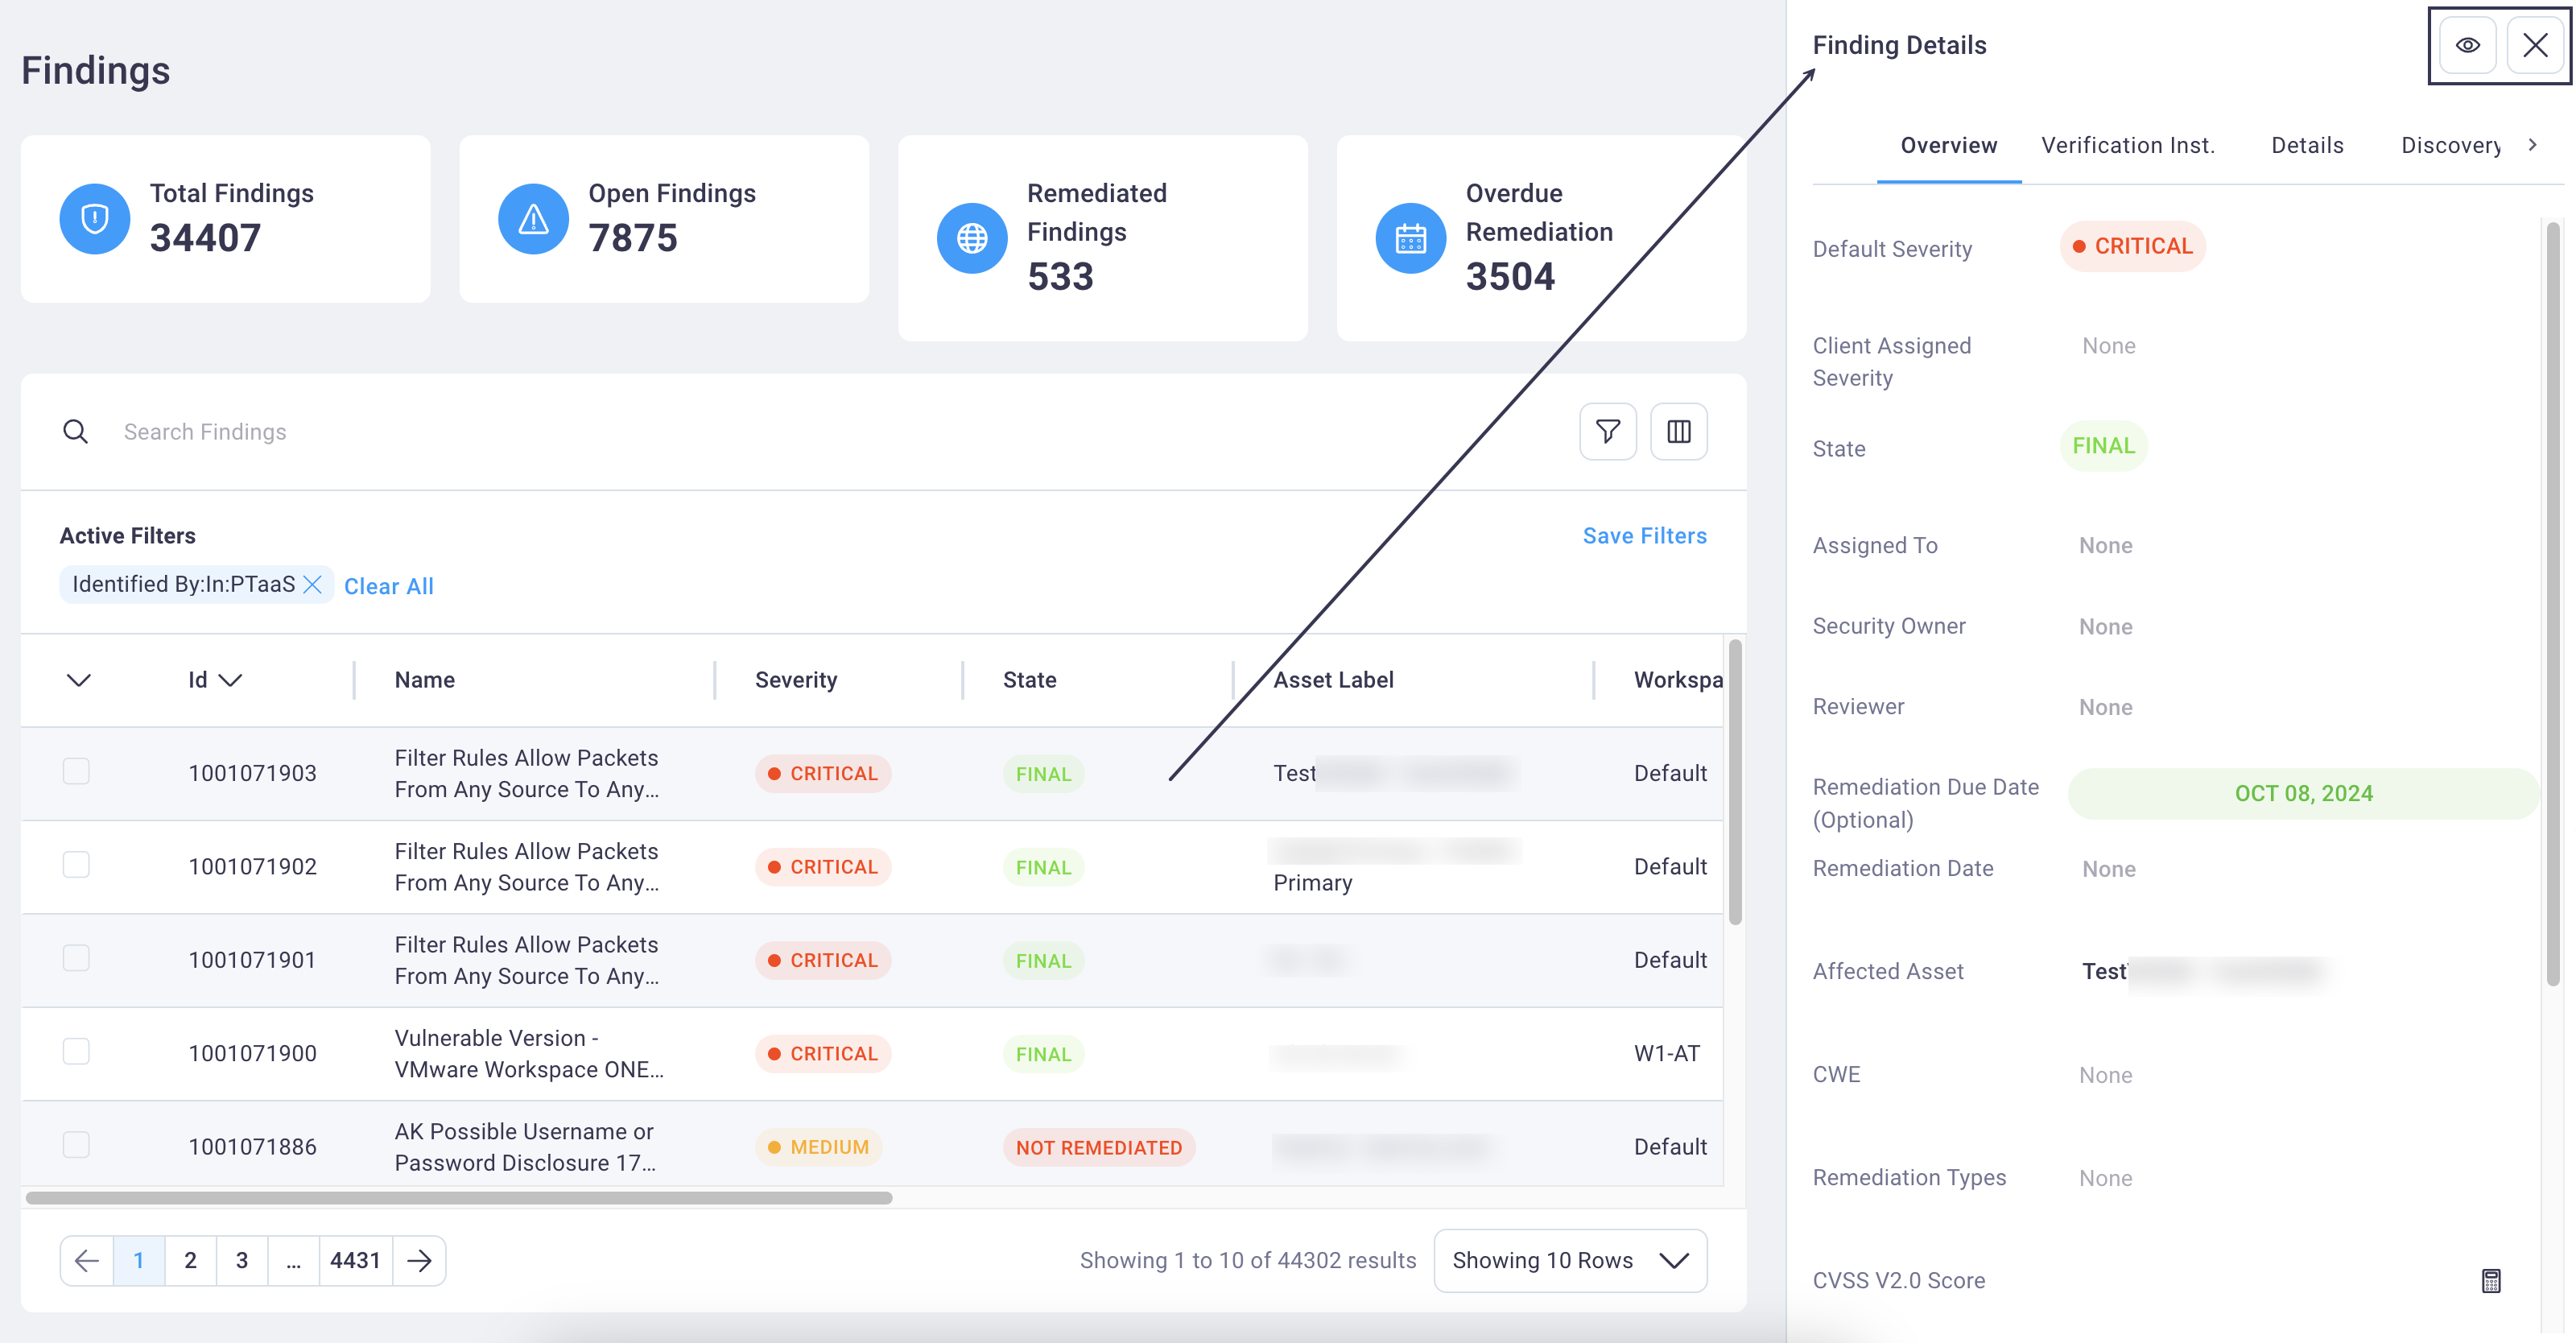
Each module displays the same set of finding cards: Total Findings, Open Findings, Remediated Findings, and Remediation Overdue.
Use the image and table below as a beginning reference for actions you can take to work with your organization’s findings.
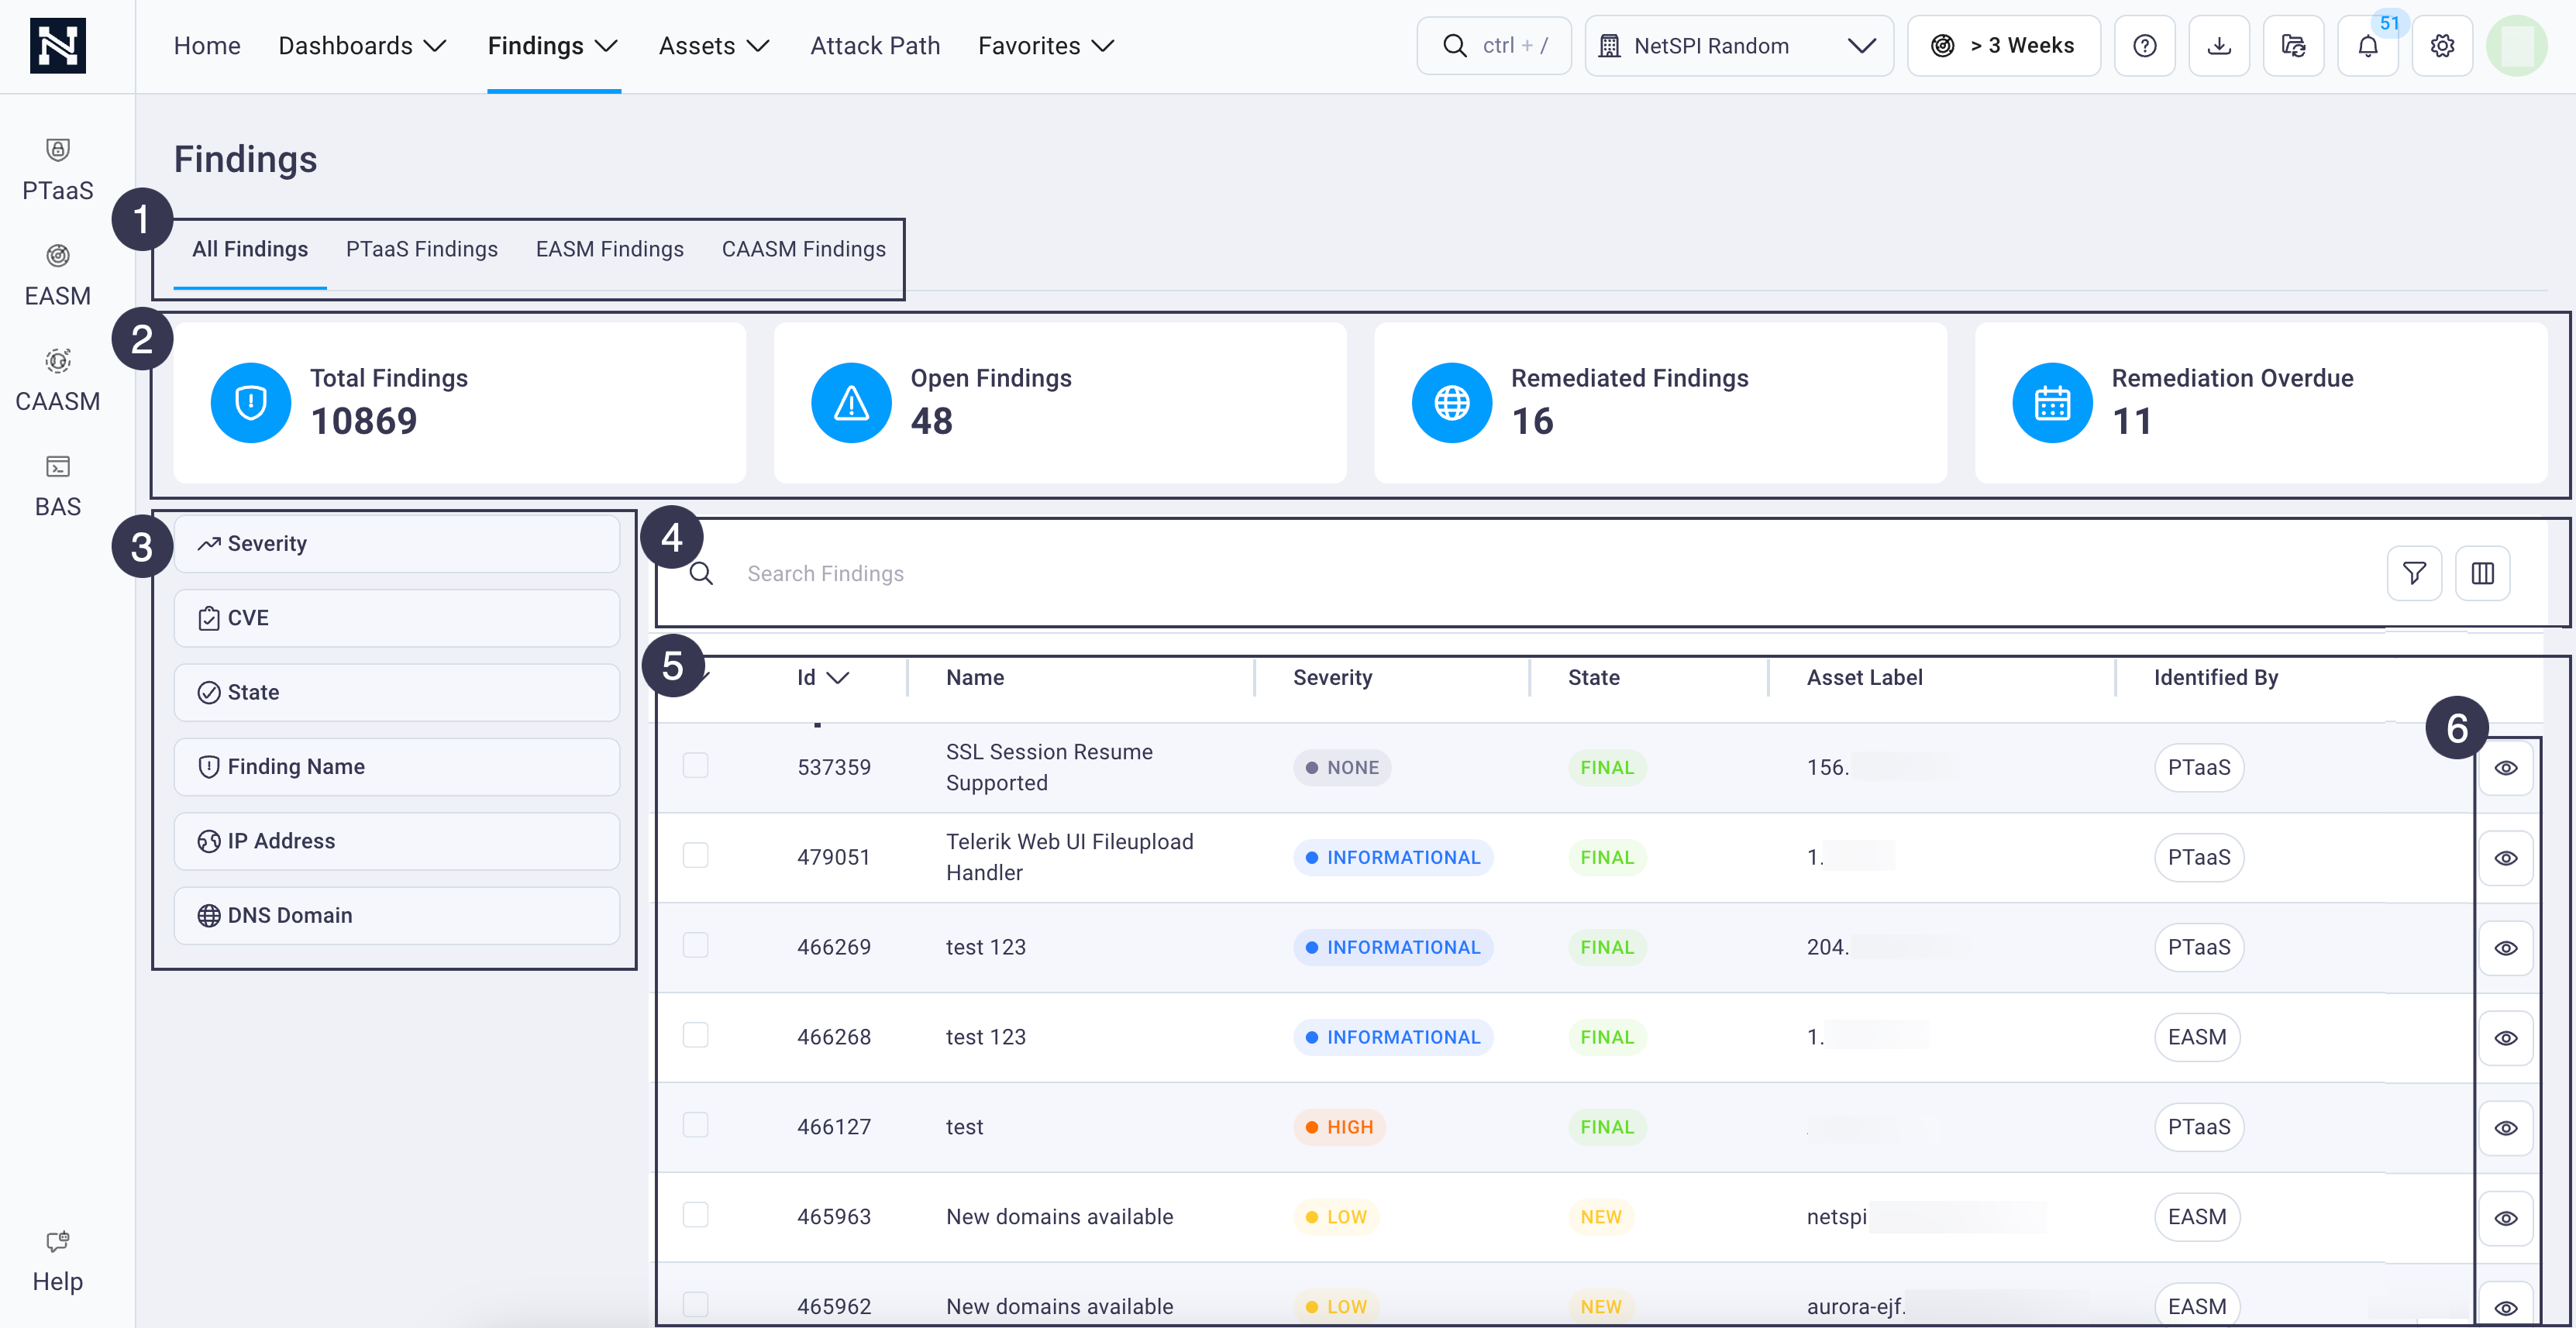
| Callout Functionality | Description |
|---|---|
| 1 | Findings source view: Choose to view all findings across all modules, or only those findings discovered by PTaaS, EASM, or CAASM. |
| 2 | Findings Cards: Select any Findings card to filter the findings that display in the Findings table to match your selection. The selected card displays the following based on the card's label: total number of findings, findings with a status of Open, findings with a status of Remediated, User Remediated, and Exception Granted, and findings with a status of Remediation Overdue. |
| 3 | Finding Fast Filter: Select a finding aspect from the left navigation |
| 4 | Search / Filter / Table Display |
| 5 | Findings Table: This is where all your findings display.
 |
| 6 | Select the Details icon 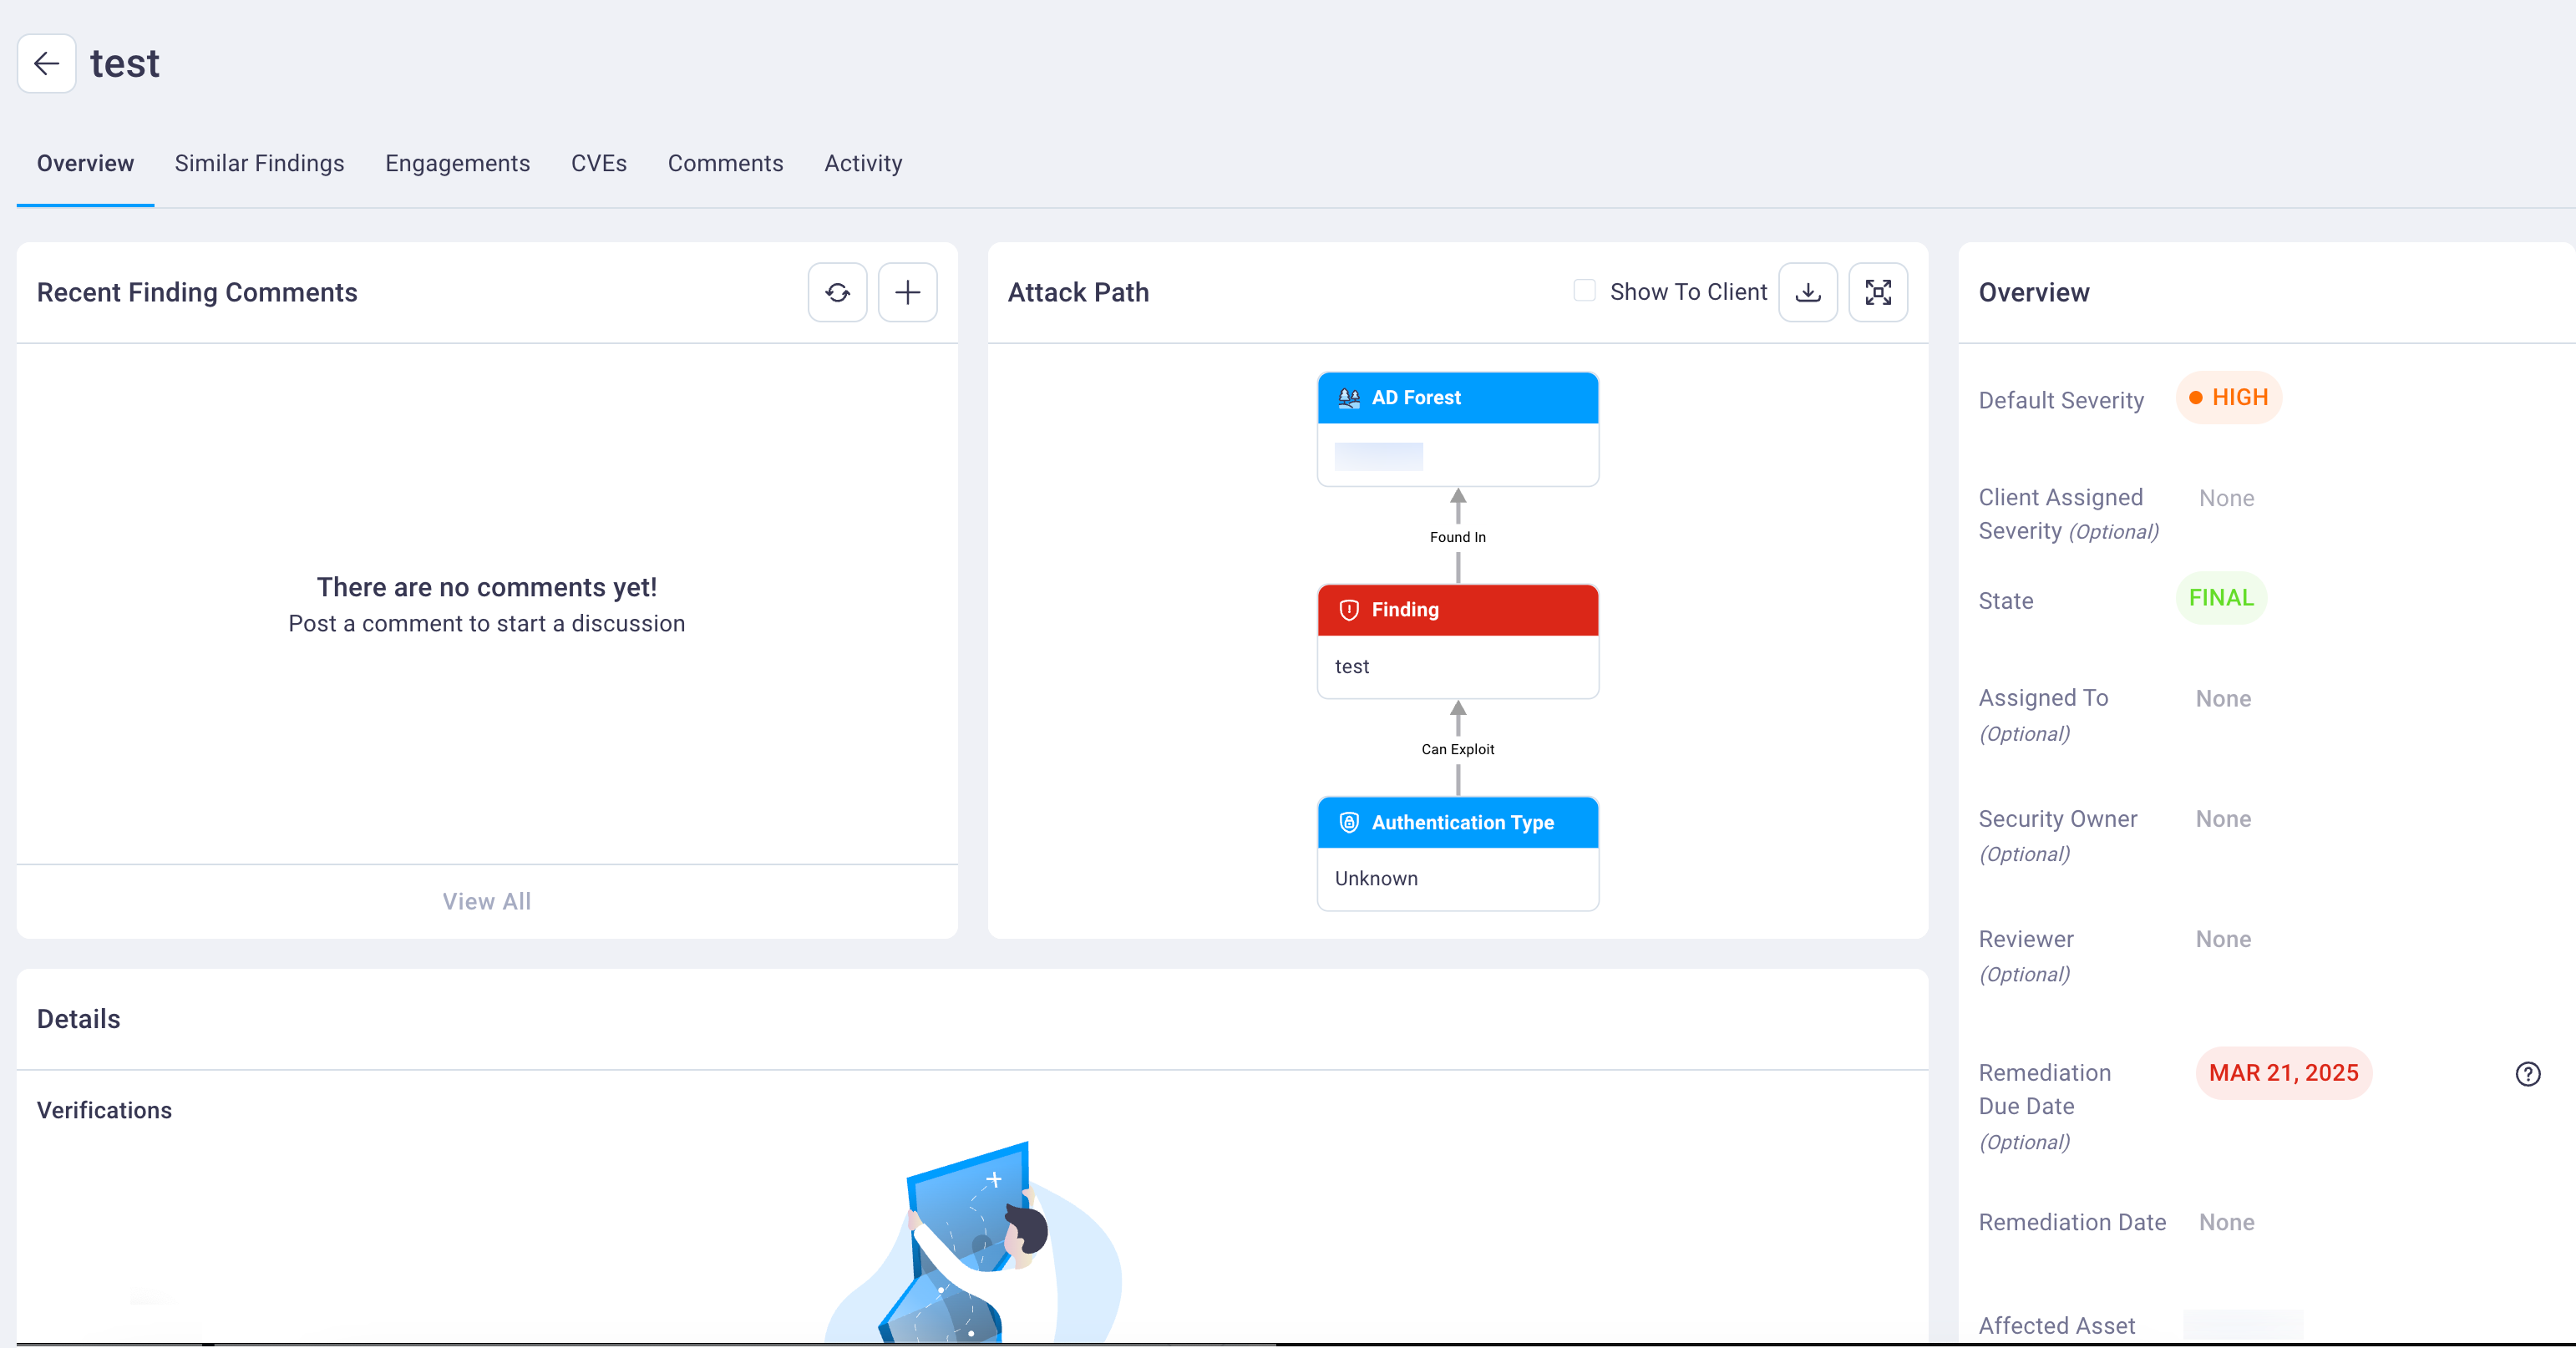 See the |
#
Filtering findings
There are three ways to filter the findings table to bring focus to the findings that matter most to you.
- Top row
filter cards Fast filter in the side navigation- Filter icon for
custom filtering
#
Filtering findings using the top-level filter cards
The top row of the Findings page displays cards of total, open, remediated and overdue remediation findings.
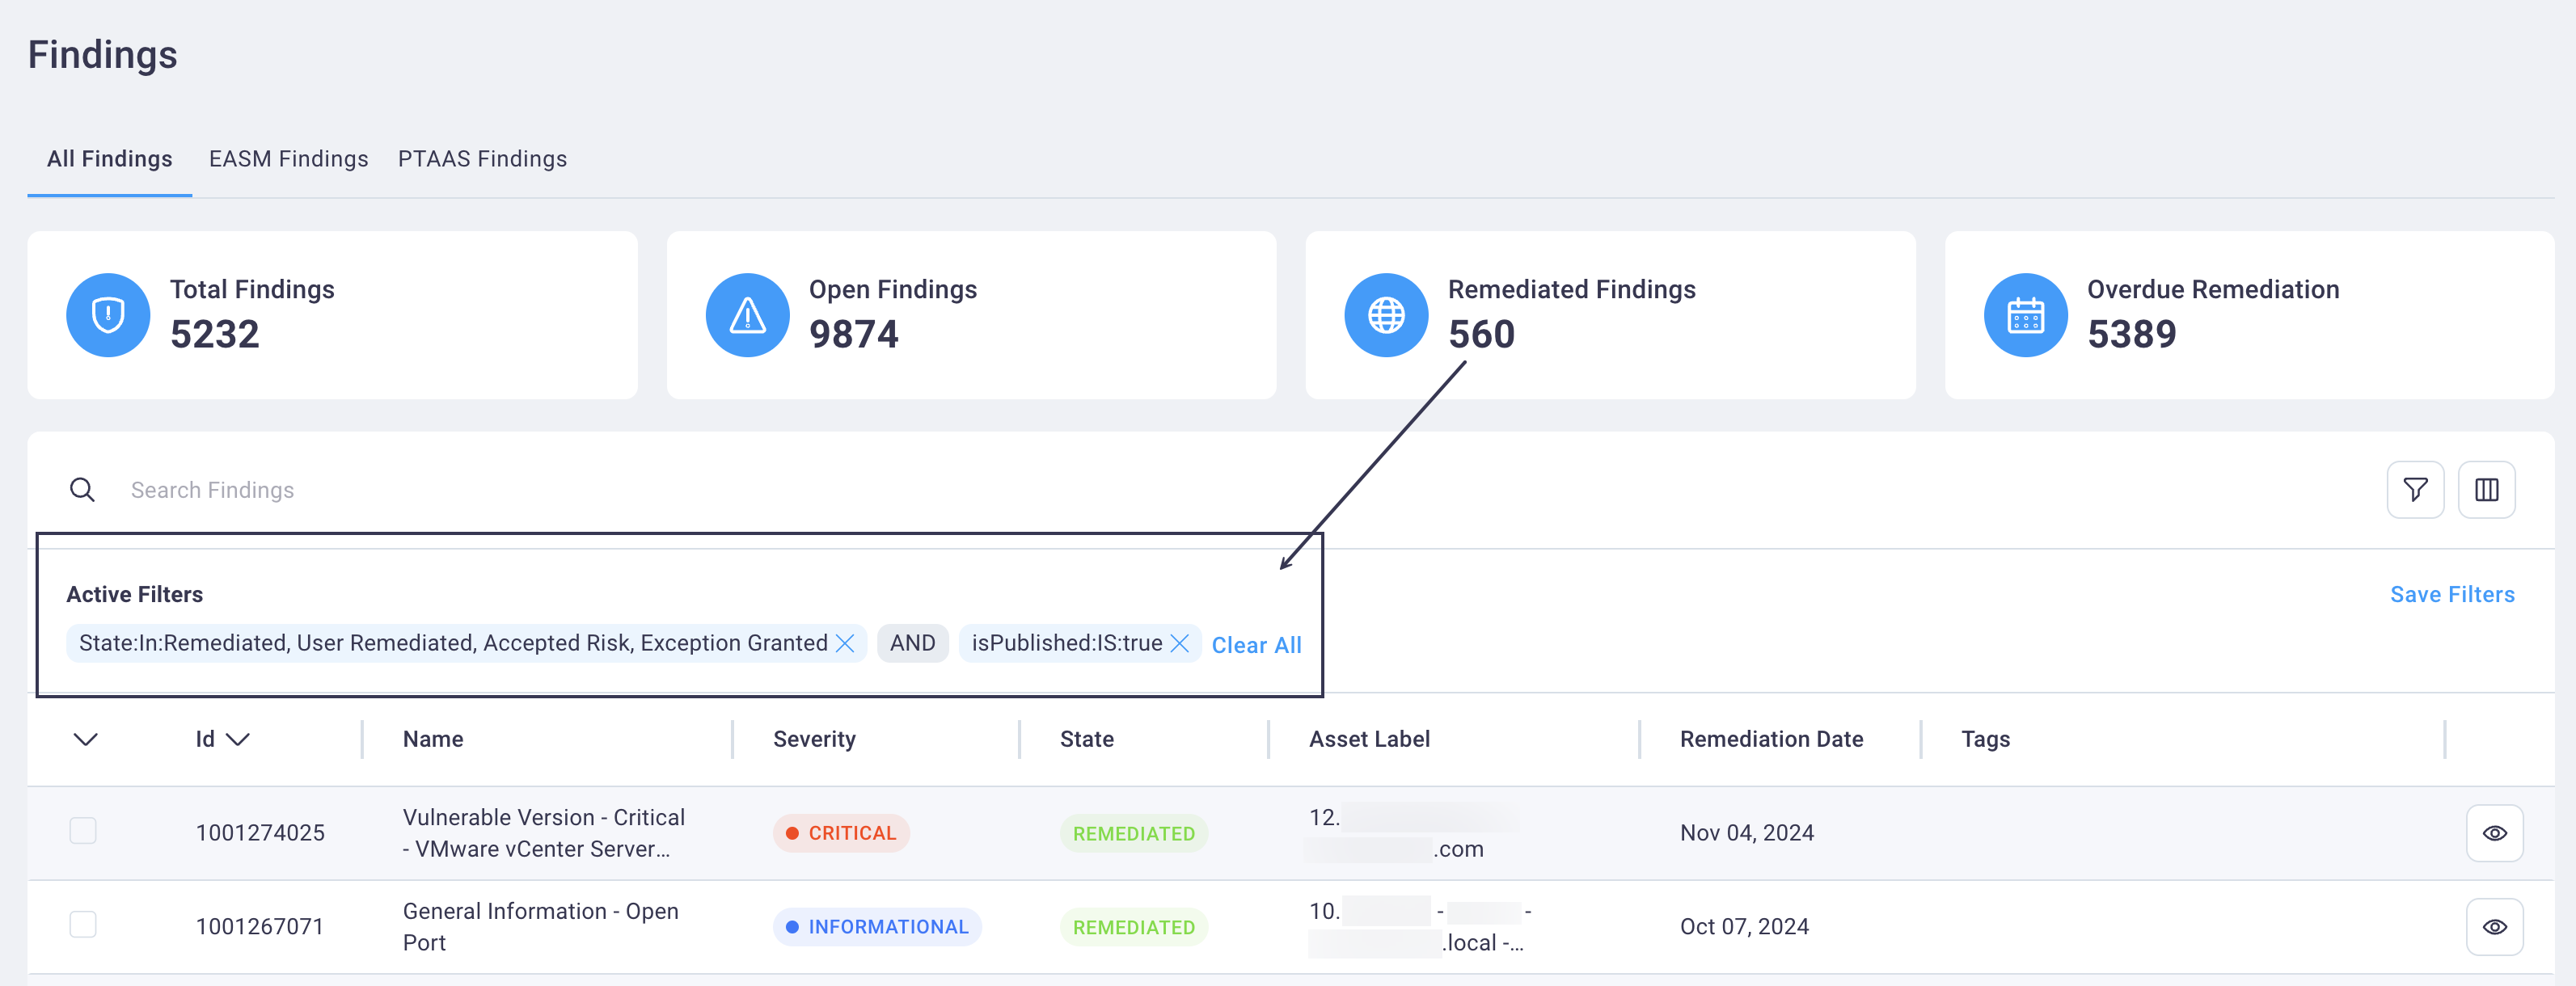
Select any one of the Findings filter cards to filter the Findings table to display findigs data that matches the selected card.
The Active Filters row displays at the top of the table when you select a filter card (except for Total Findings) so that you can see which finding states are included/excluded in the filtered list.
Select the Clear All link in the Active Filters field to remove all filter criteria.
#
Fast filter
The fast filter functionality is located in the side navigation within the Findings page. It provides a quick way to filter on items that are likely to be the most important to you.

To apply the fast filter, select check boxes for as many of the fast filter criteria as you need, scrolling down to view more items. As you select or clear checkboxes, the table dynamically changes to display finding results matching your selections.
Use the illustration and text below for more details on the Findings page fast filter functions.

There are multiple fast filters for different aspects of the selected page (Severity, CVE, etc.).
The Findings page's fast filter items include:
- Severity
- CVE
- State
- Finding Name
- IP Address
- Domain
A sort button toggles from highest to lowest count and back for each fast filter option.
Checkboxes filter the table to the right, displaying all records that match the selected criteria.
A total count displays for each fast filter option.
#
Custom filter
To perform a custom filter use the following steps:
Select the Filter icon to display the Saved Filters/Filters dialog box.
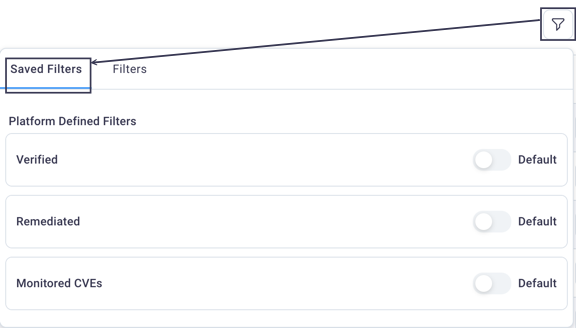
Select the Filters tab to display the freeform filter fields where you can select values and logic to build your own filter.
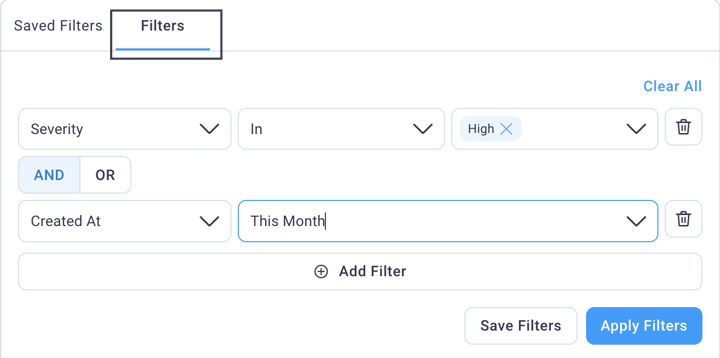
Select the Apply Filters button to display the Findgins table with values that meet your applied filter criteria.
#
Searching findings
Use the following steps to search findings.
Enter search criteria in the Search Findings field.
Press Enter to perform the search and see the results.
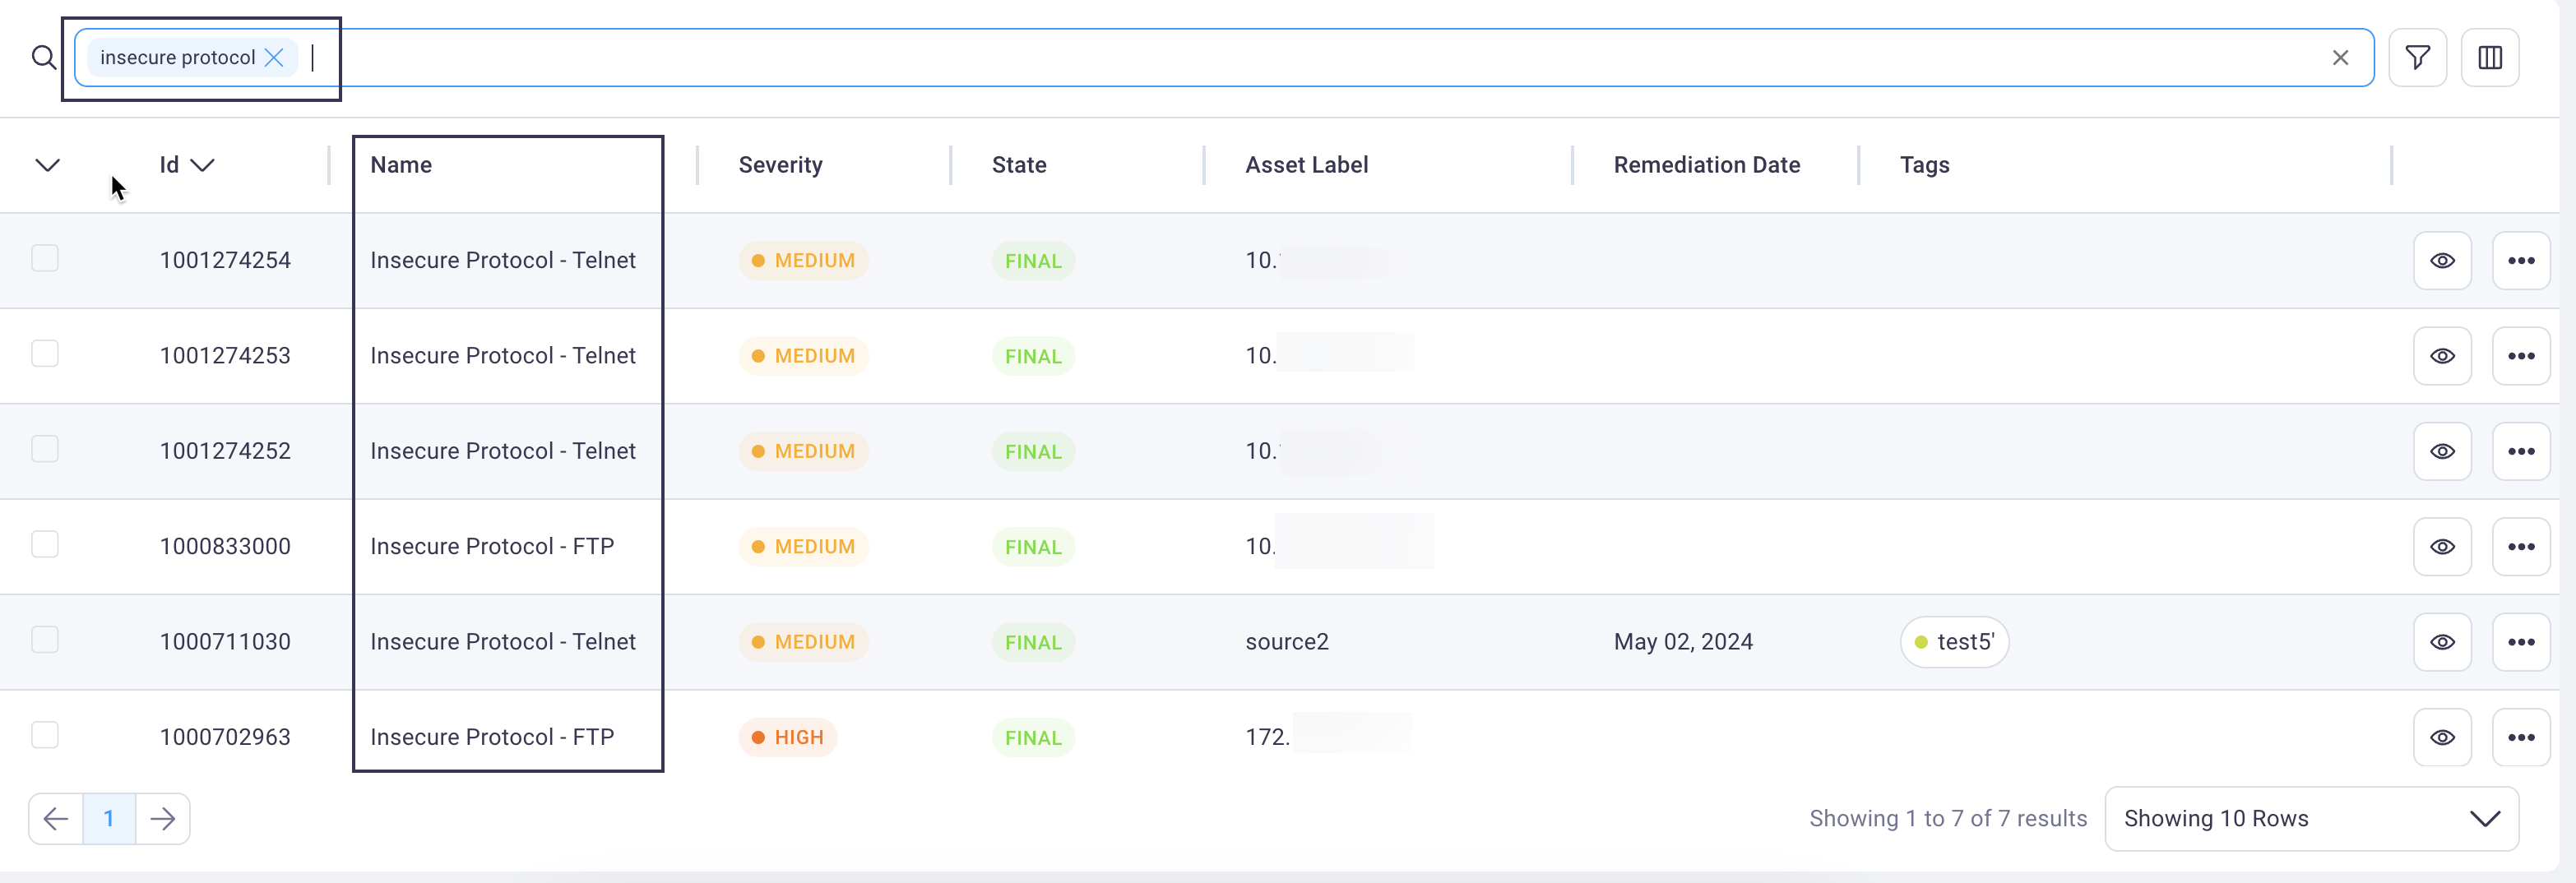
Select the 'X' next to your search text or at the far right of the search field to clear the results and return to the default table display.
See also Search, Sort, and Filter Tables
#
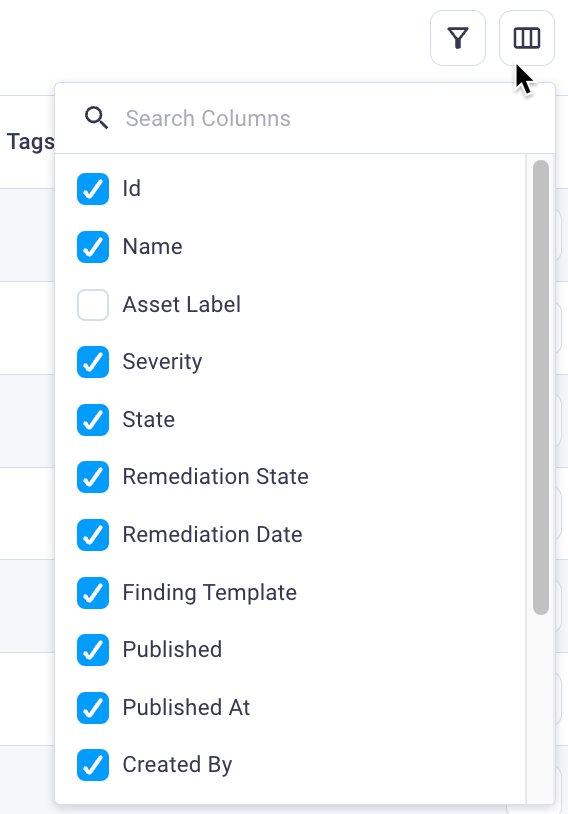
Configure the findings table display
Configure the columns that display in the Findings table by selecting the Table icon and selecting or clearing checkboxes for columns you want to display/hide.
See also Search, Sort, and Filter Tables
#
Sorting the findings table
Use the following steps to sort the findings table based on a single column.
Select any table column header to sort the Findings data by the selected column.
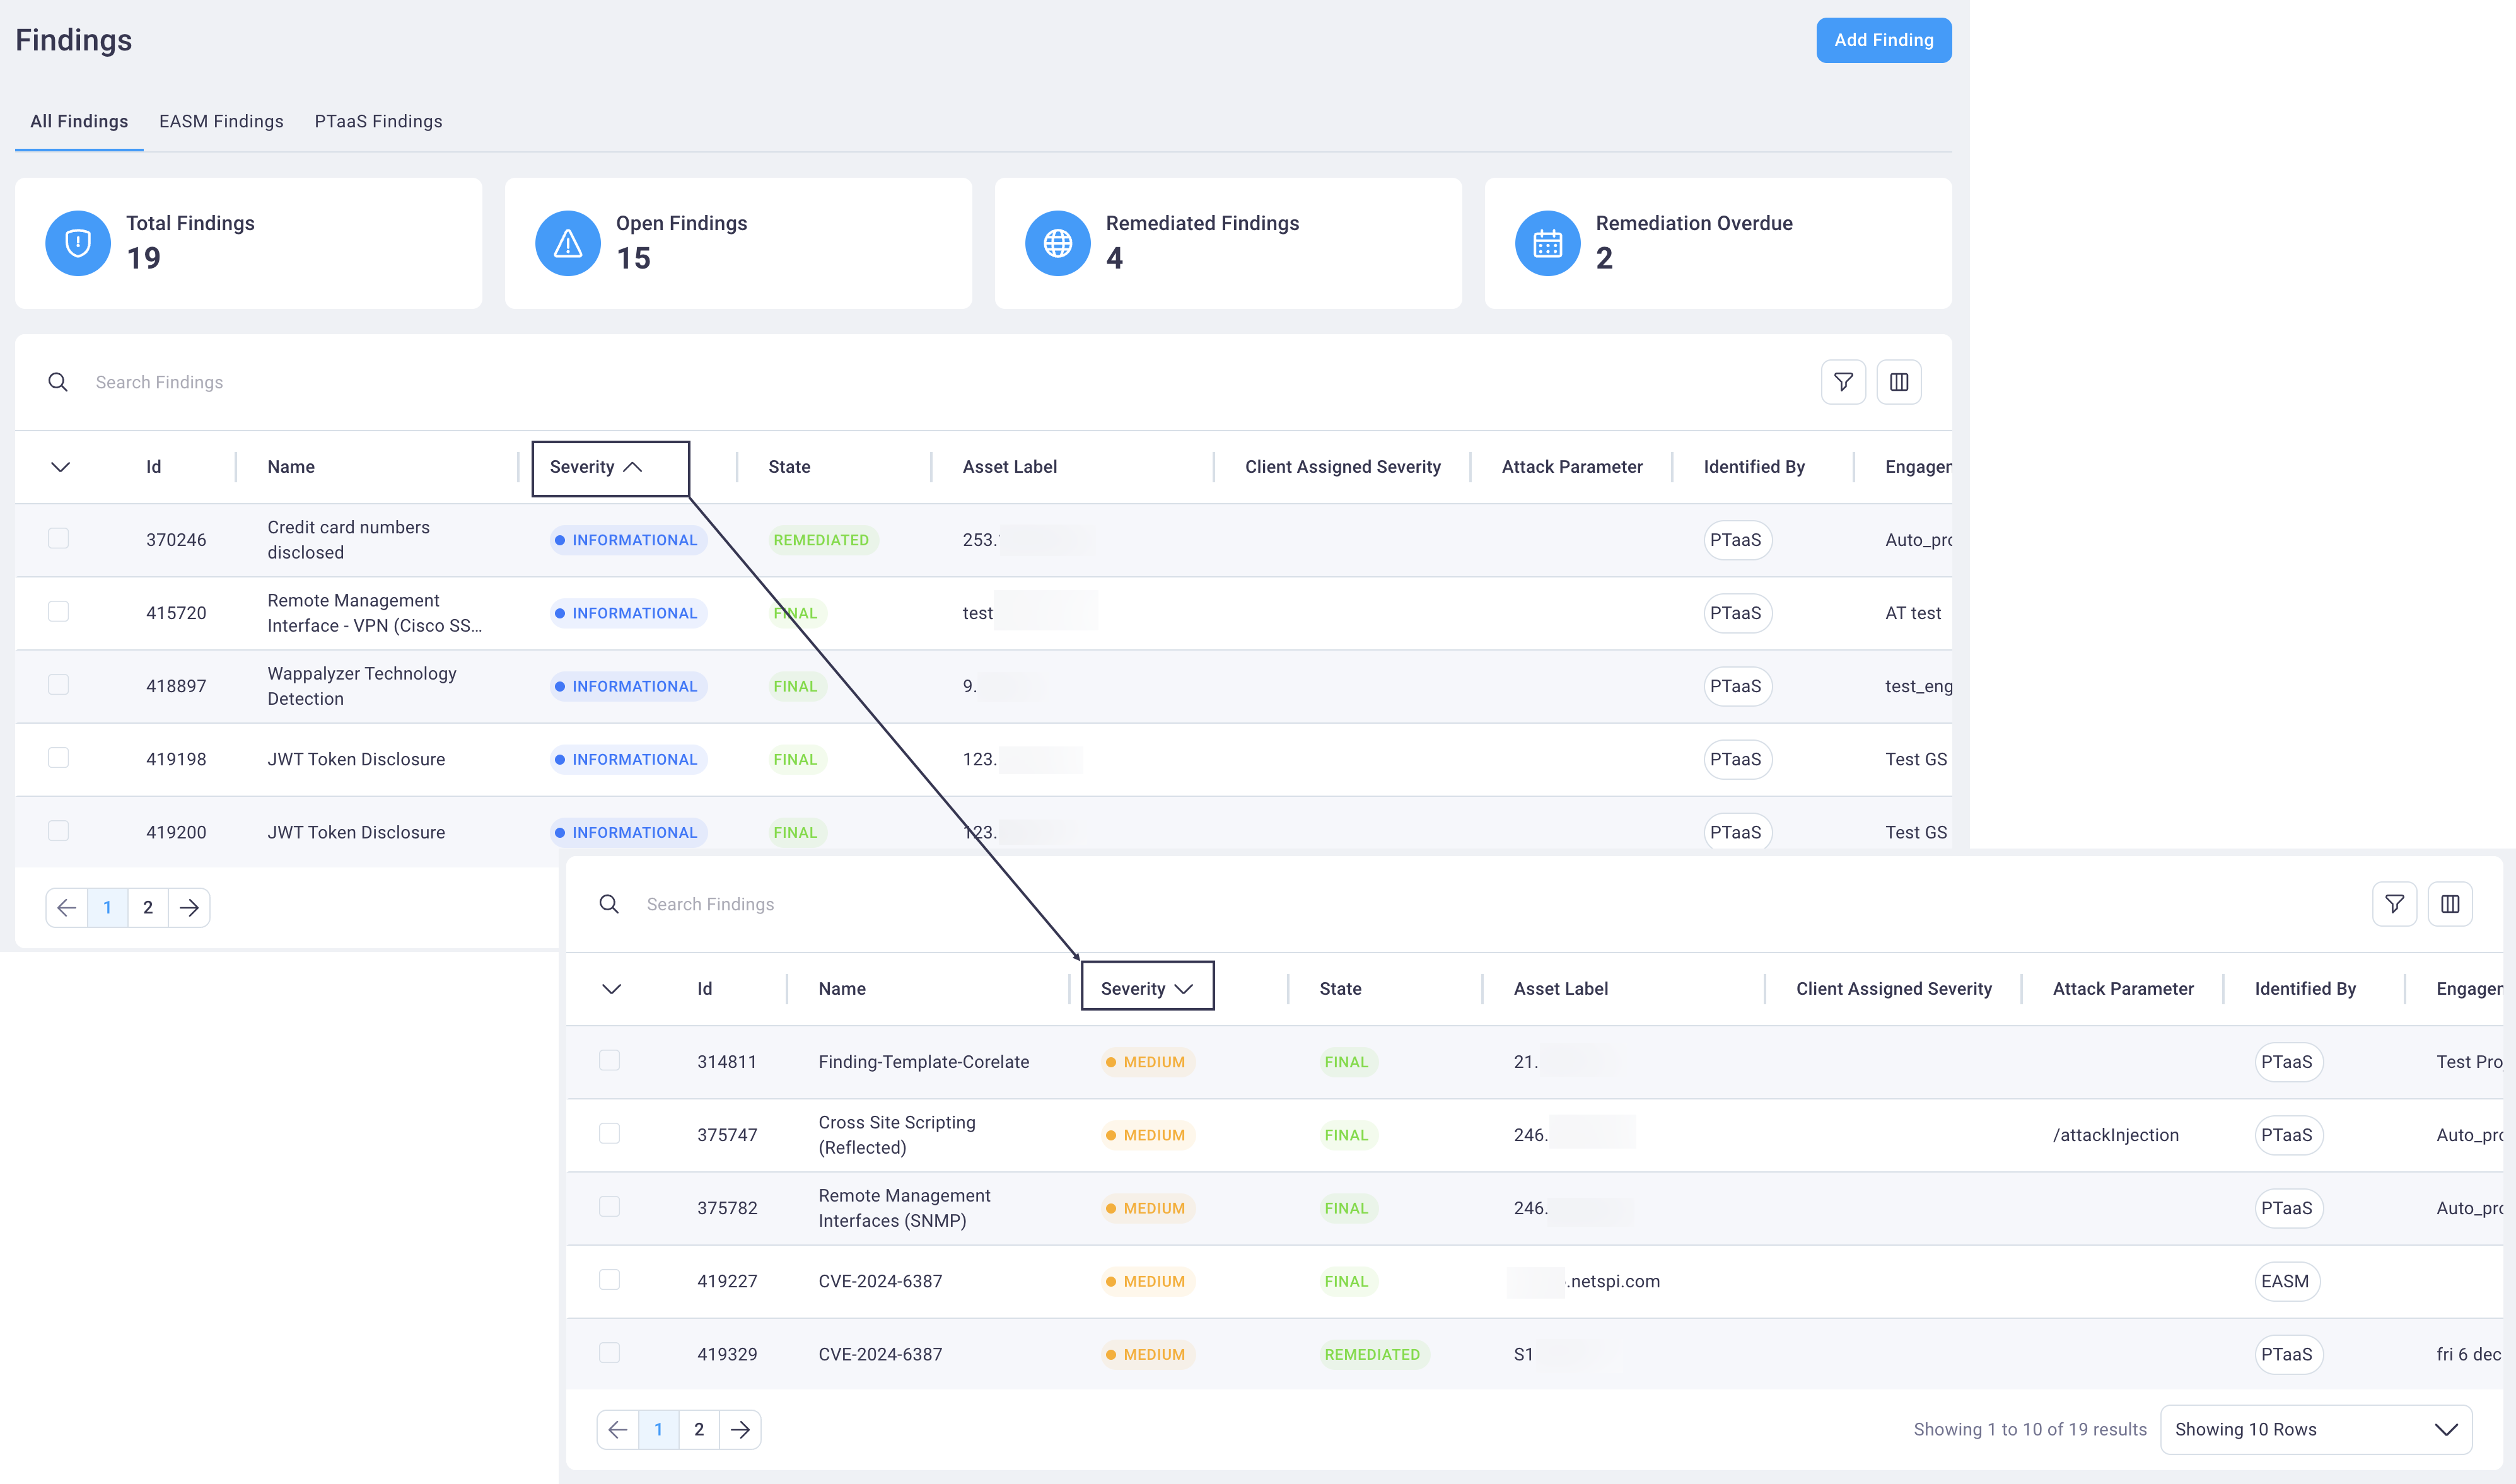
Select the table column header again to toggle the data for that column from ascending to descending and back again when selected again,
Tip
If you've customized your table such that the display is wider than the screen display, you may need to scroll right on the page to see all the table headings.
#
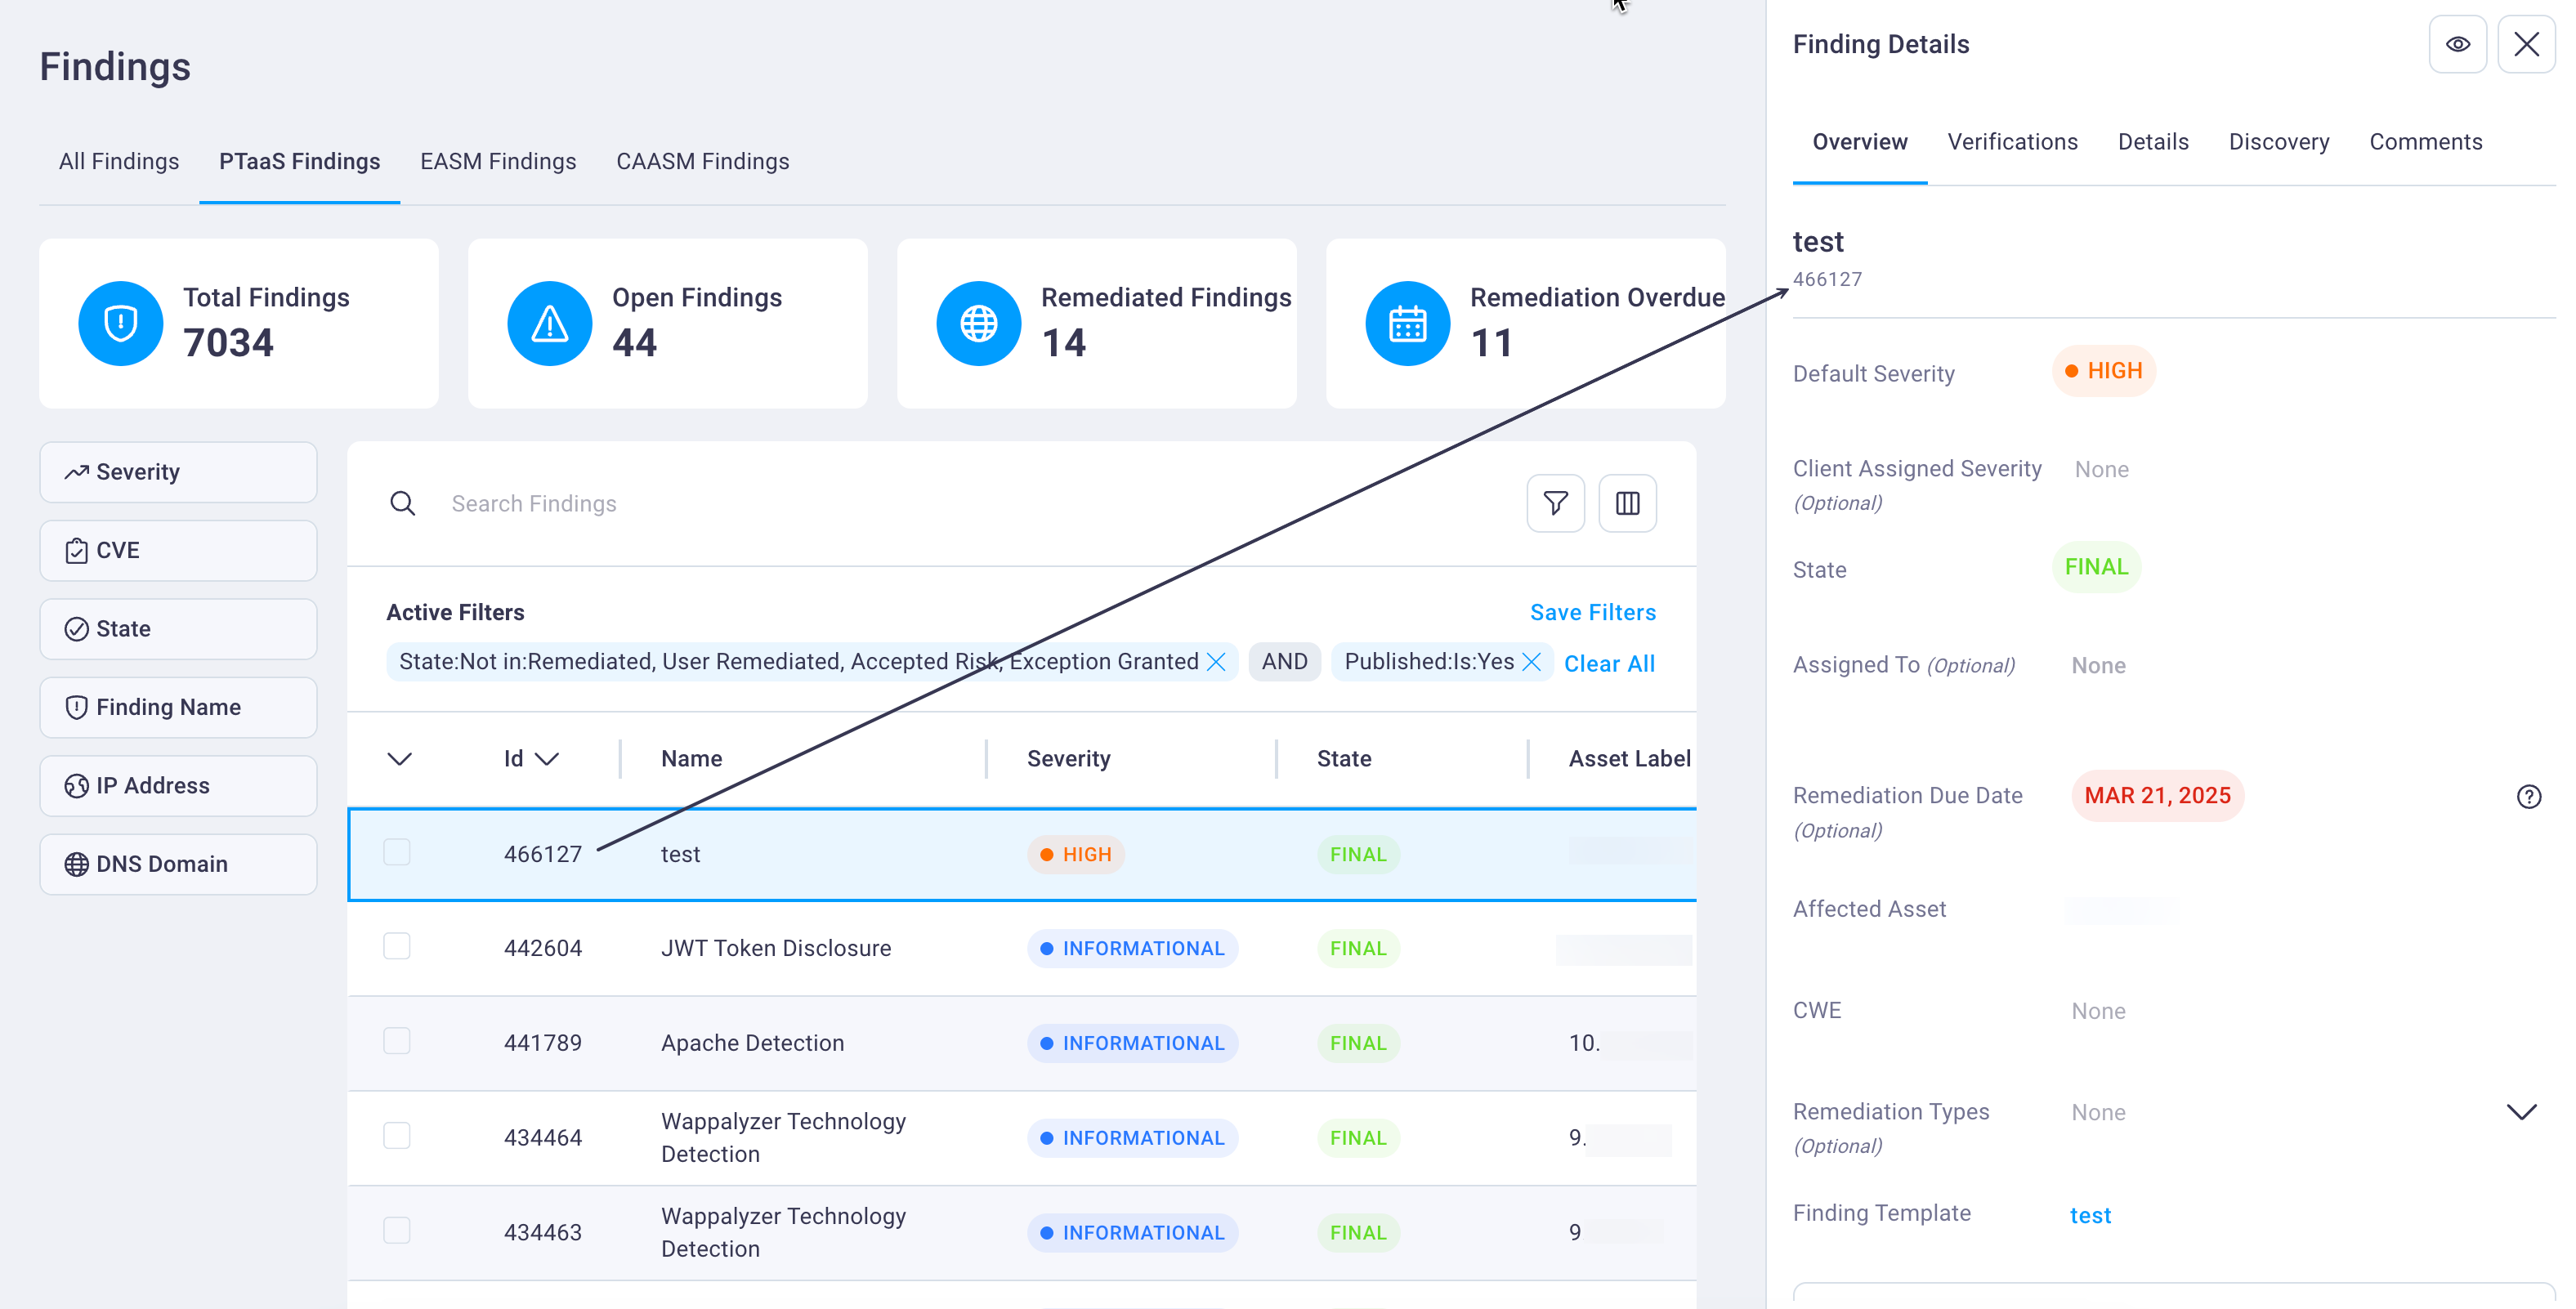
Finding Details page
Use the steps below to display the details page for any finding in the Finding table.
Select the Details icon
 to display the
Finding details page for the selected finding in a full page display.
to display the
Finding details page for the selected finding in a full page display.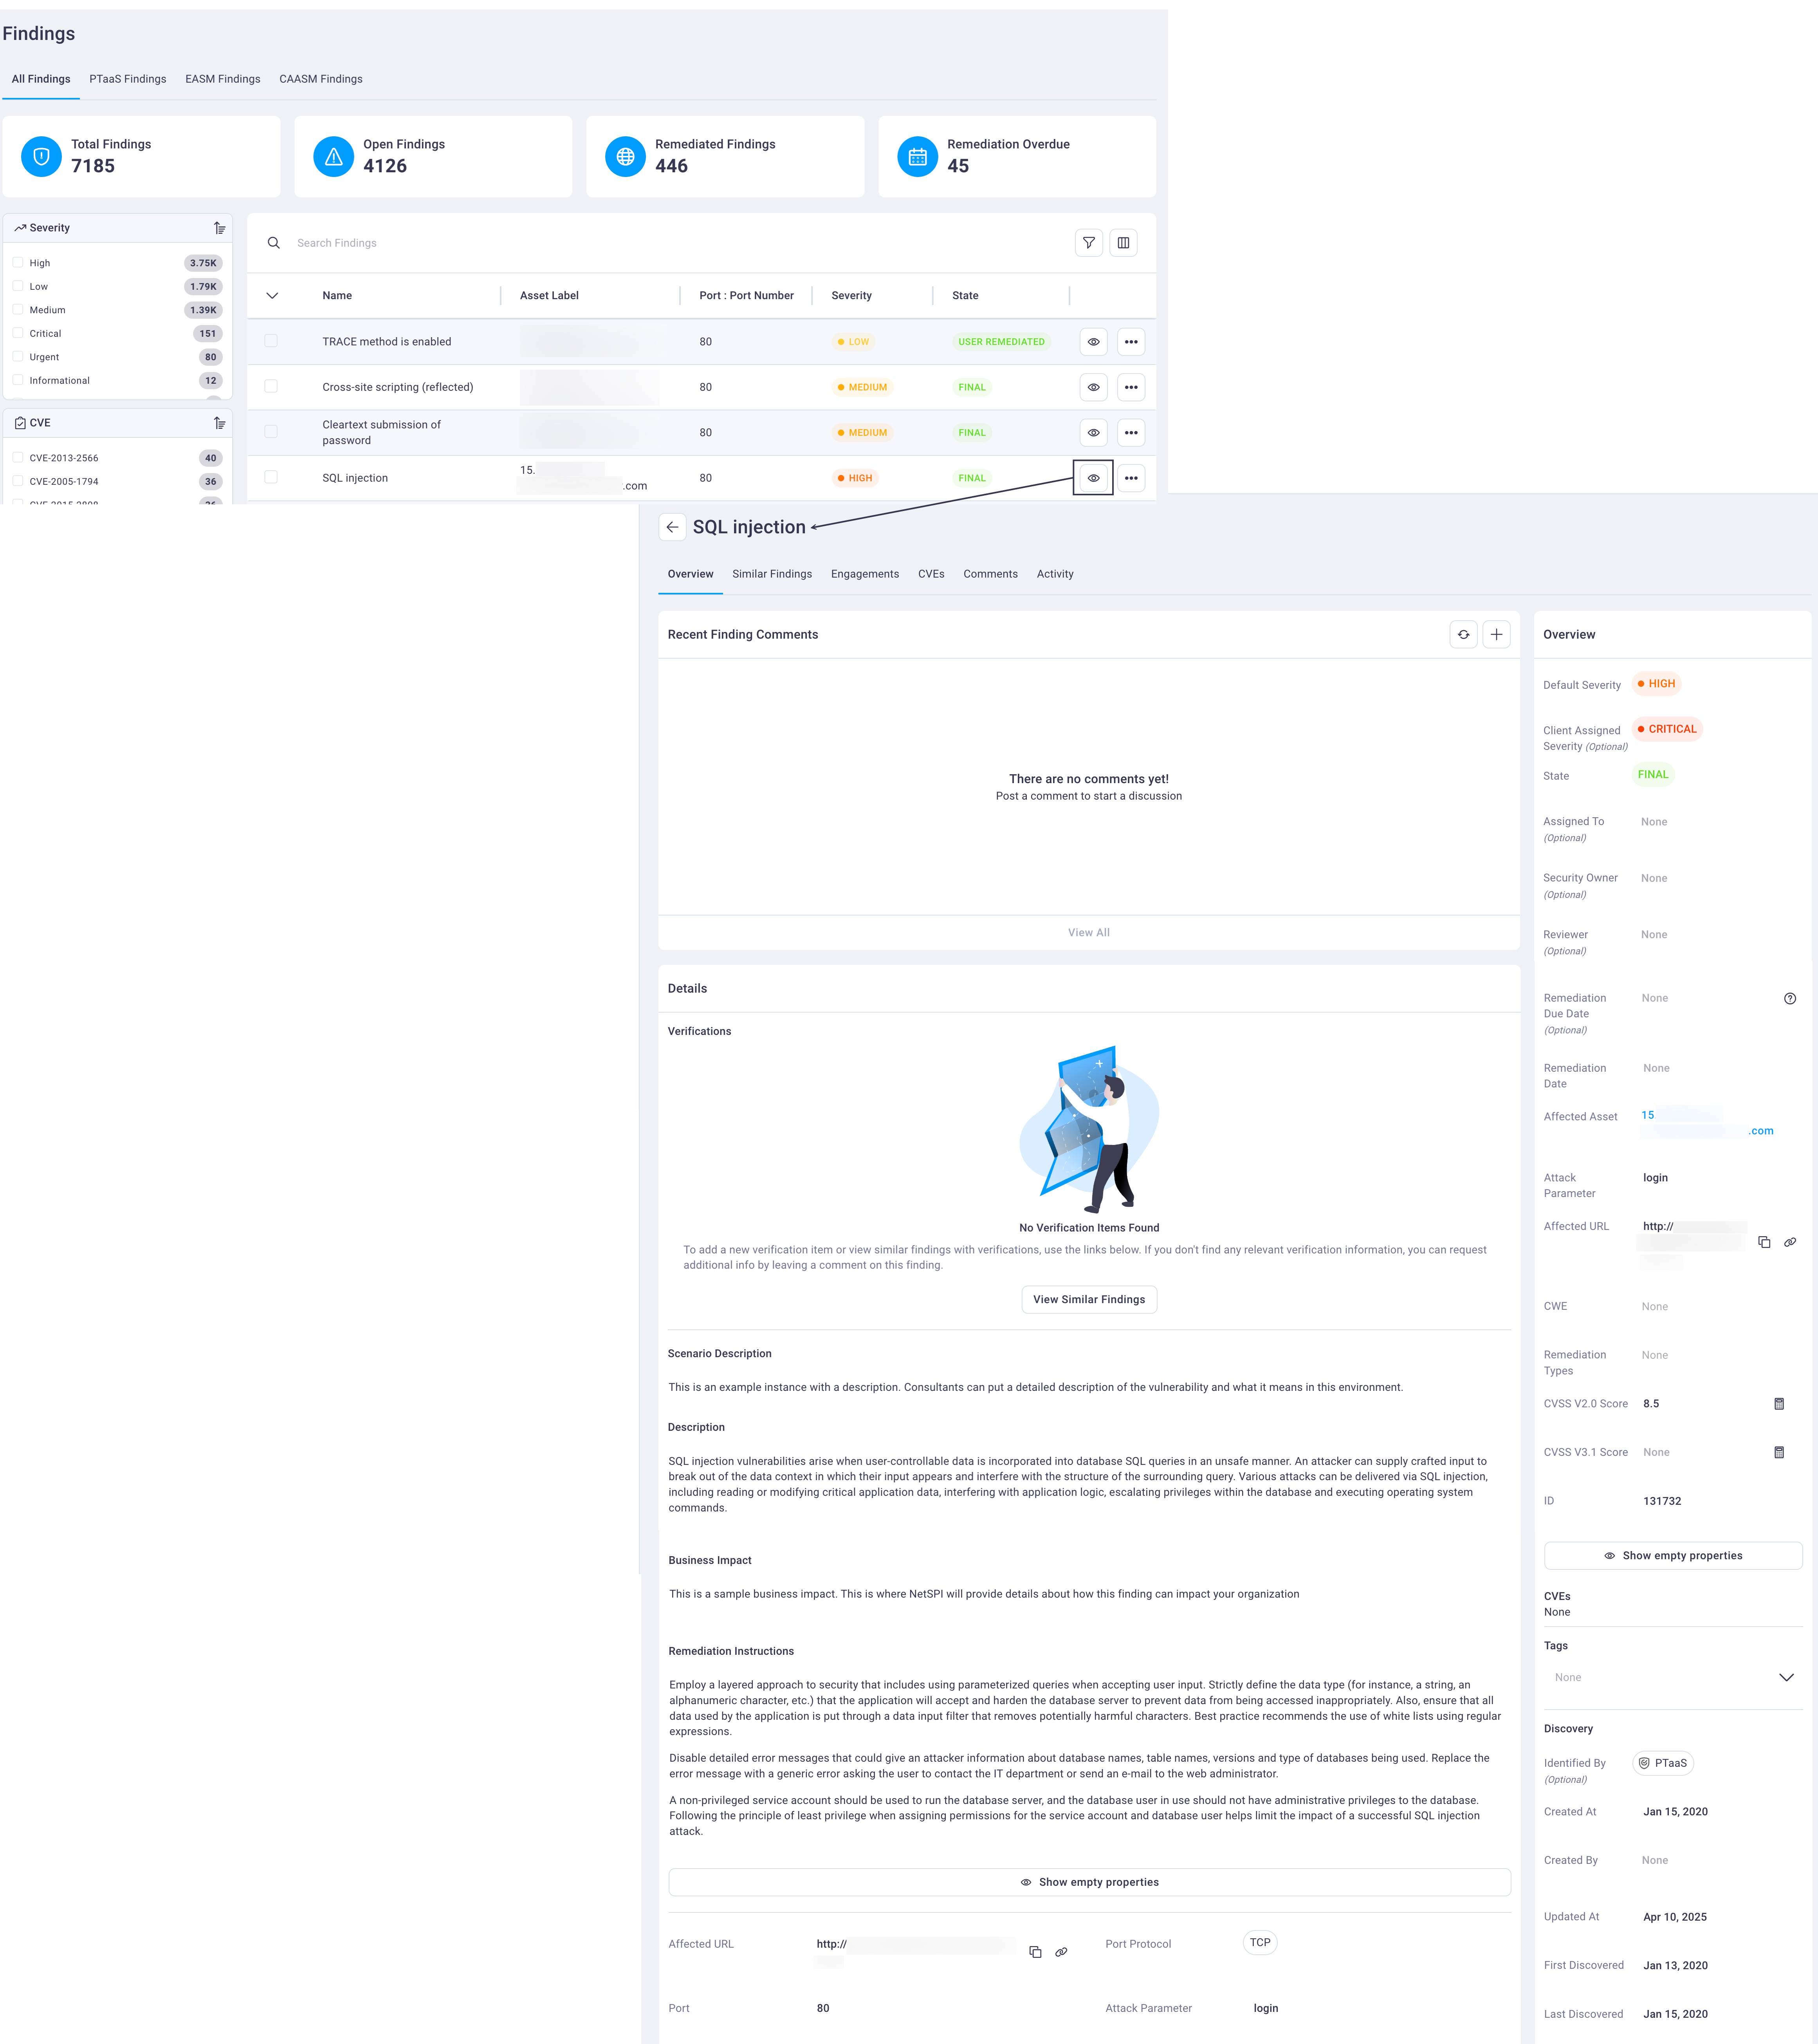
Use the table below to help you navigate the Finding details page and the Overview tab display. See the
Tabs on the Finding Details page section below for information on all the tabs.
Note
If you select anywhere in a finding table row, a condensed veiw of that finding's details dipslays in a dies pentl to the right. You can also select the Details icon here to move from the condensed view to the full page view.
#
Tabs on the Finding Details page
The default view is the Overview tab, as described above. The finding’s category/name displays as a view-only title at the top of the page.
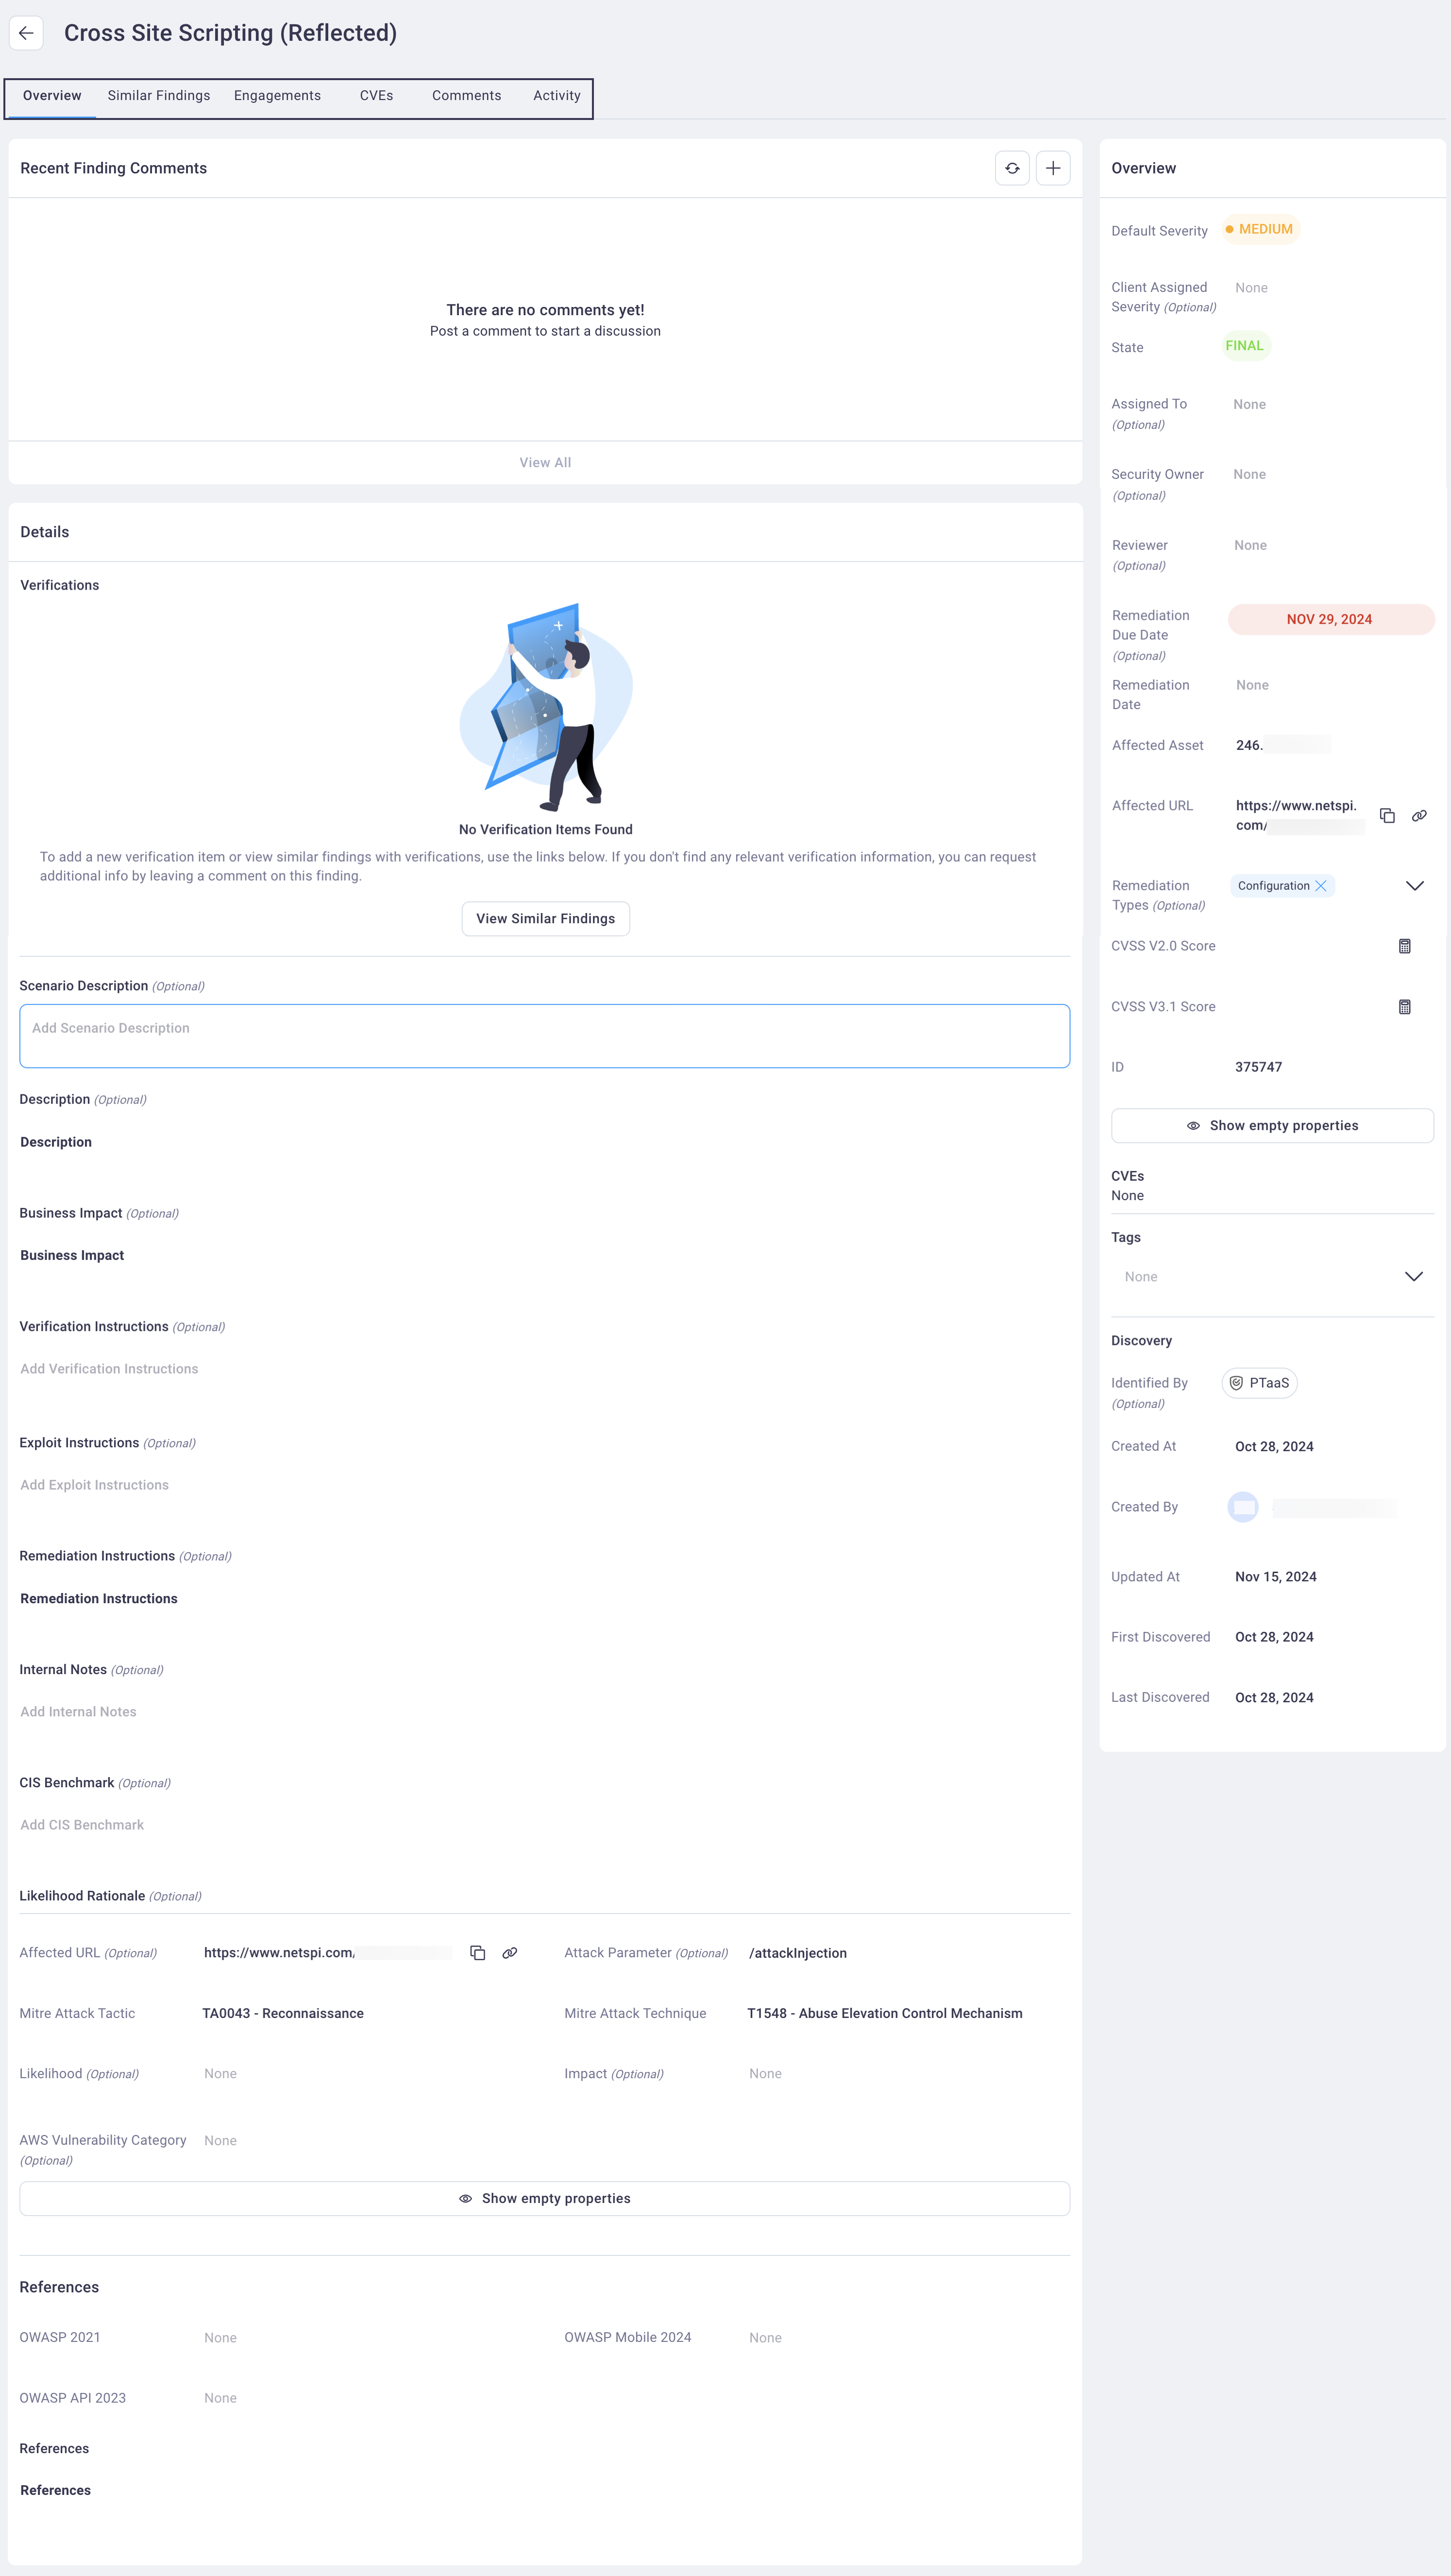
Select the other Finding Detail tabs to view additional pertinent information:
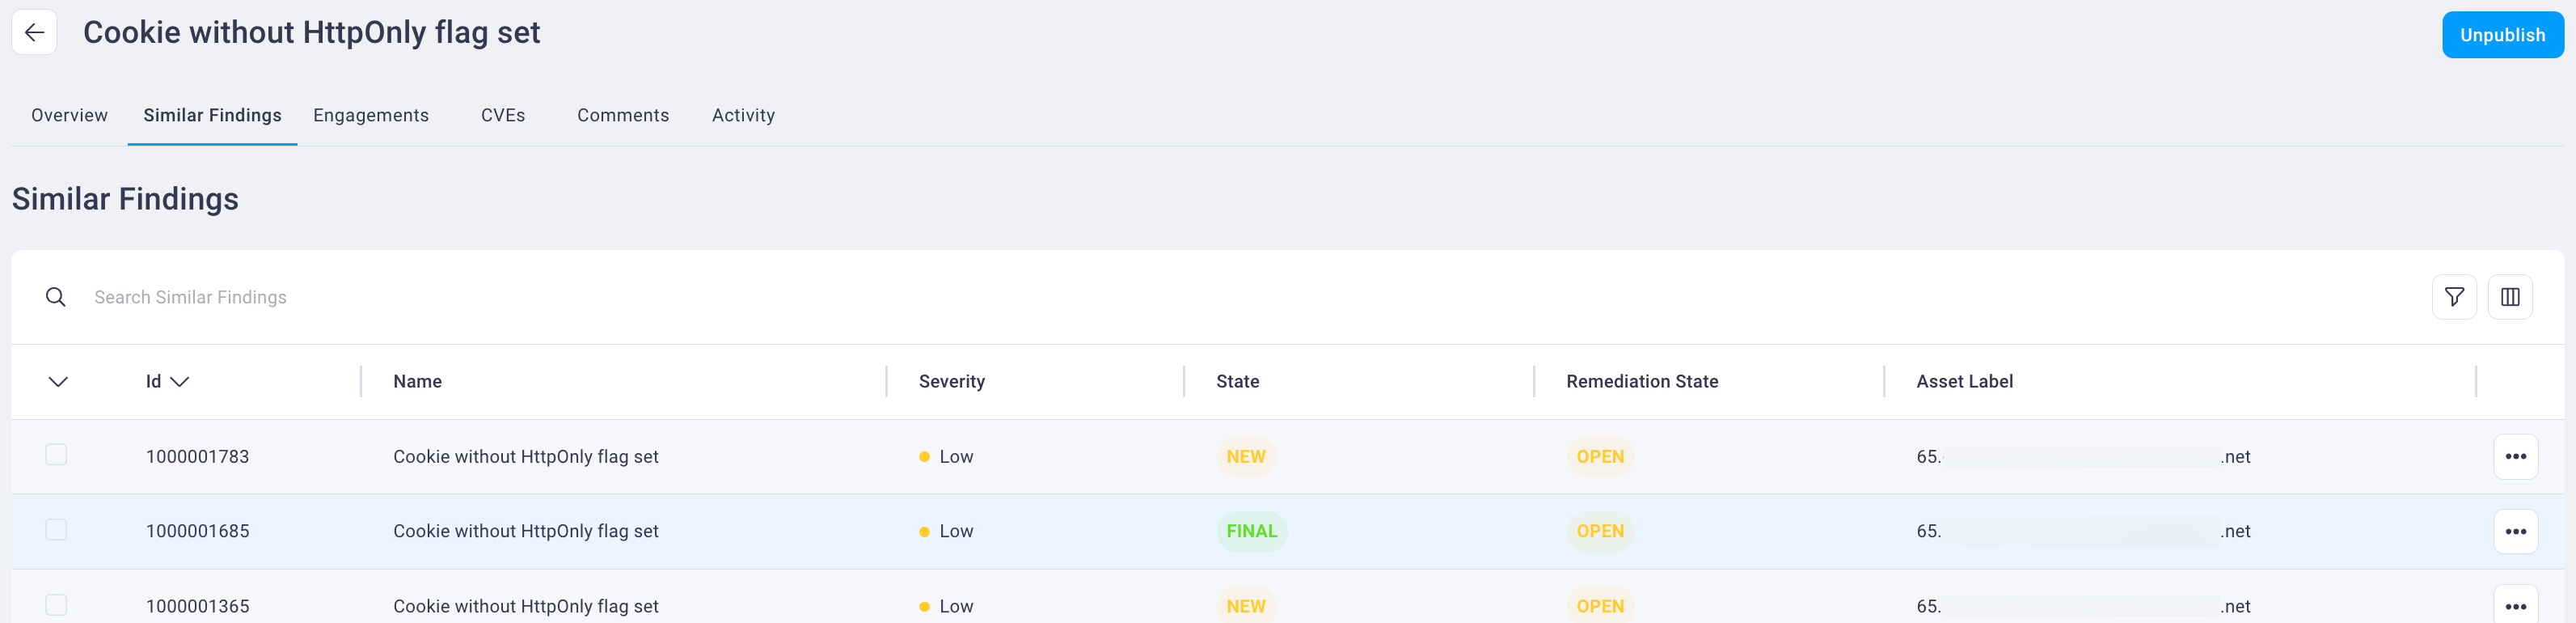
- Similar Findings: Displays findings that are similar to the finding you selected
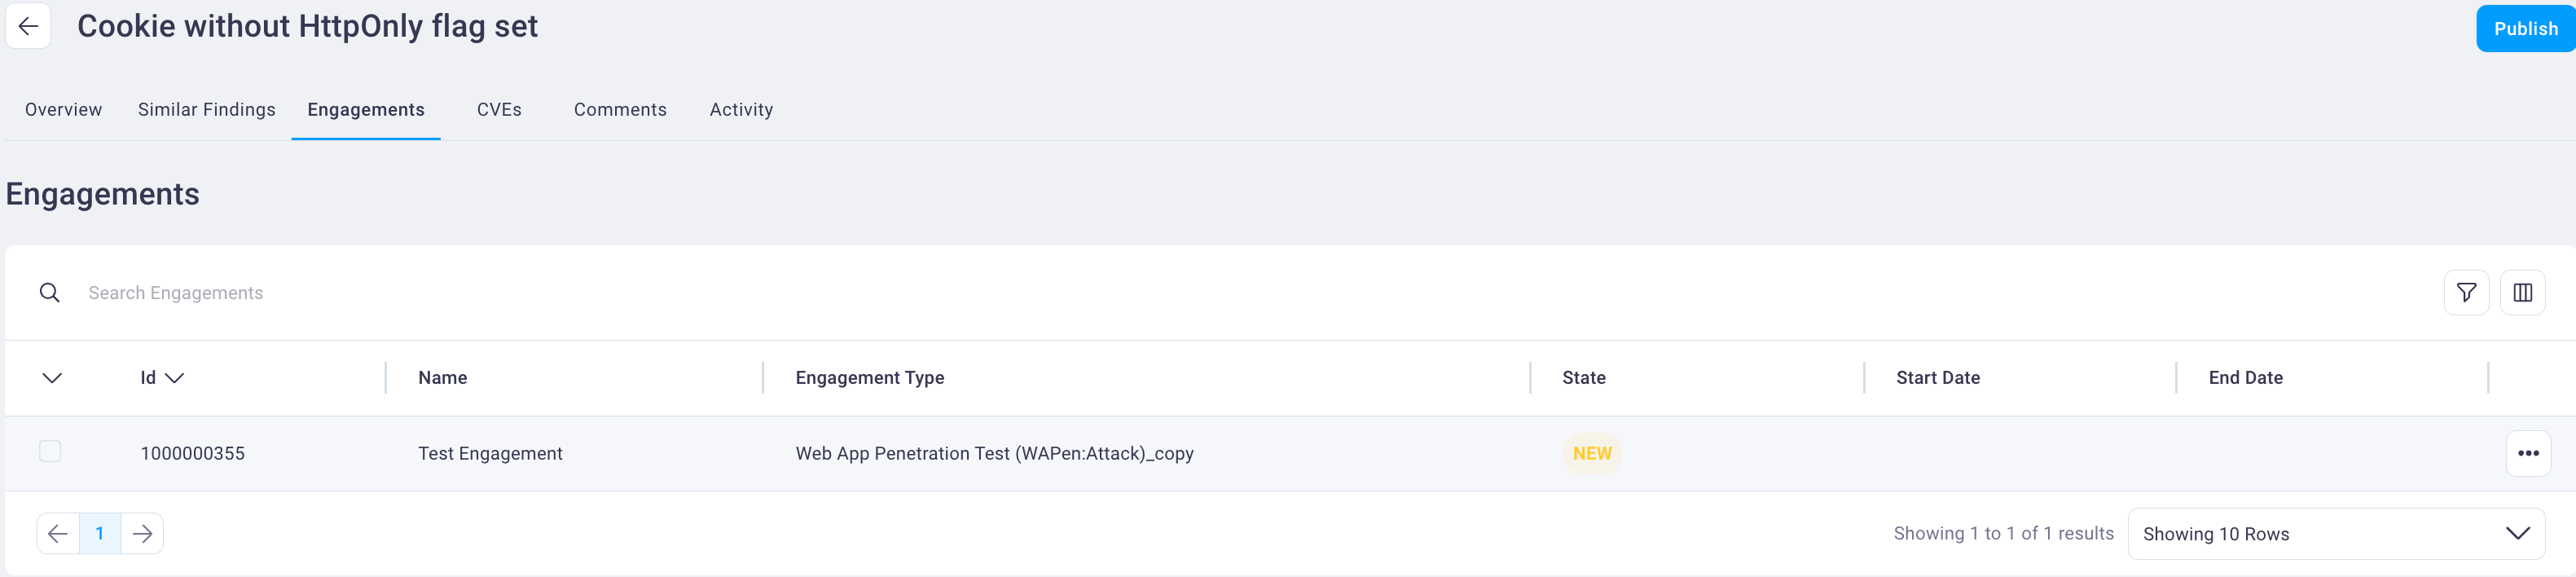
Engagements: Displays all or your organization’s engagements that contain this finding; selecting a row will take you to the Engagement Details page for the selected engagement
CVEs: Displays any known CVEs associated with this finding
Comments: Displays historical comments and add new comments that relate to this finding
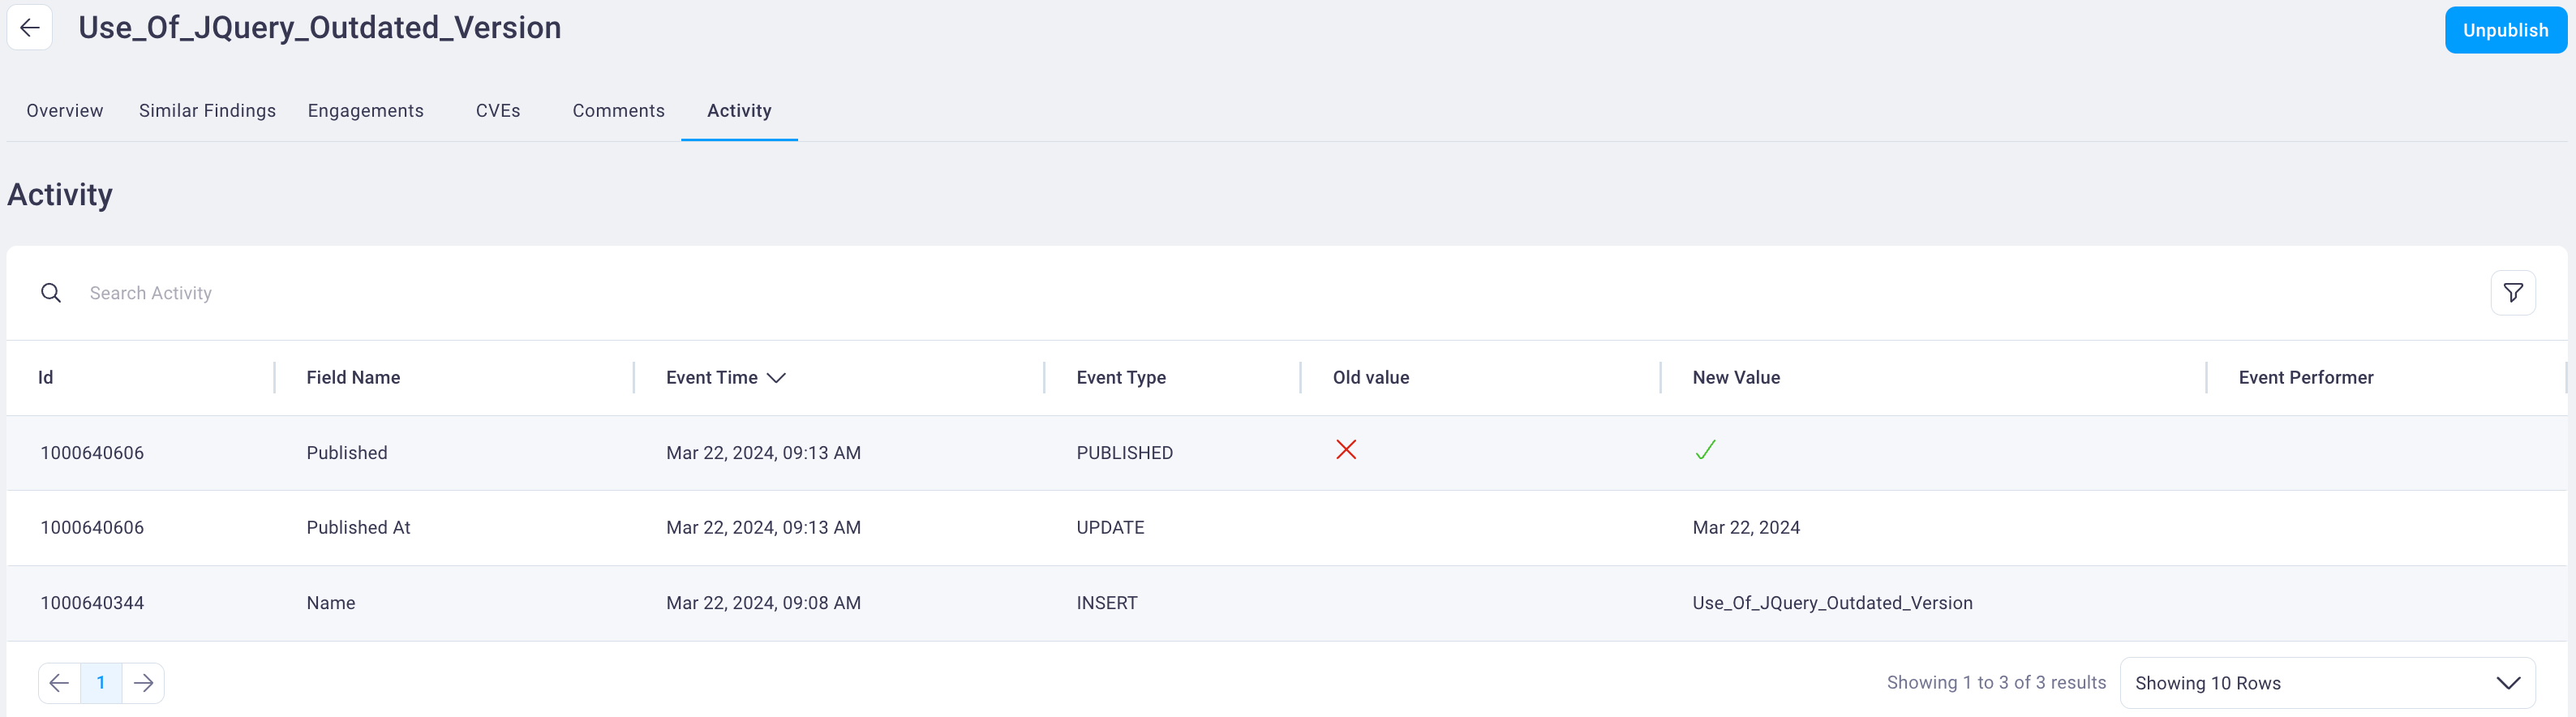
Activity: Displays a historical log of activity related to this finding