#
Managing table records
Most collections of items in the NetSPI Platform’s modules, such as the PTaaS module’s assets, engagements, findings, and users, are presented as rows in a table.
#
Row-level actions
The right-most column of a table may contain a meatball icon (…) for each row. You can use this icon to perform actions on a single entry in the row, such as delete (for Assets) or unpublish, mark as remediated, or delete (for Findings).

To perform actions on multiple entries, use the Bulk Actions drop-down menu.
#
Bulk actions selectors
Every table has the option to select all options on the current page, with certain table allowing Select all functionality. You can find these options by selecting the arrow column header above the checkbox column in the table.
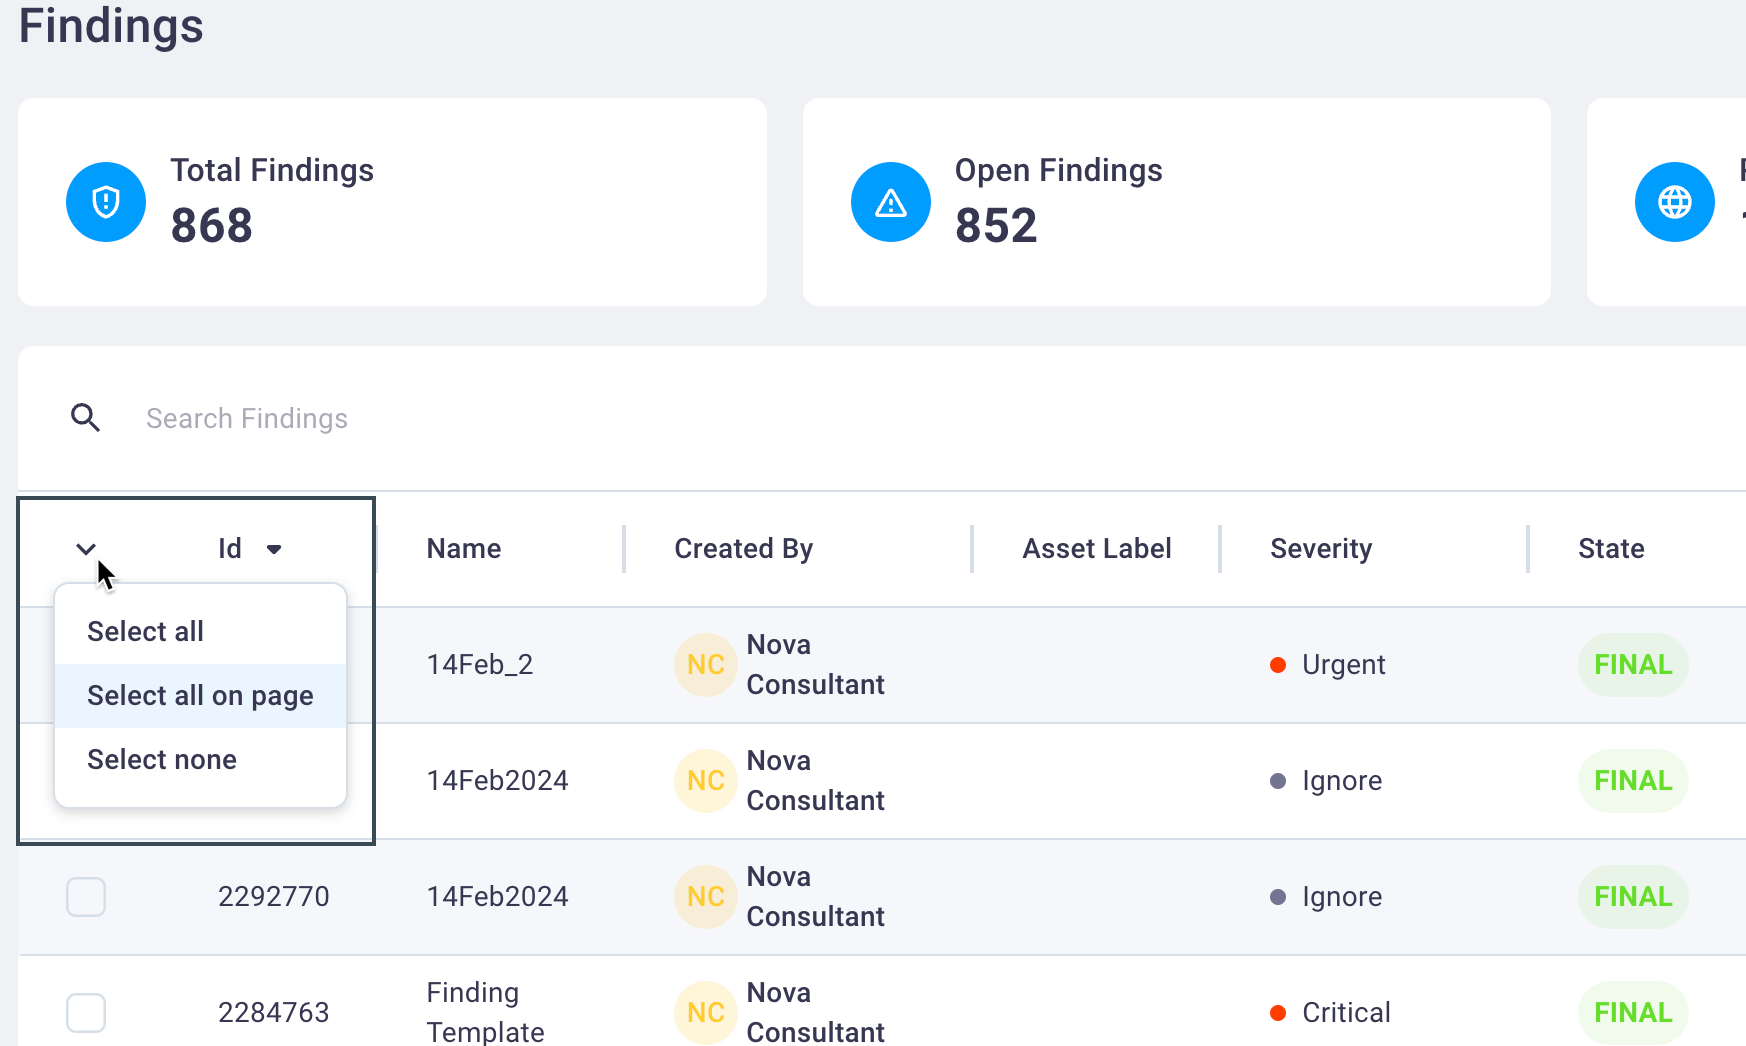
See the section below for Bulk Actions section below for information on actions you can take on bulk-selected rows.
#
Bulk actions drop-down menu
Every table has a Bulk Actions drop-down menu for managing rows. Although the available actions vary by feature or entity, each action is performed the same regardless of which table you're working with.
Note: This menu doesn't appear unless you select at least one table row.
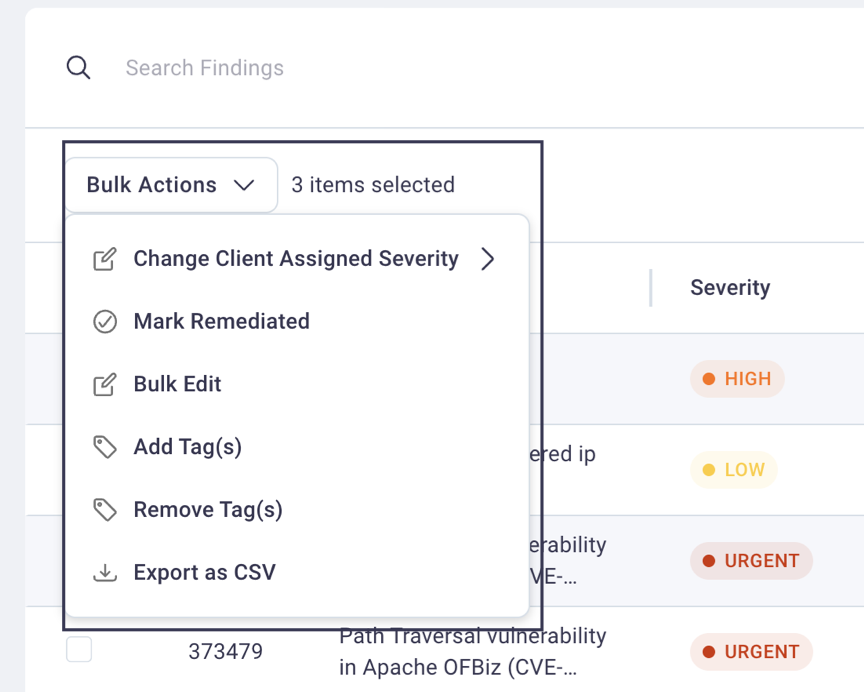
Depending on the module selected (PTaaS or EASM) actions may include:
- Change the severity level of selected rows
- Mark findings as remediated
Bulk edit selected items for findings- Add or remove tags
- Export selected rows as a CSV file
Some table rows have options unique to that entity. For example, the Findings table has an option to mark selected findings as remediated where as assets has an option to add or remove an asset from monitoring for certain asset types.
#
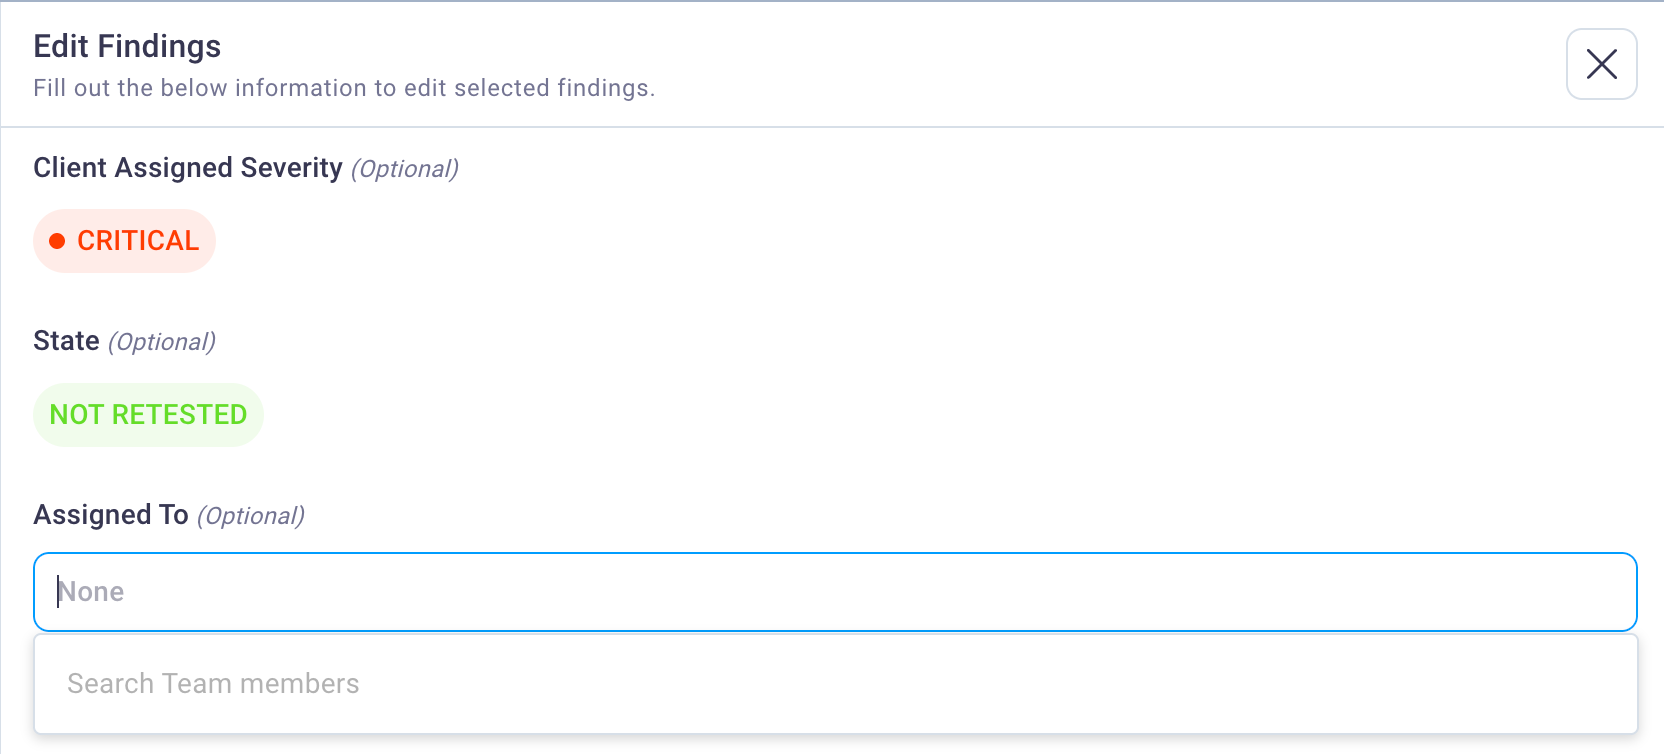
Bulk edits
The Bulk Edit option, located in the Bulk Actions drop-down list when you select one or more rows for a table, allows you to change fields at once for more than one finding.
Use the steps below to perform a bulk edit of findings.
Navigate to the Findings page and select the checkbox for more than one row in the table to enable the Bulk Actions drop-down list above the top left corner of the table.
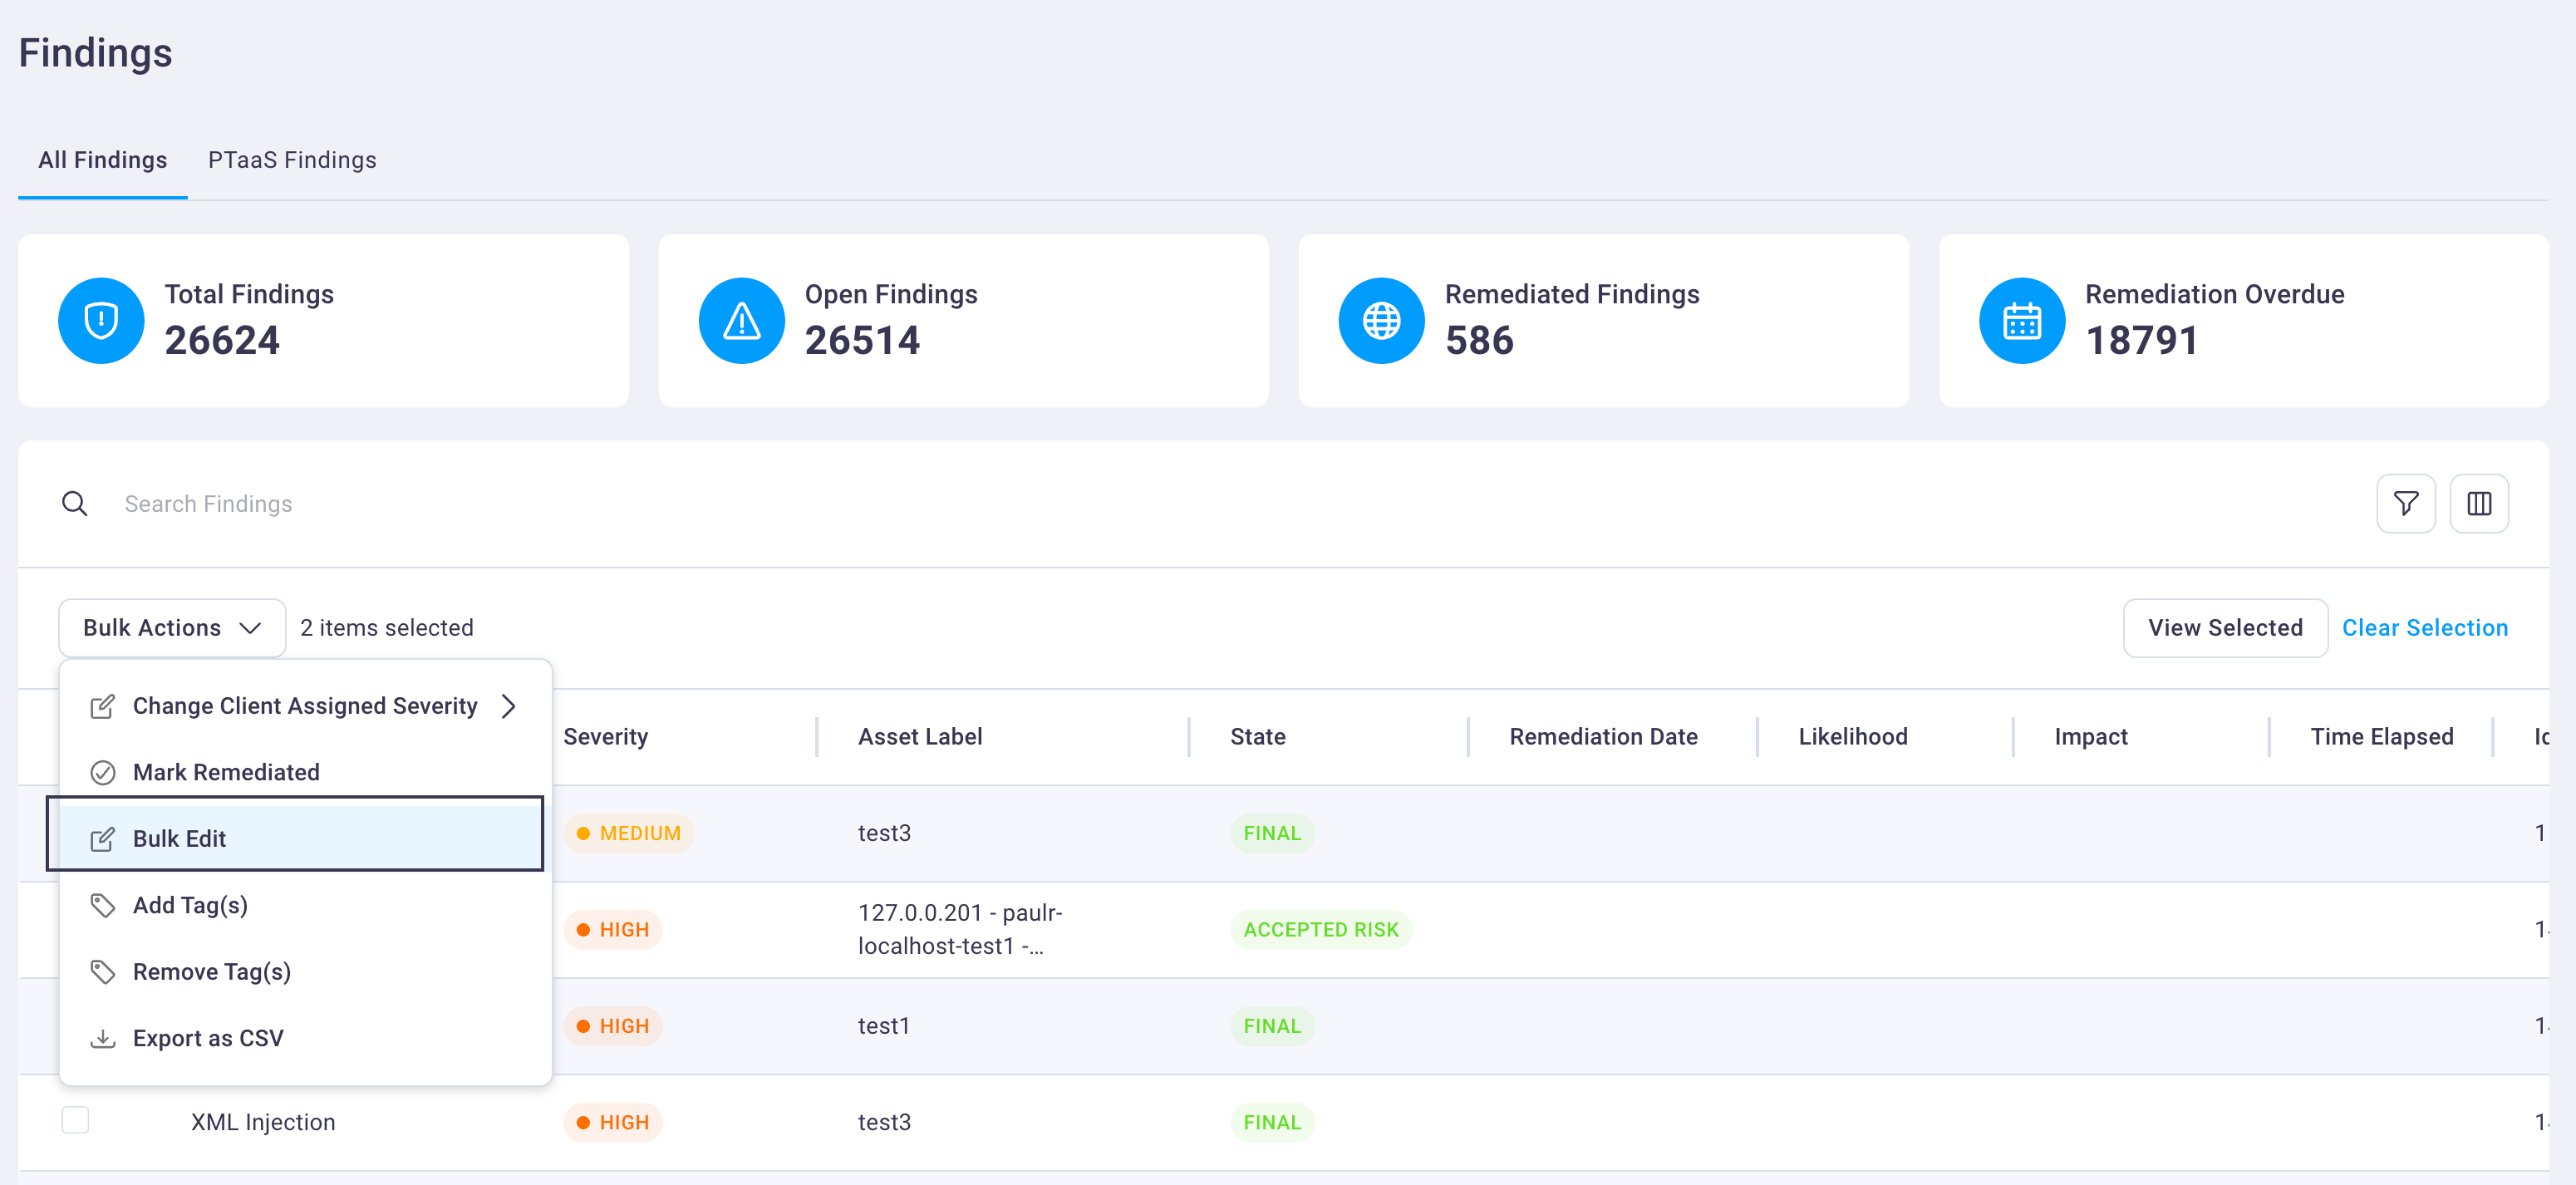
Select Bulk Edit from the Bulk Actions drop-down list to display the Edit Findings slide-out panel.
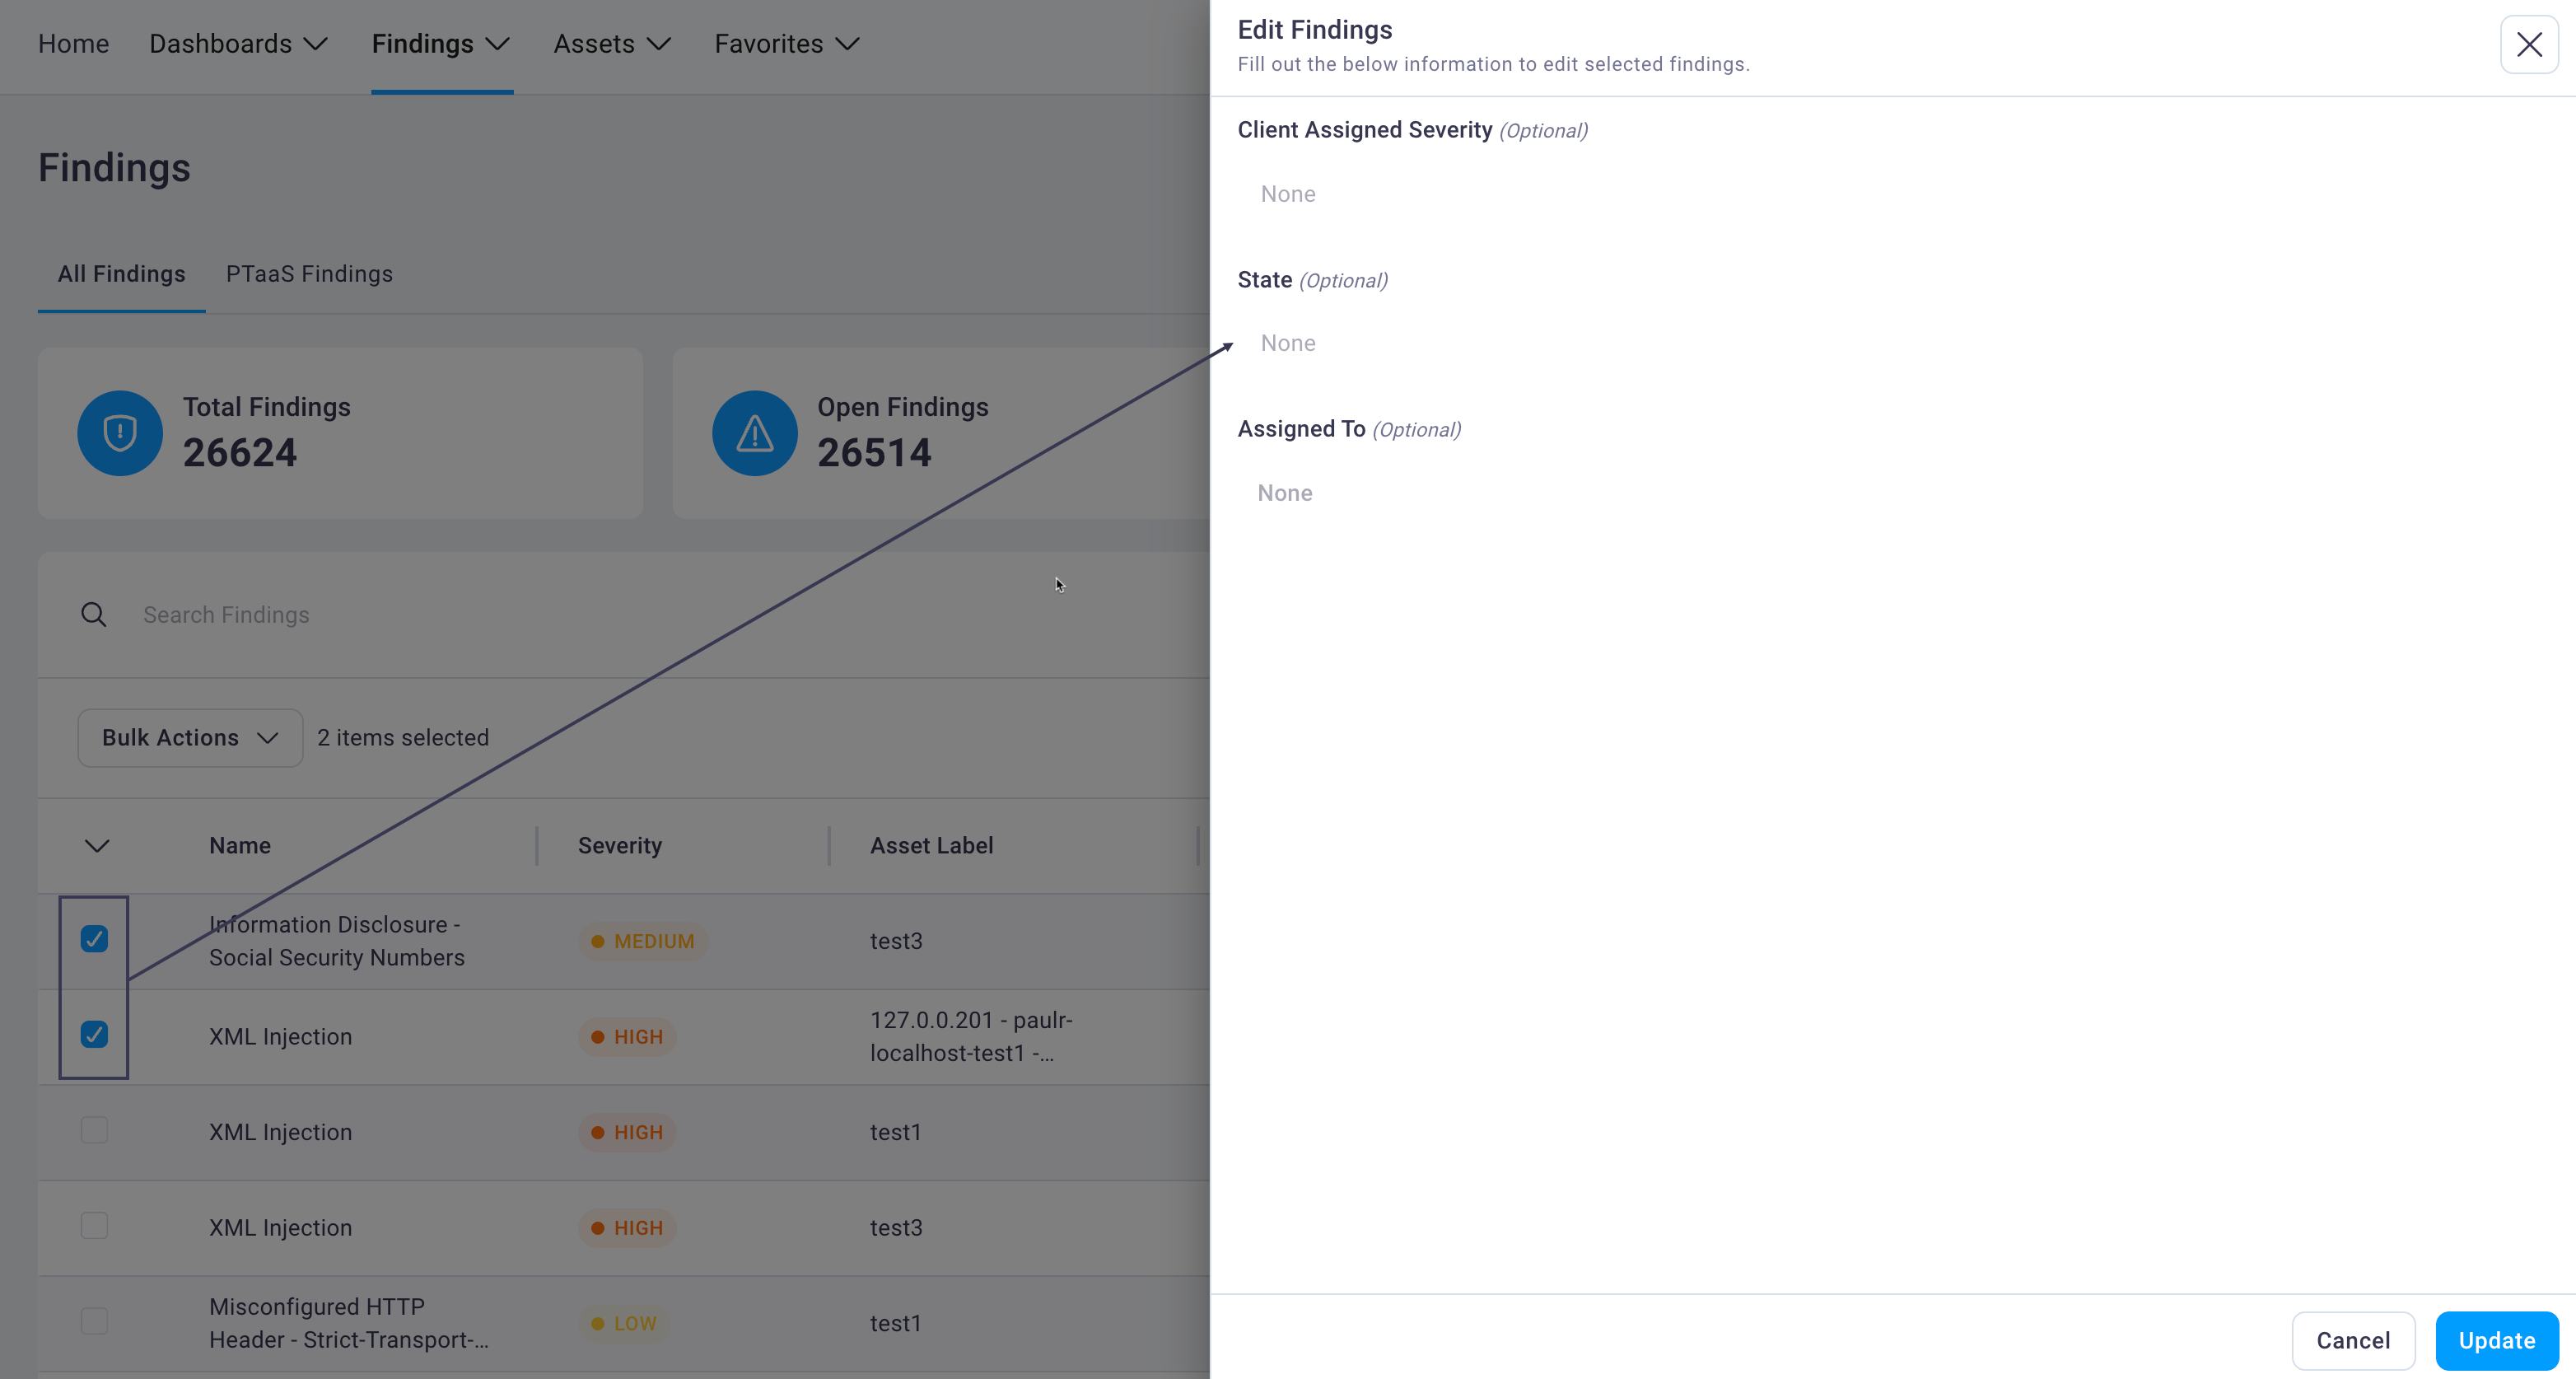
Select values or enter text as each field provides as needed.
For Findings, you can bulk edit the following fields:
- Client Assigned Severity (select values from the drop-down list)
- State (select values from the drop-down list; options are: Ready for Retest, User Remediated, and Accepted Risk)x
- Assigned To (enter the name of a NetSPI Platform user from your organization)
When finished adding and selecting values to change for the bulk edit, select the Update button to save them and return focus to the table with the edits made.