#
CAASM Integrations
CAASM integrations with the NetSPI Platform enrich and inform your security stance by broadening your attack surface visibility. This section provides details on how to configure an integration and how to understand their statuses once in place.
Requirement
You must have a Client Admin account and permissions in order to configure integrations in the NetSPI Platform.
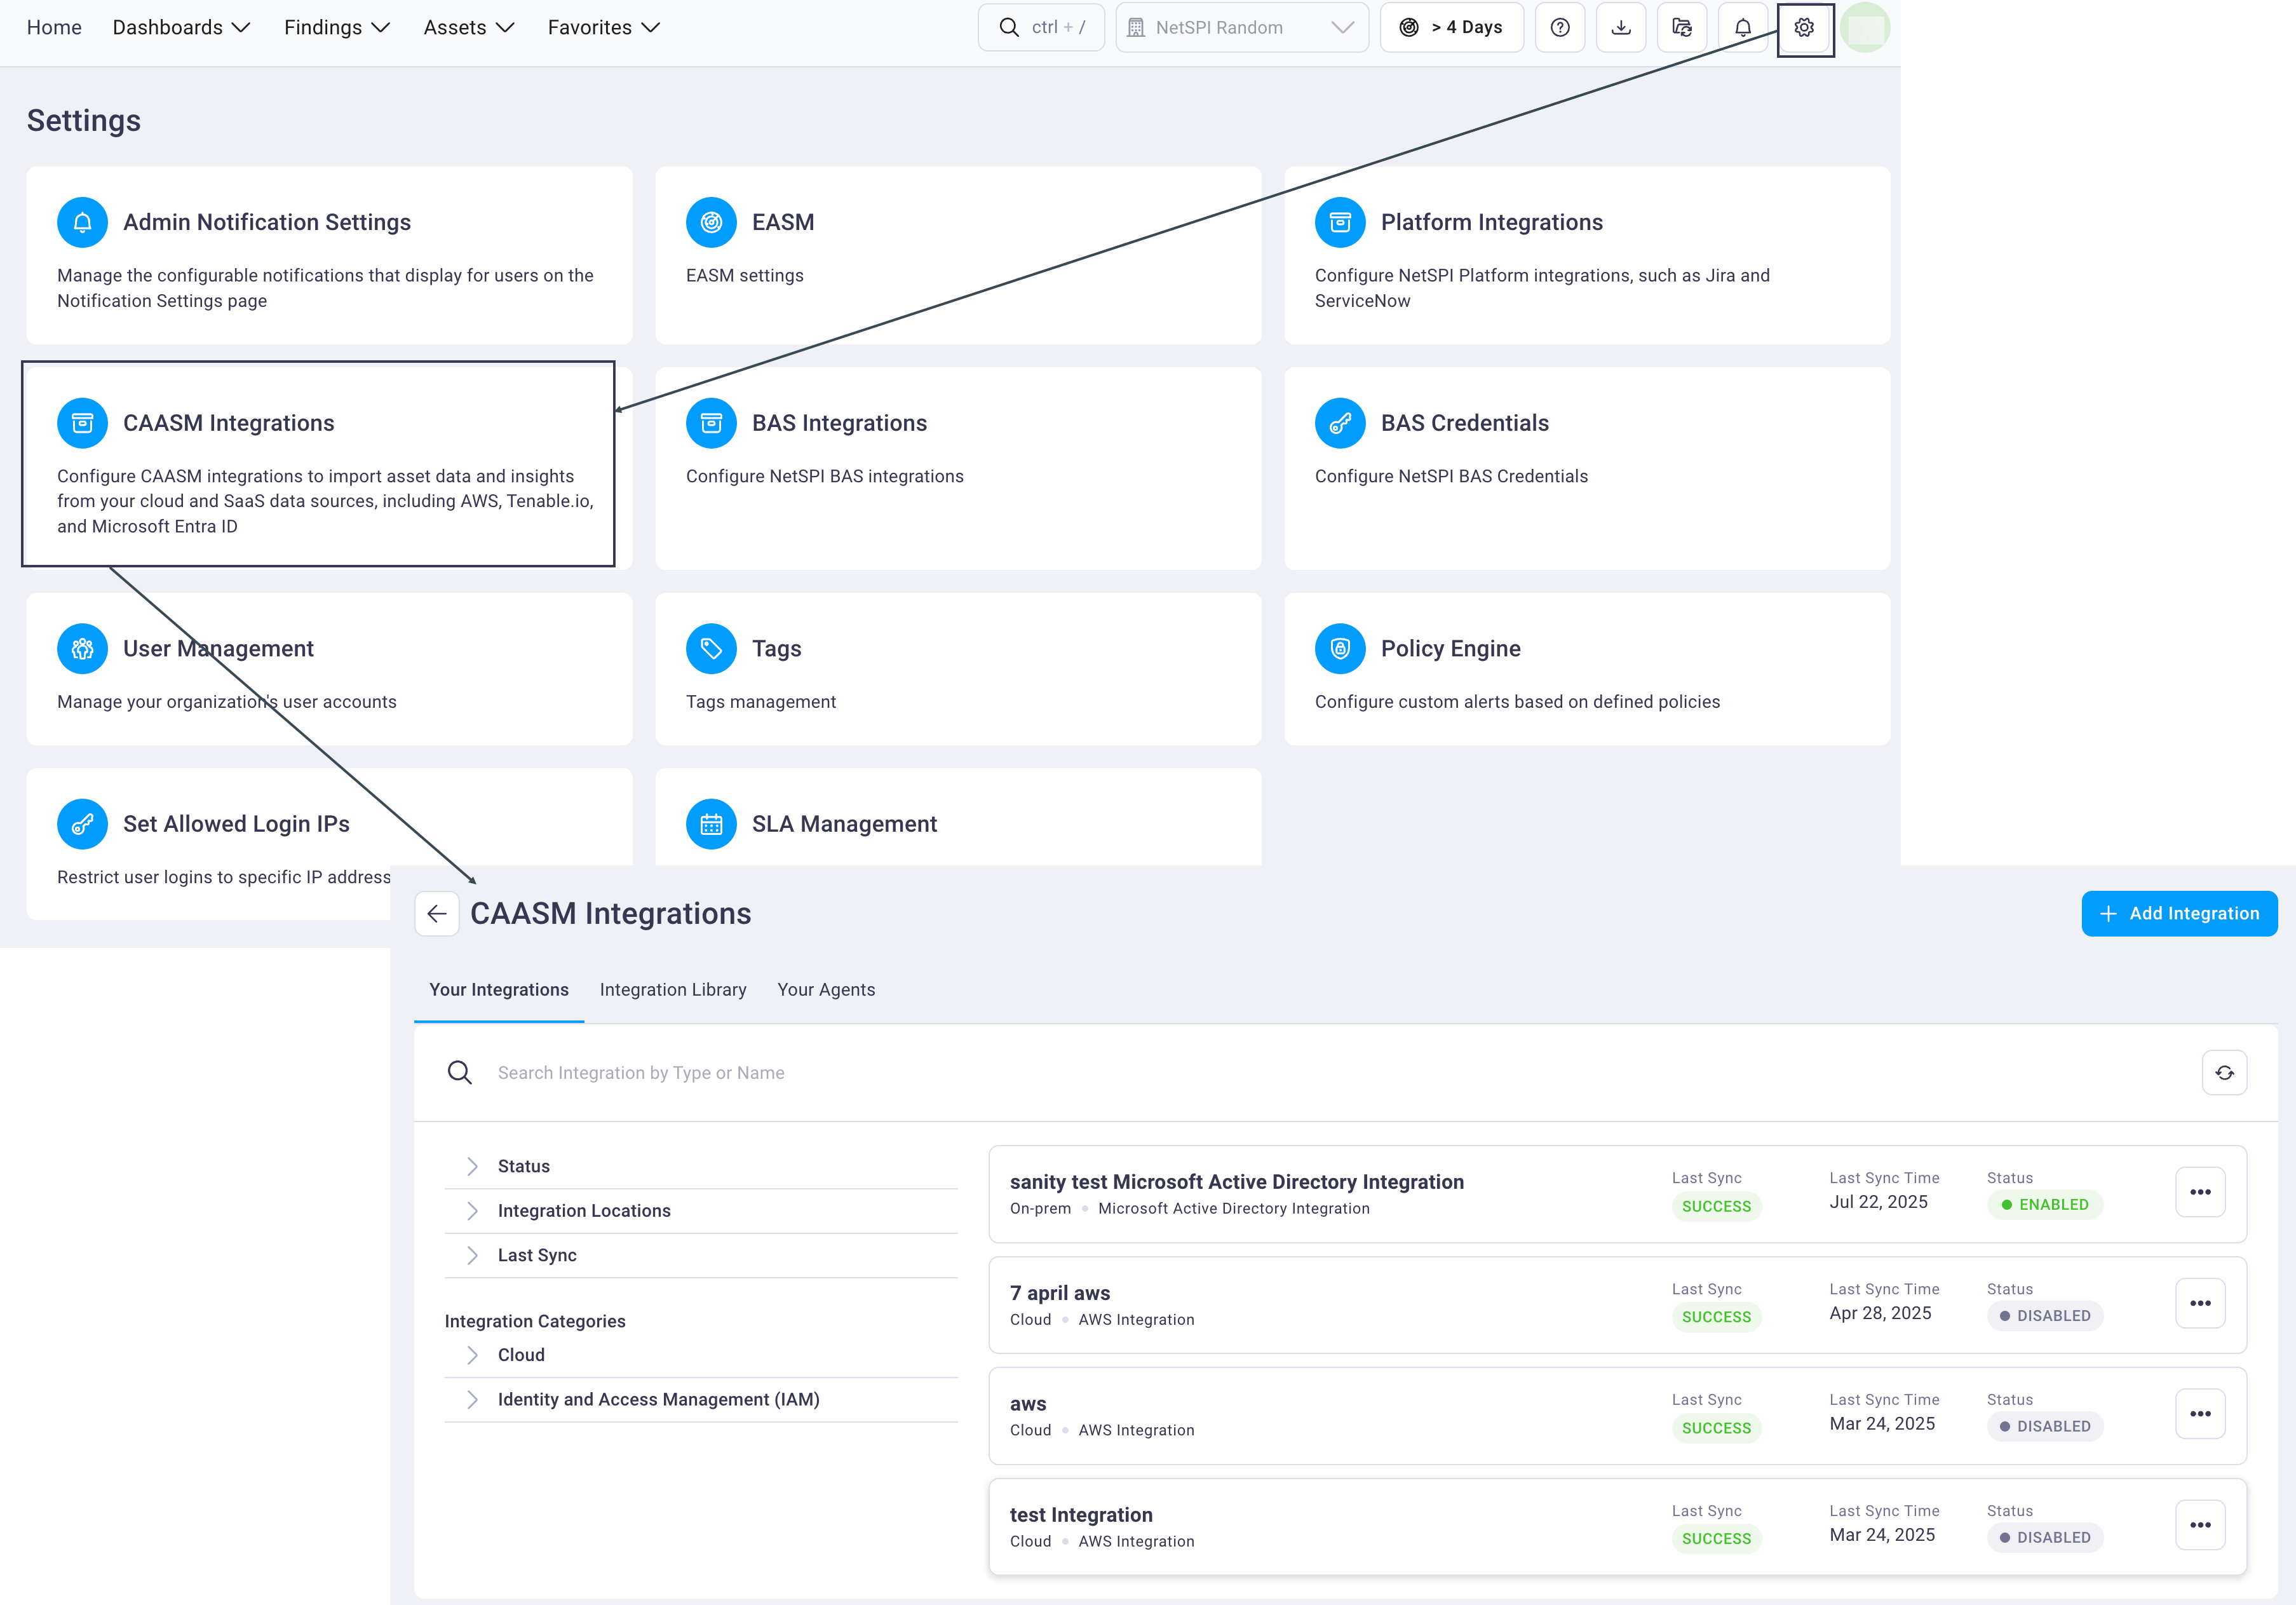
Access integrations by selecting Settings -> CAASM Integrations to view all applied integrations (on the Applied Integrations tab) and available integrations (on the Integration Library tab).
Available integrations are outlined in the table below.
#
Adding a CAASM integration
Use the steps below to add a new CAASM integration.
Select the Settings icon to display the Settings page.
Select the CAASM Integrations card to display the Integrations page for the CAASM module. Focus is on the Applied Integrations tab, which shows all of your implemented integrations.
Select the Integration Library tab to display all available integrations.
Filter your integration options by expanding the left-navigation menu to view available Integrations Scopes (Cloud) and/or expand each Integration Categories drop-down list options to locate the integration you need.
The available options change as you select options.
Select the Add button for your integration to display the integration configuration page where you can add the required information in the form fields provided.
Details for the integration display in the right of the form:
- Integration version
- Description: What the integration does
- Integration Categories: The category of integration as defined in the NetSPI Platform
Select the Create button to create the integration. Once the configuration successfully completes, a success message displays confirming its status.
See the individual integration instructions for each integration in this section for detailed steps.
#
Understanding your integration's status
All of your connected CAASM integrations can be viewed on the Applied Integrations tab.
Use the following steps to check your integrations' status.
Select the Settings icon to display the Settings page.
Select the CAASM Integrations card to display the Integrations page.
On the Applied Integrations tab, you can expand and select the left navigation options to filter your integrations to display those of interest to the right. See item 1 in the image above and the example below.
The main part of the page displays a table view of your integrations, with each row comprised of a single, configured integration instance. See item 2 in the image above.
Each row of the Integrations table includes the following information and functionality:
Last Sync: The status of the last, most recent synchronization between the NetSPI Platform and your integrated product
Last Sync Time: The date and time of the last, successful synchronization between the NetSPI Platform and your integrated product
Status: This is the current status of your integration:
- Enabled: configured to actively sync with the NetSPI Platform
- Disabled: configured to not actively sync with the NetSPI Platform at this time
Alternate actions kebab menu
- Edit: Opens the integration Form in edit mode
- History: Opens the integration to the History tab, which displays a chronological history of the connector's synchronization run start and end times and the status of each synchronization
- Rerun: Begins a new synchronization for the integration
- Delete: Deletes the integration
Select any integration row to display the configuration details Form tab for the integration.
You can also select the History tab to view the chronological history of the integration's syncing with the NetSPI Platform.