#
Integration Library
The Integration Library tab is where you can view all of your integration options and set up a new integration.
The table below lists all of the available integrations and their categories.
#
Adding a CAASM integration
Use the steps below to add a new CAASM integration.
Select the Settings icon to display the Settings page.
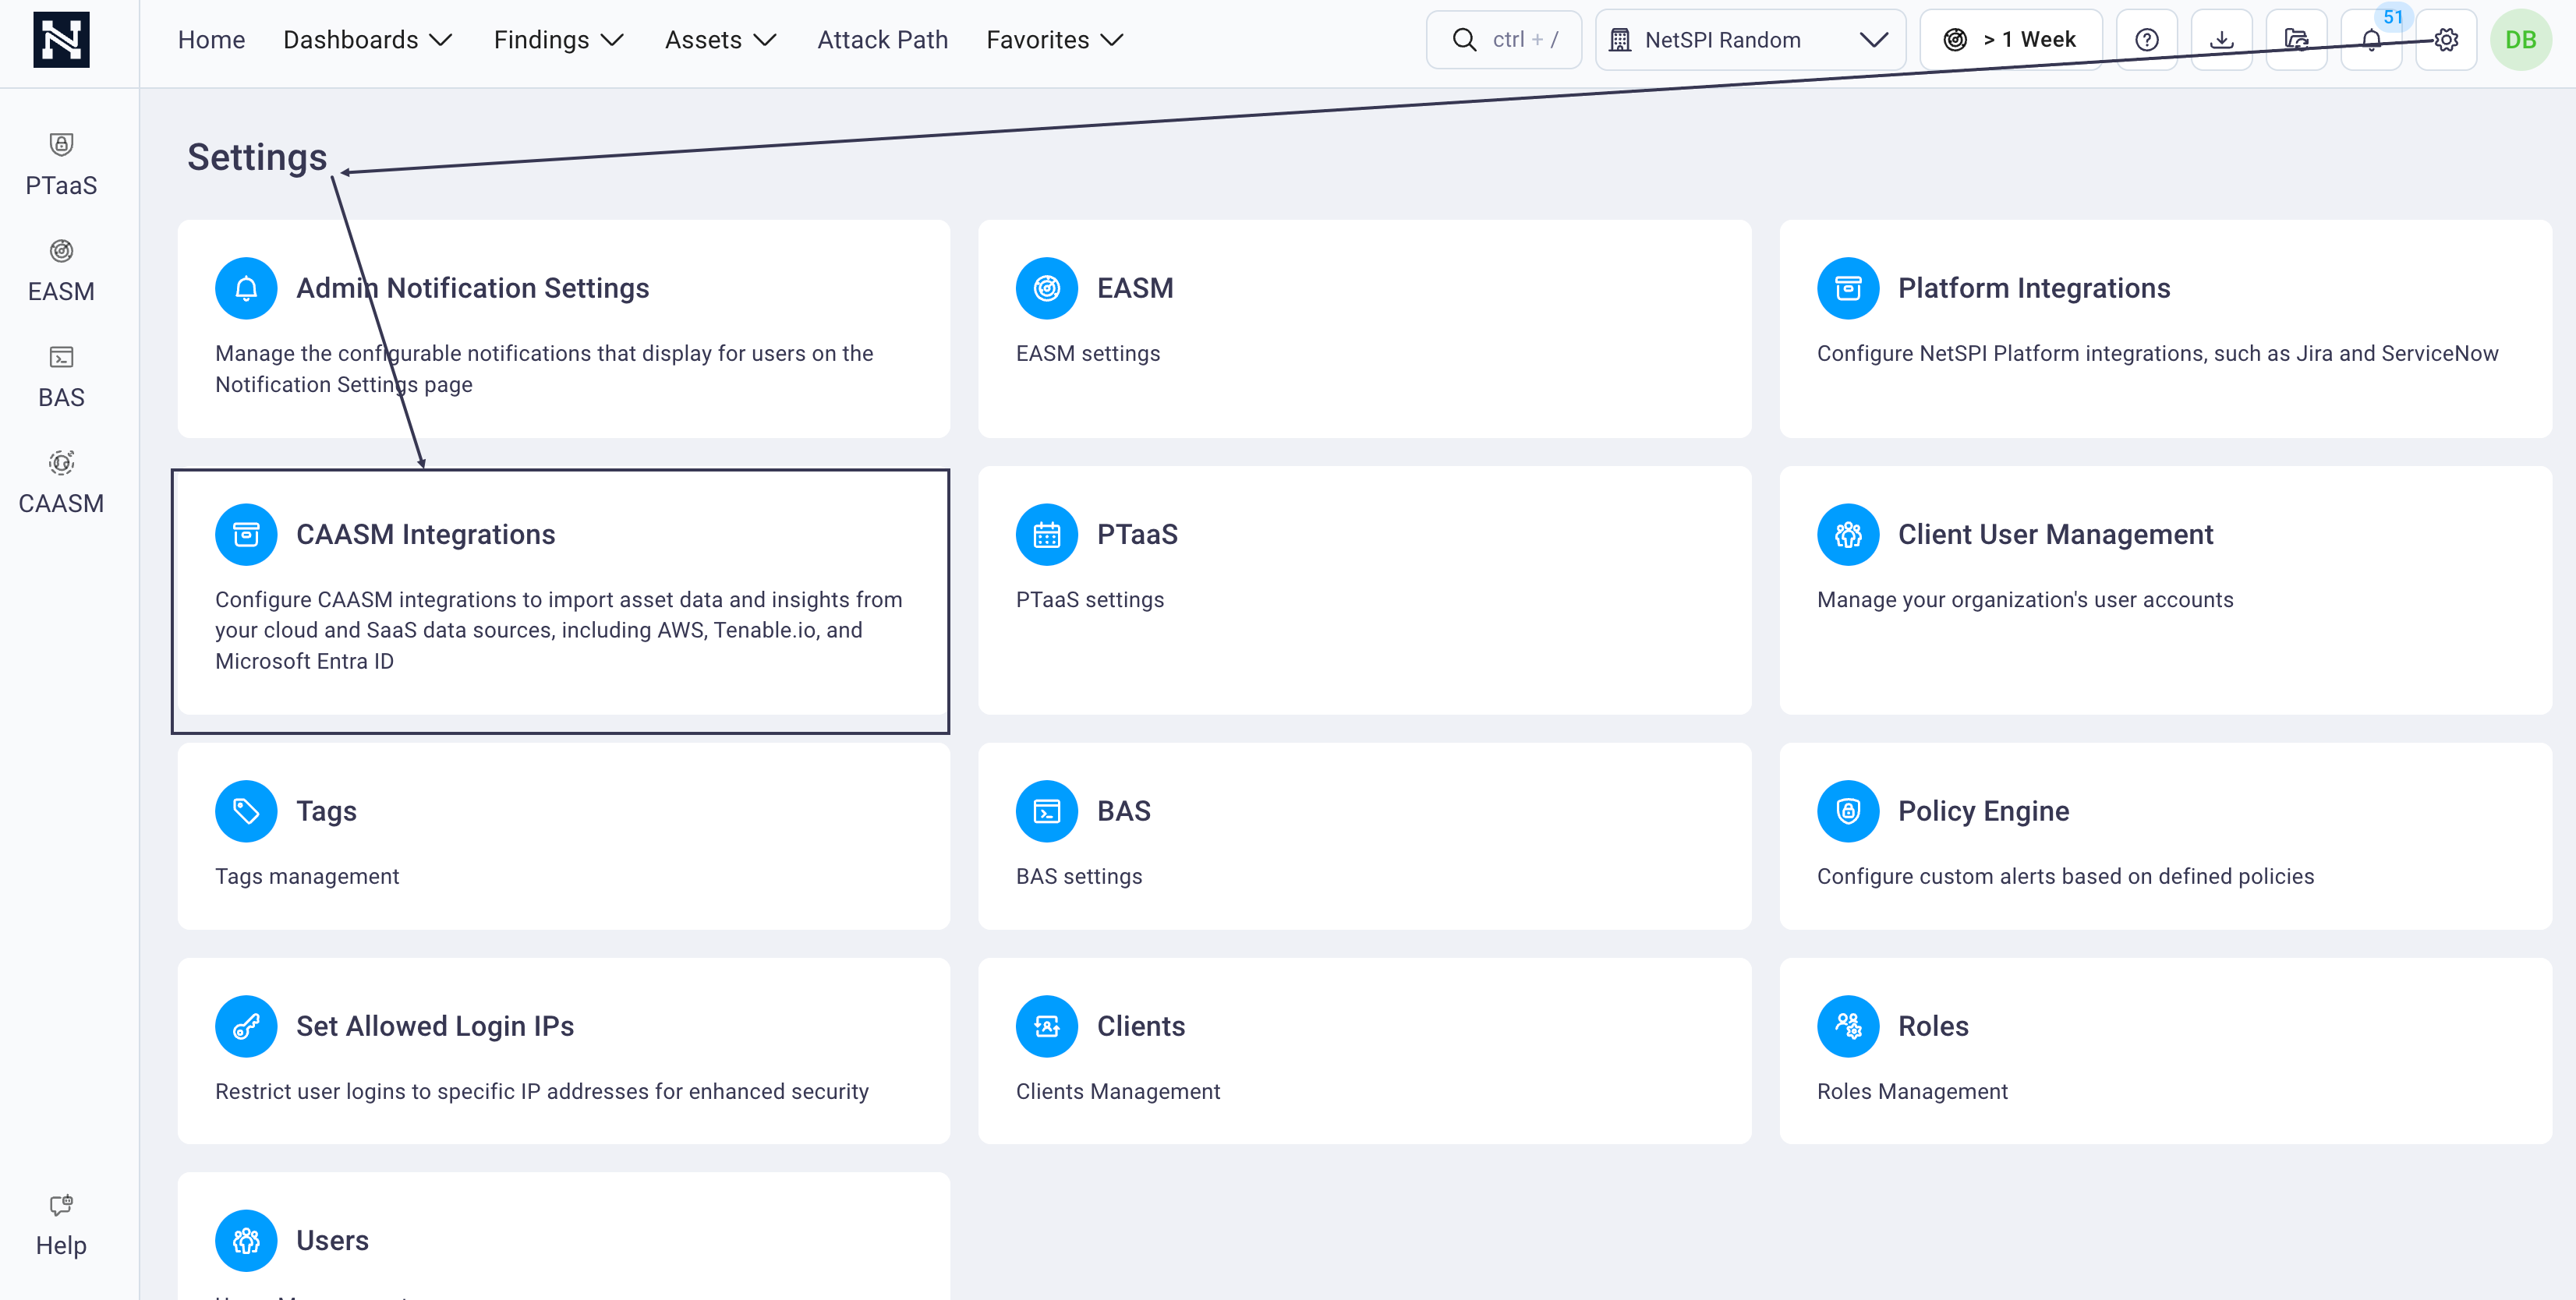
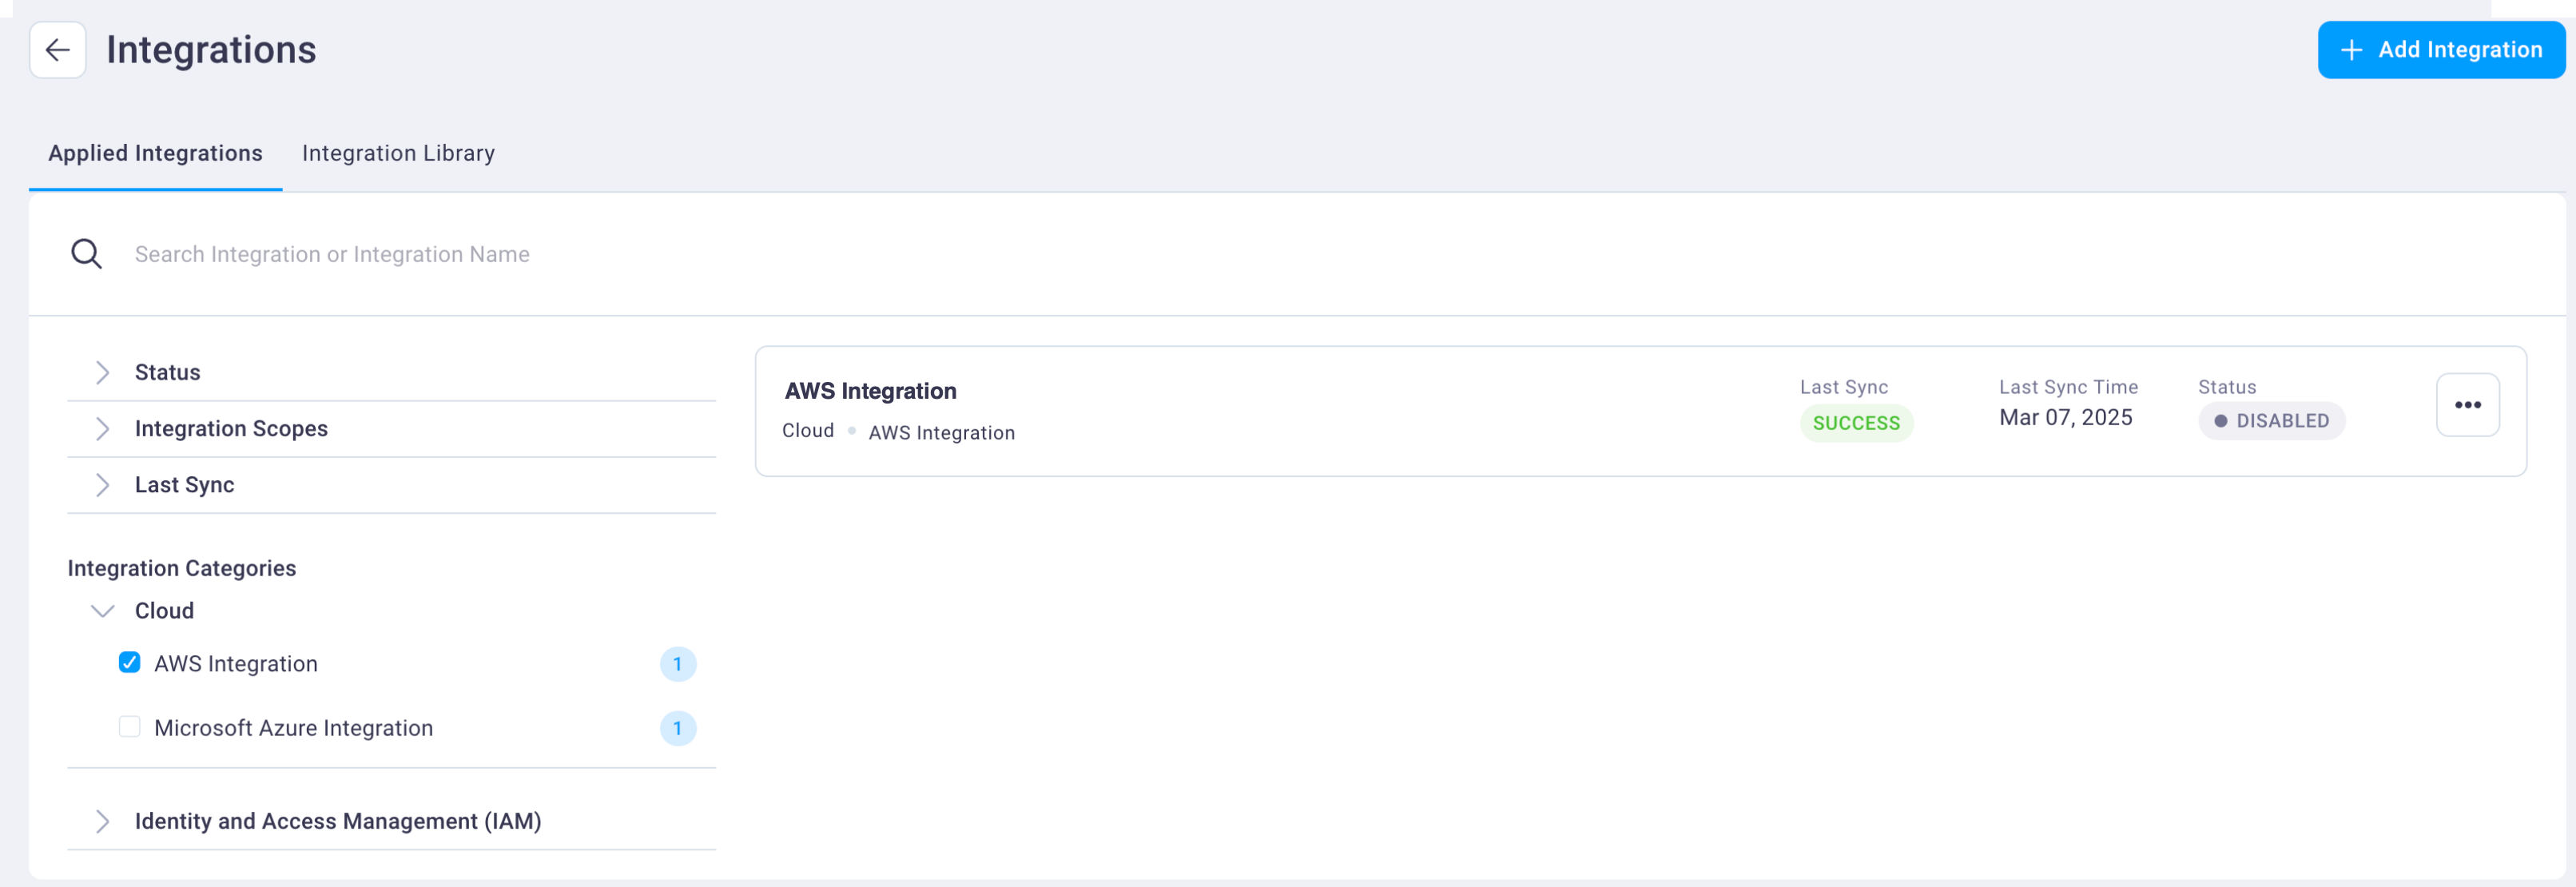
Select the CAASM Integrations card to display the Integrations page for the CAASM module. Focus is on the Applied Integrations tab, which shows all of your implemented integrations.
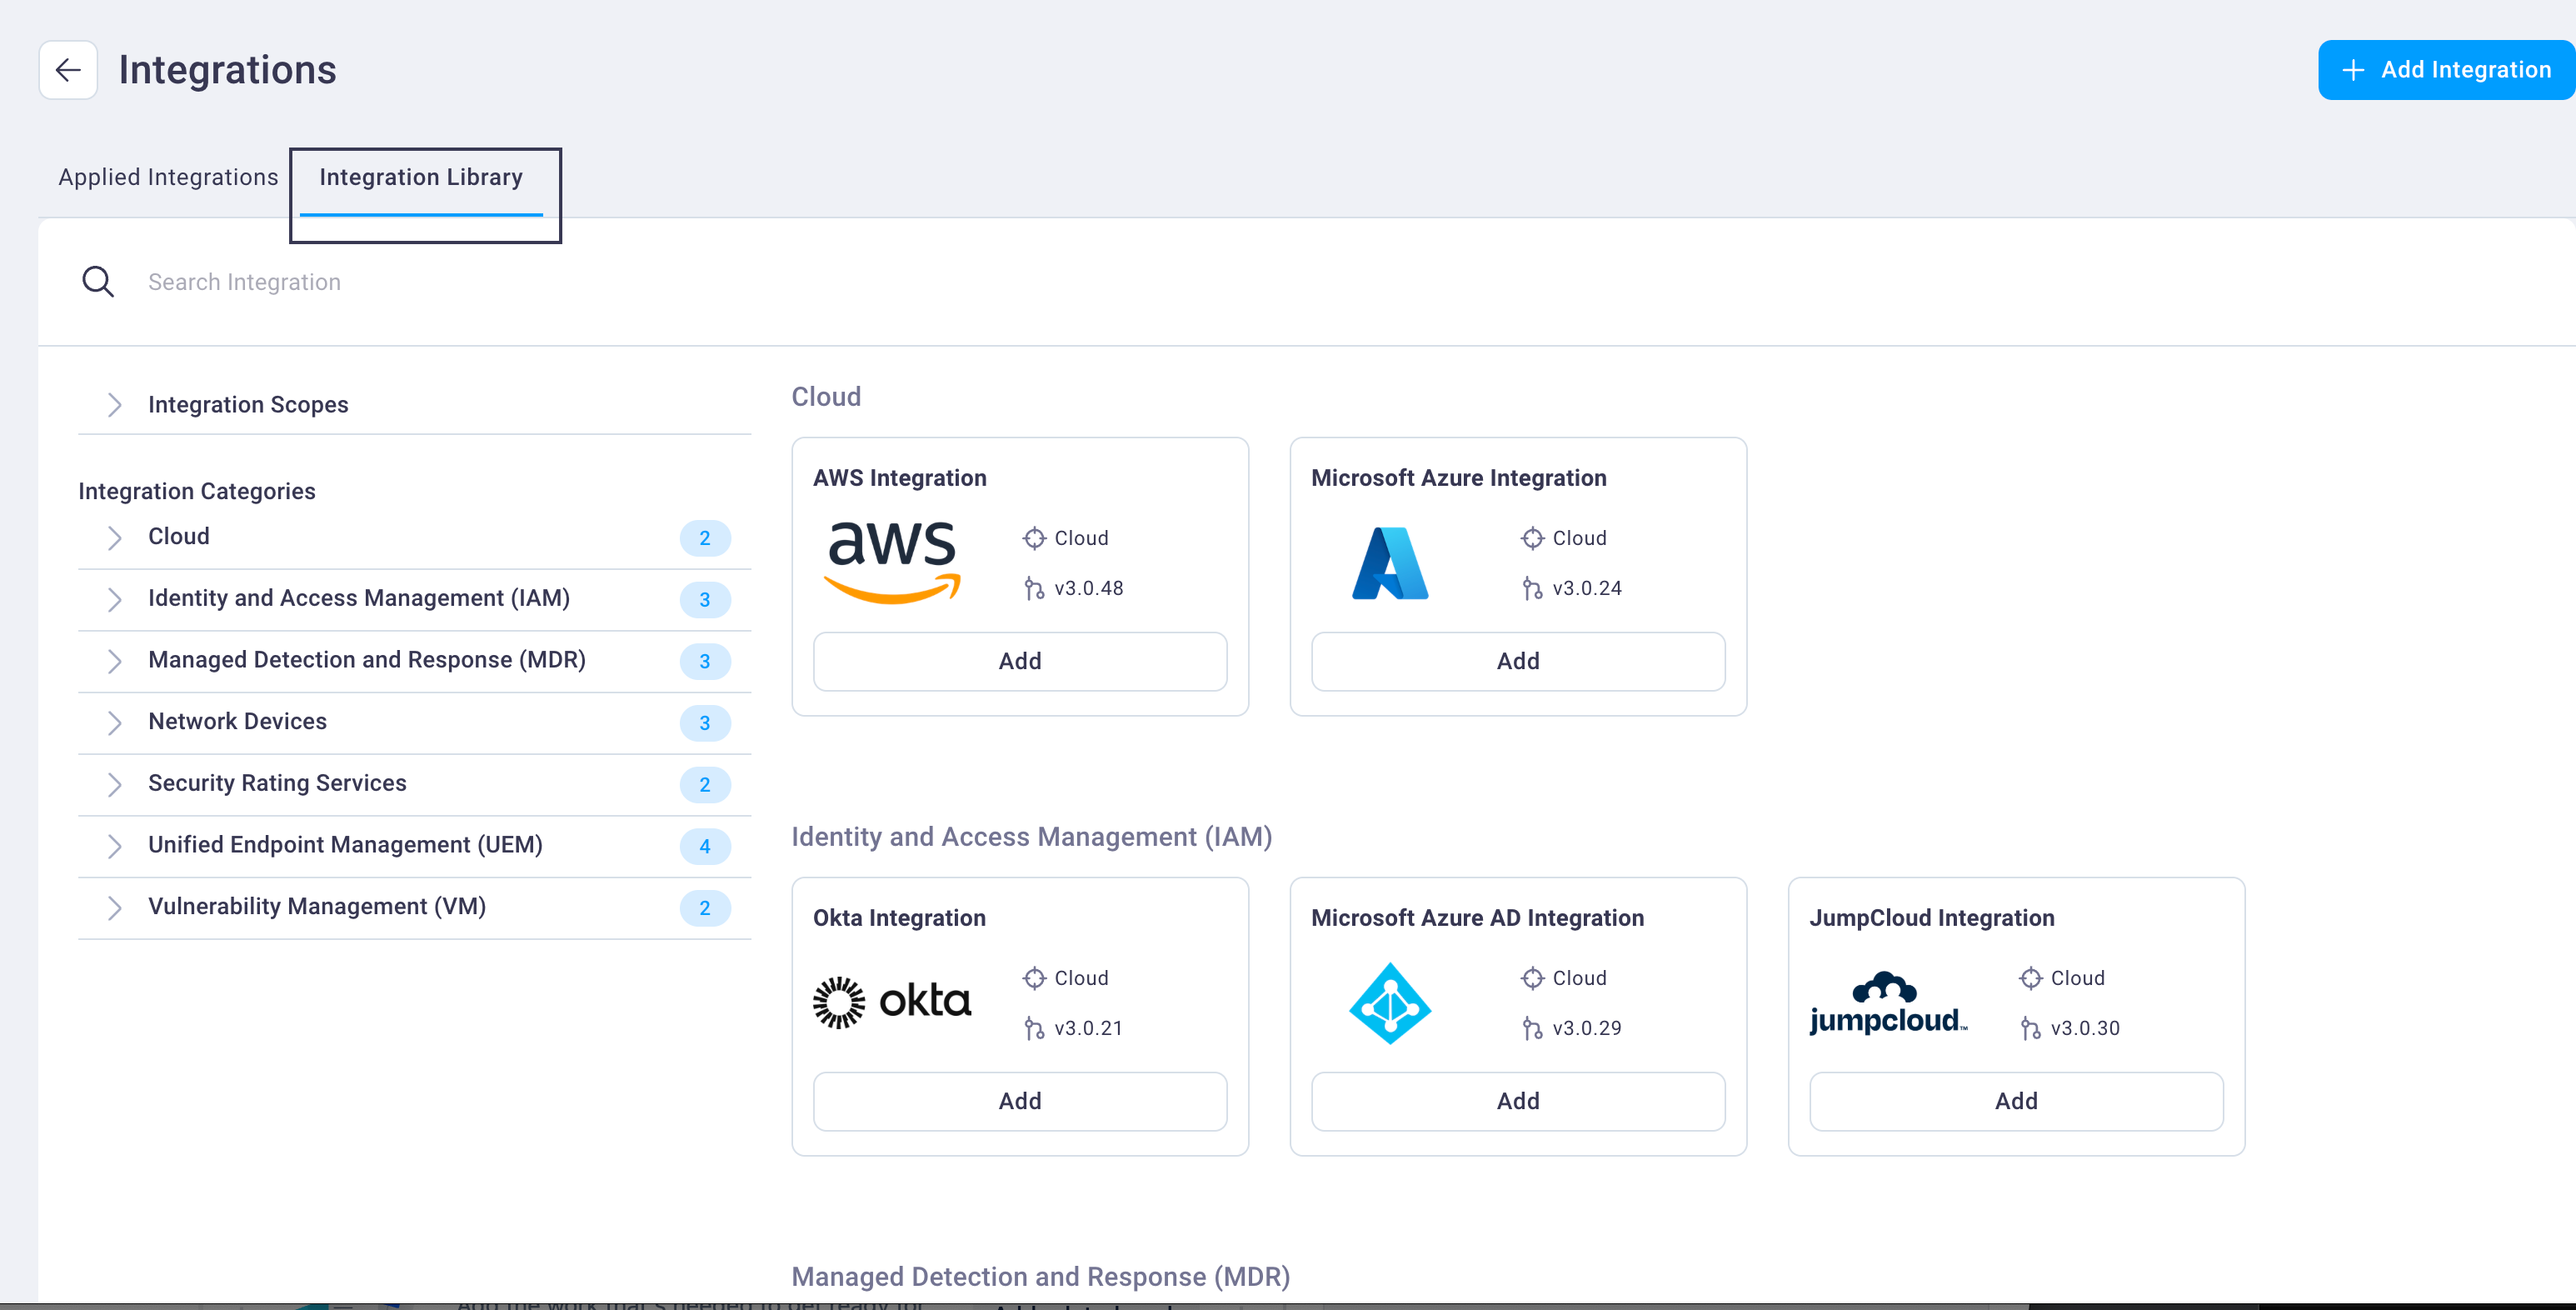
Select the Integration Library tab to display all available integrations.
Filter your integration options by expanding the left-navigation menu to view available Integrations Scopes (Cloud) and/or expand each Integration Categories drop-down list options to locate the integration you need.
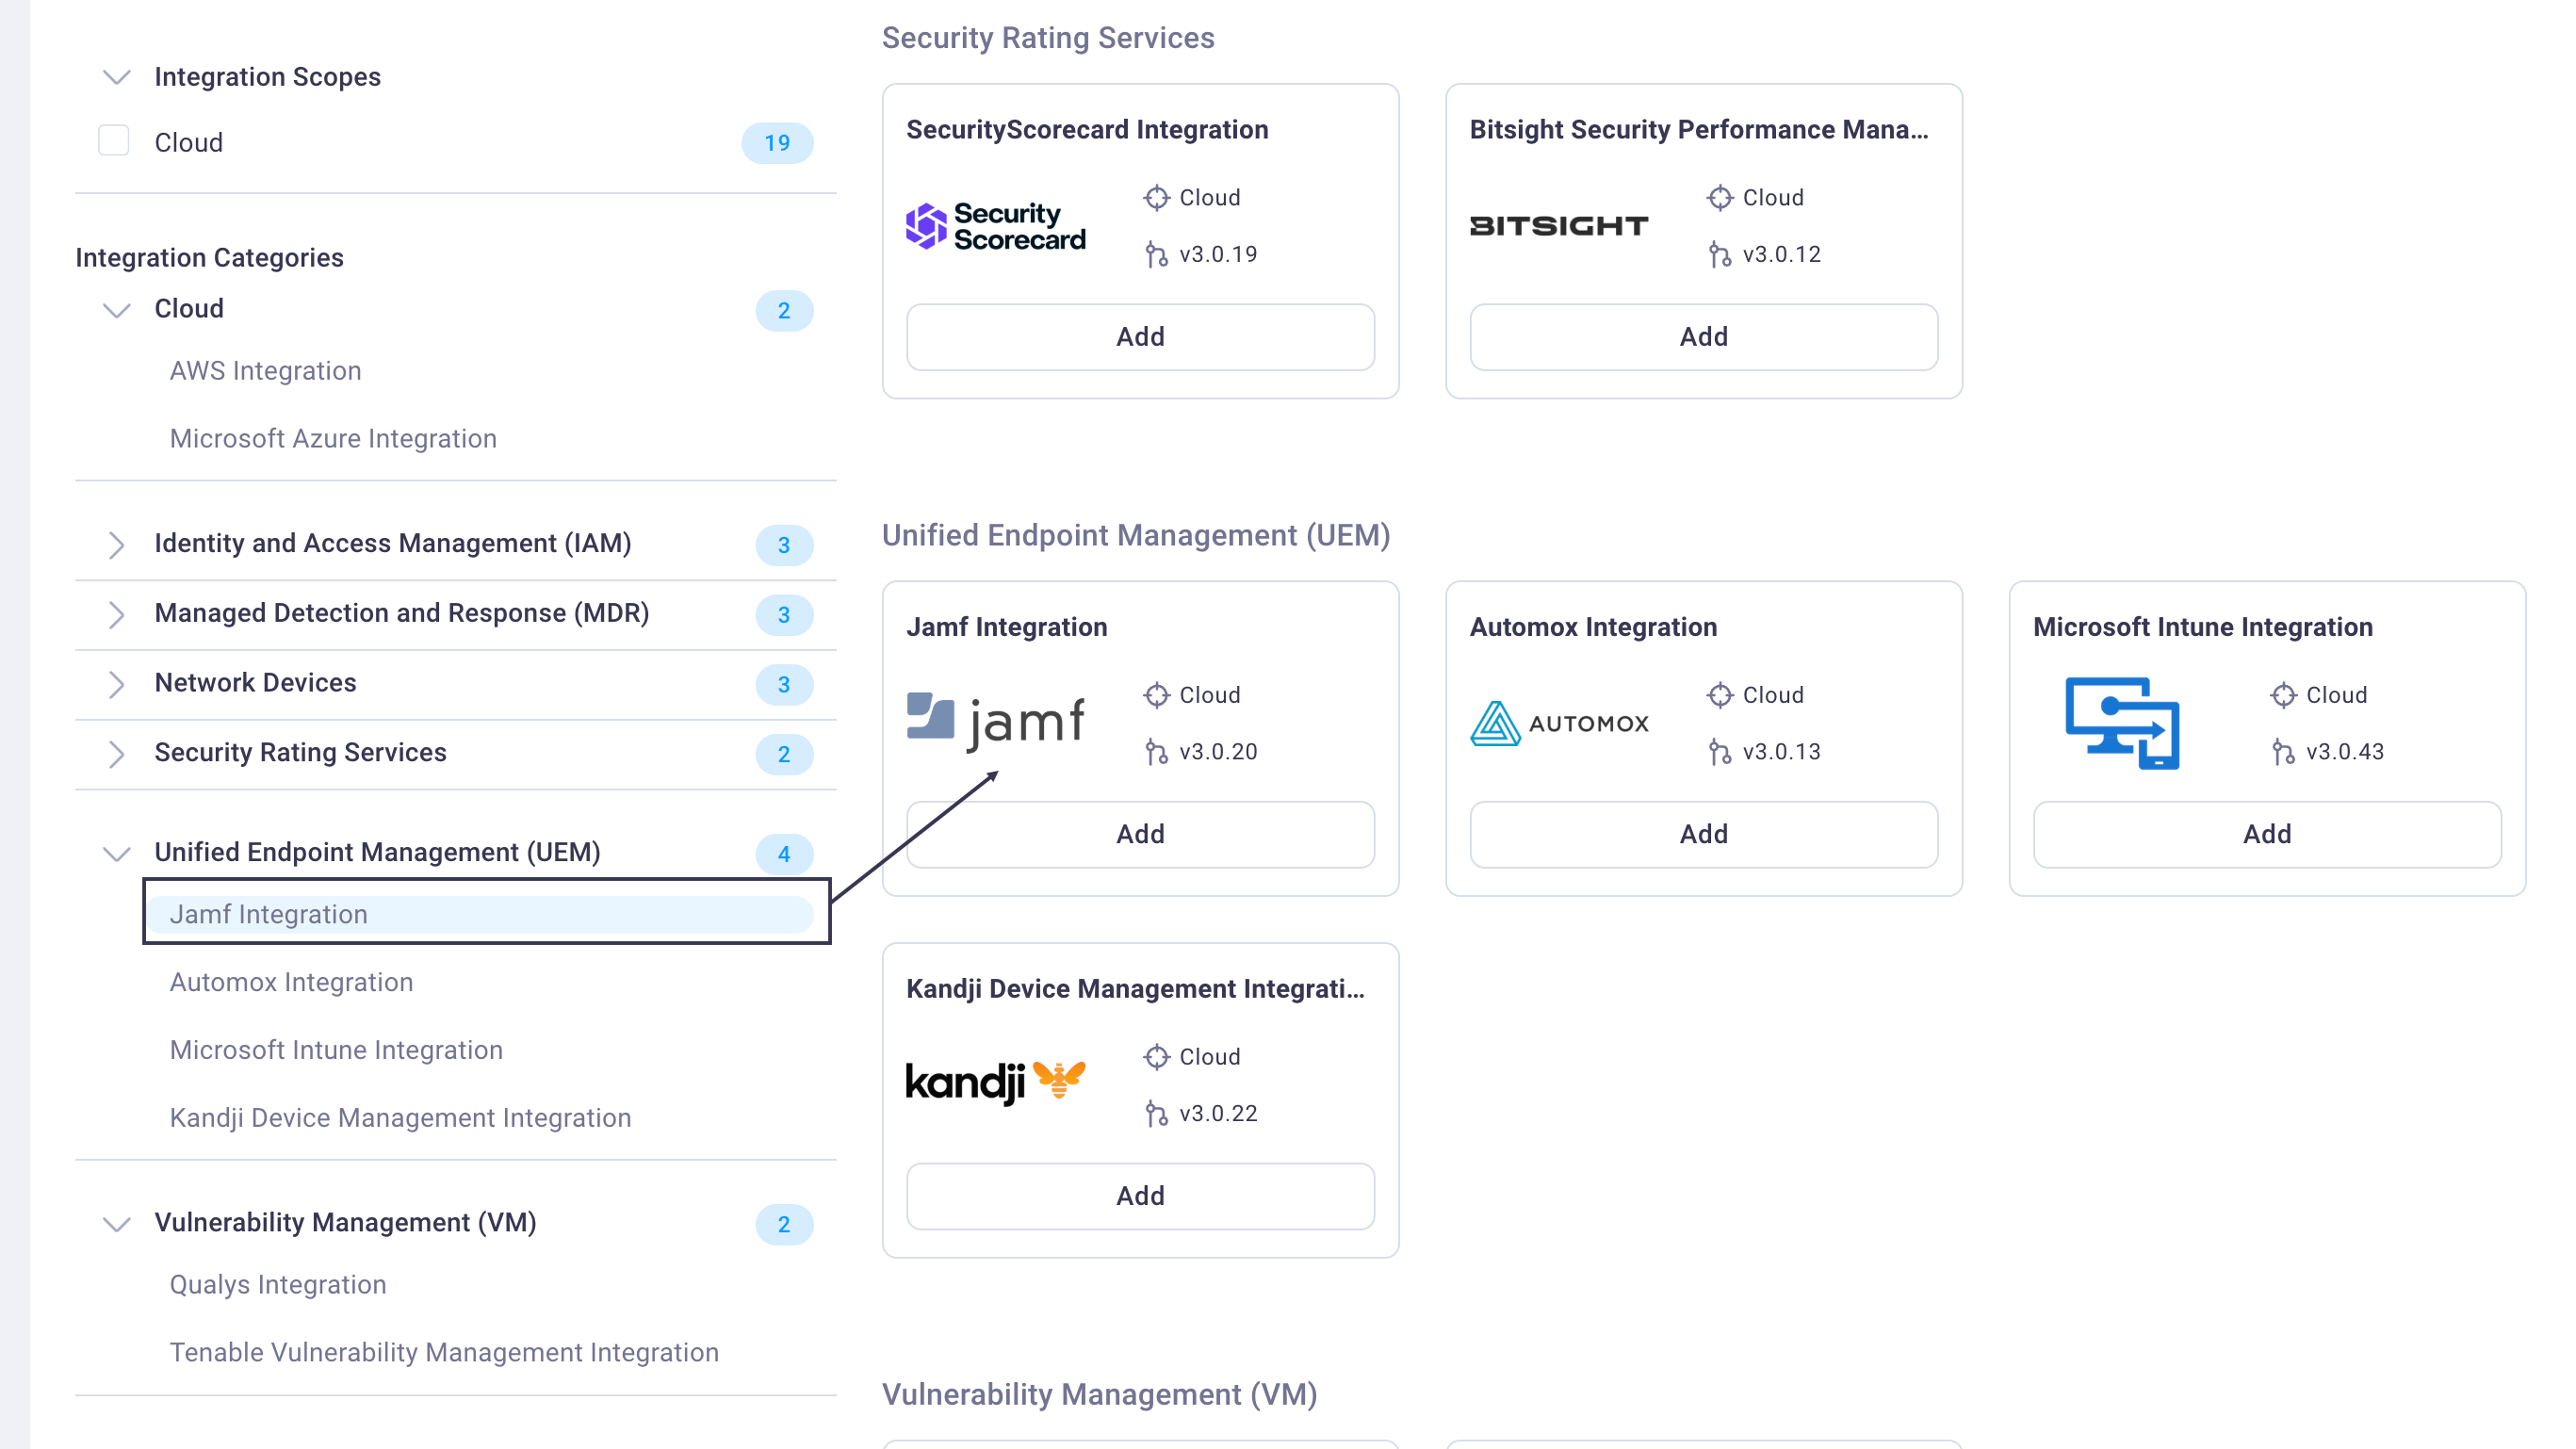
The available options change as you select options.
Select the Add button for your integration to display the integration configuration page where you can add the required information in the form fields provided.
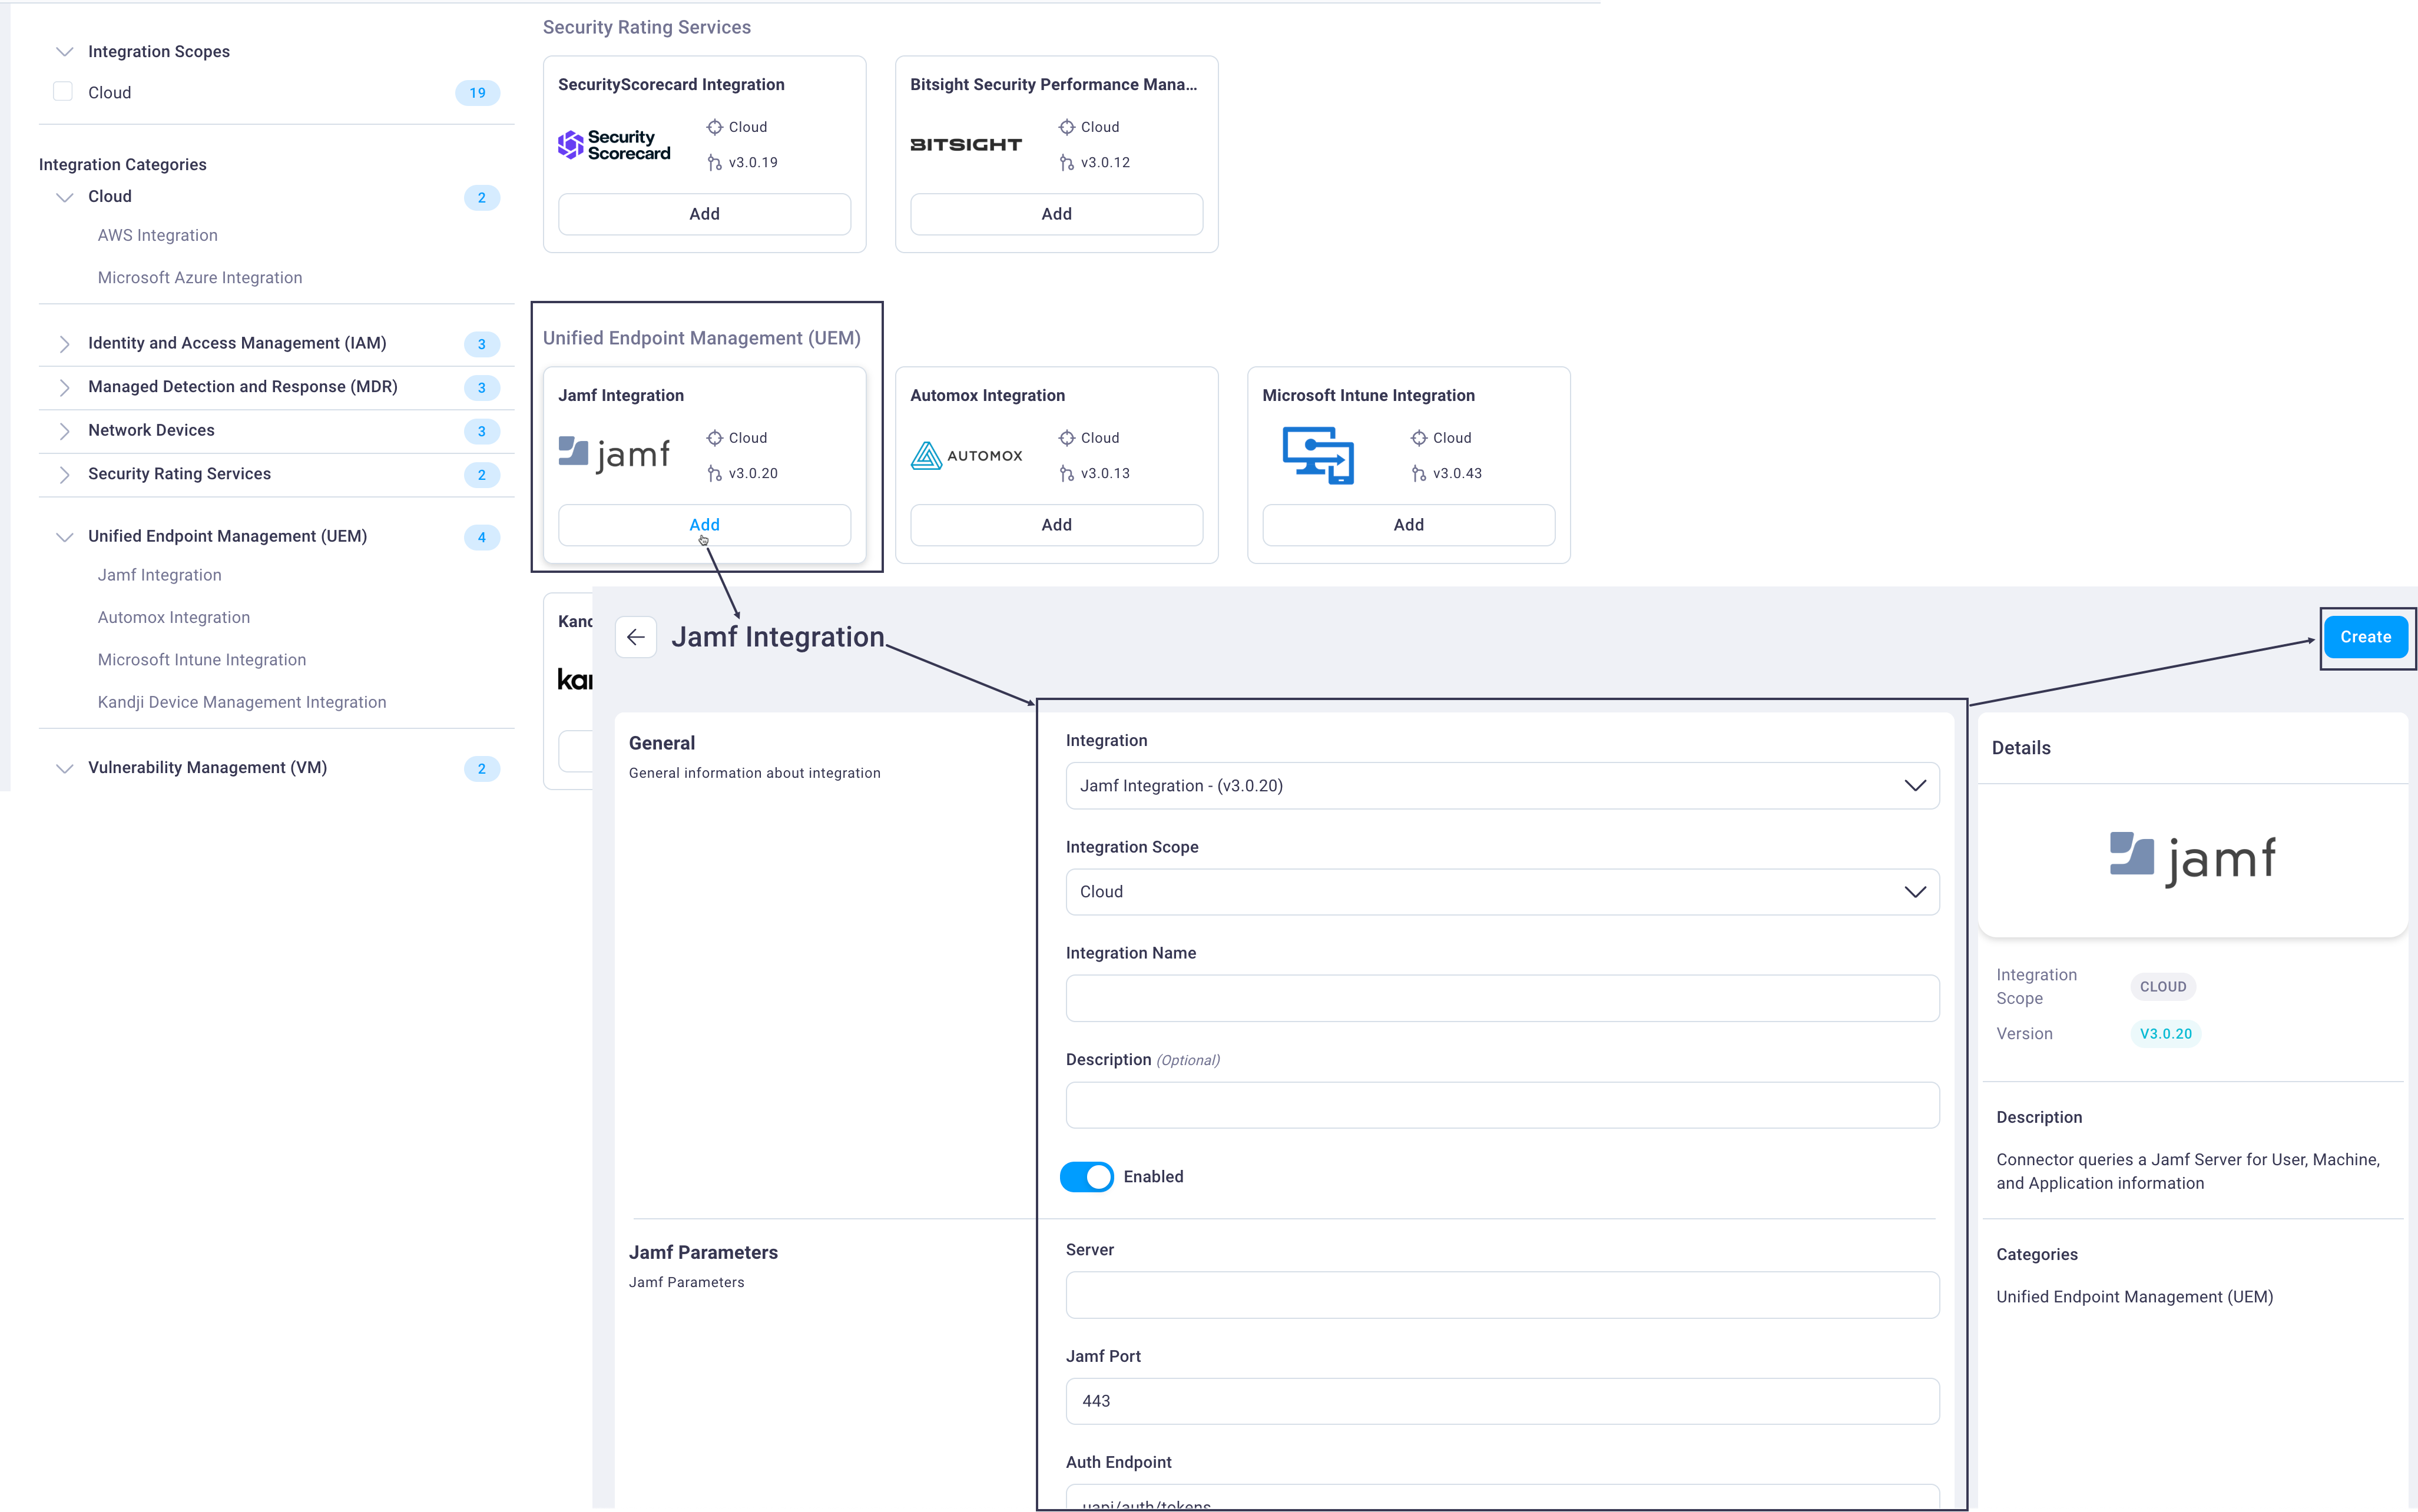
Details for the integration display in the right of the form:
- Integration version
- Description: What the integration does
- Integration Categories: The category of integration as defined in the NetSPI Platform
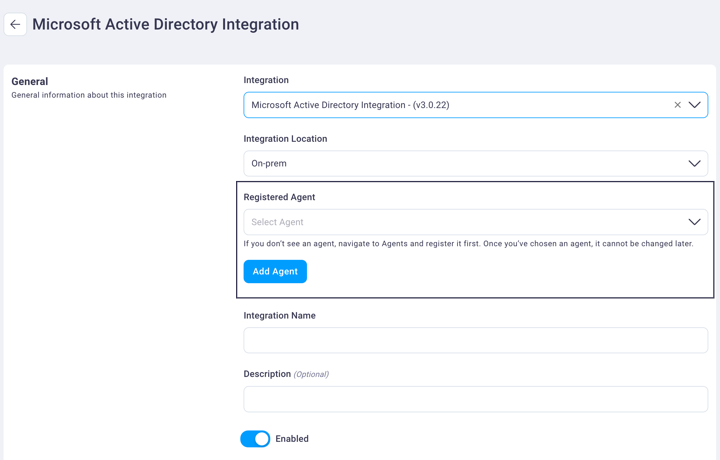
Note
If you select an on-prem integration, such as Microsoft Active Directory, an option to register an agent and an Add Agent button display.
Select the Create button to create the integration. Once the configuration successfully completes, a success message displays confirming its status.

See the individual integration instructions for each integration in this section for detailed steps.