#
Microsoft Active Directory (on-prem)
The NetSPI Platform has a growing integration with Microsoft Active Directory.
This integration supports the Microsoft Active Directory product only.
Similar to our other integrations, the Microsoft Active Directory integration is read-only and does not perform actions to configure systems or otherwise change anything about your Microsoft Active Directory system.
#
Supported asset types
Thr Microsoft Active Directory integration provides the NetSPI Platform visibility into the following asset types:
- IP
- DNSRecord
- Identity
- OperatingSystem
- Person
- PermissionGroup
- System
#
Data run frequency
The Microsoft Active Directory integration pulls data every six hours.
#
Endpoints used
This integration does not use a Rest API.
It does require permission for the following commands to return responses from the Microsoft Active Director servers.
- Search command of the LDAP3 python library.
- Search command of the impact.ldap python library.
#
Required permissions
This integration requires a username/password combination with the following access permissions:
If OU hardening has occurred: "Read-only access" Microsoft Active DirectoryPage: 2 of 6
If no OU hardening has occurred: no special permissions are required. Any AD account will work.
#
Configuration Steps
Use the sections below for configuring Microsoft Active Directory to integrate with the NetSPI Platform.
#
Step one: Microsoft Active Directory configuration
Create a Domain service account. This account must have a password of at least eight characters. However, we recommend a complex password of at least 16 characters or longer.
Set the domain account to never expire (to prevent the integration from failing over time). Additionally, you may wish to exempt the account from password expiration.
If your domain has OU hardening and you want the Platform to have visibility into the Users and Machines within these protected OU's (recommended), then the service account should be given explicit Read-Only access to those OU's. Similarly, if you wish to exempt specific users or machines from appearing in the Platform via this integration, then the service account should be denied all access to the corresponding Microsoft Active Directory objects or OU's. Note: In most domains, a basic service account with no special privileges is all that is needed.
This integration only captures information for one domain at a time. To capture multiple domains, create one service account and one integration for each domain.
#
Step two: NetSPI Platform CAASM configuration
Use the steps below to configure the Microsoft Active Directory in the NetSPI Platform.
Log into the NetSPI Platform as a Client Admin user.
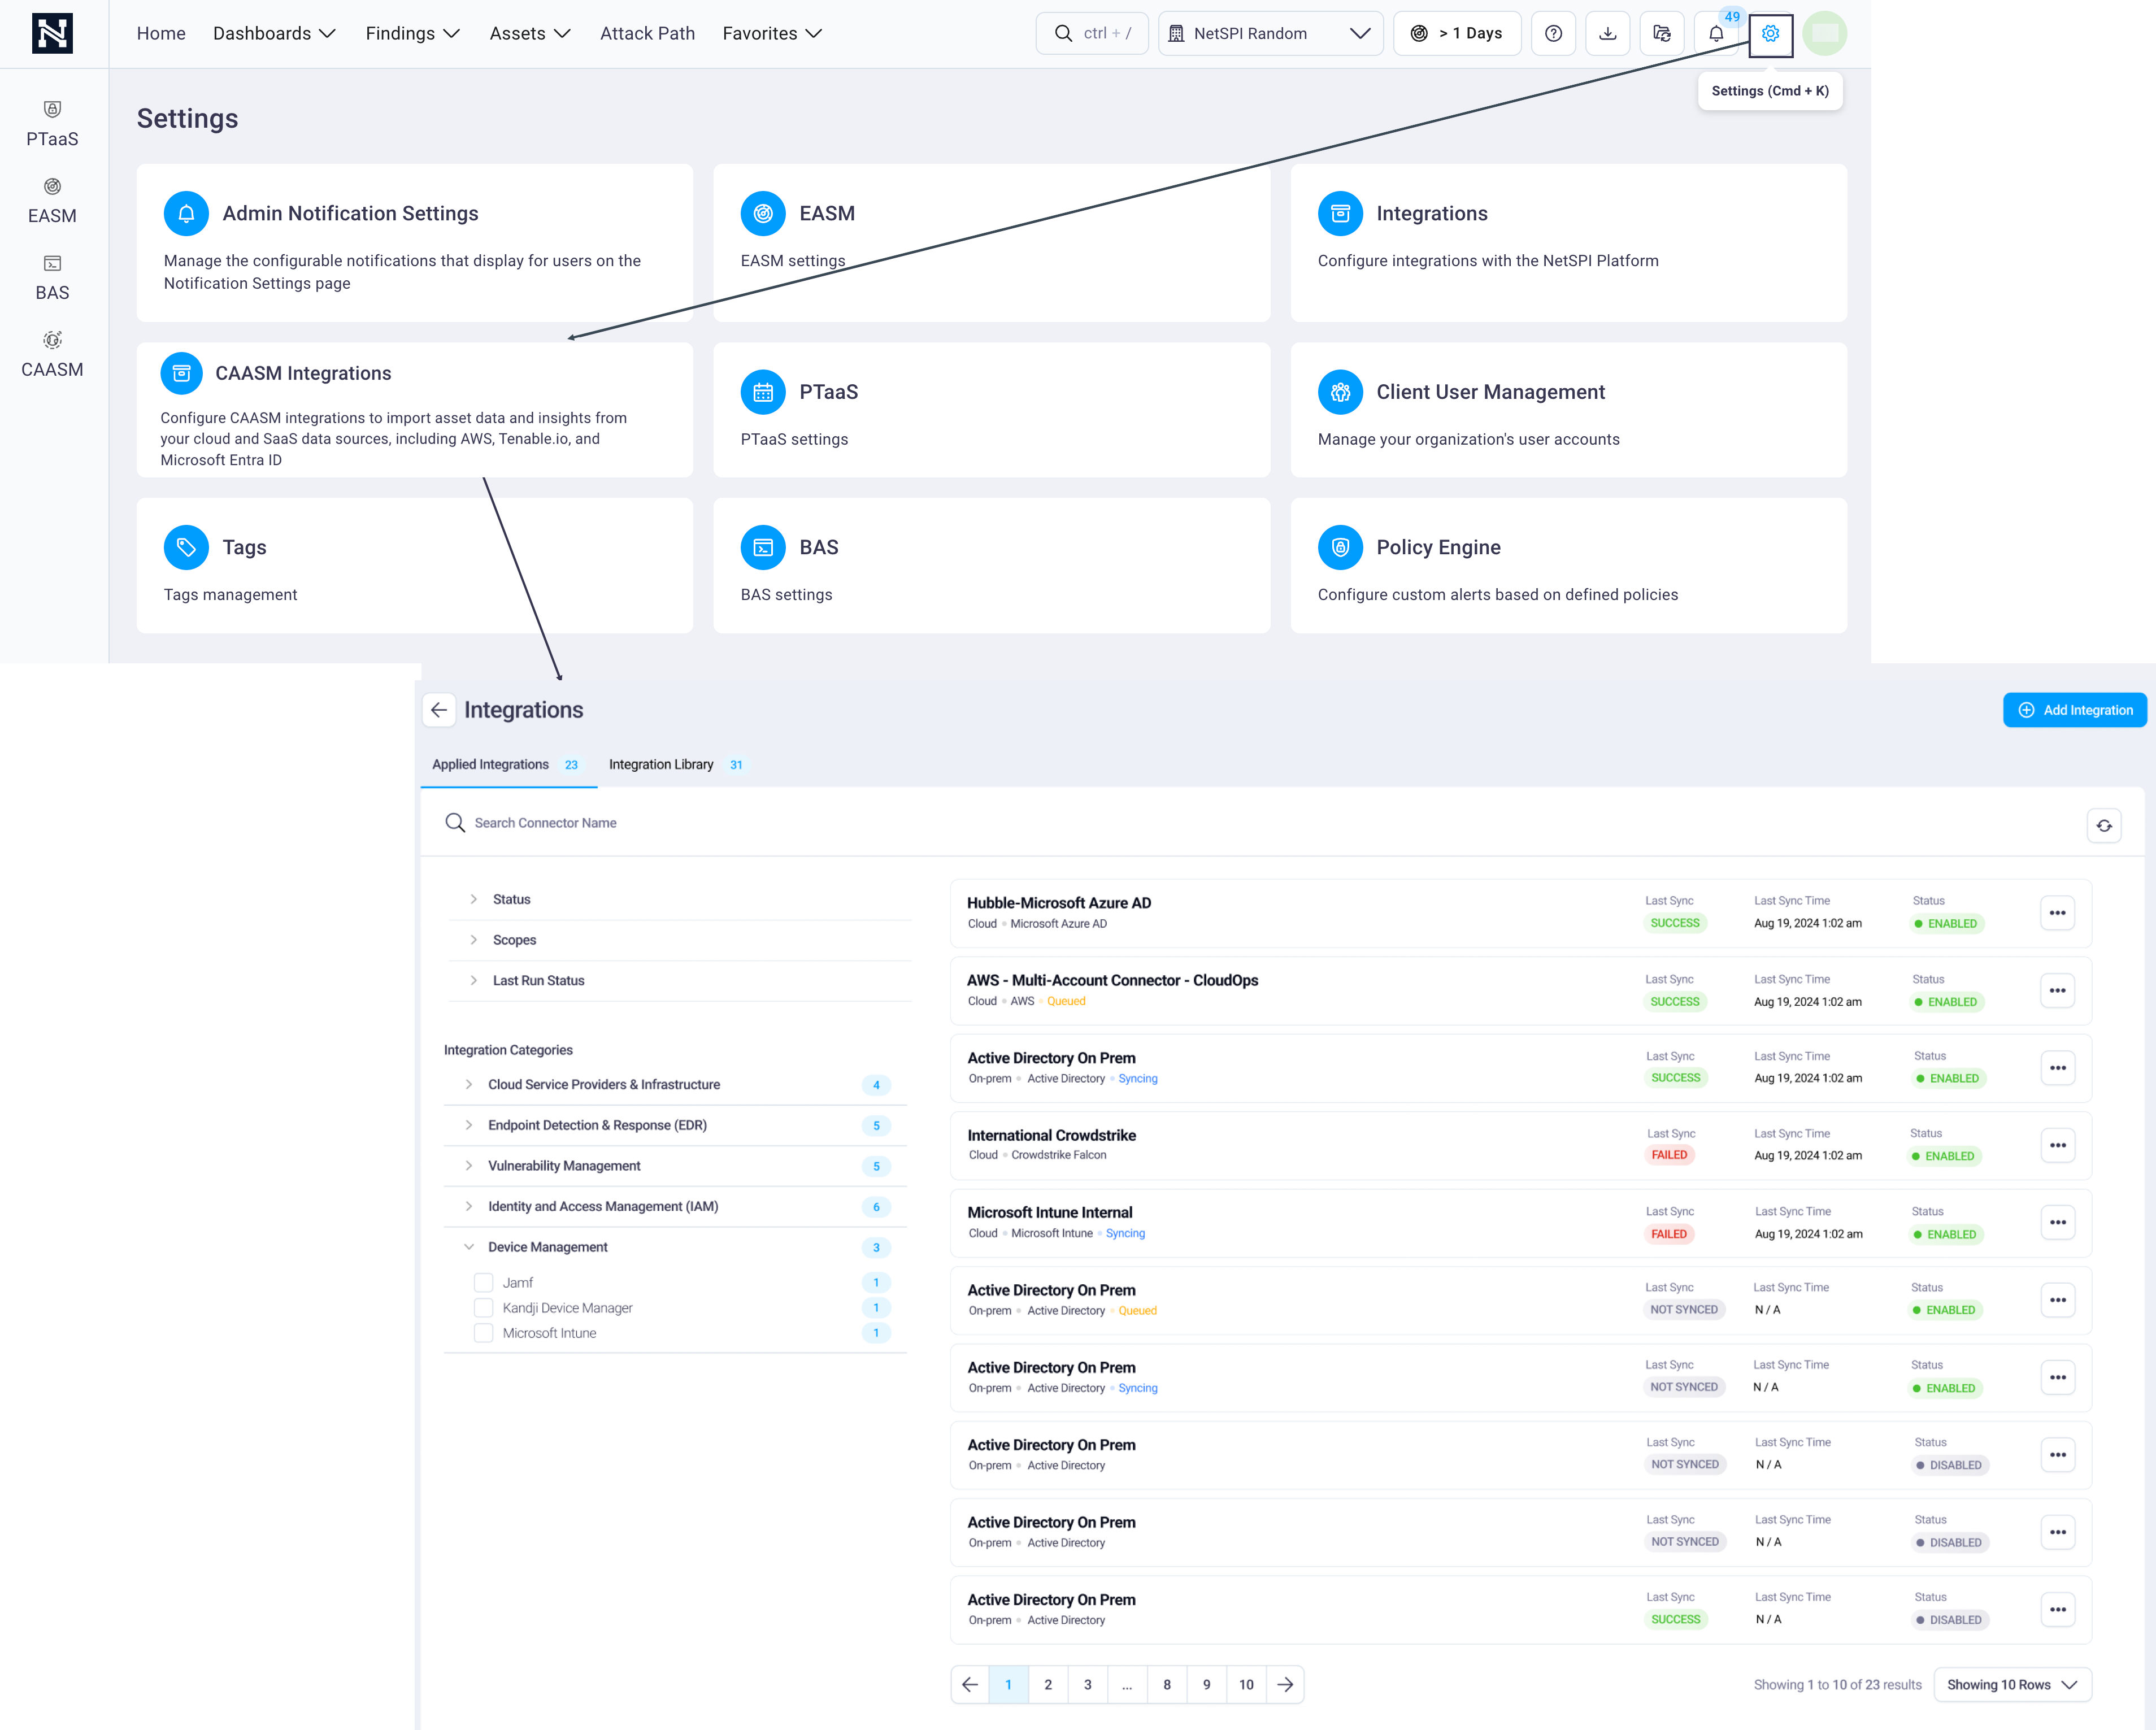
Navigate to Settings -> CAASM Integrations to display the CAASM Integrations page.

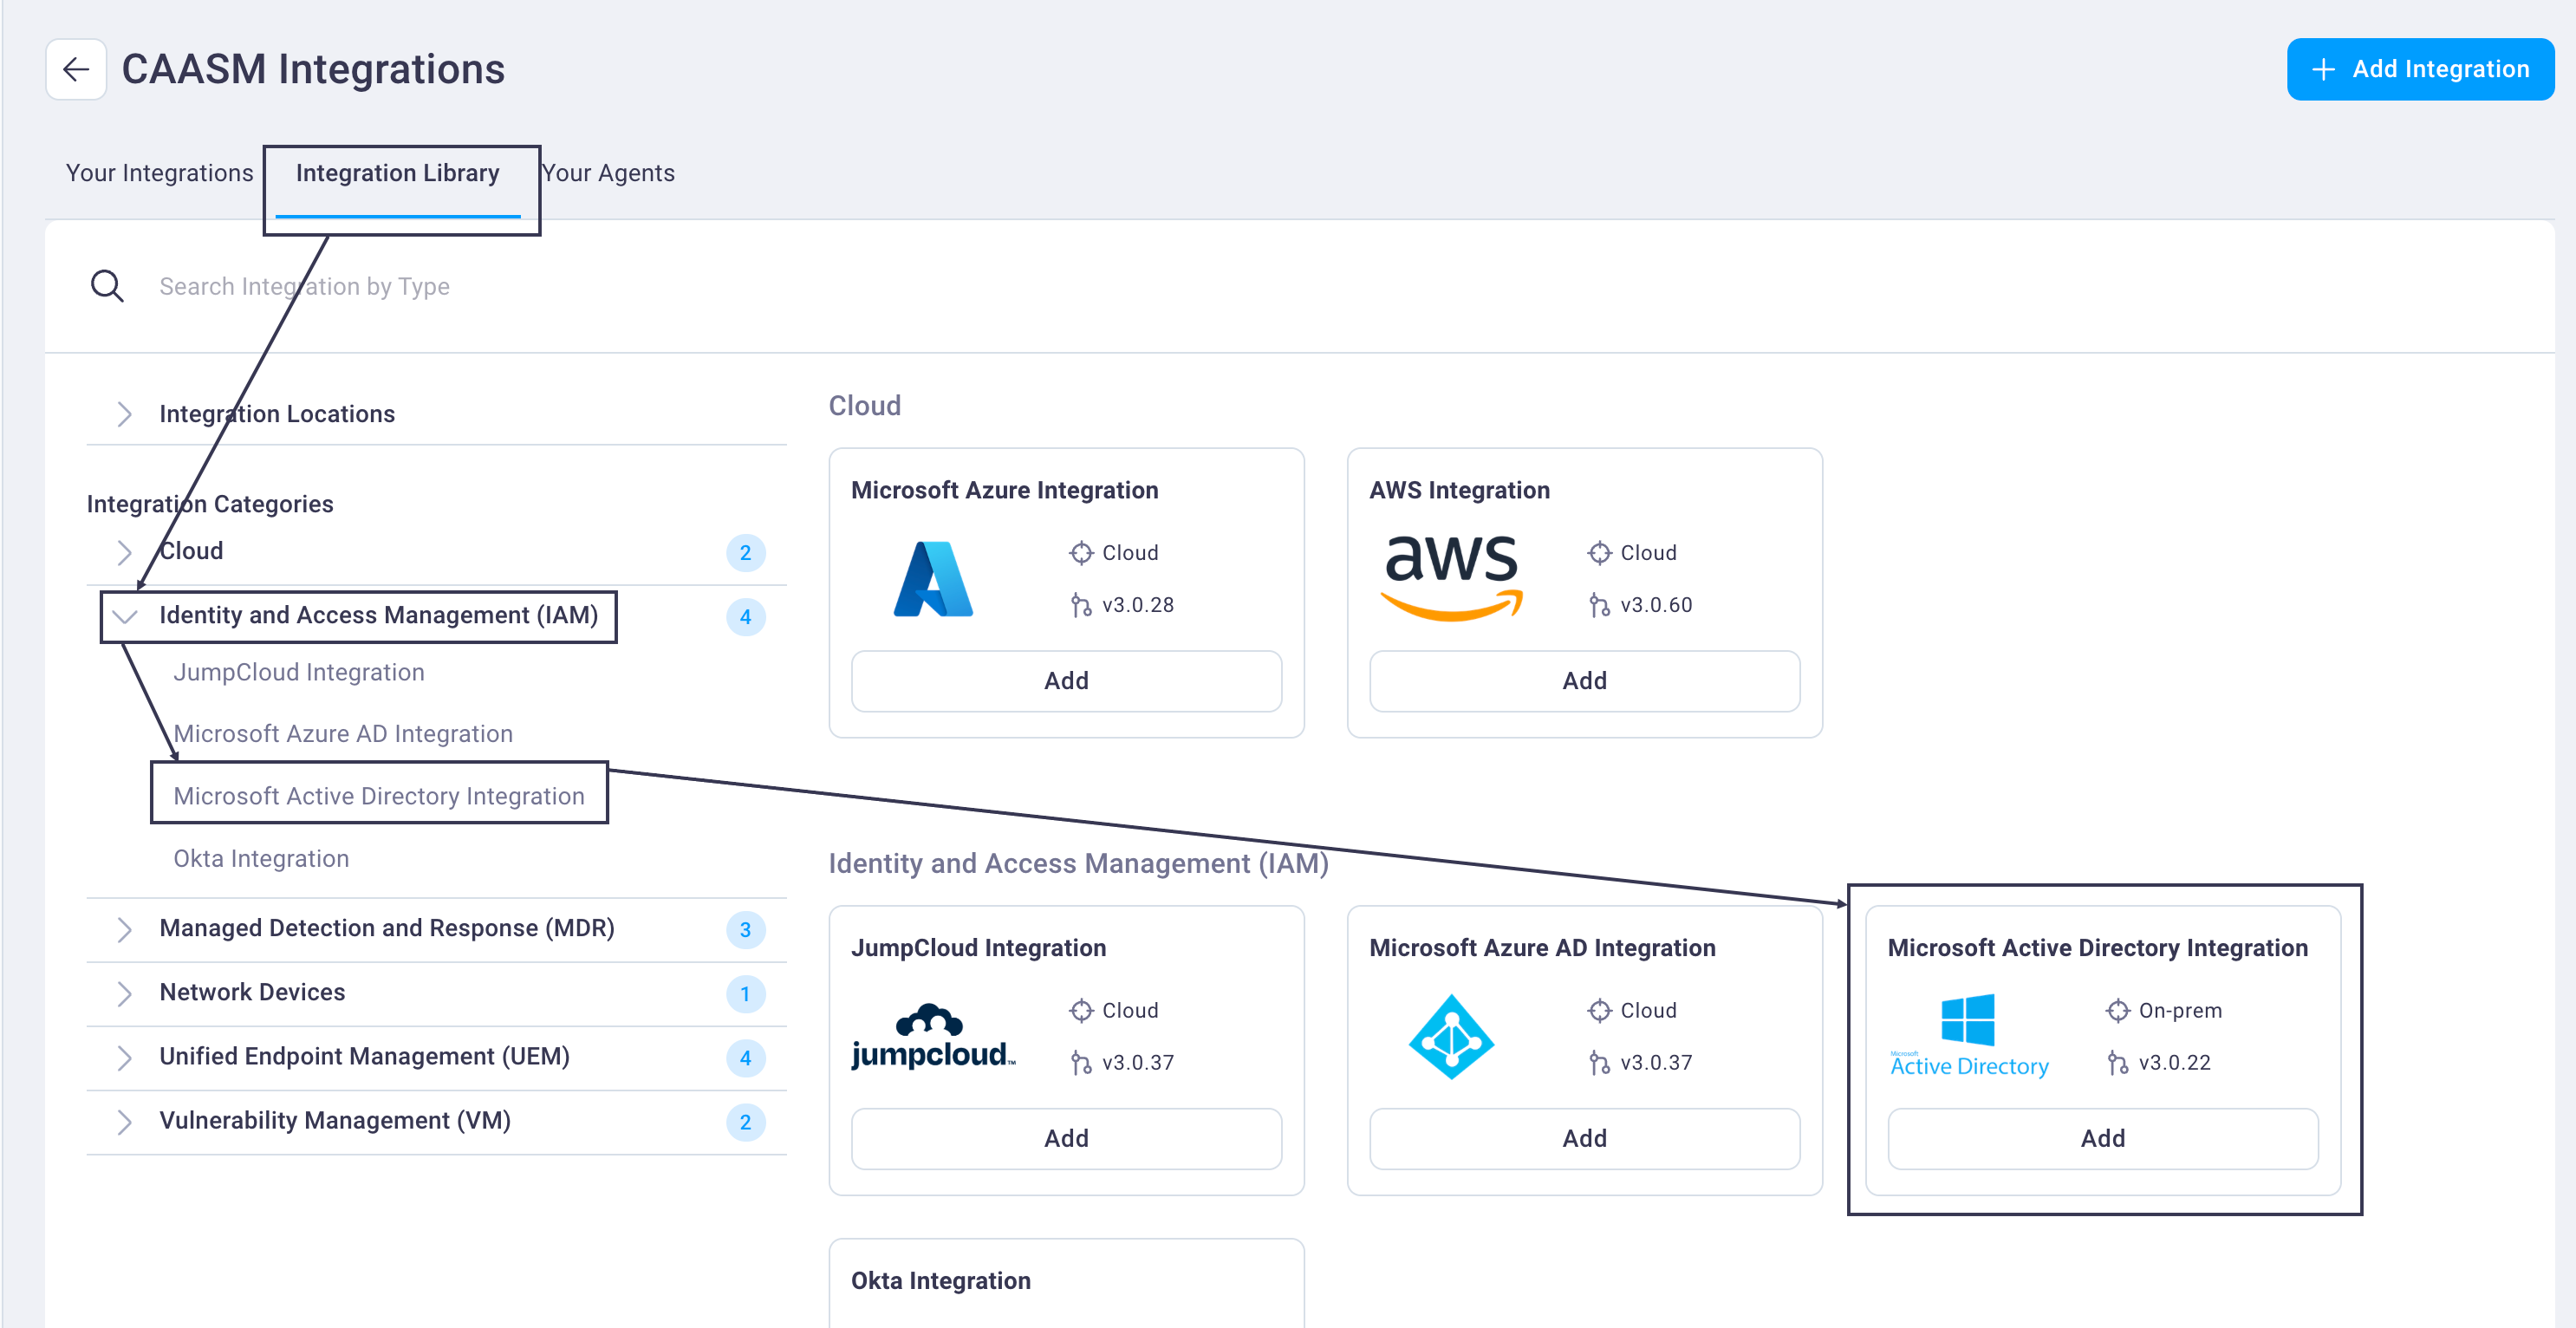
Select the Integration Library tab -> Identity and Access Management -> Microsoft Active Directory Integration.

This brings the Microsoft Active Directory integration card into focus.
Note
You can also locate the integration card by:
- Scrolling down the page on the Integration Library tab
- Entering the integration name in the Search Integration by Type or Name bar
Select the Add button on the Microsoft Active Directory card to display the Microsoft Active Directory integration configuration page.

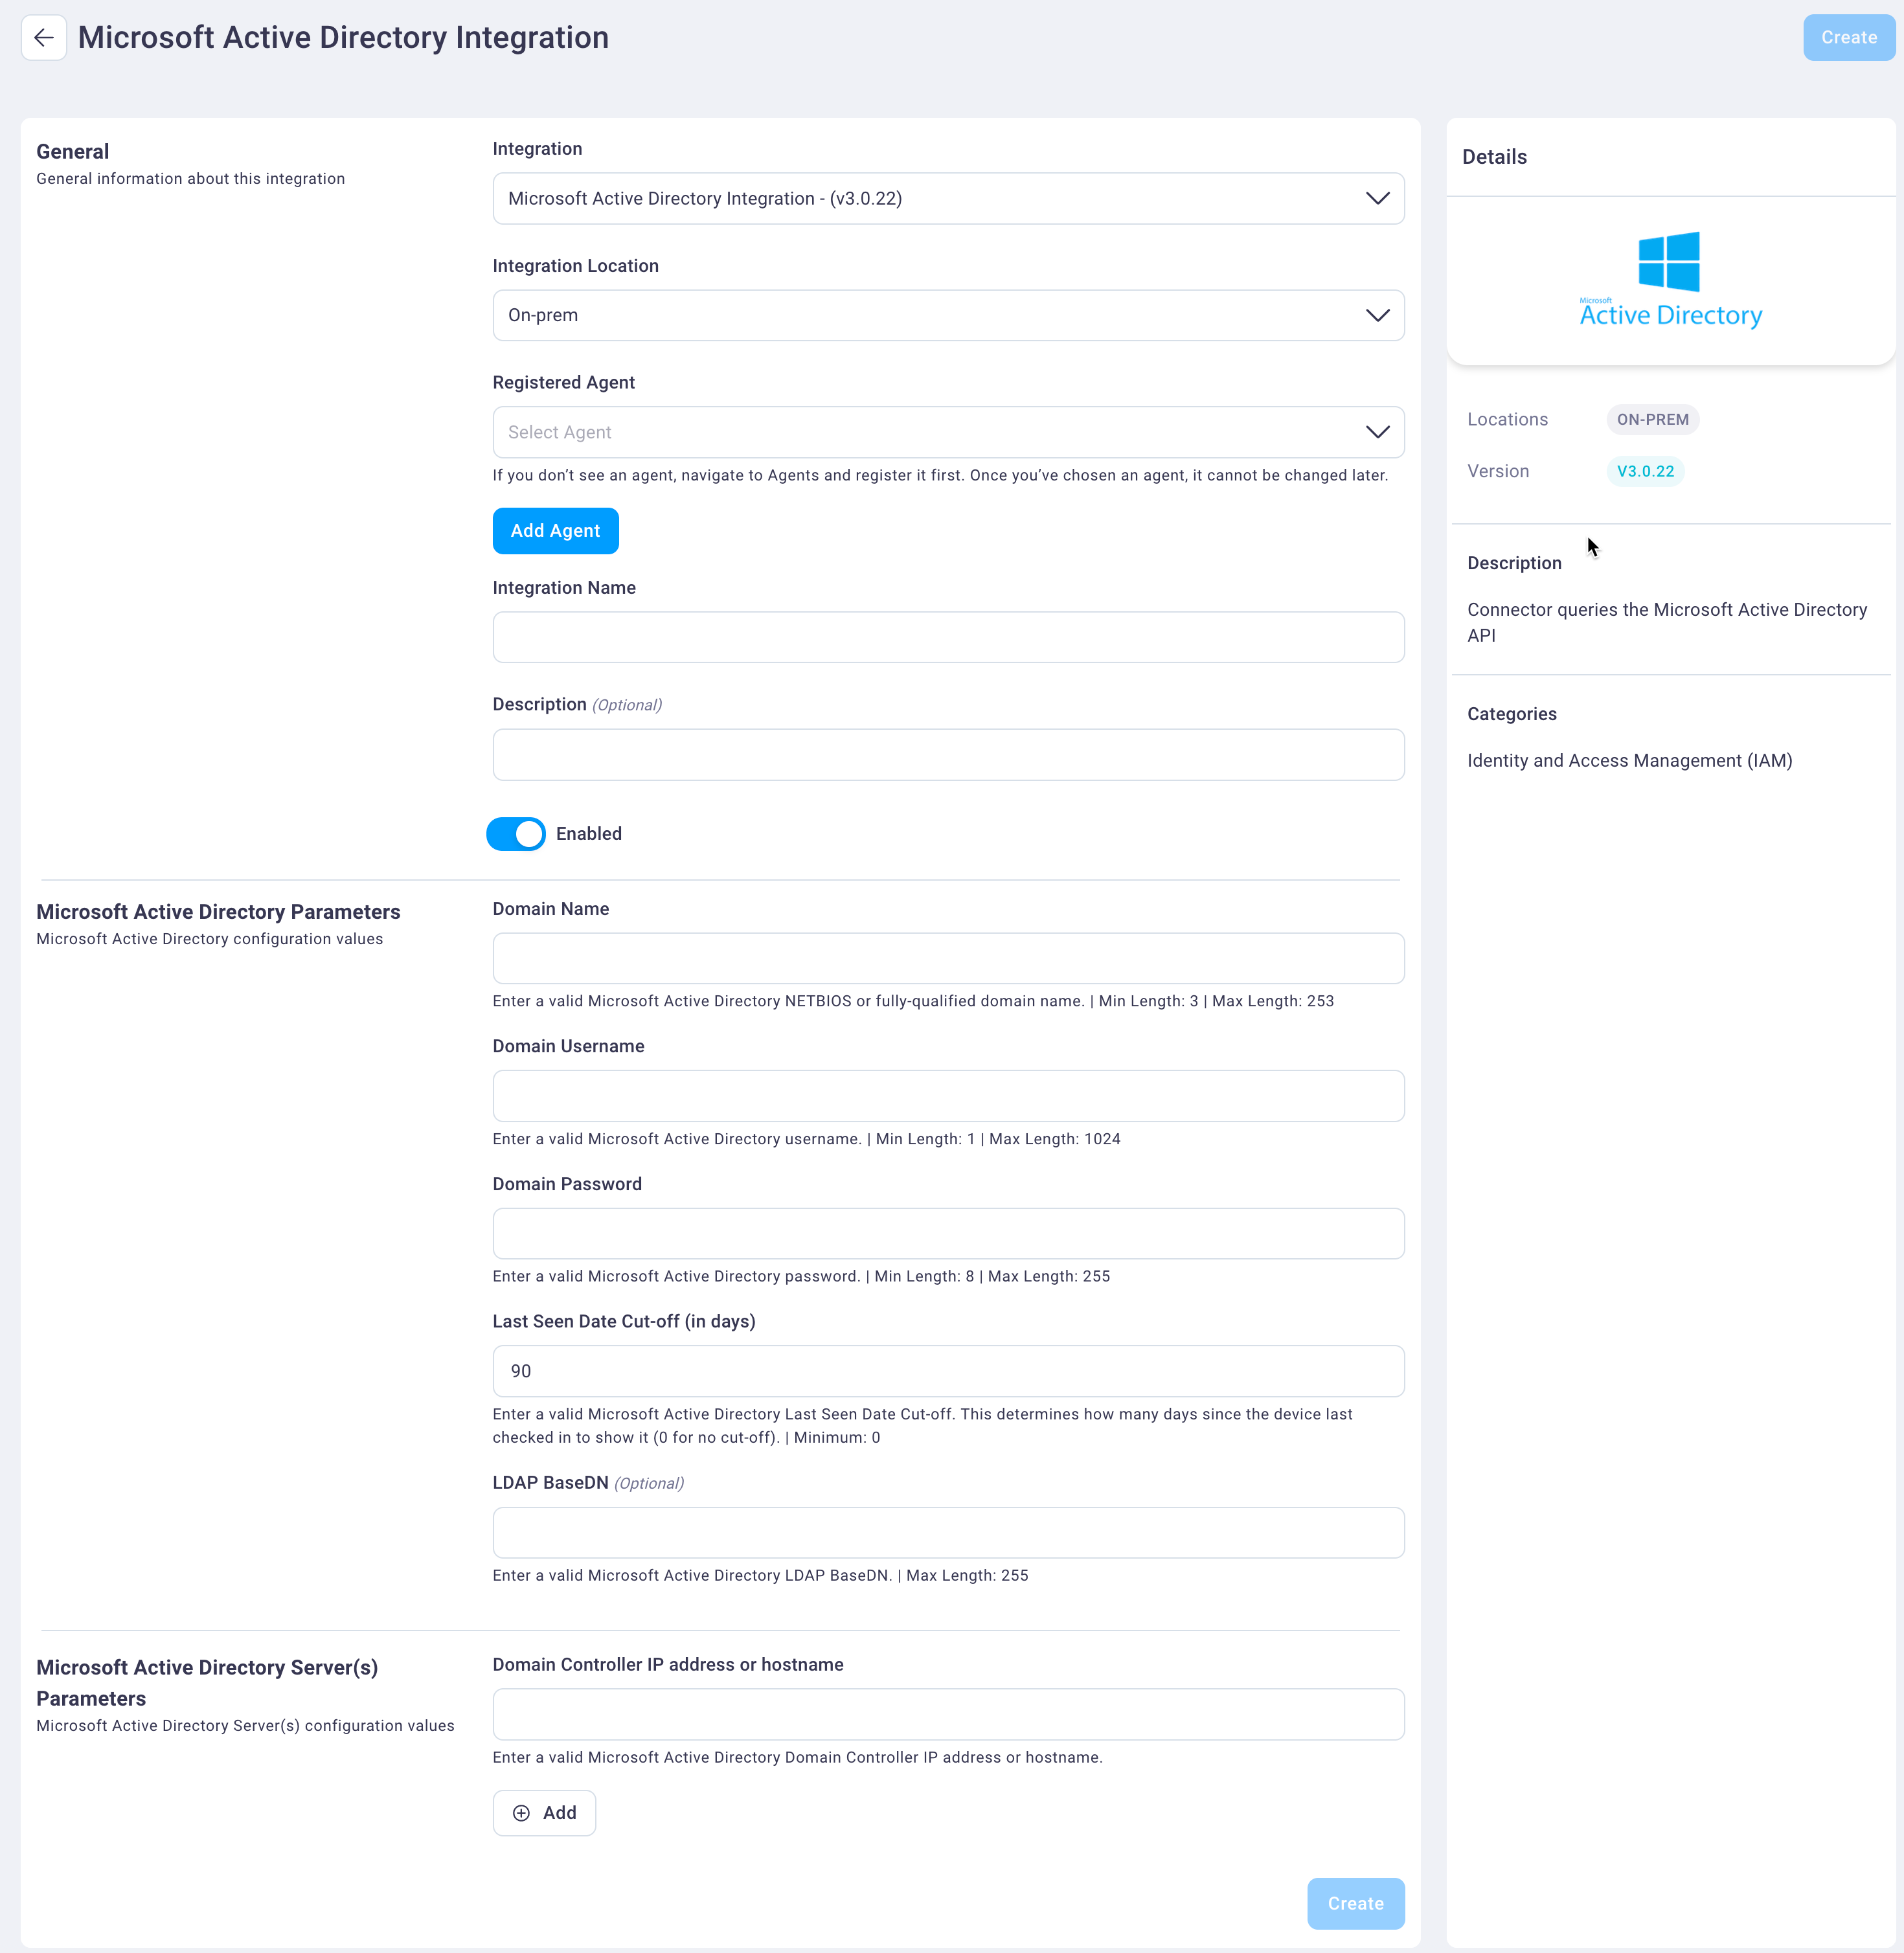
Select and enter values for the following fields.
In the General field group:
Select the integration type from the Integration drop-down list. In this case, Microsoft Active Directory Integration - (v3.0.22), which is already selected by default.
Select the integration scope from the Integration Location drop-down list. The Microsoft Active Directory integration can only run on an on-prem location, which was configured by NetSPI, and On-prem is the default value.
If you have registered an agent (which connects on-prem devices to the NetSPI Platform), select it from the Registered Agent drop-down list. See the Your Agents section for instructions.
Enter an integration name and description in the Integration Name and Description fields.
Select the Enabled slider button to display as either on (blue) or off (light gray).
In the Microsoft Active Directory Parameters field group, enter the following values:
Enter a valid Microsoft Active Directory domain name in the Domain Name field.
Enter the associated username and password in the Domain Username and Domain Password fields, respectively.
Enter a value (in days) in the Last Seen Date Cut-off (in days) field. The default value is 90.
Enter an optional value in the LDAP BaseDN field. If the Domain Name field value looks something like 'example.com' then the BaseDN value might look similar to 'dc=example,dc=com'.
In the Microsoft Active Directory Server(s) Parameters field group:
Enter a valid Microsoft Active Directory domain controller IP address or hostname in the Domain Controller IP address or hostname field.
Select Add to add additional domain controller IP addresses or hostnames as needed.
Select Create to create the integration. The new integration now displays on the Your Integrations tab with its statuses: last sync, last sync time, and status.

