#
Jamf
The NetSPI Platform's CAASM module has a broad integration with Jamf.
This Jamf integration supports the following Jamf products.
Requirements
At least one of these products must be properly licensed in order for the integration to work.
- Jamf Pro
- Jamf Now
- Jamf Protect
Note: Jamf School and Jamf Connect are not supported by this integration.
Similar to the other NetSPI Platform integrations, the Jamf integration is read-only and does not perform actions to configure systems or otherwise change anything about your Jamf system.
#
Supported asset types
Thr Jamf integration provides the NetSPI Platform visibility into the following asset types:
- Applications
- IPV4 Addresses
- Systems
- Users
- Network
#
Data run frequency
The Jamf integration pulls data every six hours.
#
Endpoints used
This integration needs access to the following API endpoints:
api/v1/computers-inventoryapi/v1/computers-inventory-detailapi/v2/mobile-devices
#
Required permissions
This integration needs a username/password combination with the following access permissions:
- "Access Level" = "Full Access"
- "Privilege Set" = "Auditor"
#
Configuration steps
Use the section below for configuring Jamf to integrate with the NetSPI Platform.
#
Jamf system configuration
In your Jamf Console, navigate to Settings -> Jamf Pro User Accounts & Groups -> + New.
Enter a Username for the account, such as "netspiapi".
Set the Access Level to Full Access.
Set the Privilege Set to Auditor.
Set the Access Status to Enabled.
Enter a descriptive name like "NetSPI Service Account" for the Full Name.
Enter an email in the the Email Address field.
Enter a complex password in the Password field. NetSPI Platform integrations must contain at least eight characters and contain characters, numbers, and special characters. We recommend a 32-character fully randomized password.
Reenter the password in Verify Password field.
Leave the Force user to change password on next login blank.
Select Save.
#
NetSPI Platform configuration
Use the steps below to configure the Jamf Integration in the NetSPI Platform.
Log into the NetSPI Platform as a Client Admin user.
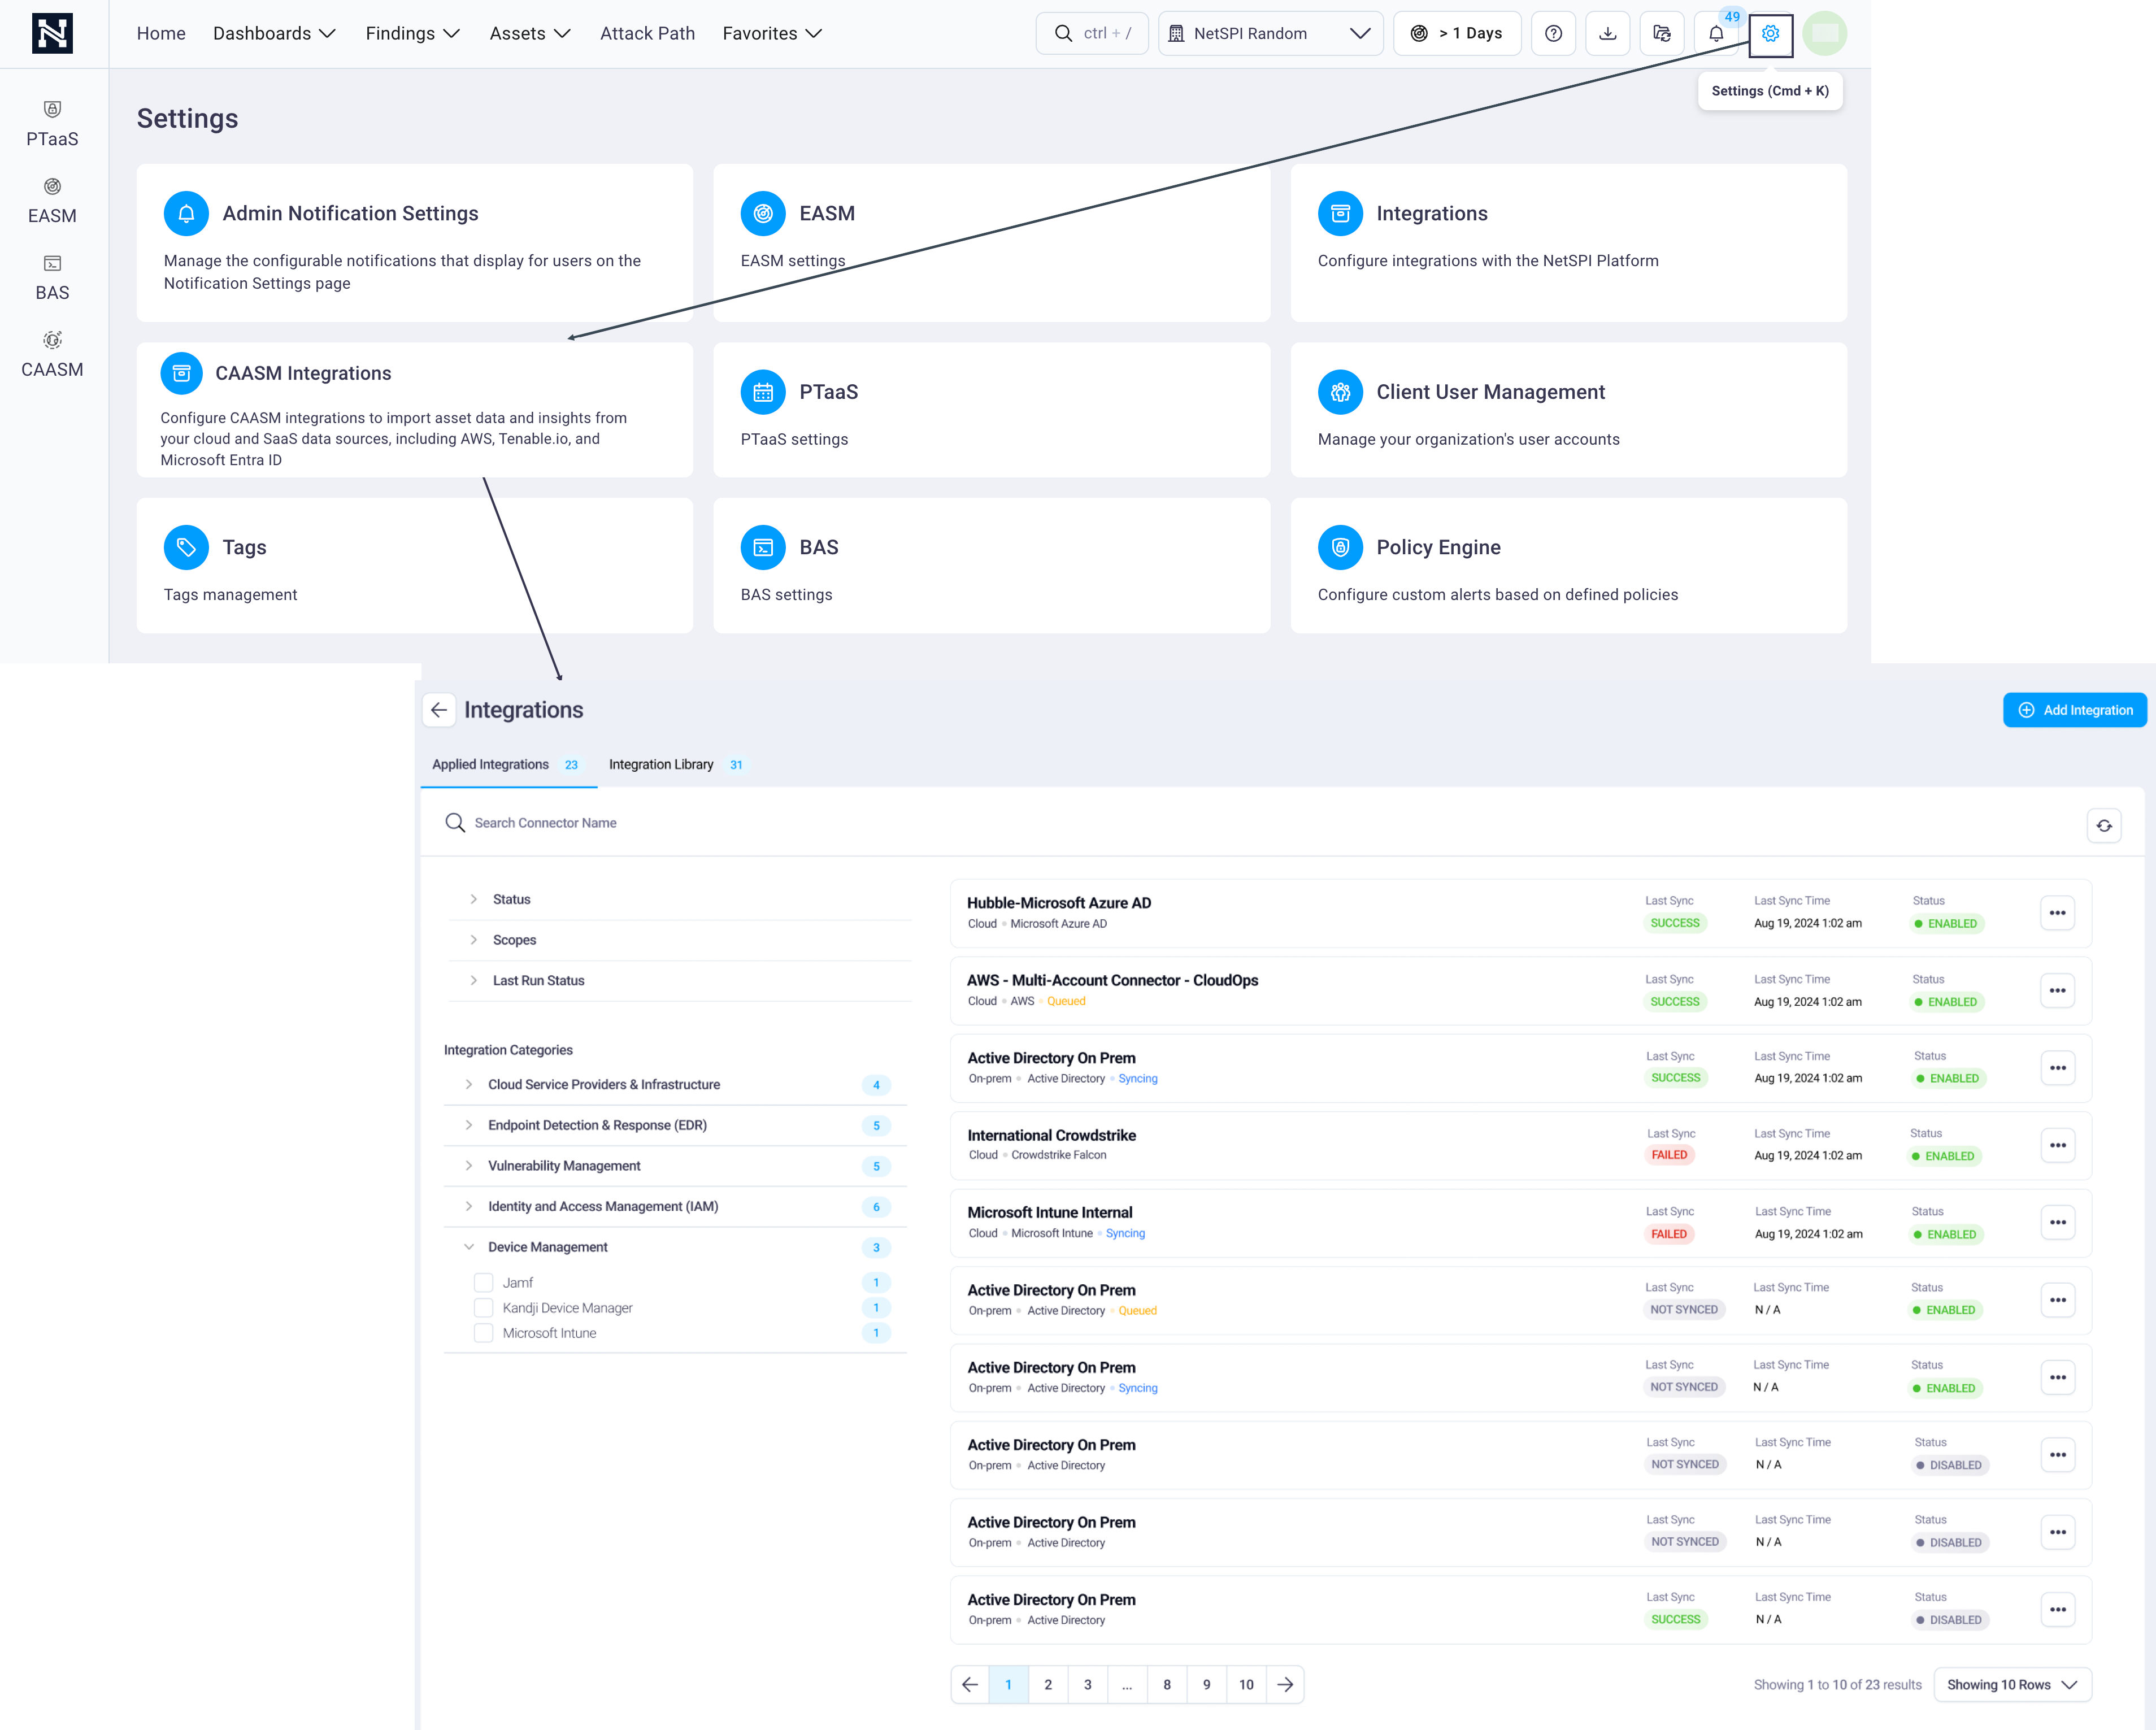
Navigate to Settings -> CAASM Integrations to display the Integrations page.

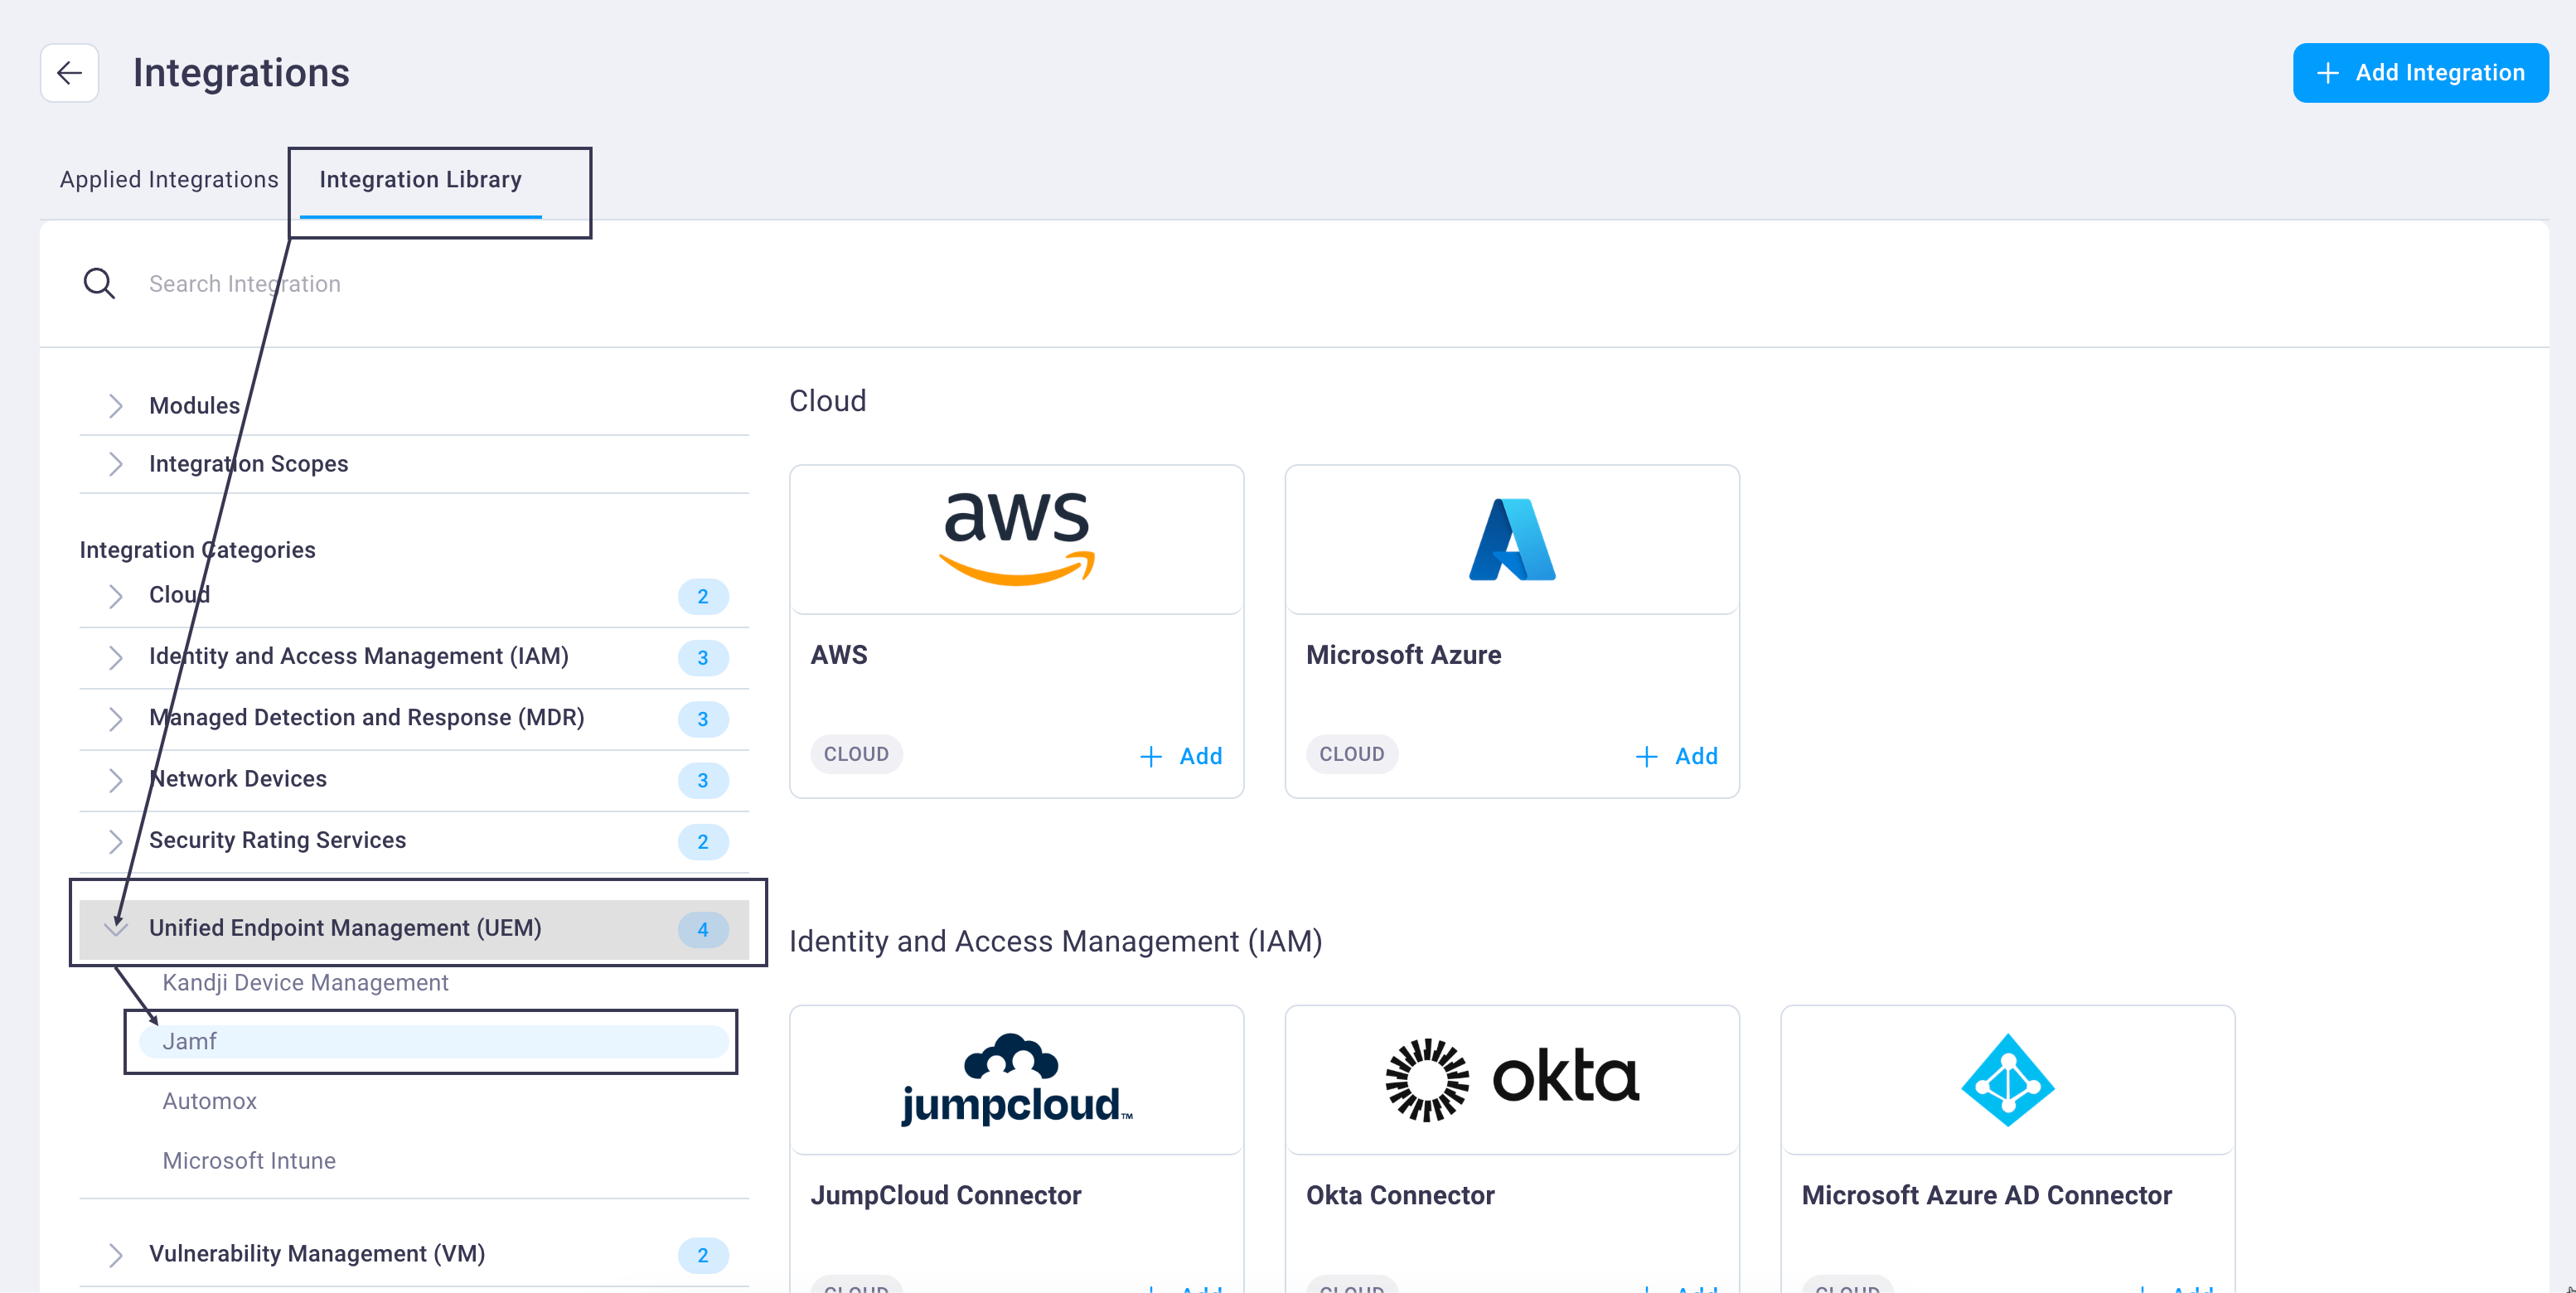
Select the Integration Library tab -> Integration Categories / Unified Endpoint Management (UEM) -> Jamf.

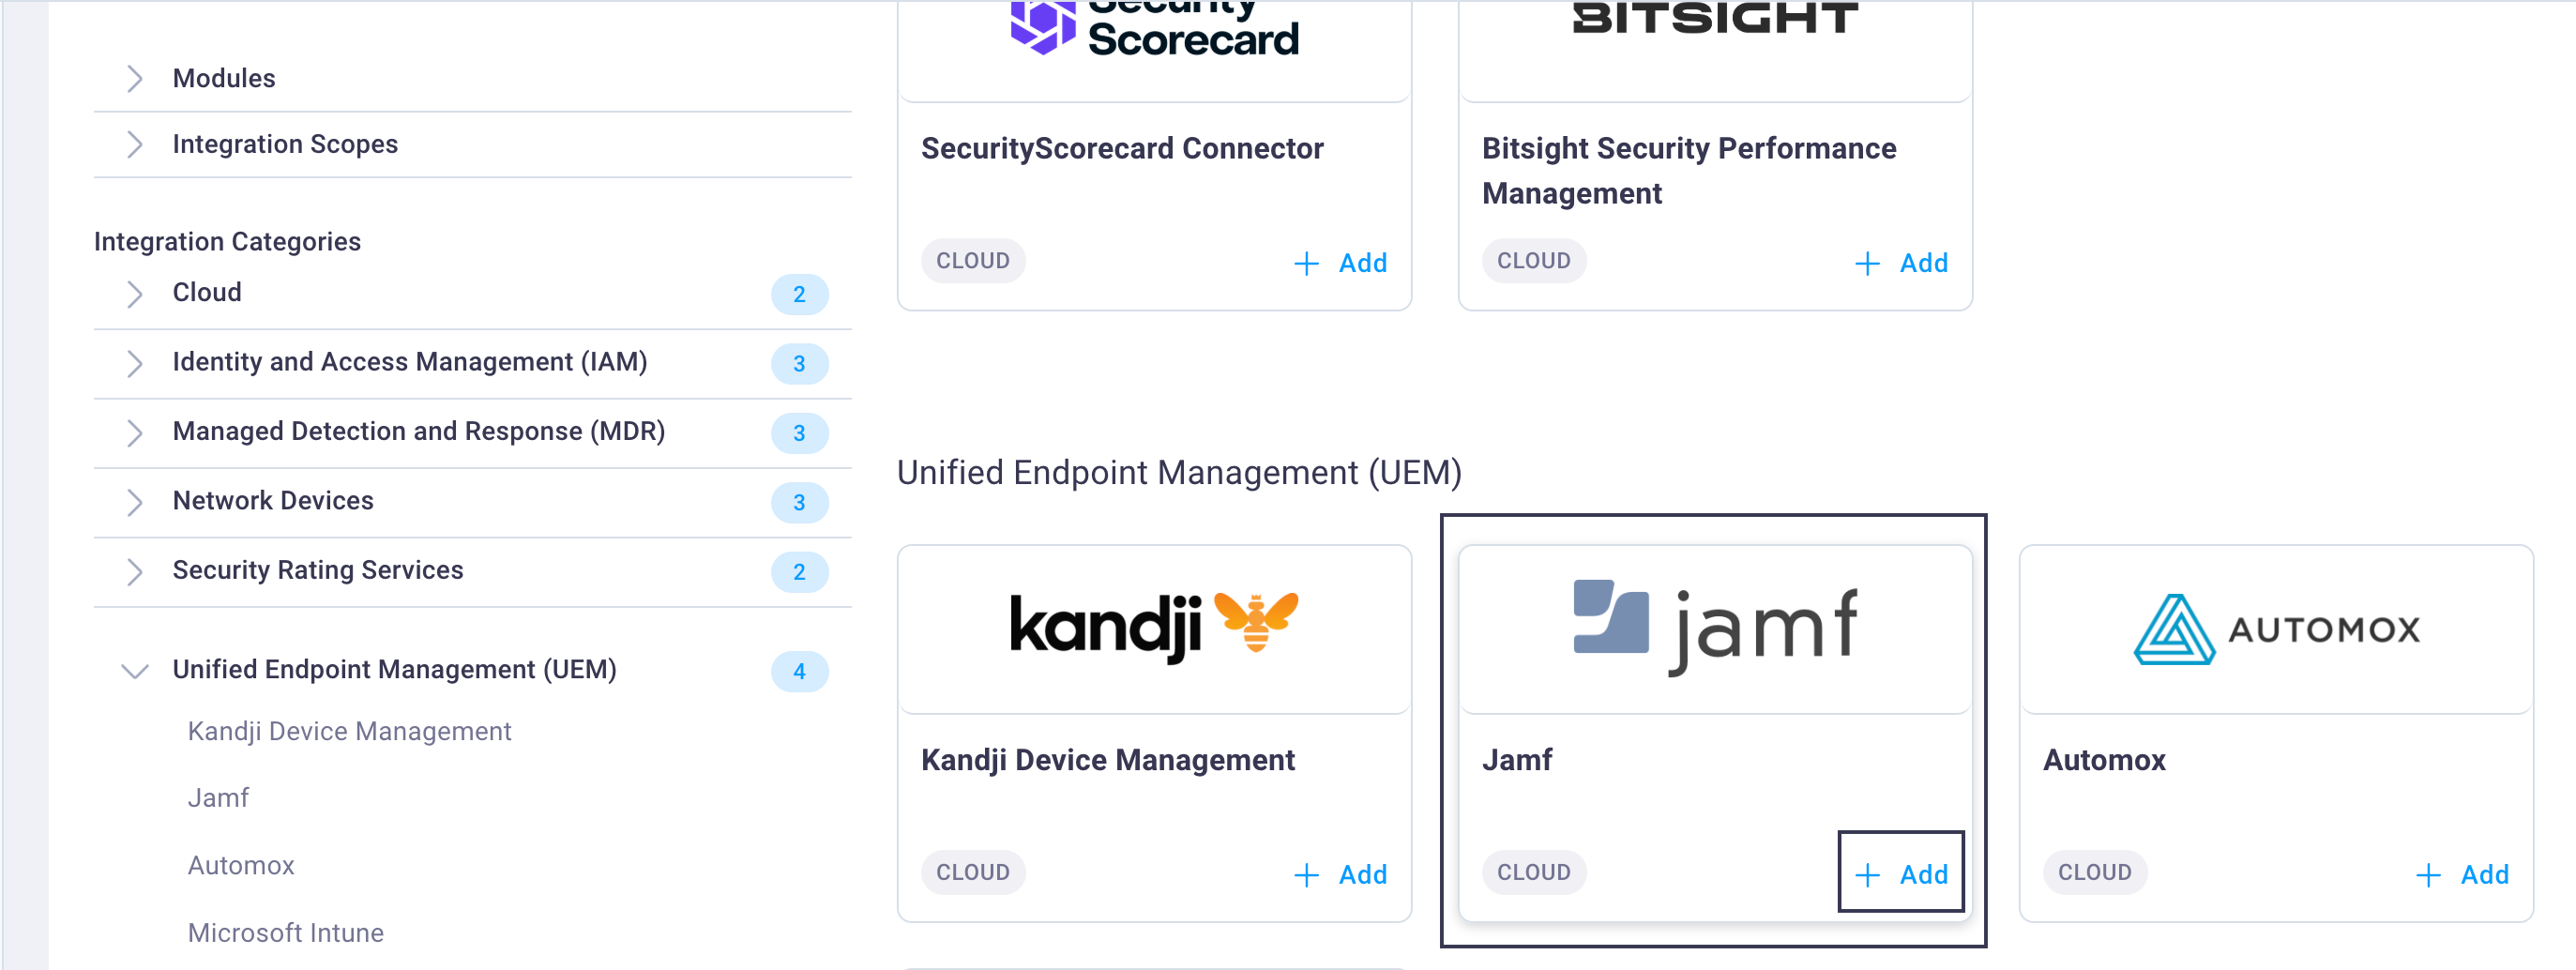
This brings the Jamf integration card into focus.

Note
You can also locate the integration card by:
- Scrolling down the page on the Integration Library tab
- Filter the integration options displayed by selecting any of the other left navigation choices besides Integration Categories, e.g., by Modules or Integration Scopes (cloud or on premise)
- Enter the integration name in the Search integration bar
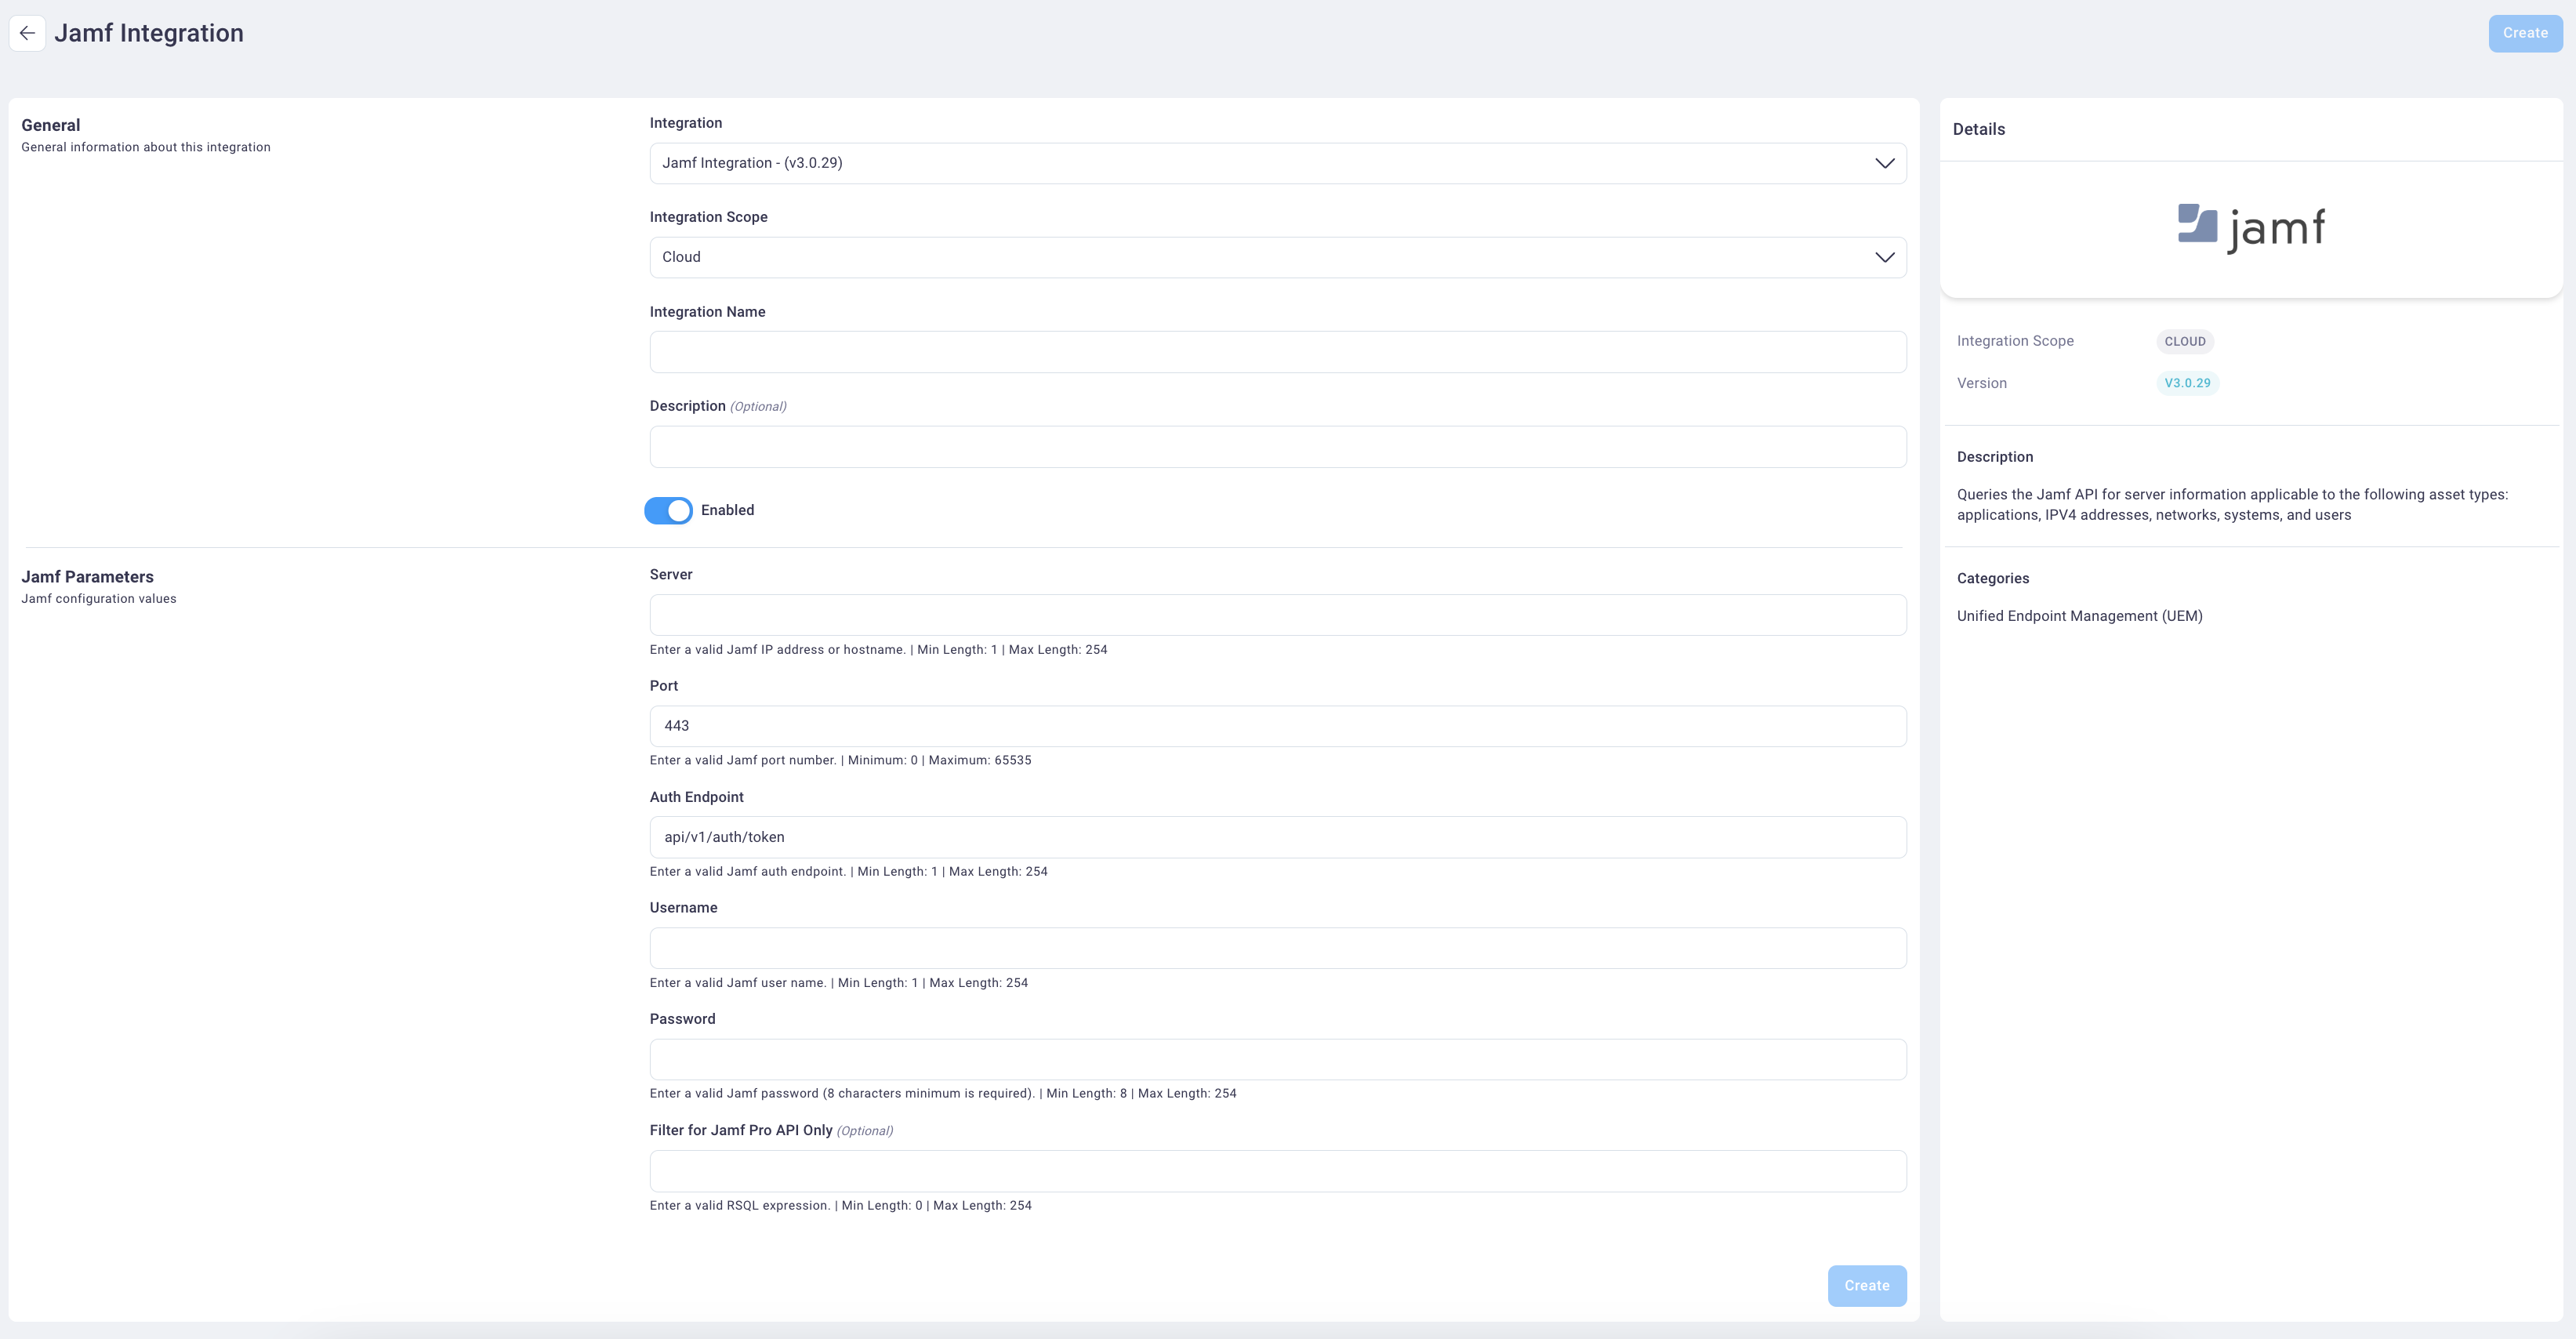
Select the Add button on the Jamf card to display the Jamf integration configuration page.

Note the integration details display in the right Details field group: integration scope (cloud or on premise), NetSPI Platform modules that support this integration, and the supported Jamf version.
Select and enter values for the following fields to complete the Jamf integration setup.
Select the integration type from the Integration drop-down list. In this case, Jamf, which is already selected by default.
Select the integration scope from the Scope drop-down list. The Jamf integration must be able to talk to your Jamf server, which will typically live in the cloud. In most cases, this integration should run on the cloud scope. Cloud displays as the default value for the Jamf integration.
Enter an integration name and description in the Integration Name and Description fields.
Select the Enabled slider button to display as either on (blue) or off (light gray).
Enter values in the Jamf Server and Jamf Port fields.
Enter the auth endpoint in the Auth Endpoint field. This is usually set to the default Auth endpoint listed. Please contact NetSPI support if this endpoint is not working.
Enter your Jamf username and Jamf password in the Username and Password fields.
In the Optional filter Only for JAMF Pro API field, enter an RSQL filter to filter the results obtained by the Jamf integration. This is the standard Jamf RSQL filter functionality with the addition of a GetDate() function that gets the current date and time. Example: "{GetDate()-0.5}" only retrieves data modified in the last 12 hours.
Select the Create button to save the integration. The new integration now displays on the Applied Integrations tab with its statuses: current and last run, last run time, and status (enabled/disabled).

