#
Your Agents
CAASM agents bring your on-premise device data into the NetSPI Platform. On-prem data, combined with your cloud-based data, gives you an even more robust view of your attack surface.
A CAASM agent consists of a small Virtual Machine (VM) OVA file that you download from the NetSPI Platform's CAASM Settings page and install in your on-prem device's VM environment.
Use the following instructions to bring you on-prem device data into the NetSPI Platform.
In the NetSPI Platform, navigate to CAASM -> CAASM Integration -> Your Agents tab.
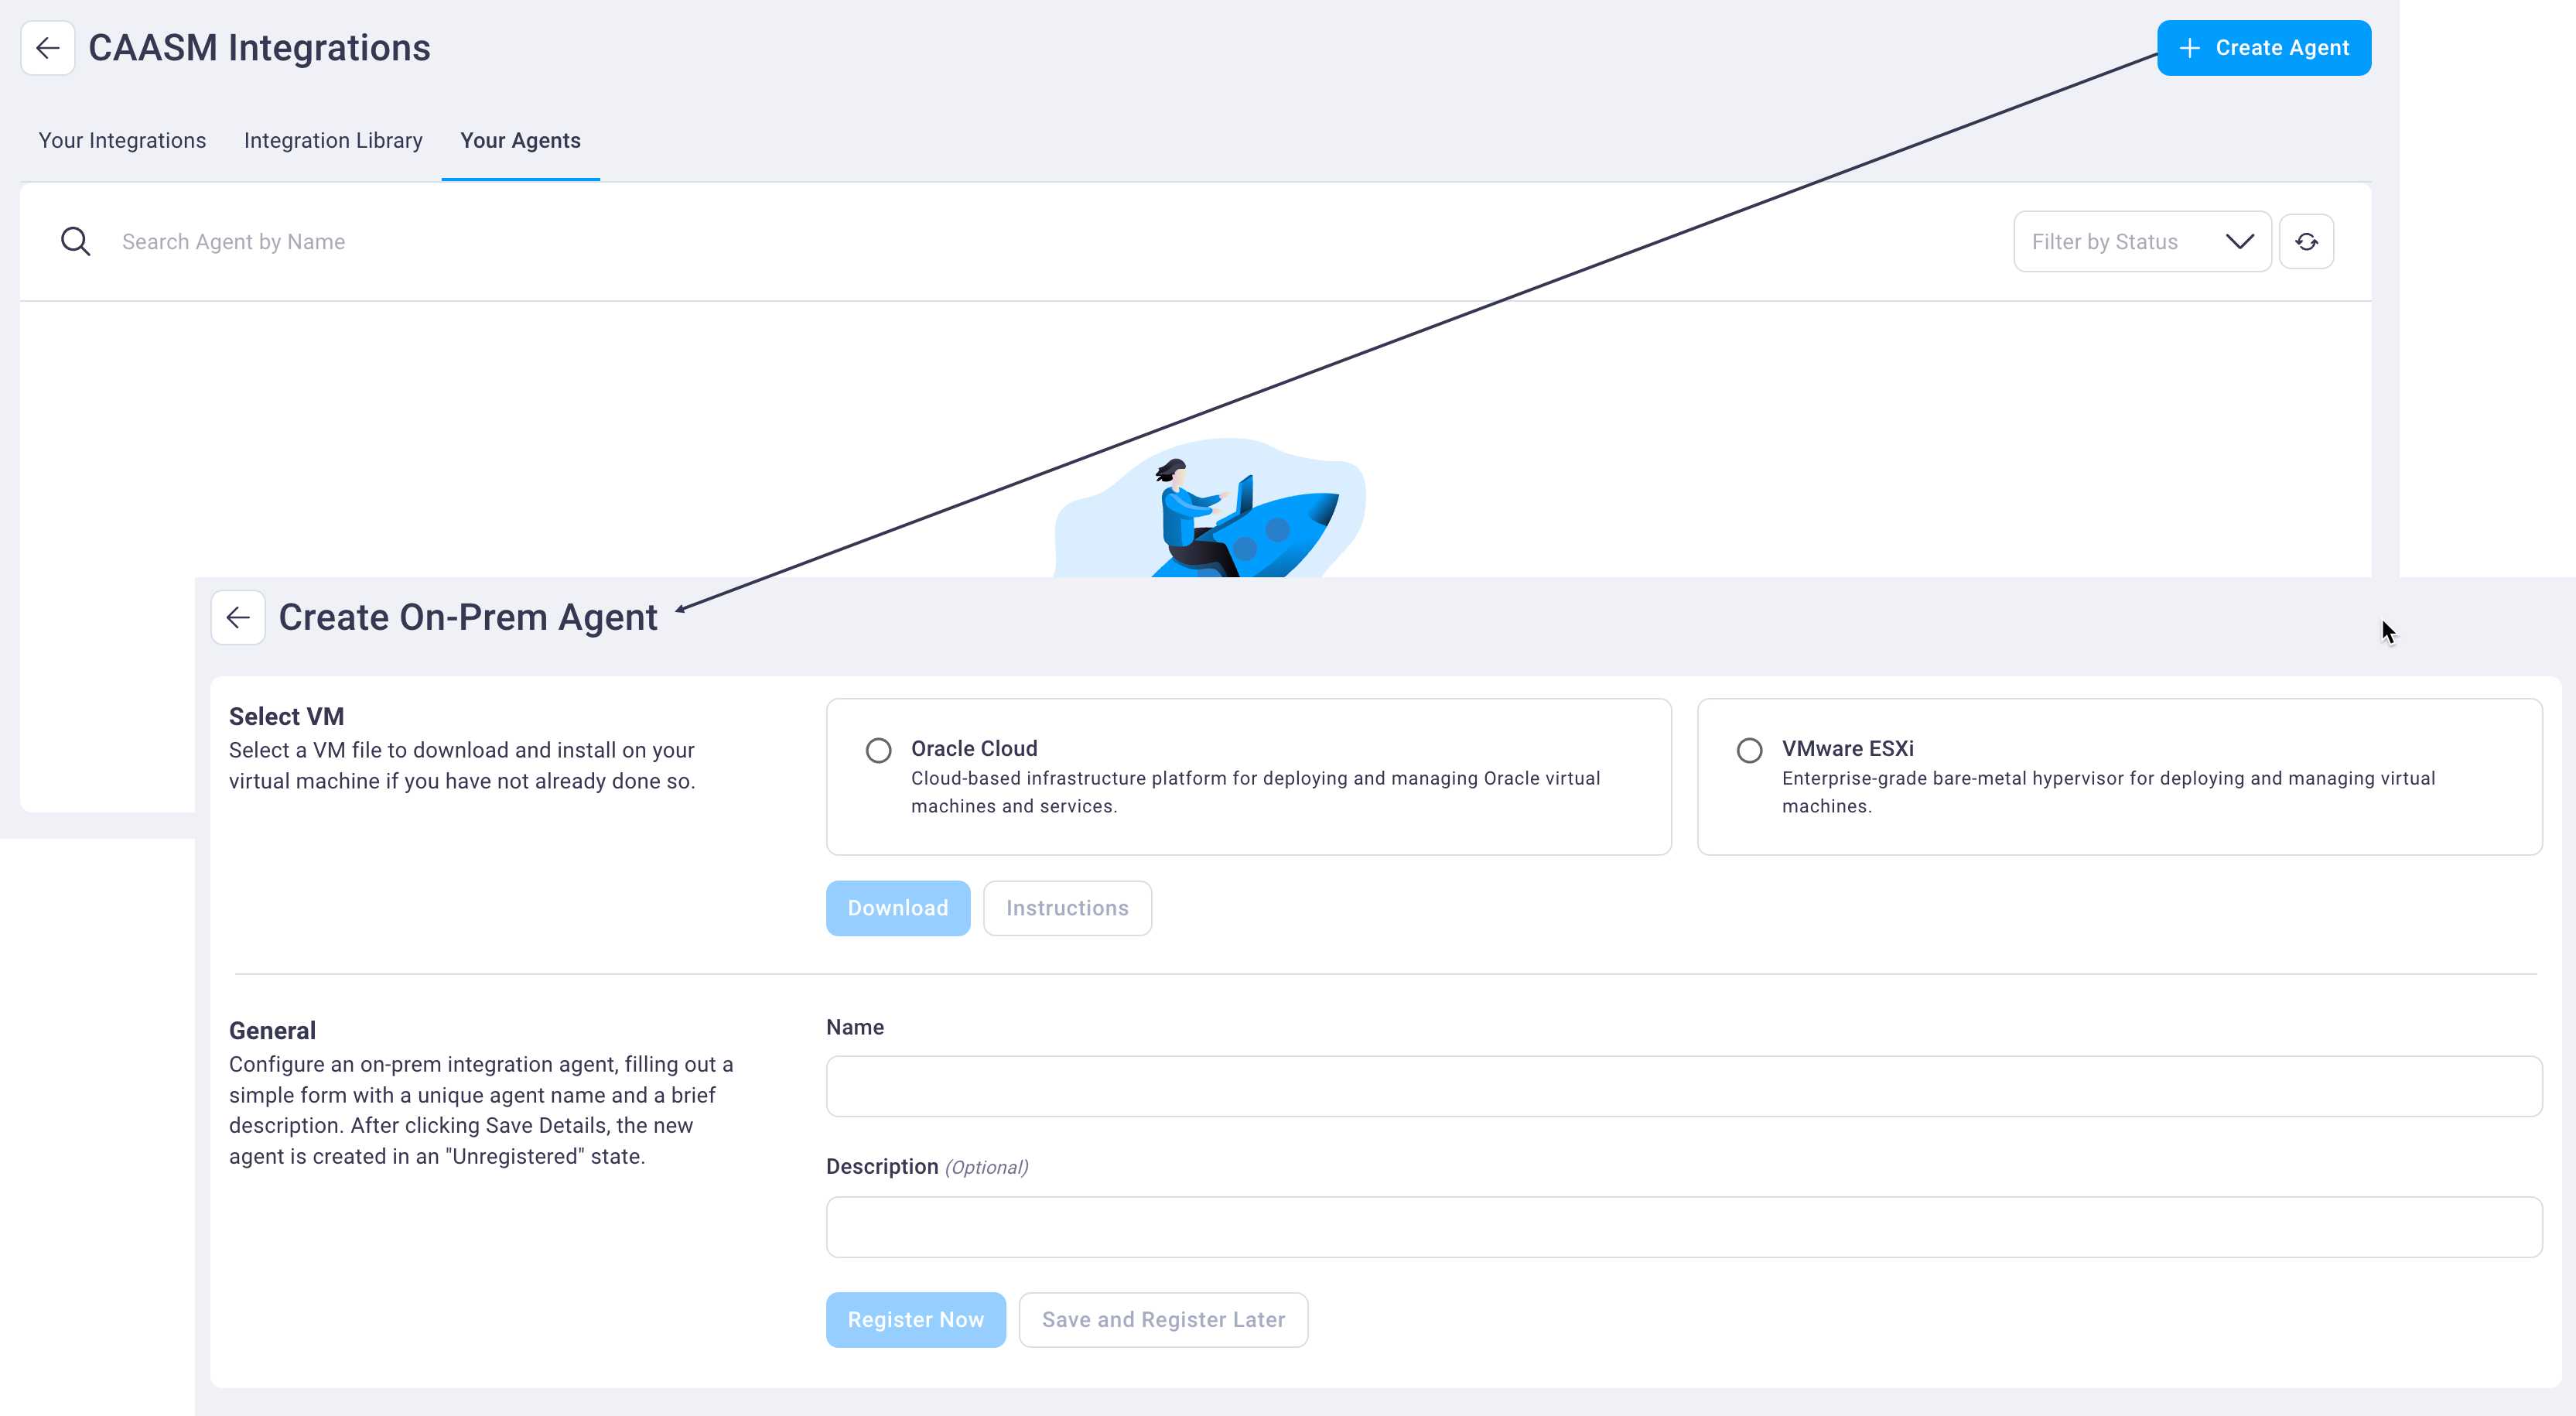
Select the Create Agent button to display the Create On-Prem Agent fields.
Select the VM file of your choice (Oracle Cloud or MMware ESXi) and then select Download to download it.
Install the downloaded OVA file on you on-prem device using the steps below.
Log into the console on the agent VM.
You can do this either directly in your virtualization technology or via SSH (if you've previously configured networking or if your network supports DHCP), using the following credentials: Username:
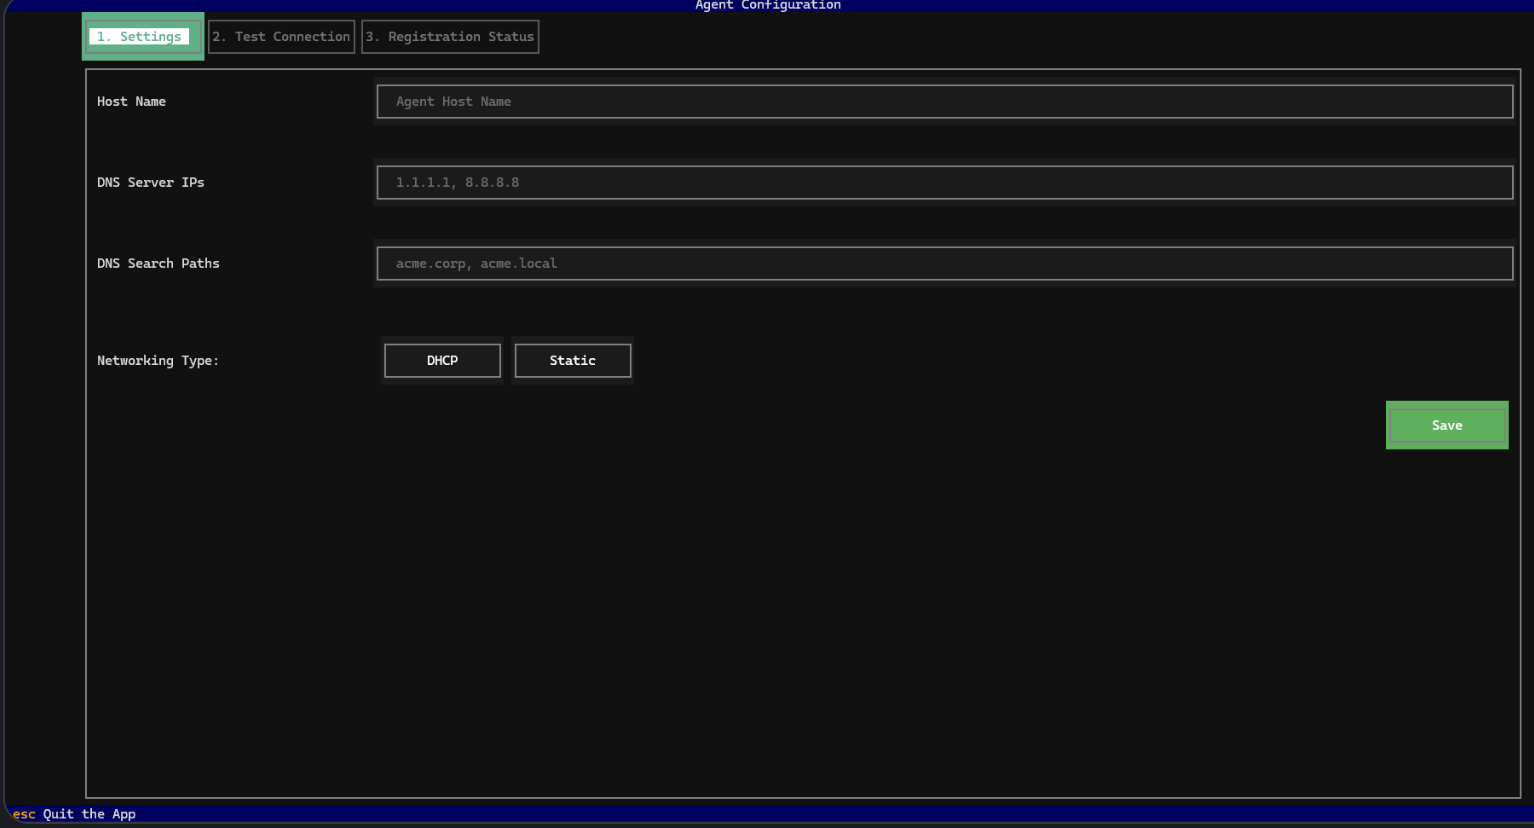
userPassword:netspi.Once authenticated you will see one of the following user interfaces (depending on your console capabilities). Both are functionally equivalent, though you may or may not be able to select them. Note that SSH connections may be disrupted during network configuration changes.
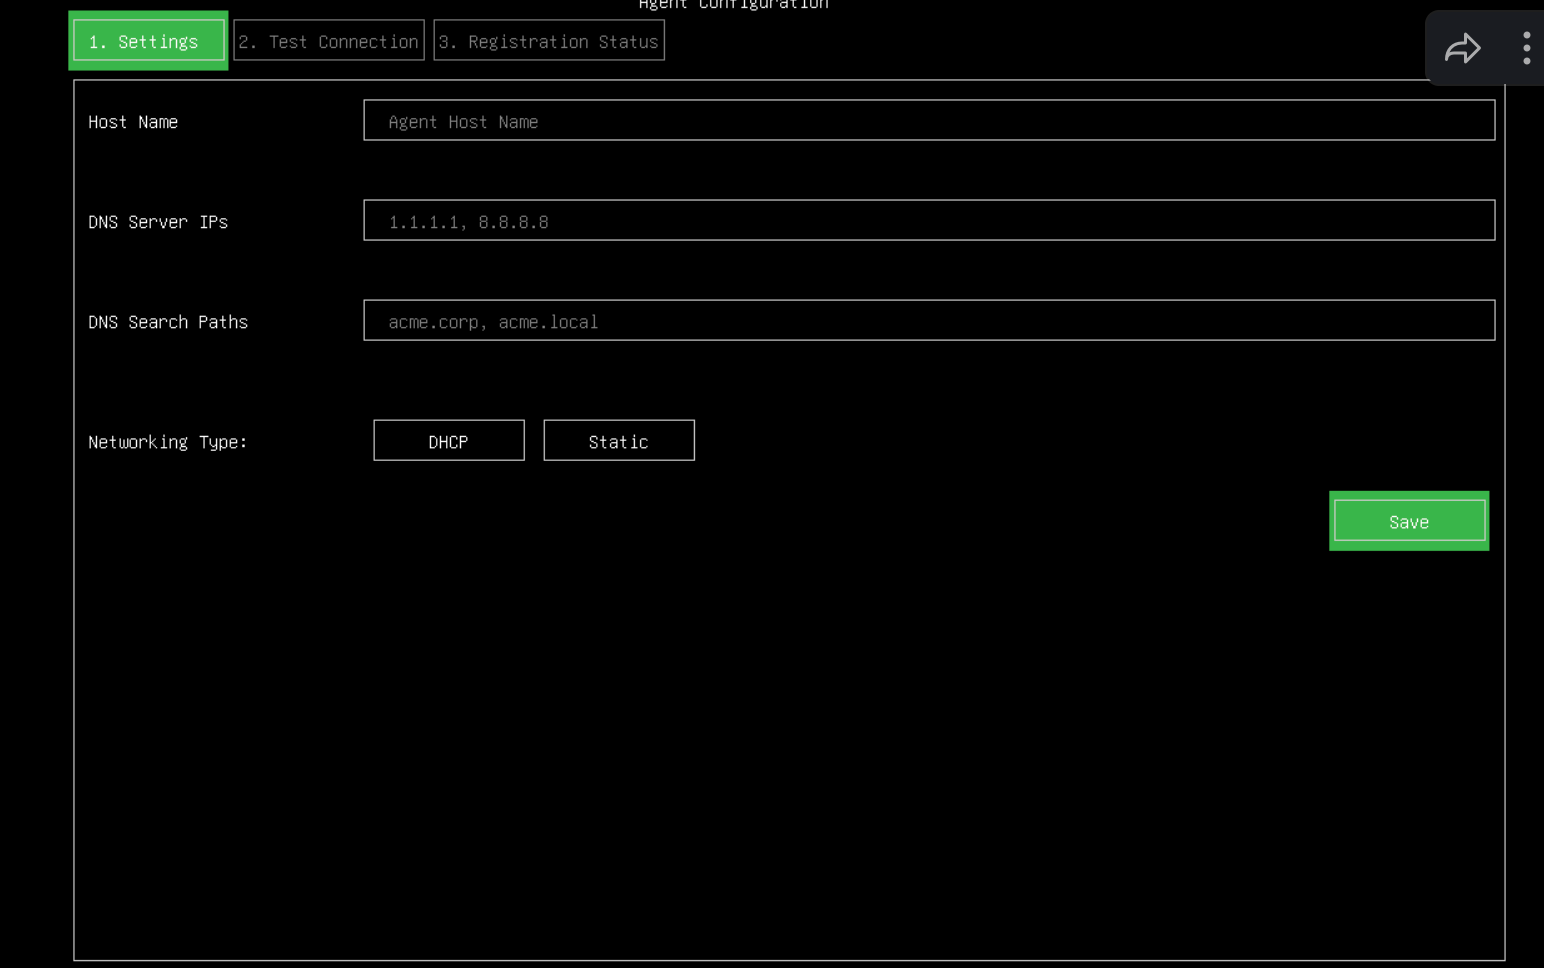
Tab to the Host Name field and enter a hostname.
This is how the device will advertise itself on your network. NetSPI recommends selecting a name that meets your organization's IT naming policy, something similar to:
netspi-agent-1.Tab to the DNS Service IPs field and enter optional, internal DNS server IPs.
Though this field is optional, NetSPI recommends providing a complete list of internal DNS servers so that DNS resolution will be fully functional on the agent. Note that this is not necessary if you intend to configure the agent with DHCP and your DHCP server will advertise appropriate DNS servers.
Tab to the DNS Search Paths field and enter optional, internal DNS search paths.
Though this field is optional, NetSPI recommends providing a complete list of internal DNS search paths so that DNS resolution will be fully functional on the agent. Note that this is not necessary if your intend to configure the agent with DHCP and your DHCP server will advertise appropriate DNS search paths.
Tab to Networking Type field and do one of the following:
If the agent should be configured as DHCP, then tab until DHCP is highlighted and then press the Enter key to select it and then select Save and press Enter.
If a Static network configuration is required, tab to the Static button and then press the Enter key to select it. The following additional fields display.
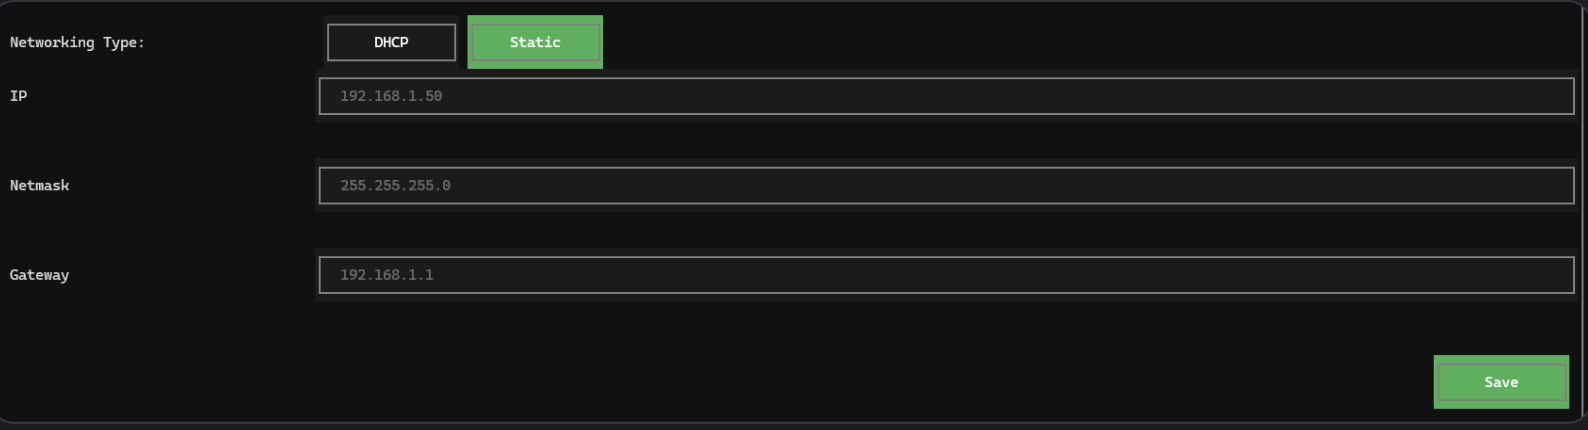
Tab through these fields and provide appropriate settings before tabbing to the Save button to select it and then press the Enter key.
Once the Save button has been selected, you will be prompted to validate any configuration errors.
If there are errors, take steps to resolve them try again.
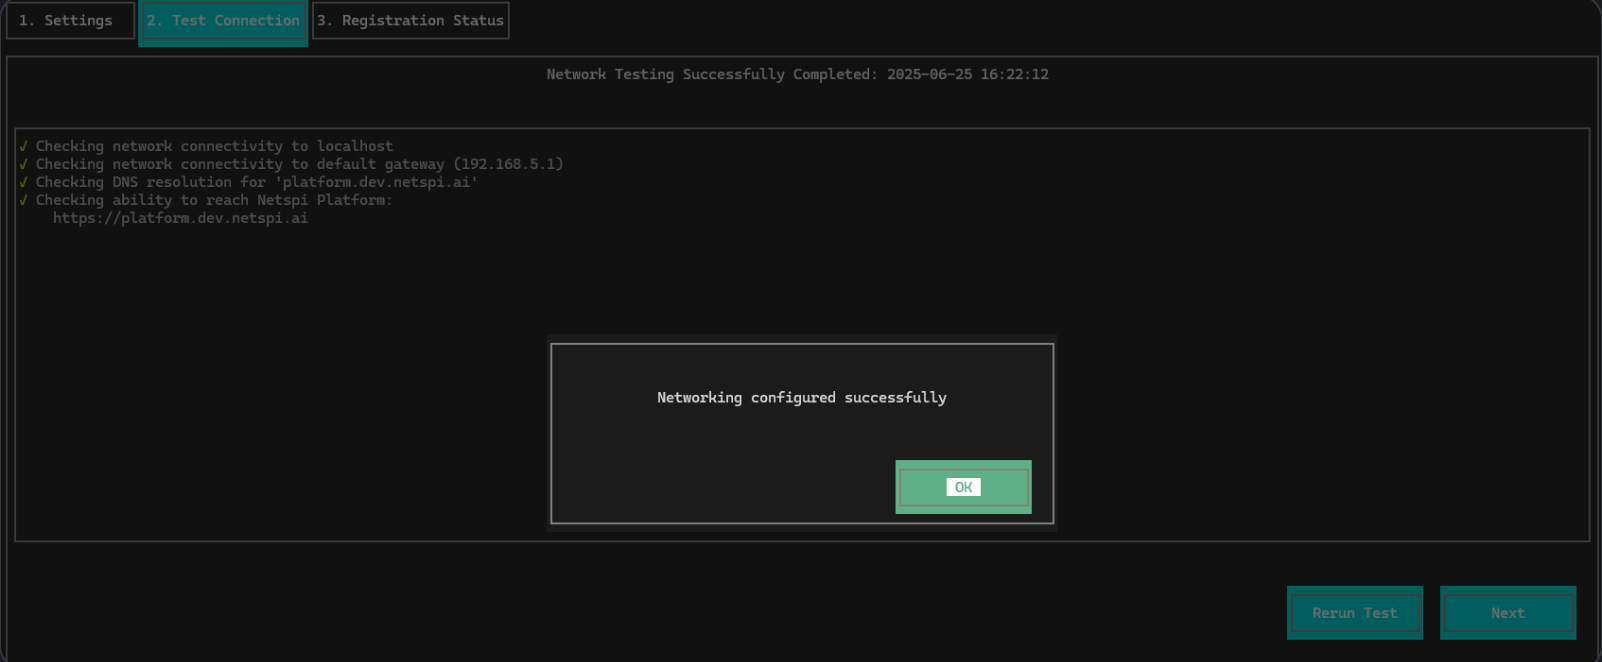
Once the configuration passes validation, the agent will attempt to configure networking based on your changes and then will display the Test Connection tab automatically perform some network sanity checks. NetSPI recommends performing this initial step via the local console versus via SSH as the network reconfiguration will likely cause a disconnection.
A successful network test will look something like this:
Below is an example of a network configuration error on a console.
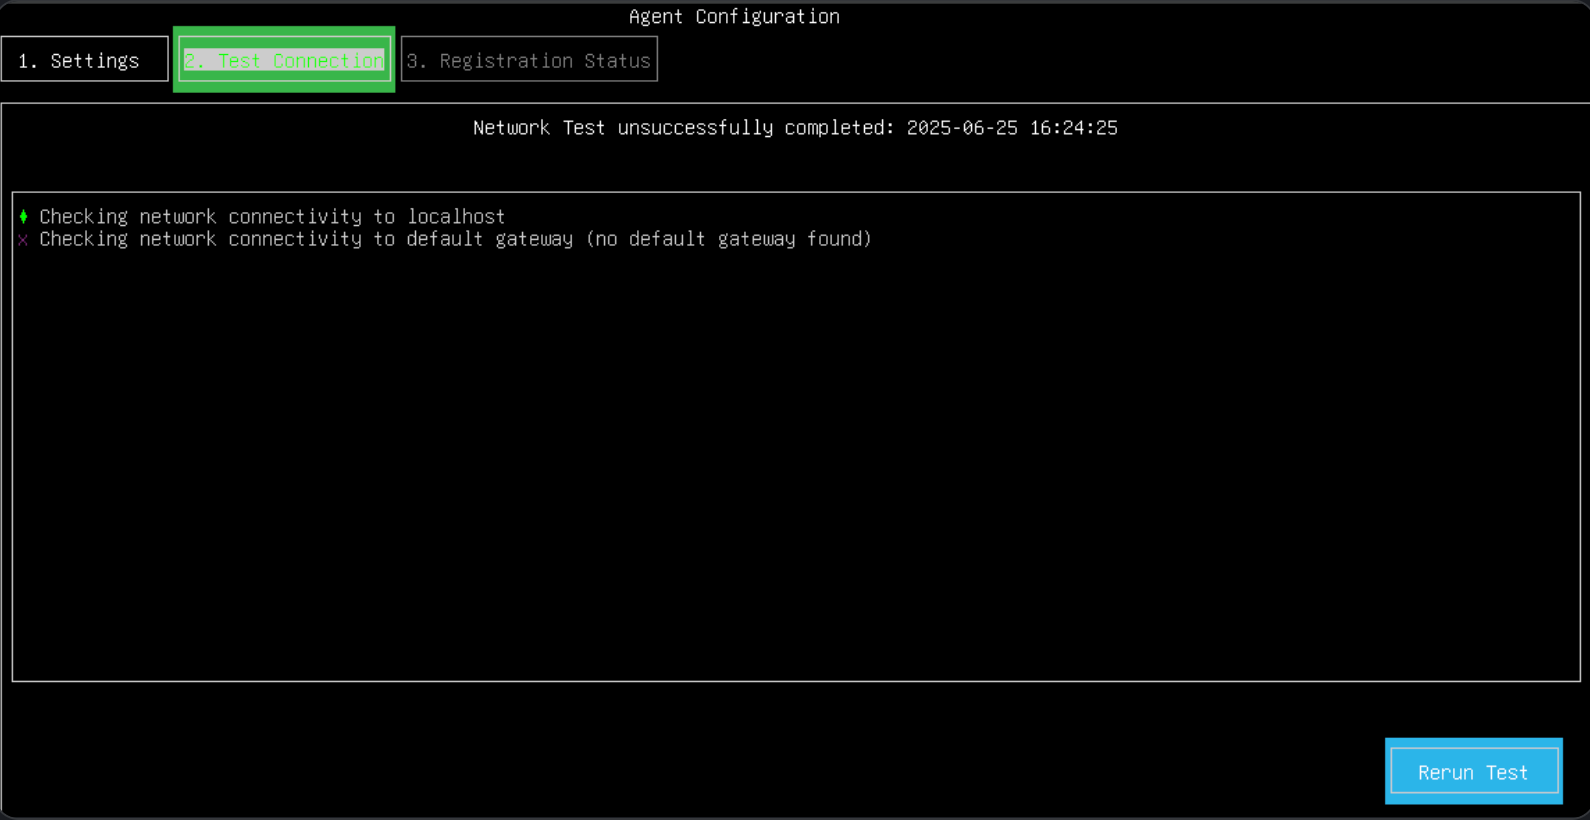
If you encounter a configuration failure, navigate back to the Settings tab, update any values, and save it, until the network tests pass. There should be only one network interface configured on the VM and connected to an appropriate network.
Once networking checks pass, do one of the following:
- Tab to the Next button on the Test Connection tab and press Enter.
- Tab to the Registration Status tab and press Enter.
Once the agent VM software is installed, return to the NetSPI Platform's Create On-Prem Agent page and enter a required name for your agent in the Name field and, if desired, provide an optional description in the Description field.
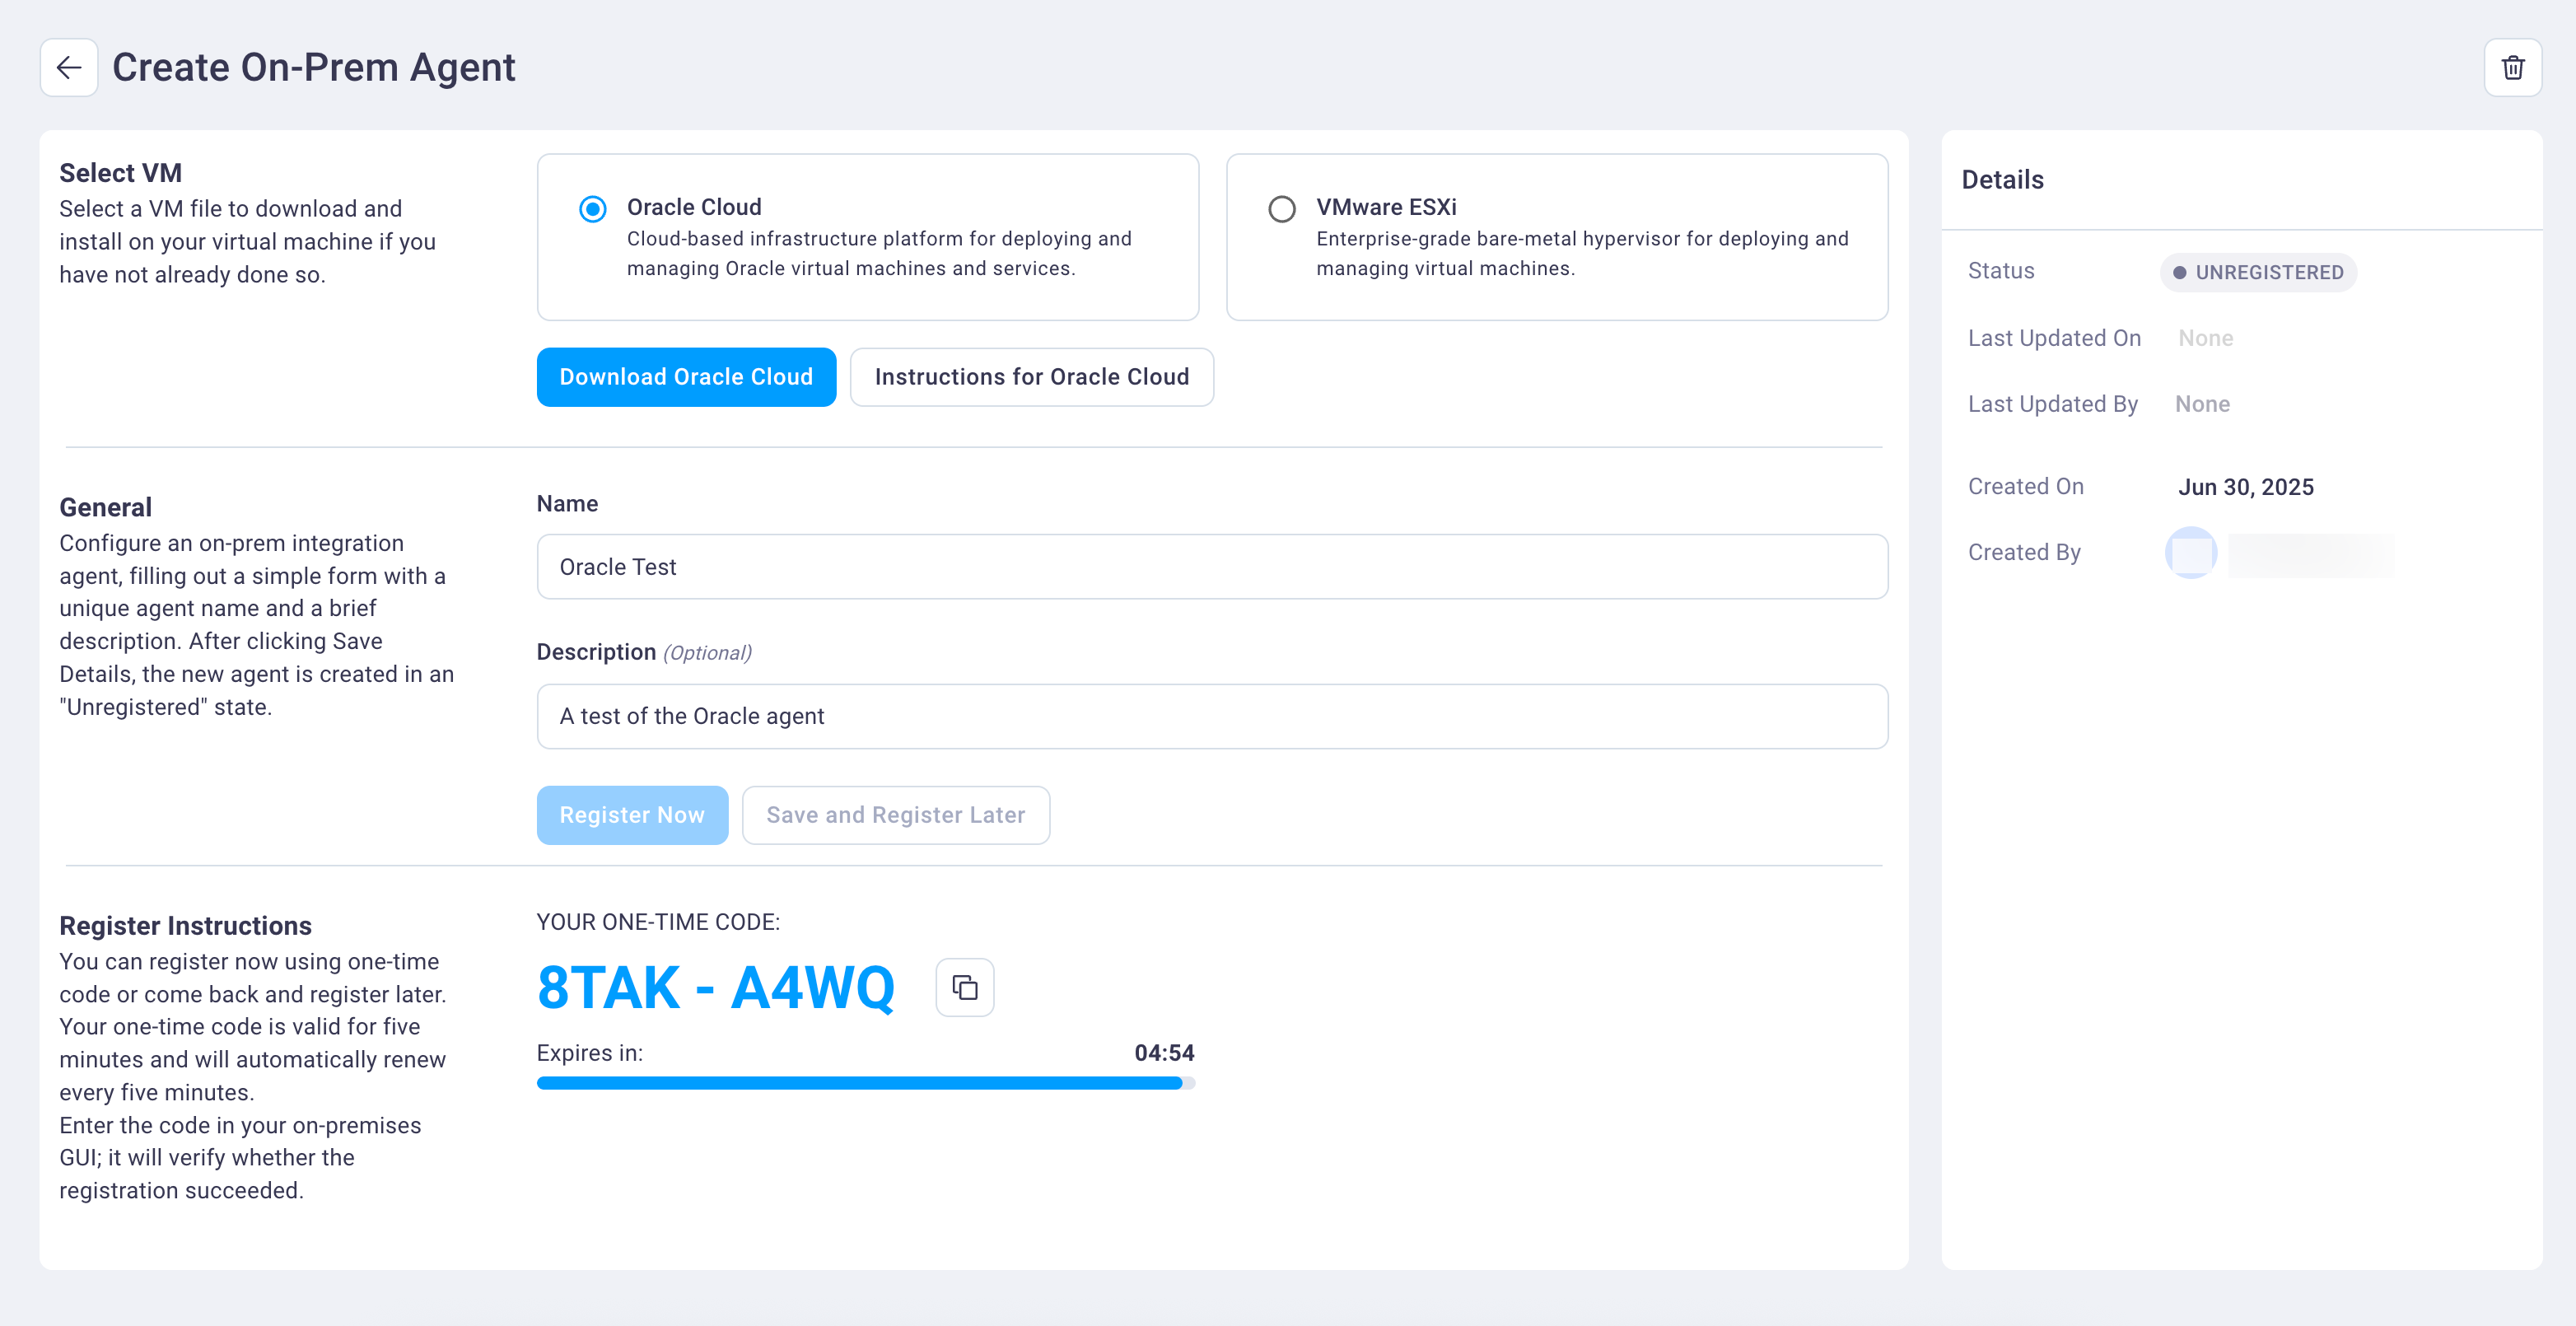
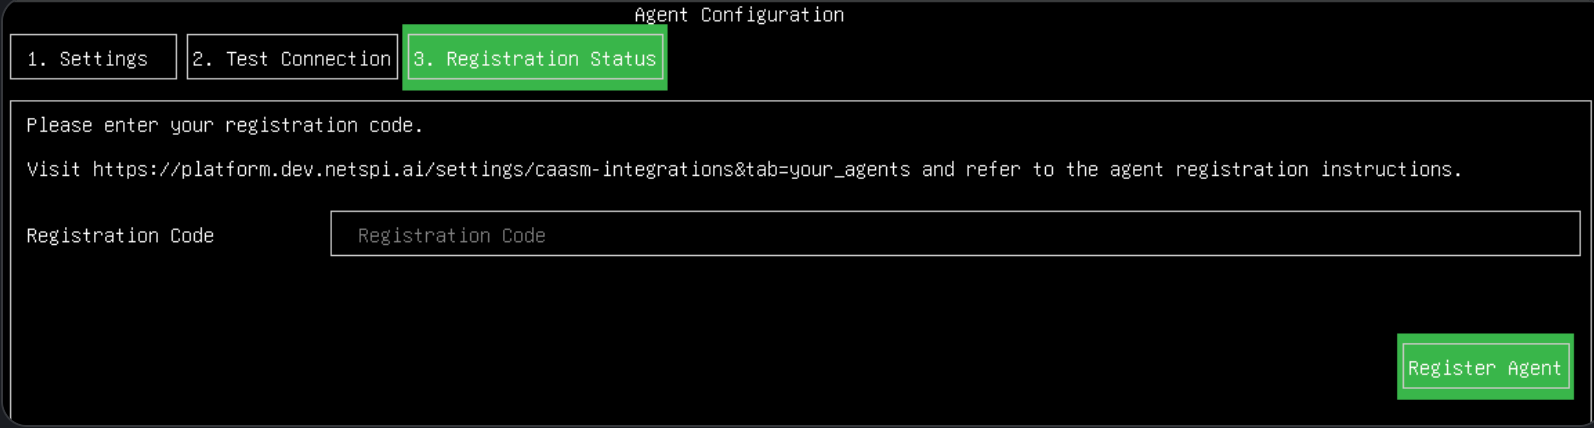
Select the Register Now button to display the one-time registration code and registration instructions.
Note
There is a limit on the number of registration / transfer codes that can be applied per day. If the limit is reached, you may need to wait for a day before adding more agents.
Navigate back to your on-premise device's console and enter the registration code before it expires (five minutes), tab to the Register Agent button, and press Enter. The registration process can take several seconds to complete and will verify if the registration succeeds.
On successful registration you should see a screen similar the the one below.
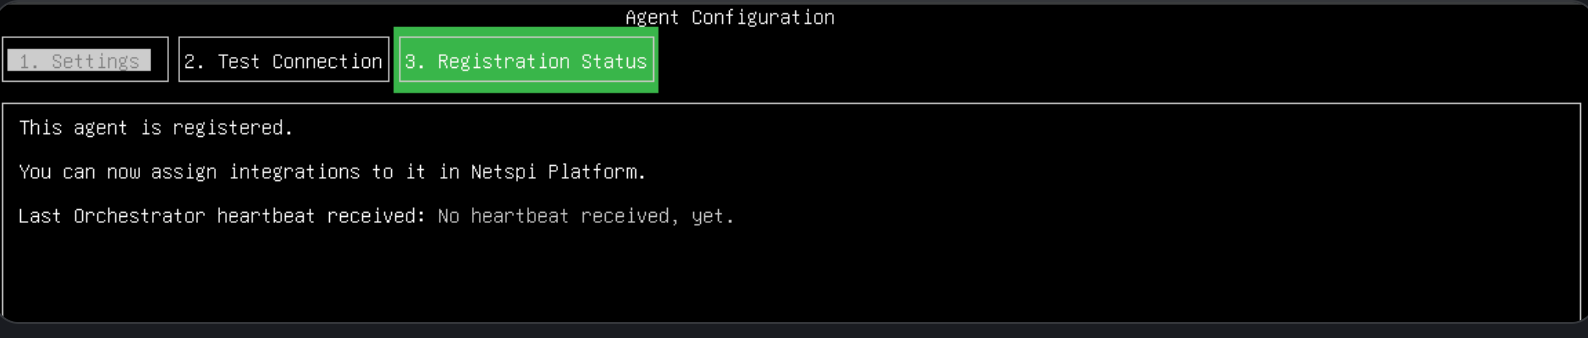
At this point, registration is complete. At any time you can log back into the agent console to see the latest heartbeat information, retest your networking and authentication via the Test Connection tab, or reconfigure the networking.
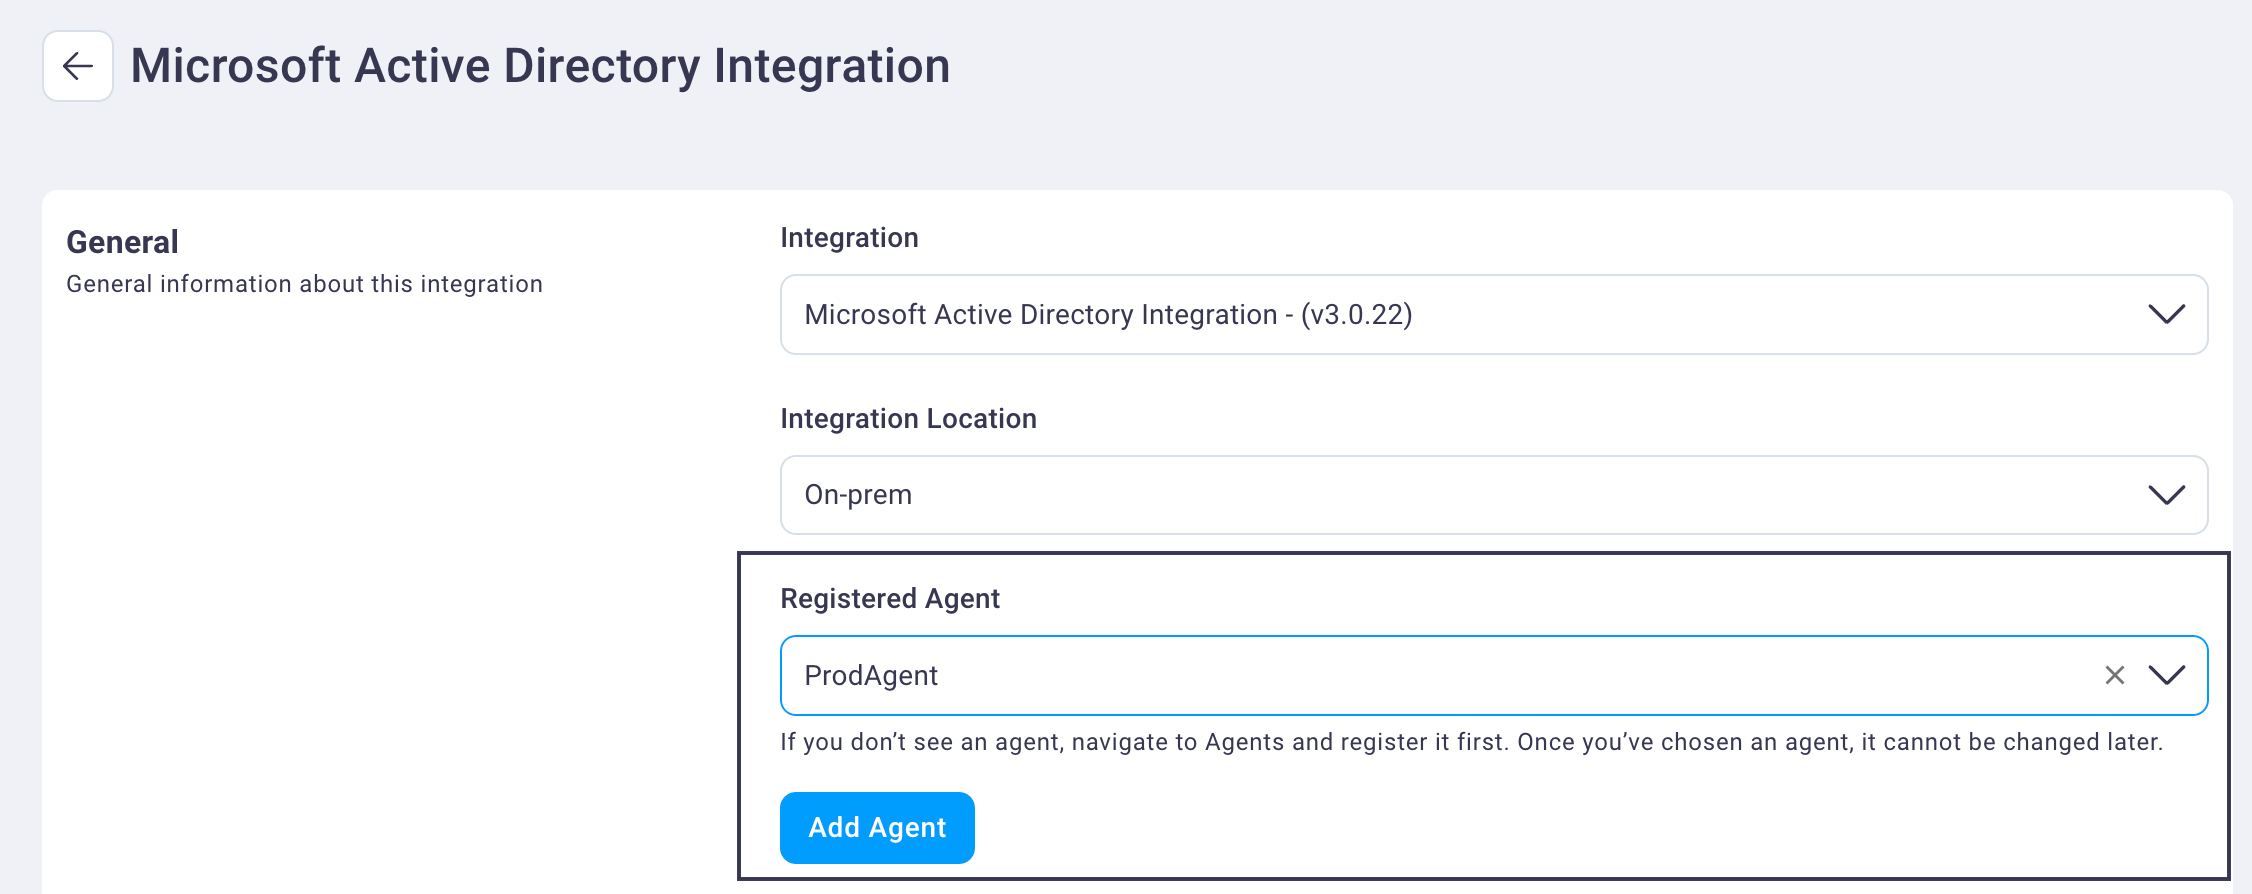
You can now add or associate your agent with your integration upon setup, such as in this Microsoft Active Directory integration example below, by selecting the agent from the drop-down list and then selecting Add Agent.