#
EASM Asset introduction
Assets are items on the public internet that do not contain any inherent risk themselves. Their risk increases through exposures: flaws or gaps in your attack surface that could be exploited by an attacker. This section explains how to navigate the EASM assets and directs you to the sections where you can learn about each asset type.
#
Viewing assets
Use the steps below to view assets in the EASM Assets table.
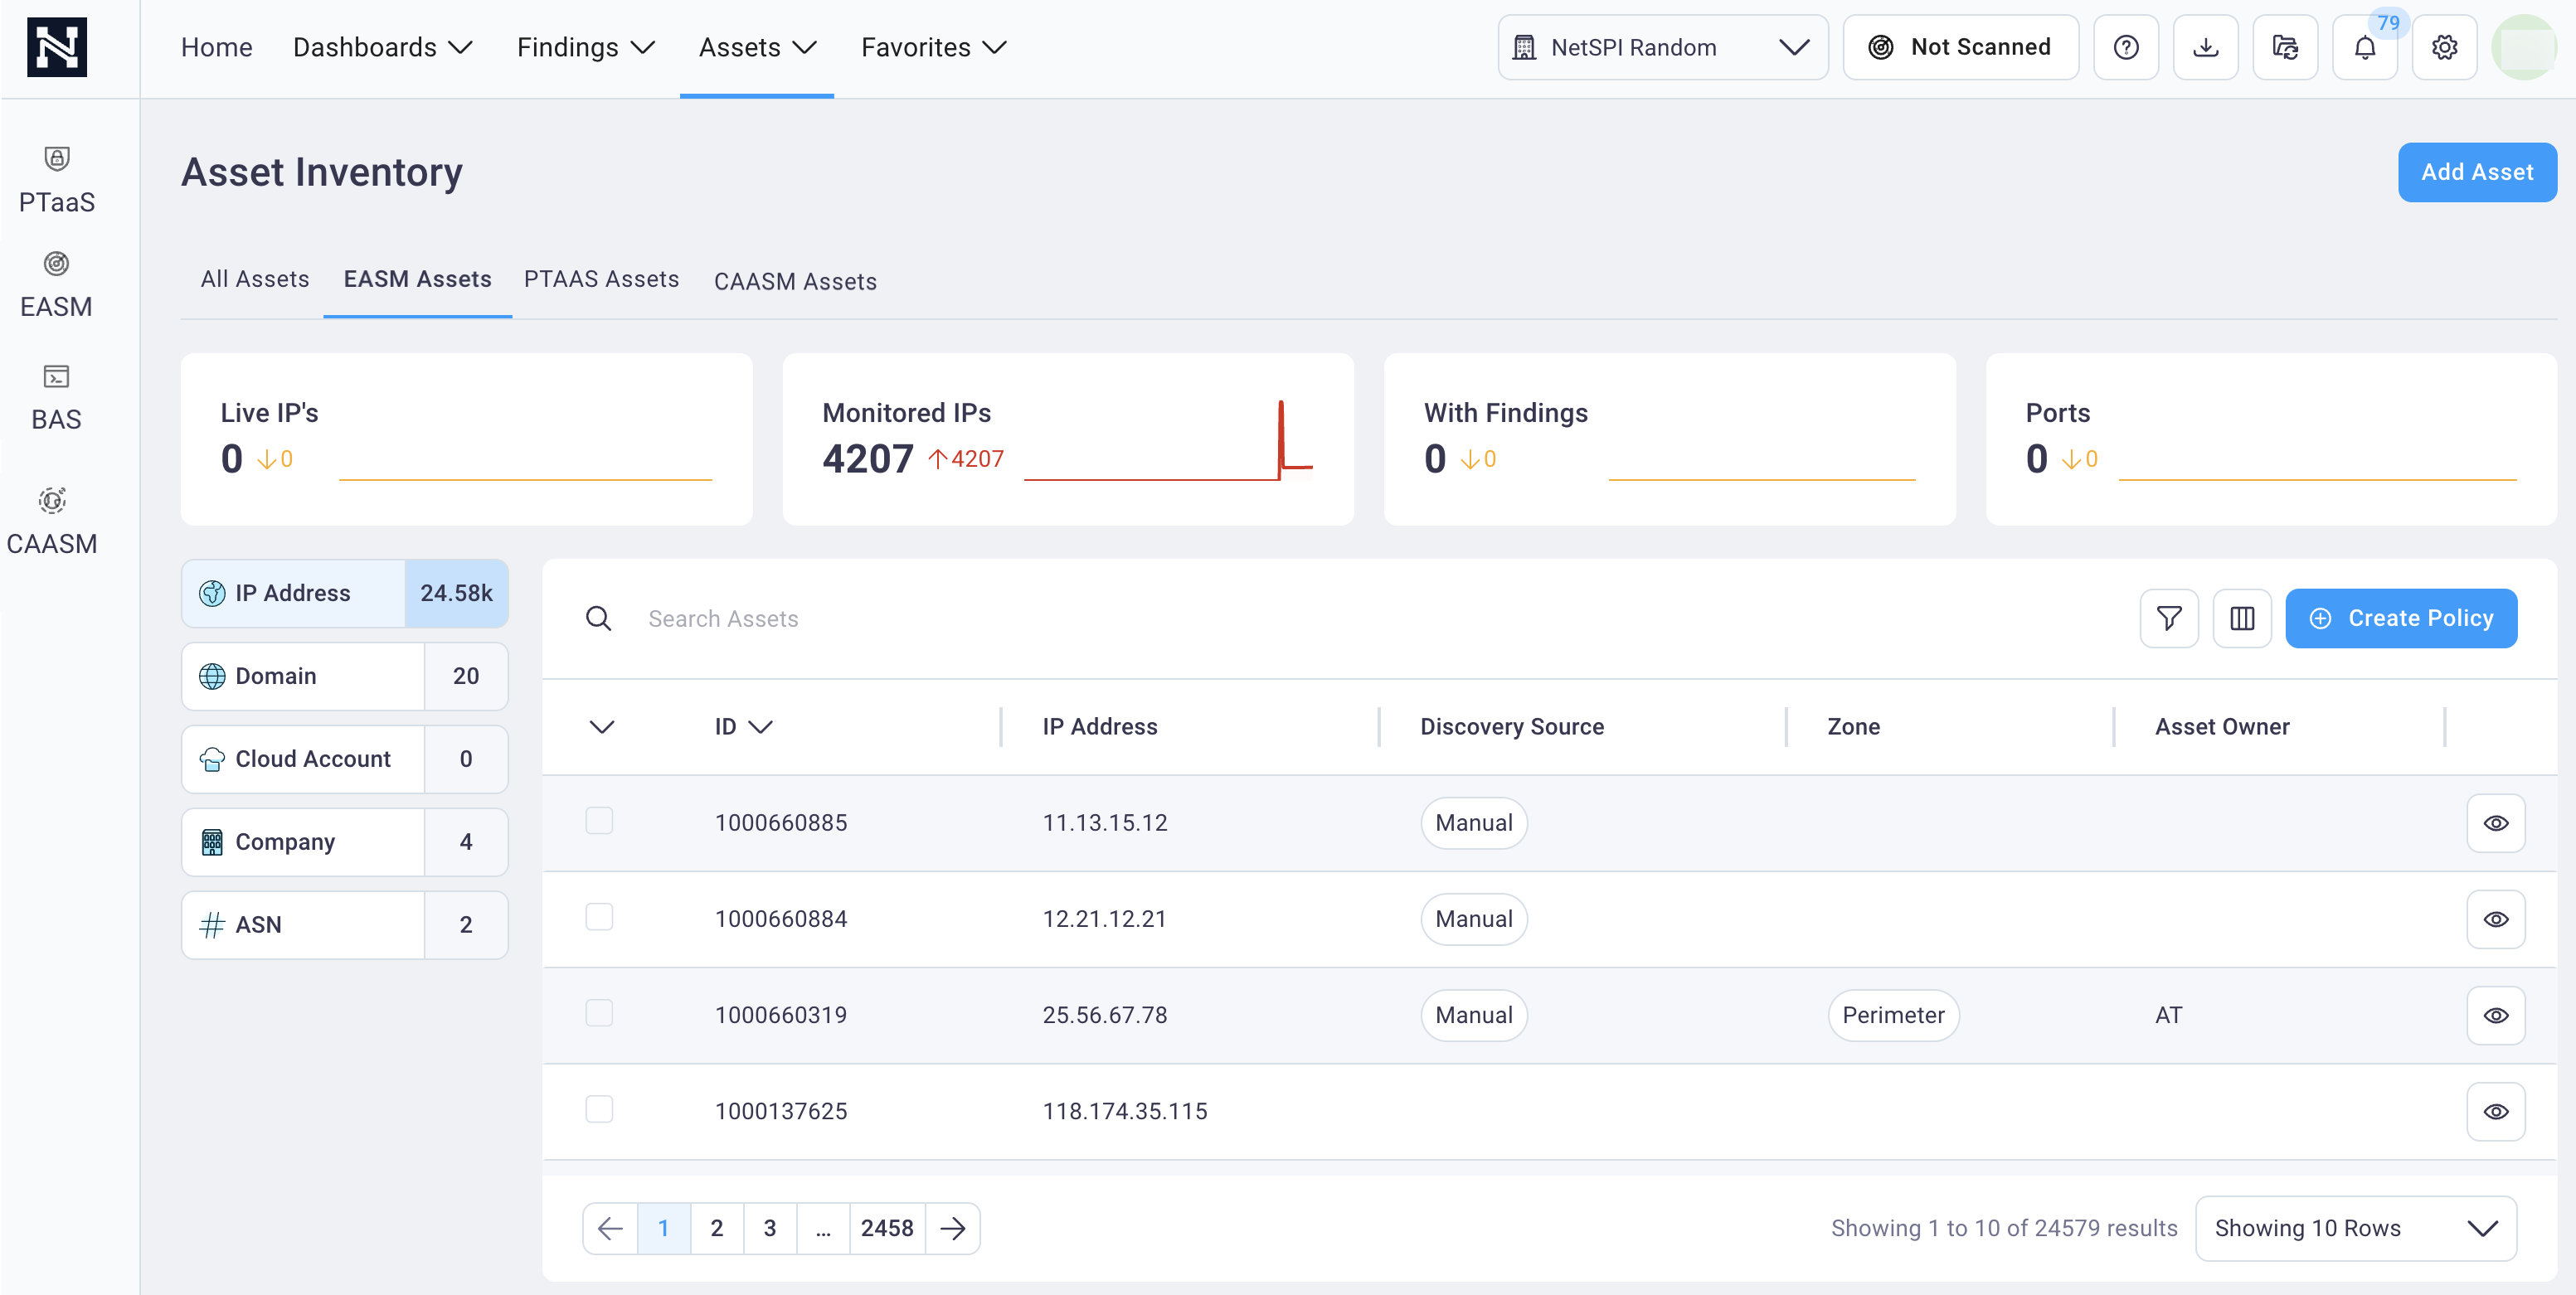
Select Assets from the top menu and select EASM Assets to display the Asset Inventory page with focus on the EASM Assets tab and the Assets table.

EASM assets are viewed by asset class, and the default display is the IP Address asset type (the first asset class listed in the left Asset Class menu (IP Address, Domain, etc.)).
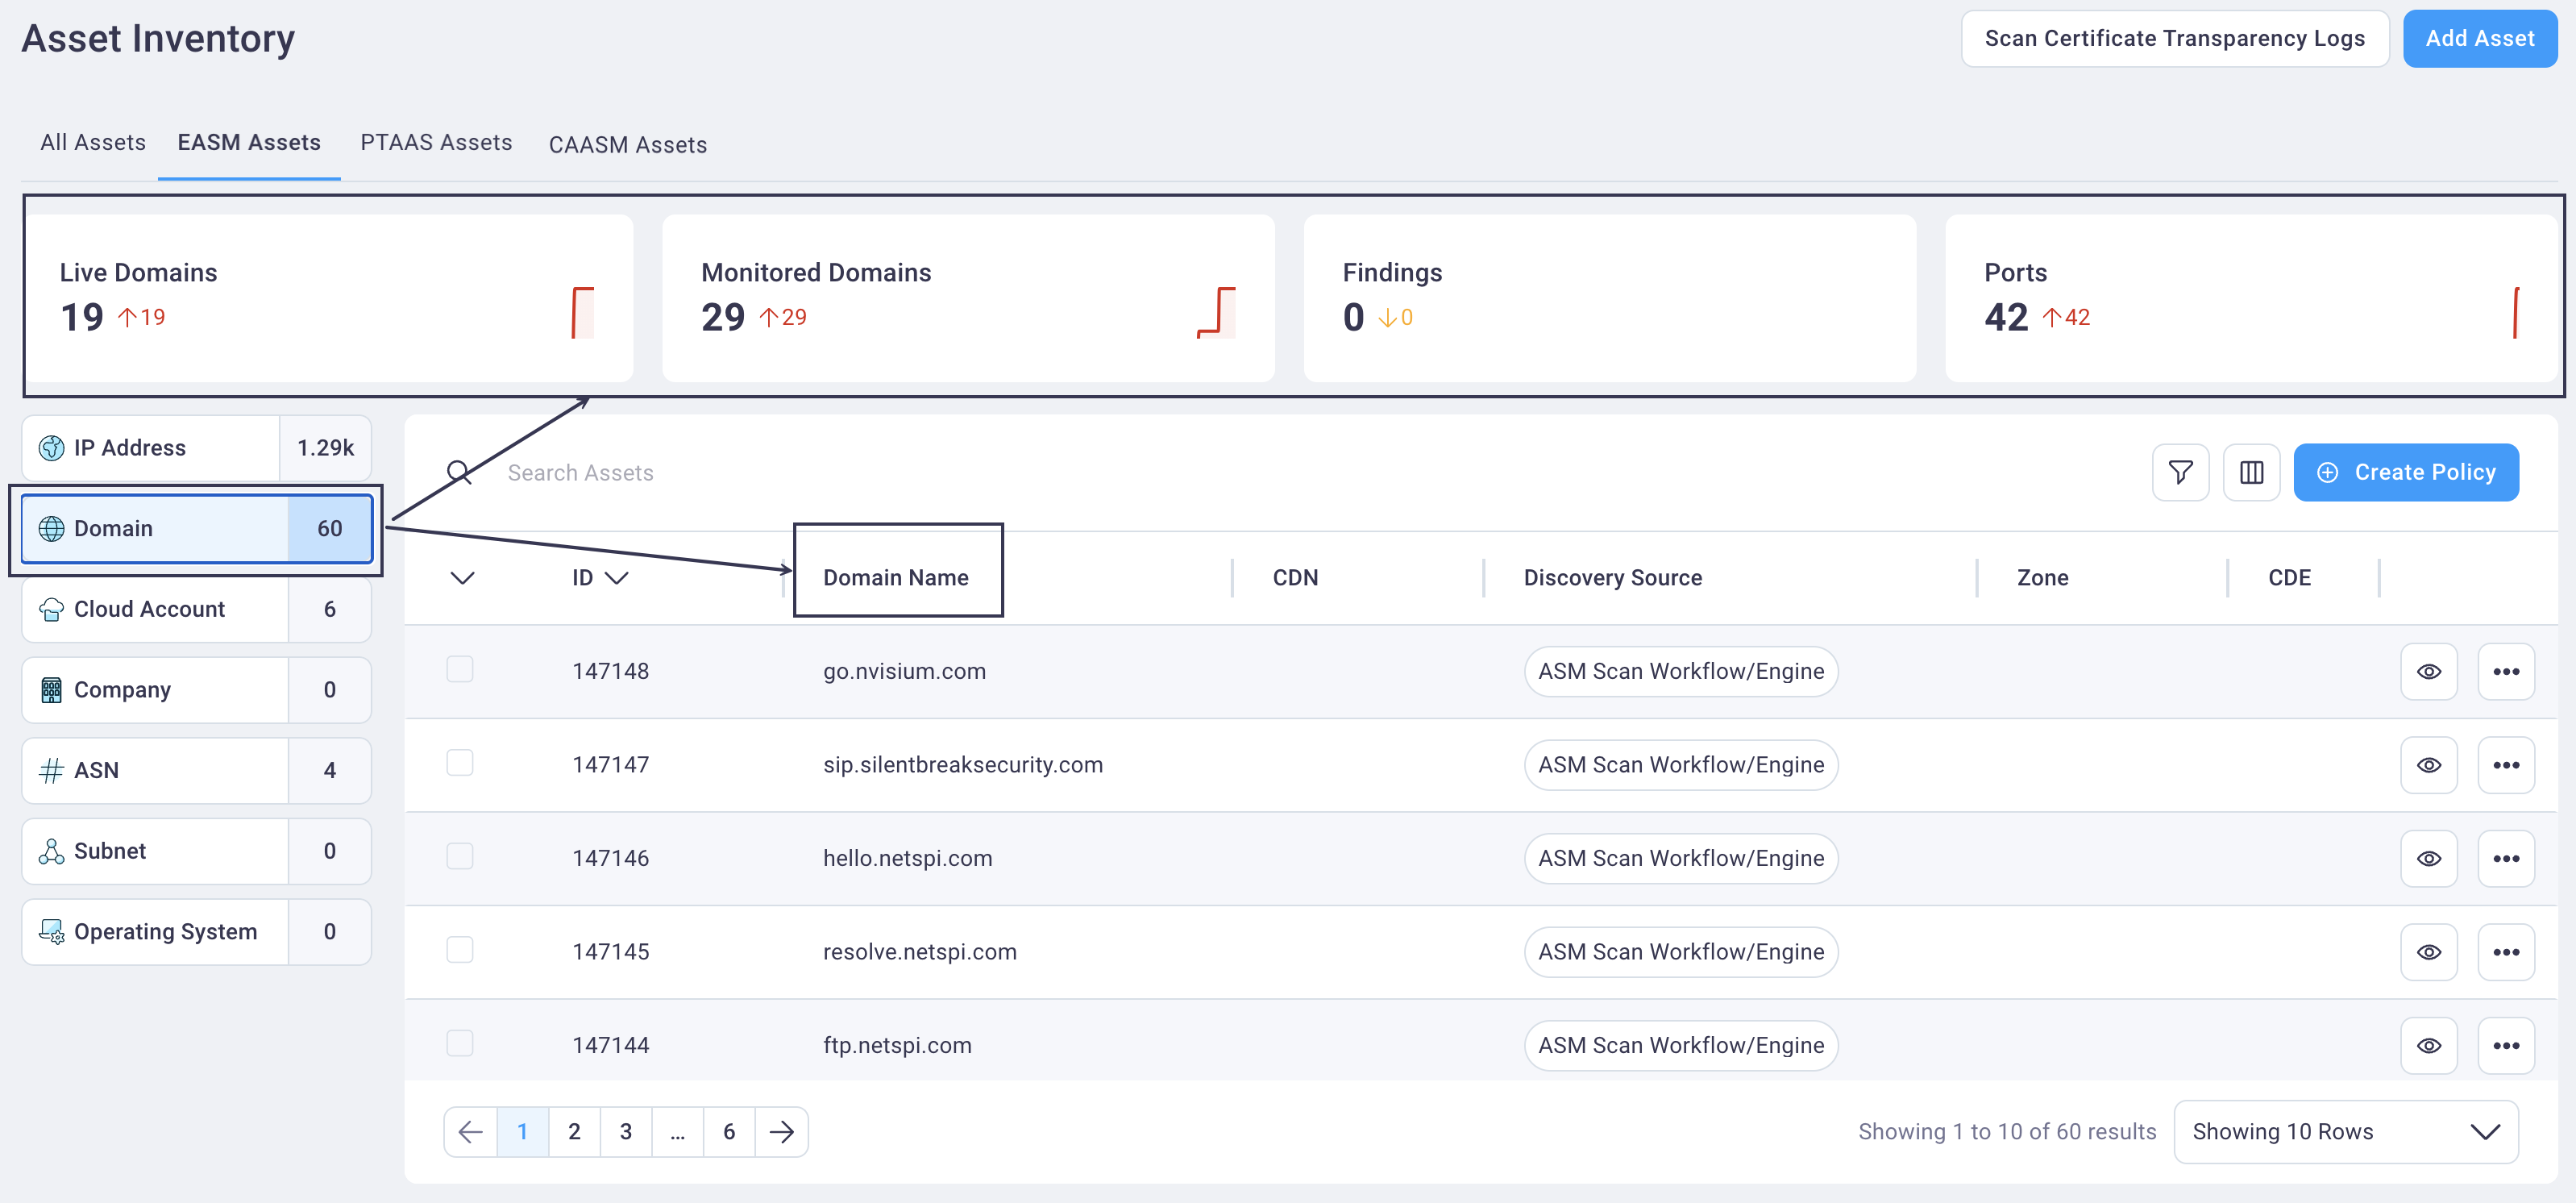
Select the asset class in the left side of the Assets Inventory page to display all assets of that type in the Assets table and the summary cards above it.
Note
Selecting any of the Asset summary cards above the Assets table auto-filters the table to display assets matching those criteria.
Asset types in EASM include:
The following asset types will be coming soon:
- Applications
- Source code
- Network devices
- Identity
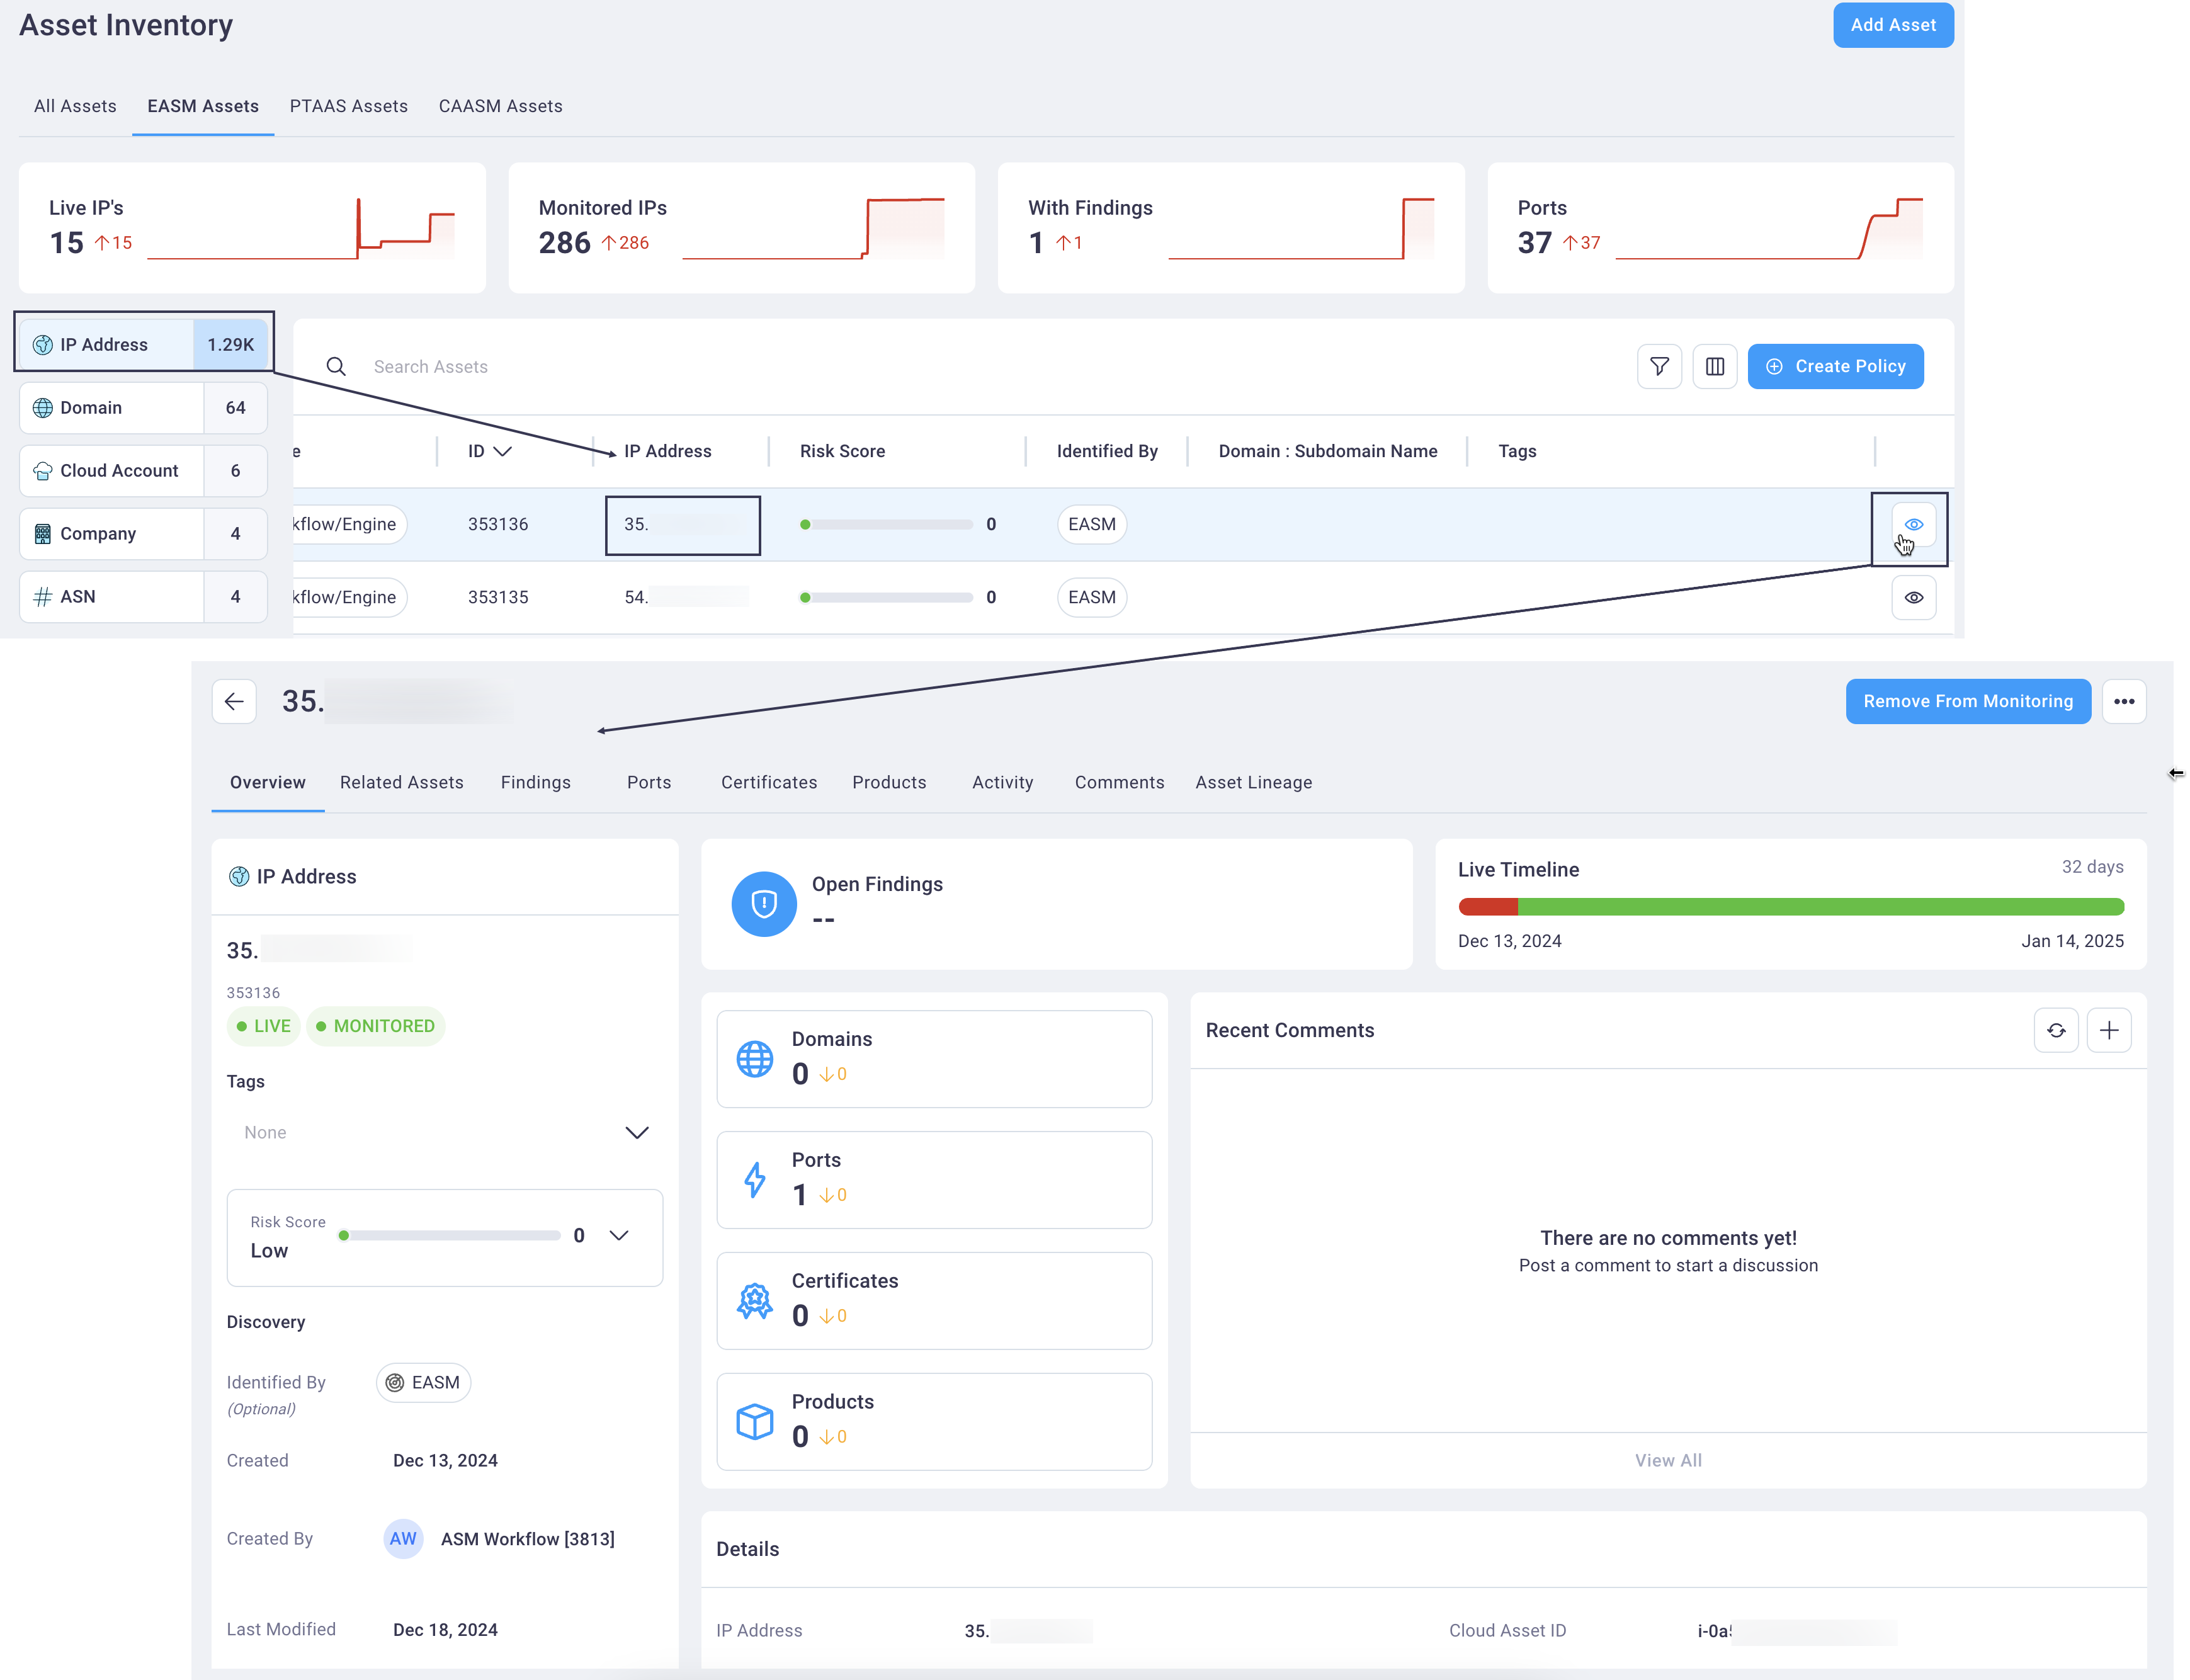
In the Assets table, scroll right to select the Asset Details icon to the far right of any row to view the details page for that asset.
See also:
- IP asset details
- Domain asset details
- Cloud Account asset details
- Company asset details
- ASN asset details
#
Adding an asset
Assets will be added by EASM as they scan and discover them. But you can manually add assets now.
Use the following steps to add an asset.

- Navigate to the EASM Assets page (top menu Assets -> EASM Assets).
- Select the asset class that matches the one you want to add (e.g., IP Address, Domain, Cloud Account, Company, or ASN) at the far left next to the table.
Select the Add Asset button near the top right of the page to display the Add Asset field in the left slide-out panel.

Select the IPs/Domains tab or the Cloud tab (for Cloud Account) and enter the requested values:
- For IPs/Domains: A line separated list or a CSV upload of IPs and domains; select tags if desired
- For Cloud: Enter an account name and select the cloud provider from the available fields (AWS,
GCP, and Microsoft Azure are supported)

#
Filtering assets
When you first land on the Assets page, IP Address is selected by default. Selecting any other asset will change the table display to show all the assets of that selected type.
Selecting any of the top four cards at the top of the page auto-filters the asset table to display the selected card's state:
- A total count of all assets of that type
- Assets of that type with open findings
- Assets of that type without open findings
- Assets of that type with entry points

See the Search, Sort, and Filter tables section for customizing the table display and the Save applied filter as a preset to save your user-defined filters for reuse.
#
Merging assets
With the correct permissions, you can merge EASM assets. See the Merging assets section of this guide for details.
#
Removing assets from monitoring
When you have the correct permissions, you can remove an asset from being monitored by EASM by selecting the Remove from Monitoring button on any Asset details page.
When an asset (IP Address, Domain, or ASN) is removed from monitoring, any related findings for that asset are unpublished and don't display on the EASM Findings page.
See also: Working with Assets