#
Working with assets
An asset is something owned by your organization where a vulnerability (finding) could be found, such as a on a web server, a source code file, or an IP address.
Every finding in the NetSPI Platform is associated with an asset. Assets are created automatically when importing finding data.
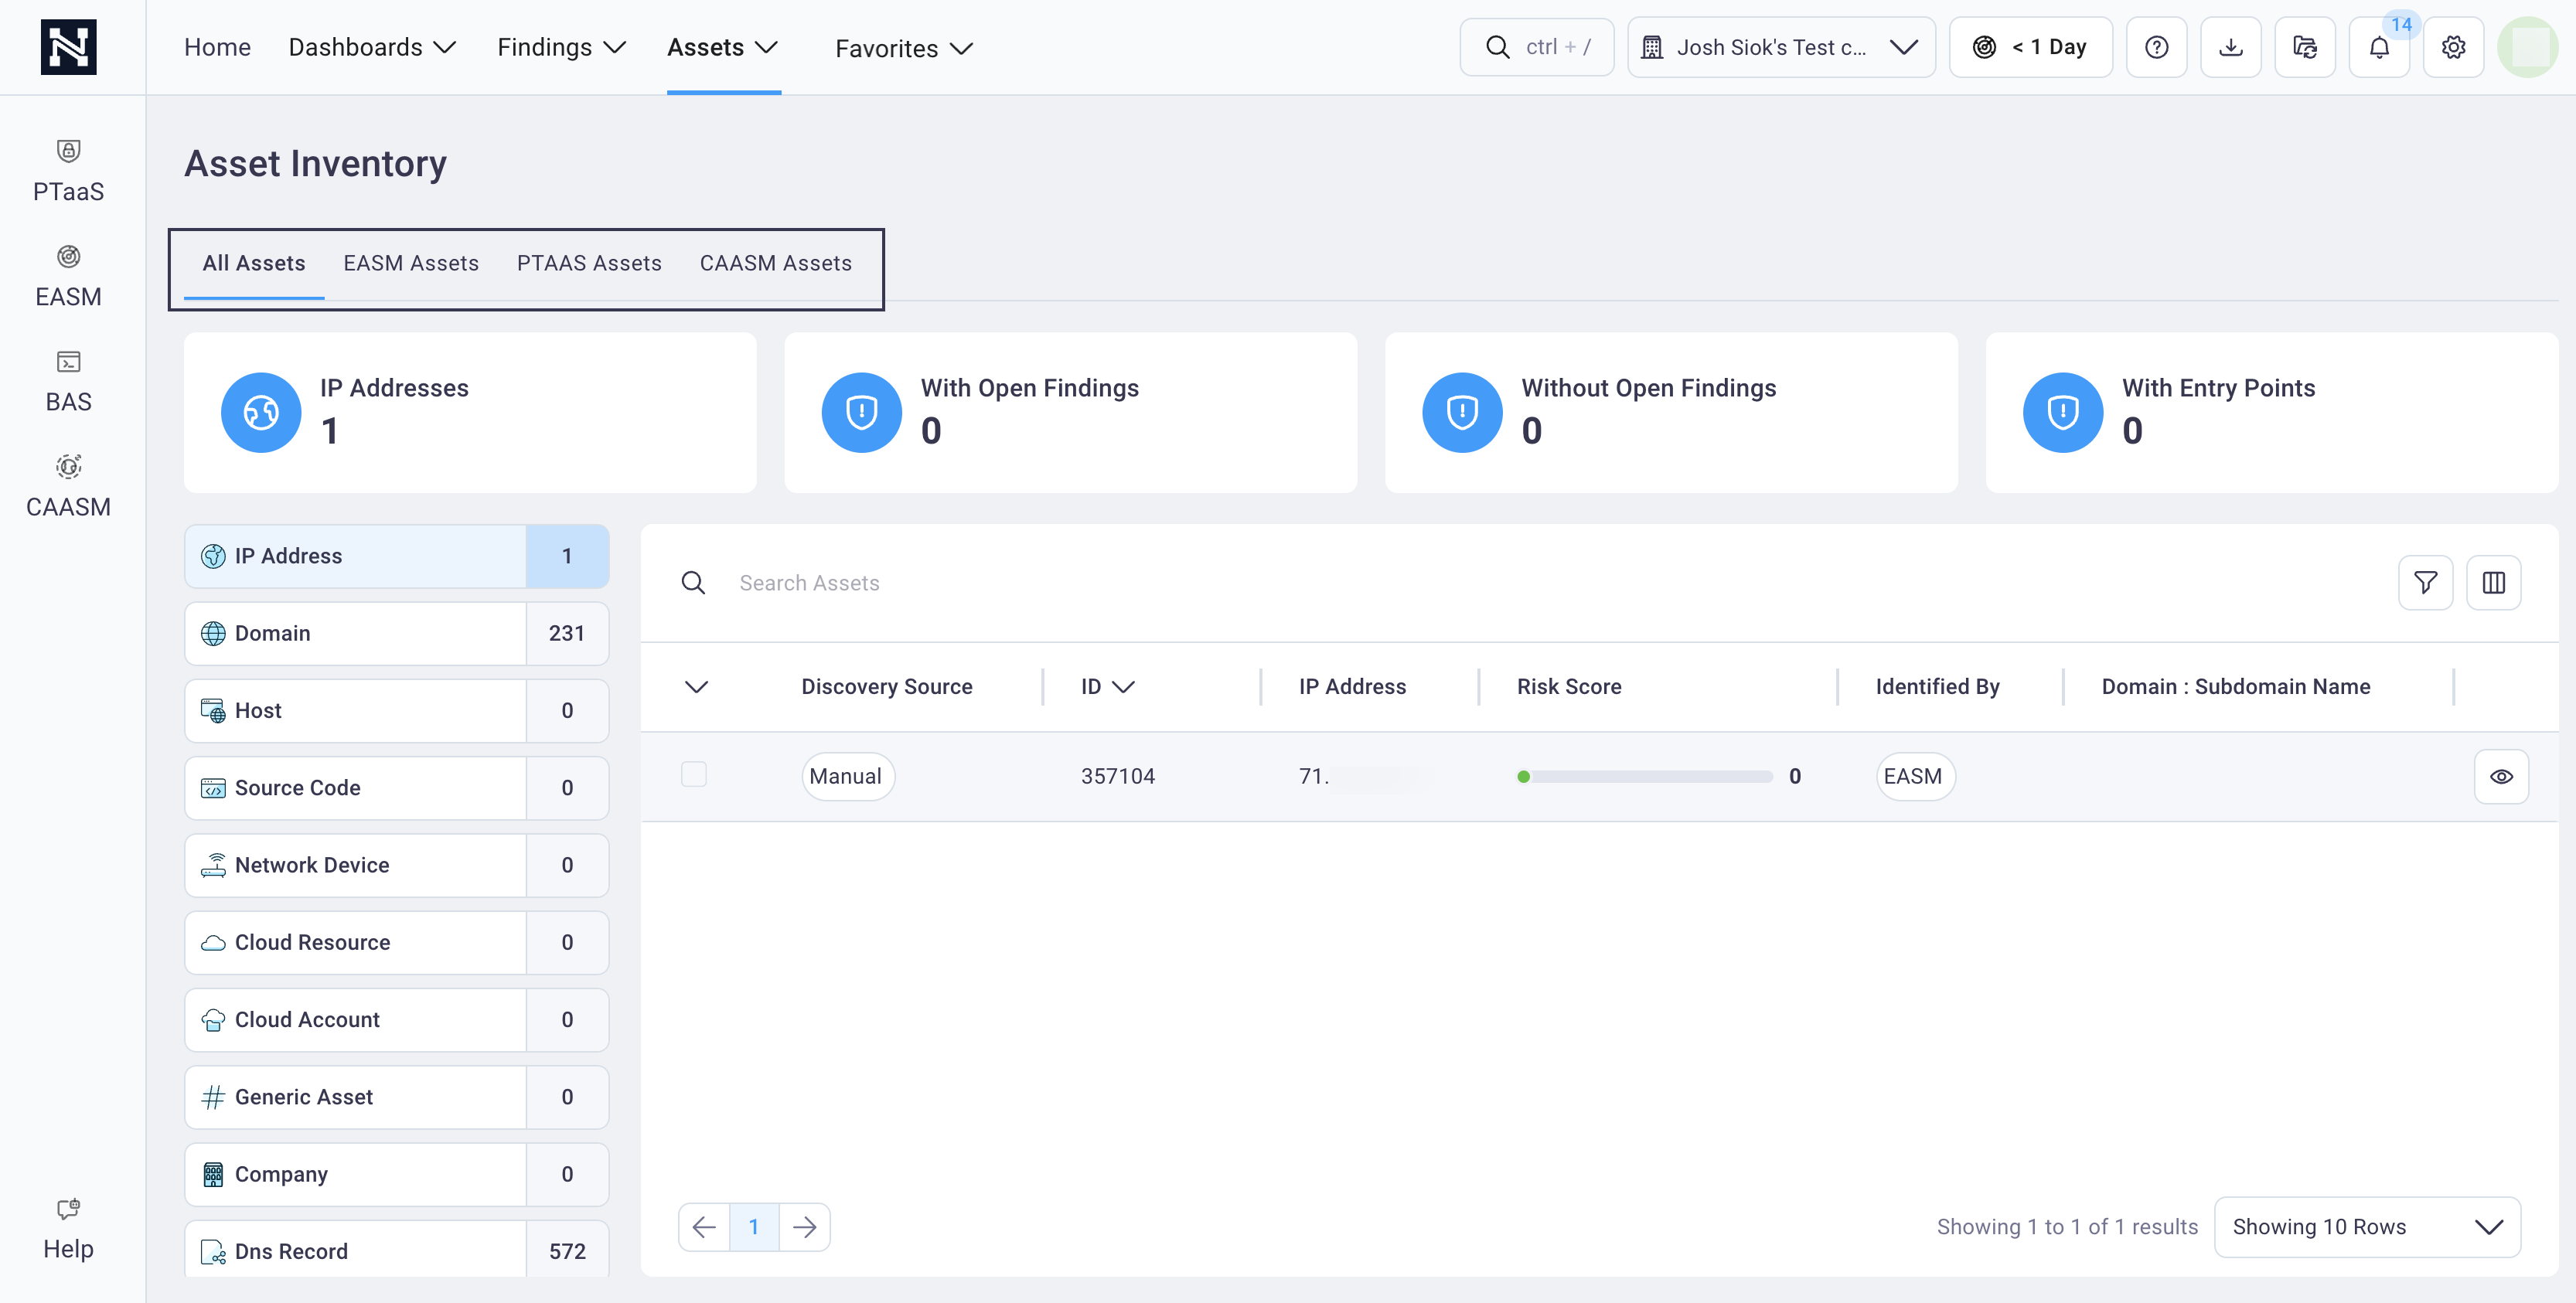
The Assets page displays all of your organization's assets on the All Assets tab, combining PTaaS, EASM, and CAASM-discovered assets when you are subscribed to all three modules.
#
Accessing assets
From the top menu, select Assets, and then All Assets, PTaaS Assets, EASM Assets, or CAASM Assets.
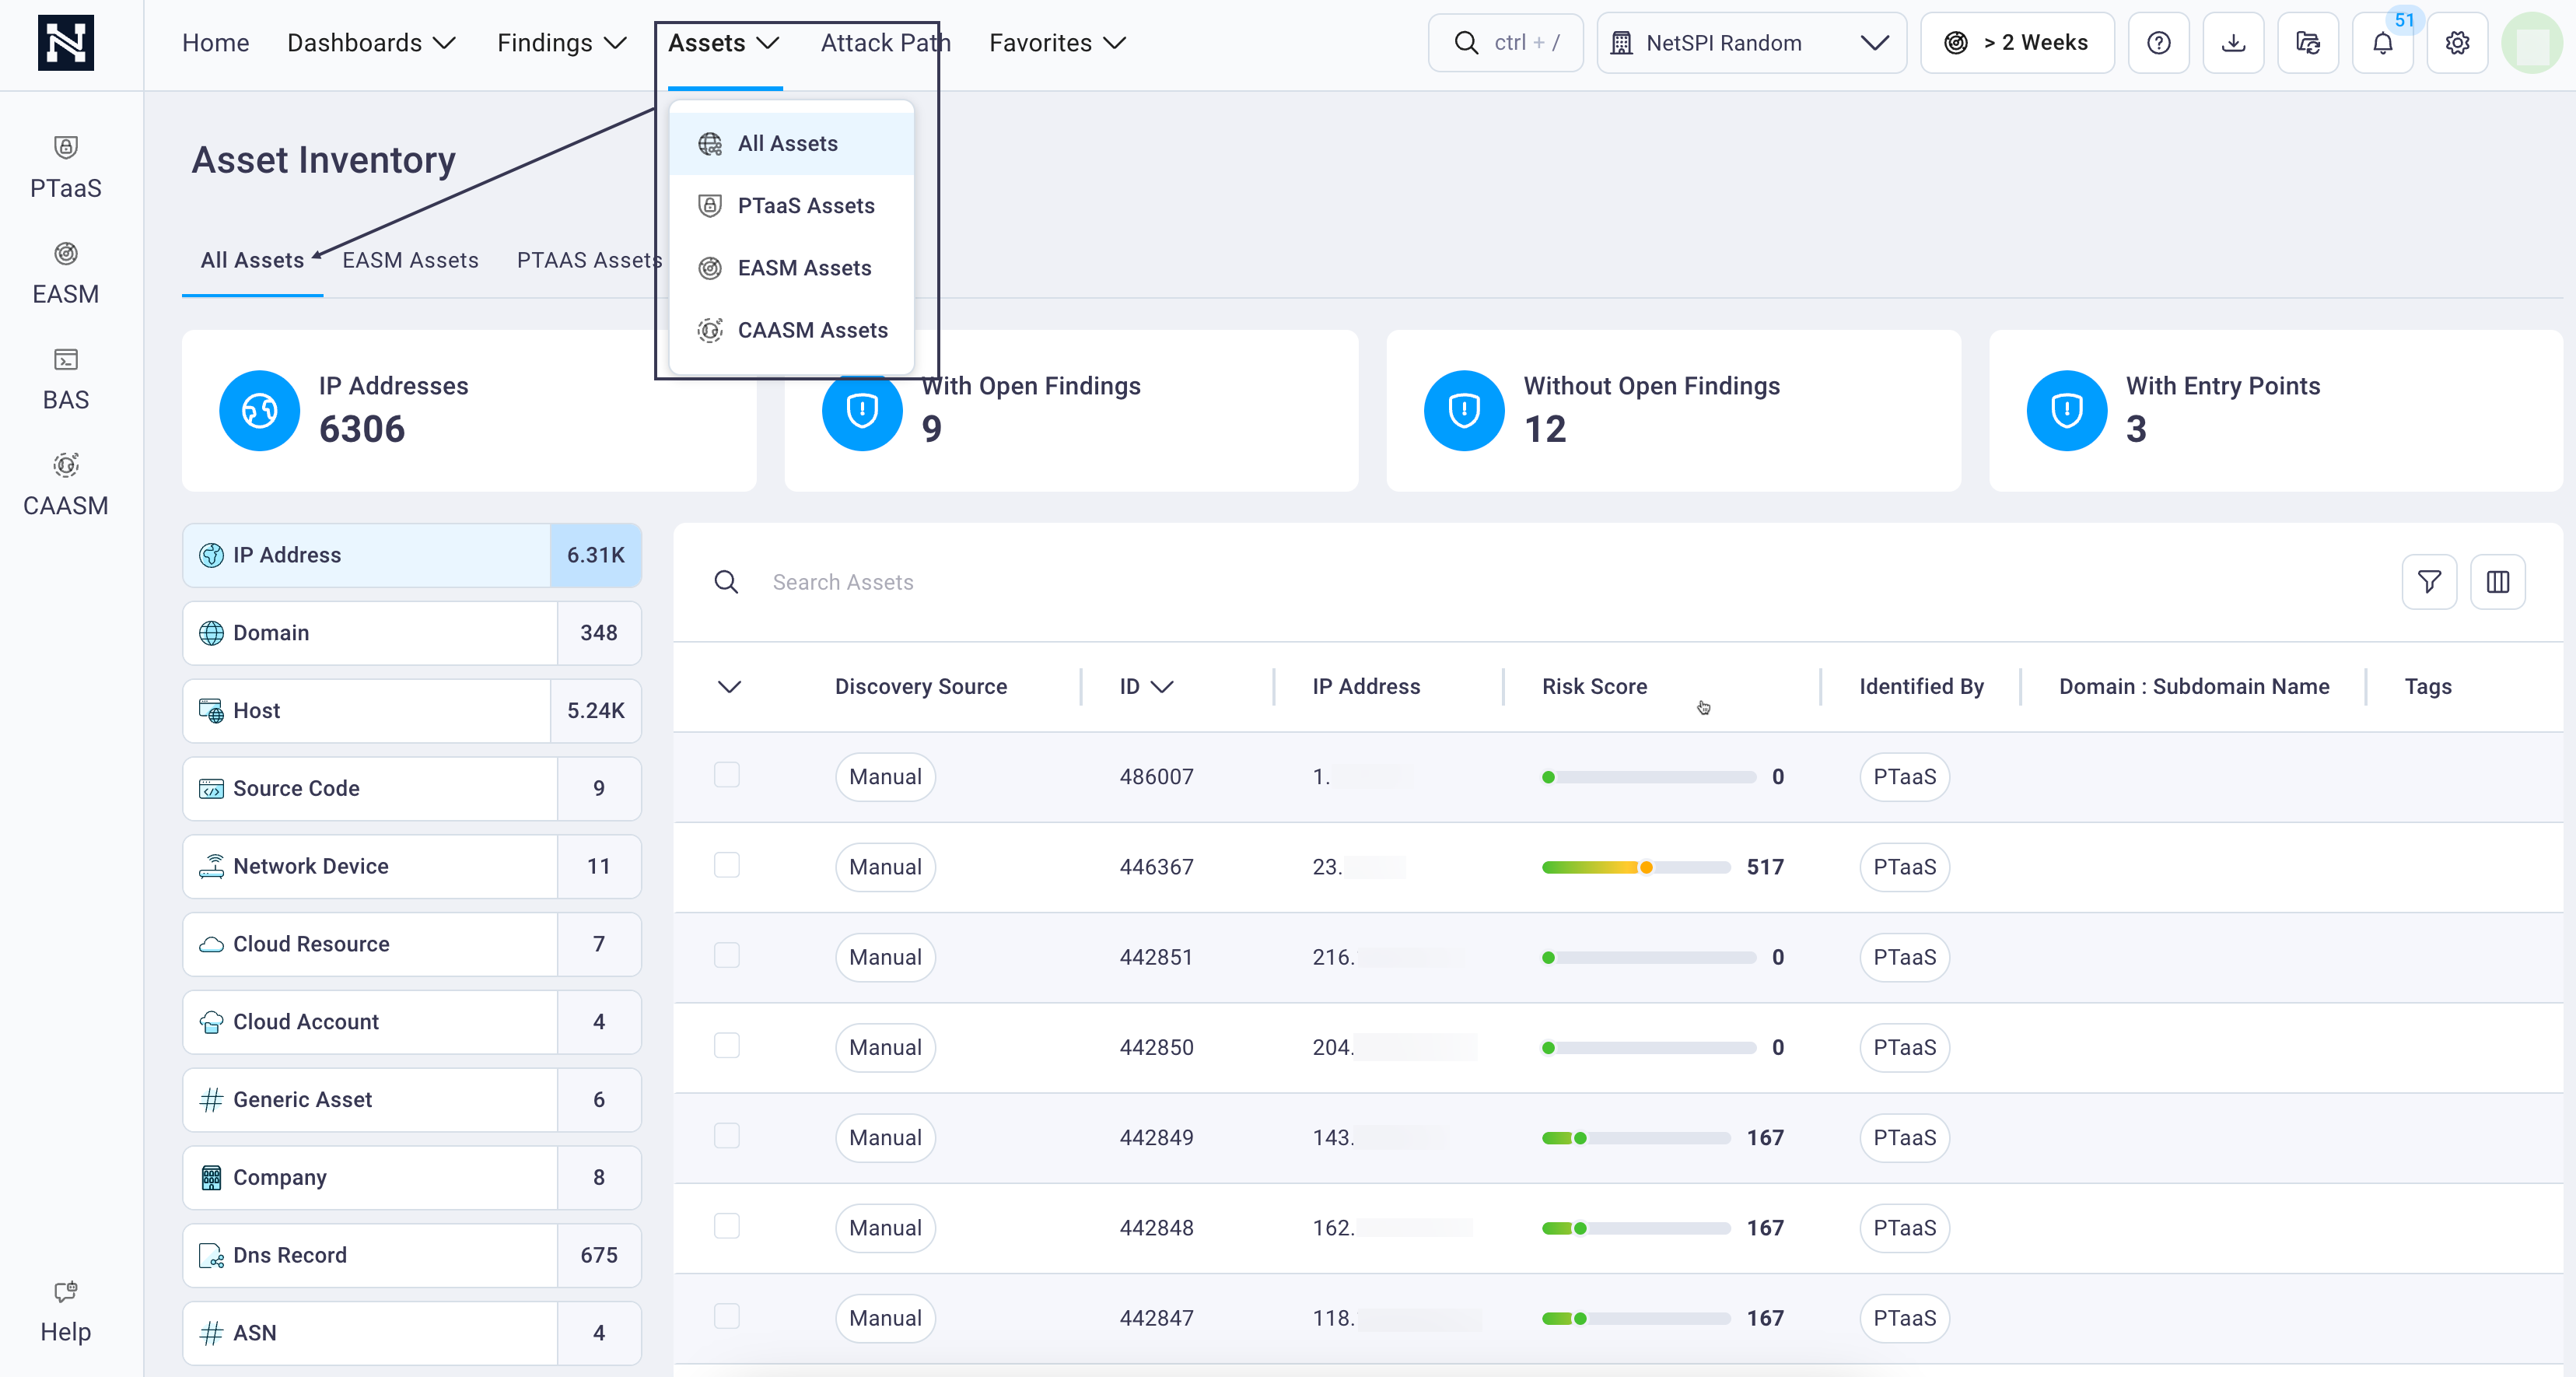
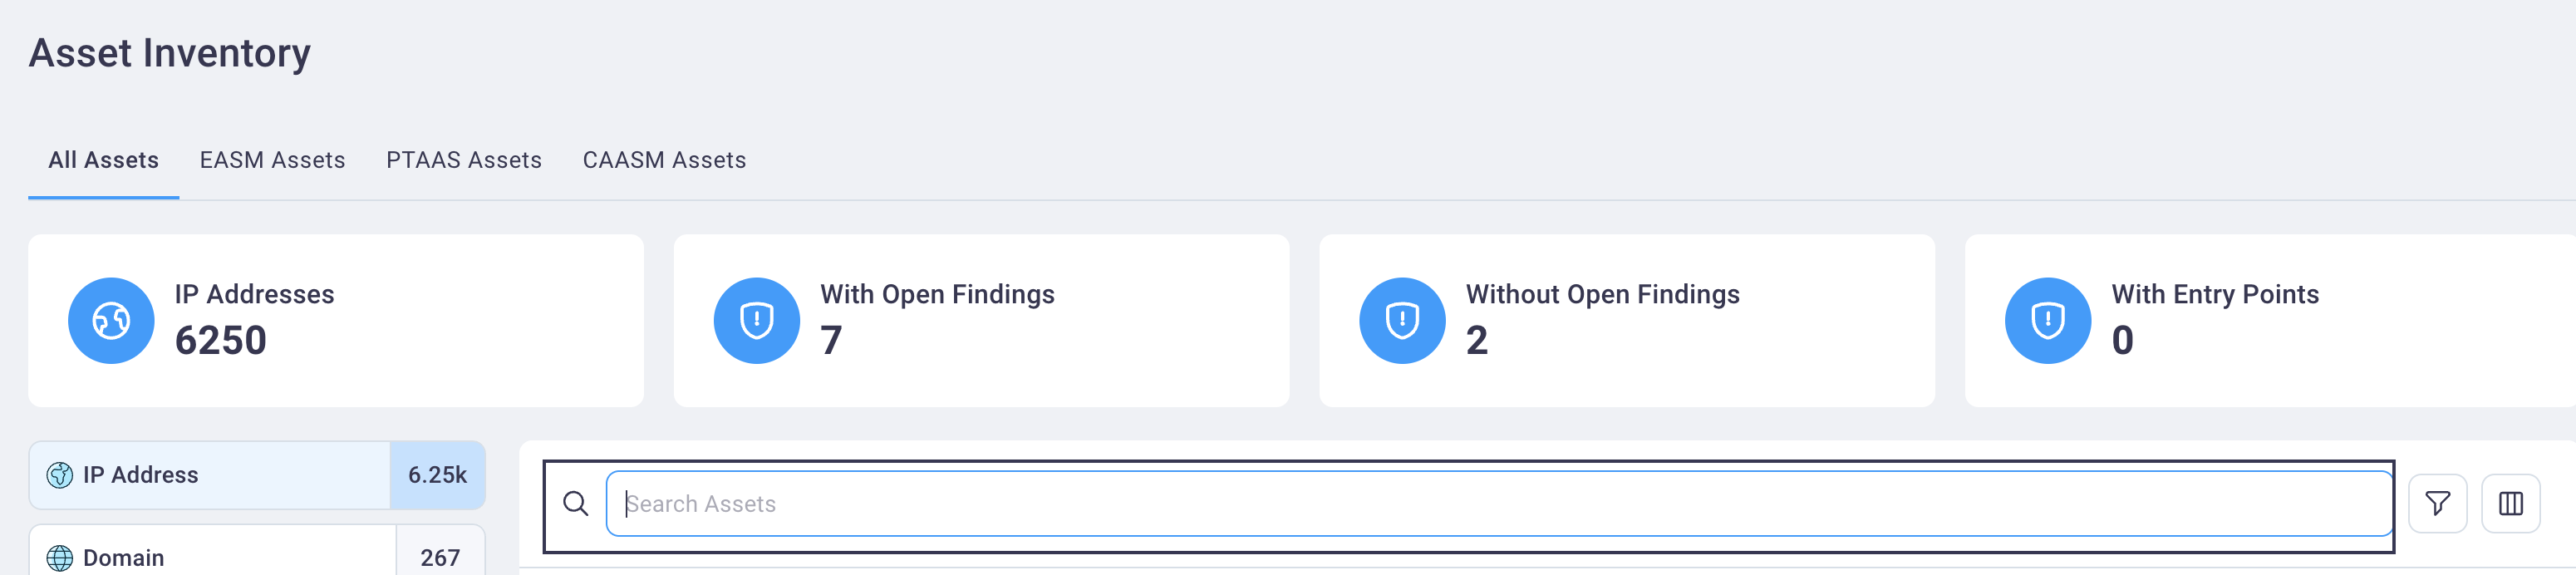
This displays the Asset Inventory page for your organization, with the All Assets tab and IP Addresses asset type as the default display.
Each module displays a different set of asset cards and covers different asset types, some that overlap the others. For details on each module's Assets page, see:
Use the image and table below as a beginning reference for actions you can take to customize and view your organization’s asset data in a way that suits you.
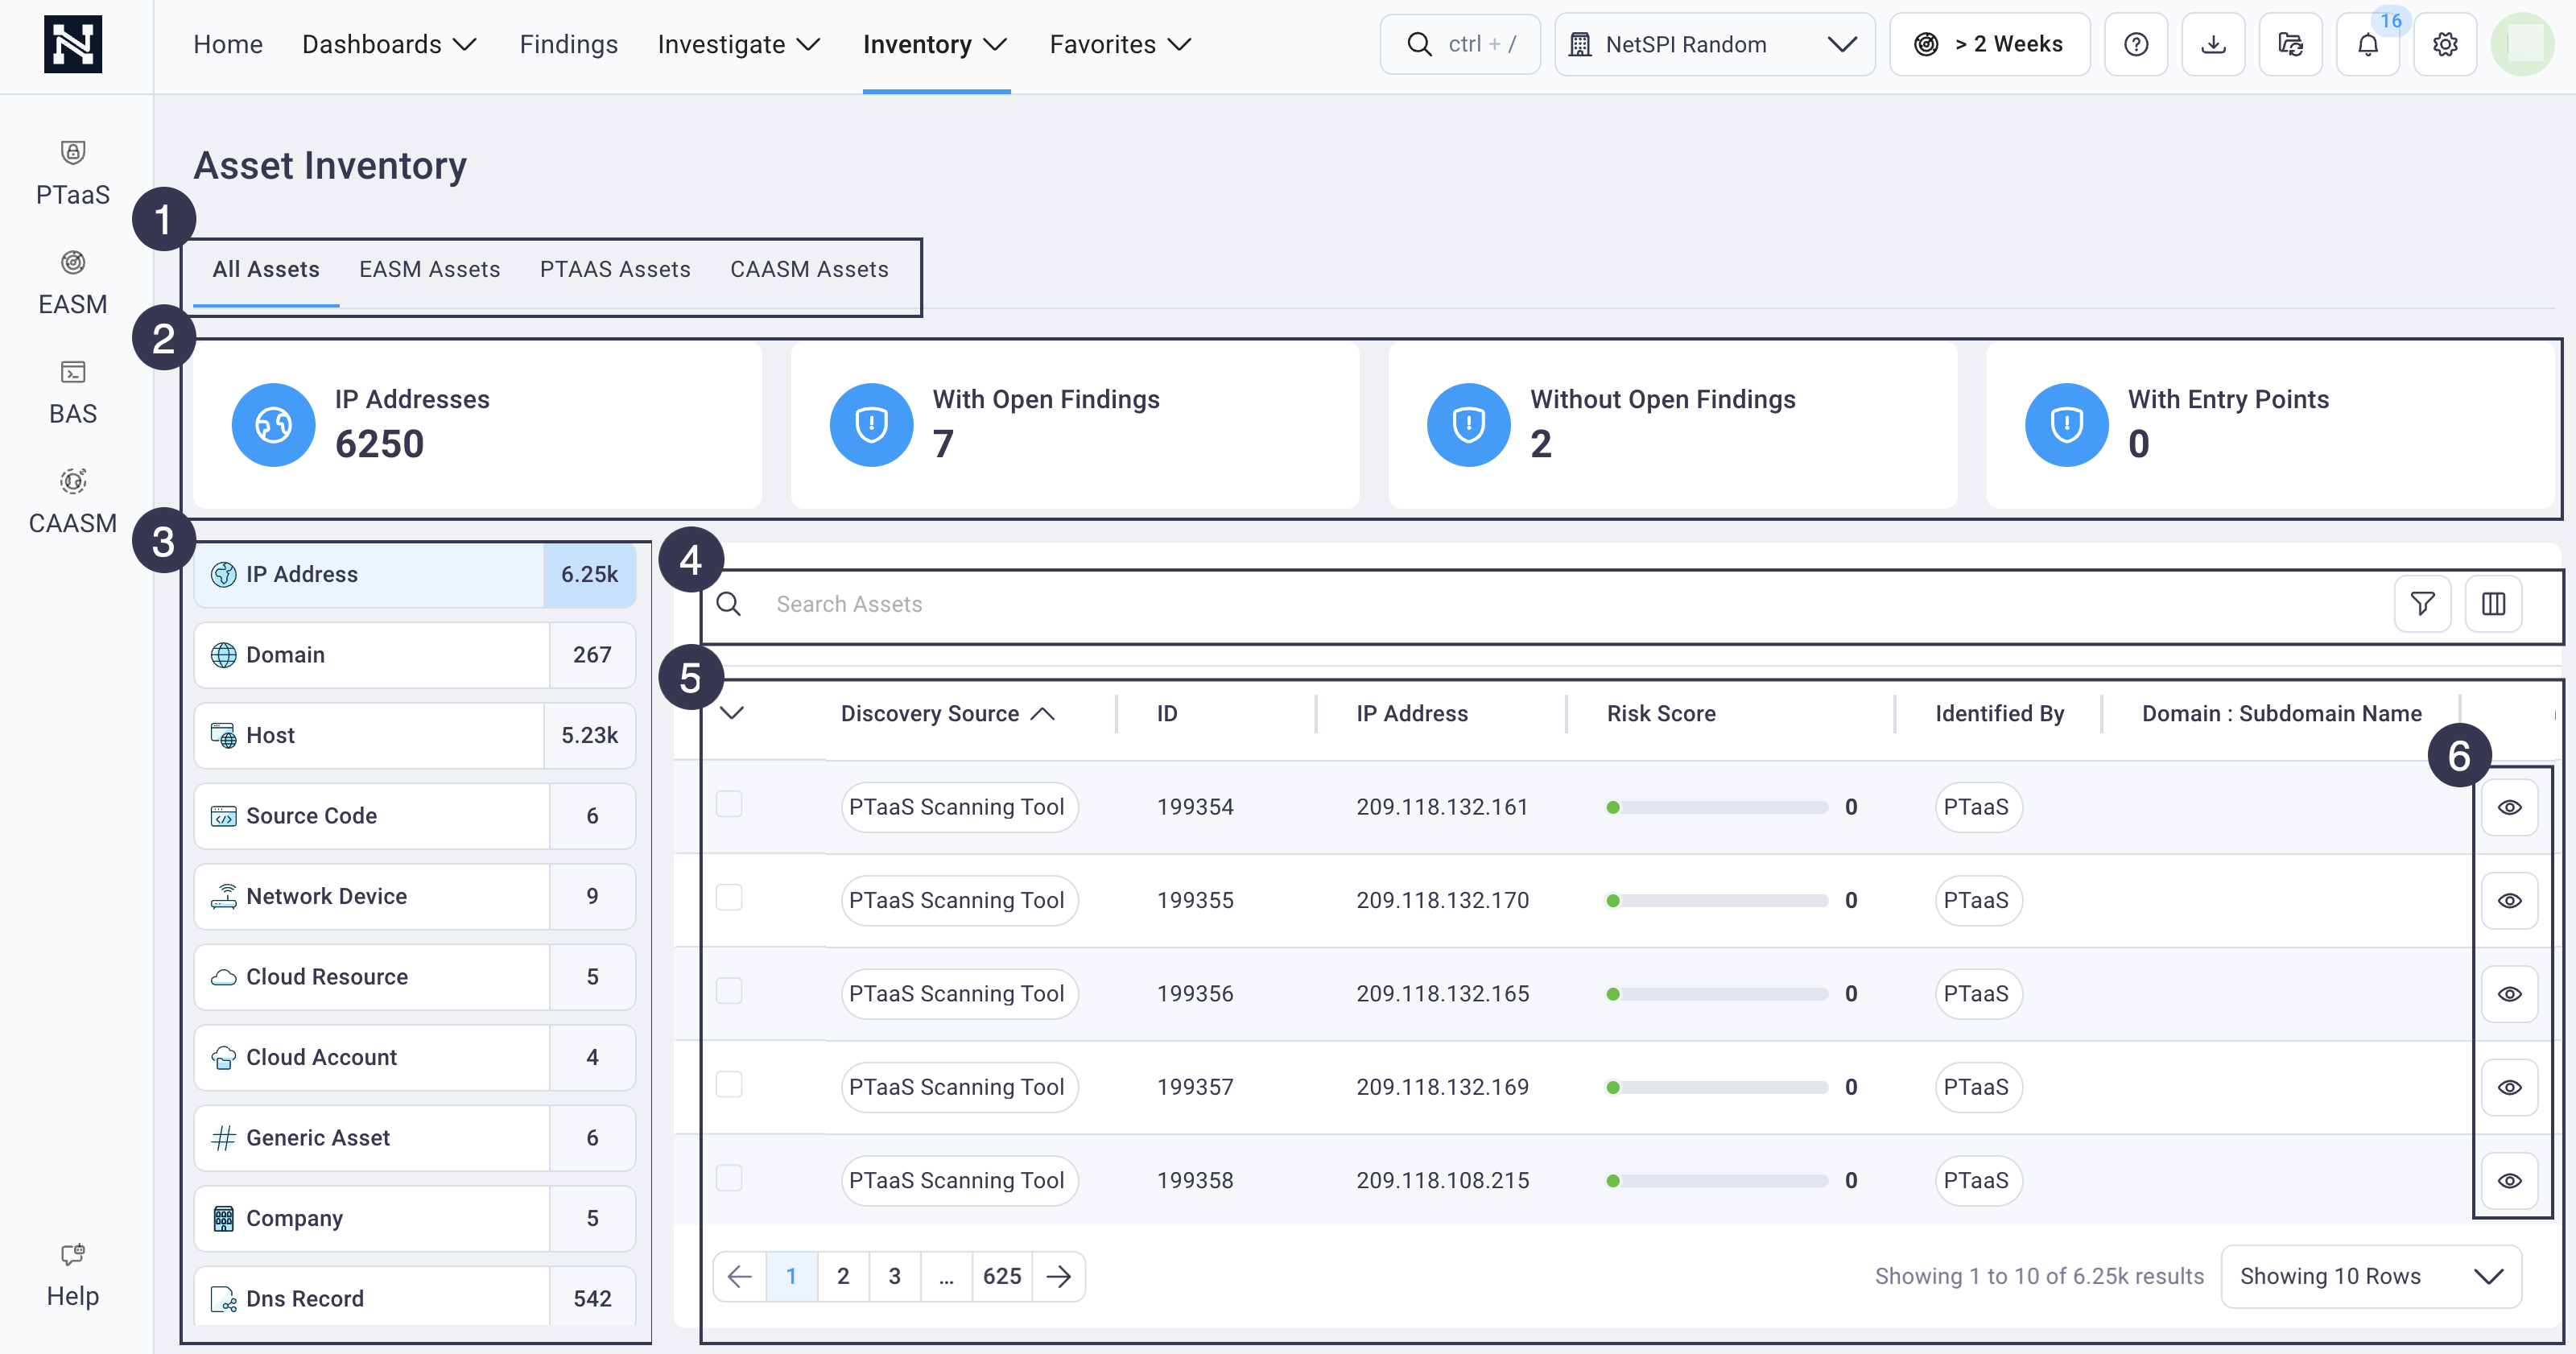
| Callout Functionality | Description |
|---|---|
| 1 | Asset source view: Choose to view all assets across all modules, or only those assets discovered by EASM, PTaaS, or CAASM. |
| 2 | Asset Cards: Select any Asset card to filter the assets that display in the Assets table to match your selection. Each card displays the total number of assets, those assets with or without open findings and those assets that have entry points. The Asset card data and labels change to match the asset type selected from the asset type buttons to the left of the asset table. |
| 3 | Asset Selector: Select a specific asset type to display all assets for that asset type in the asset table and the summary count for that asset at the top of the page. |
| 4 | Search / Filter / Table Display |
| 5 | Asset Table: This is where all your assets are displayed for the selected asset type.
 |
| 6 | Select the Details icon 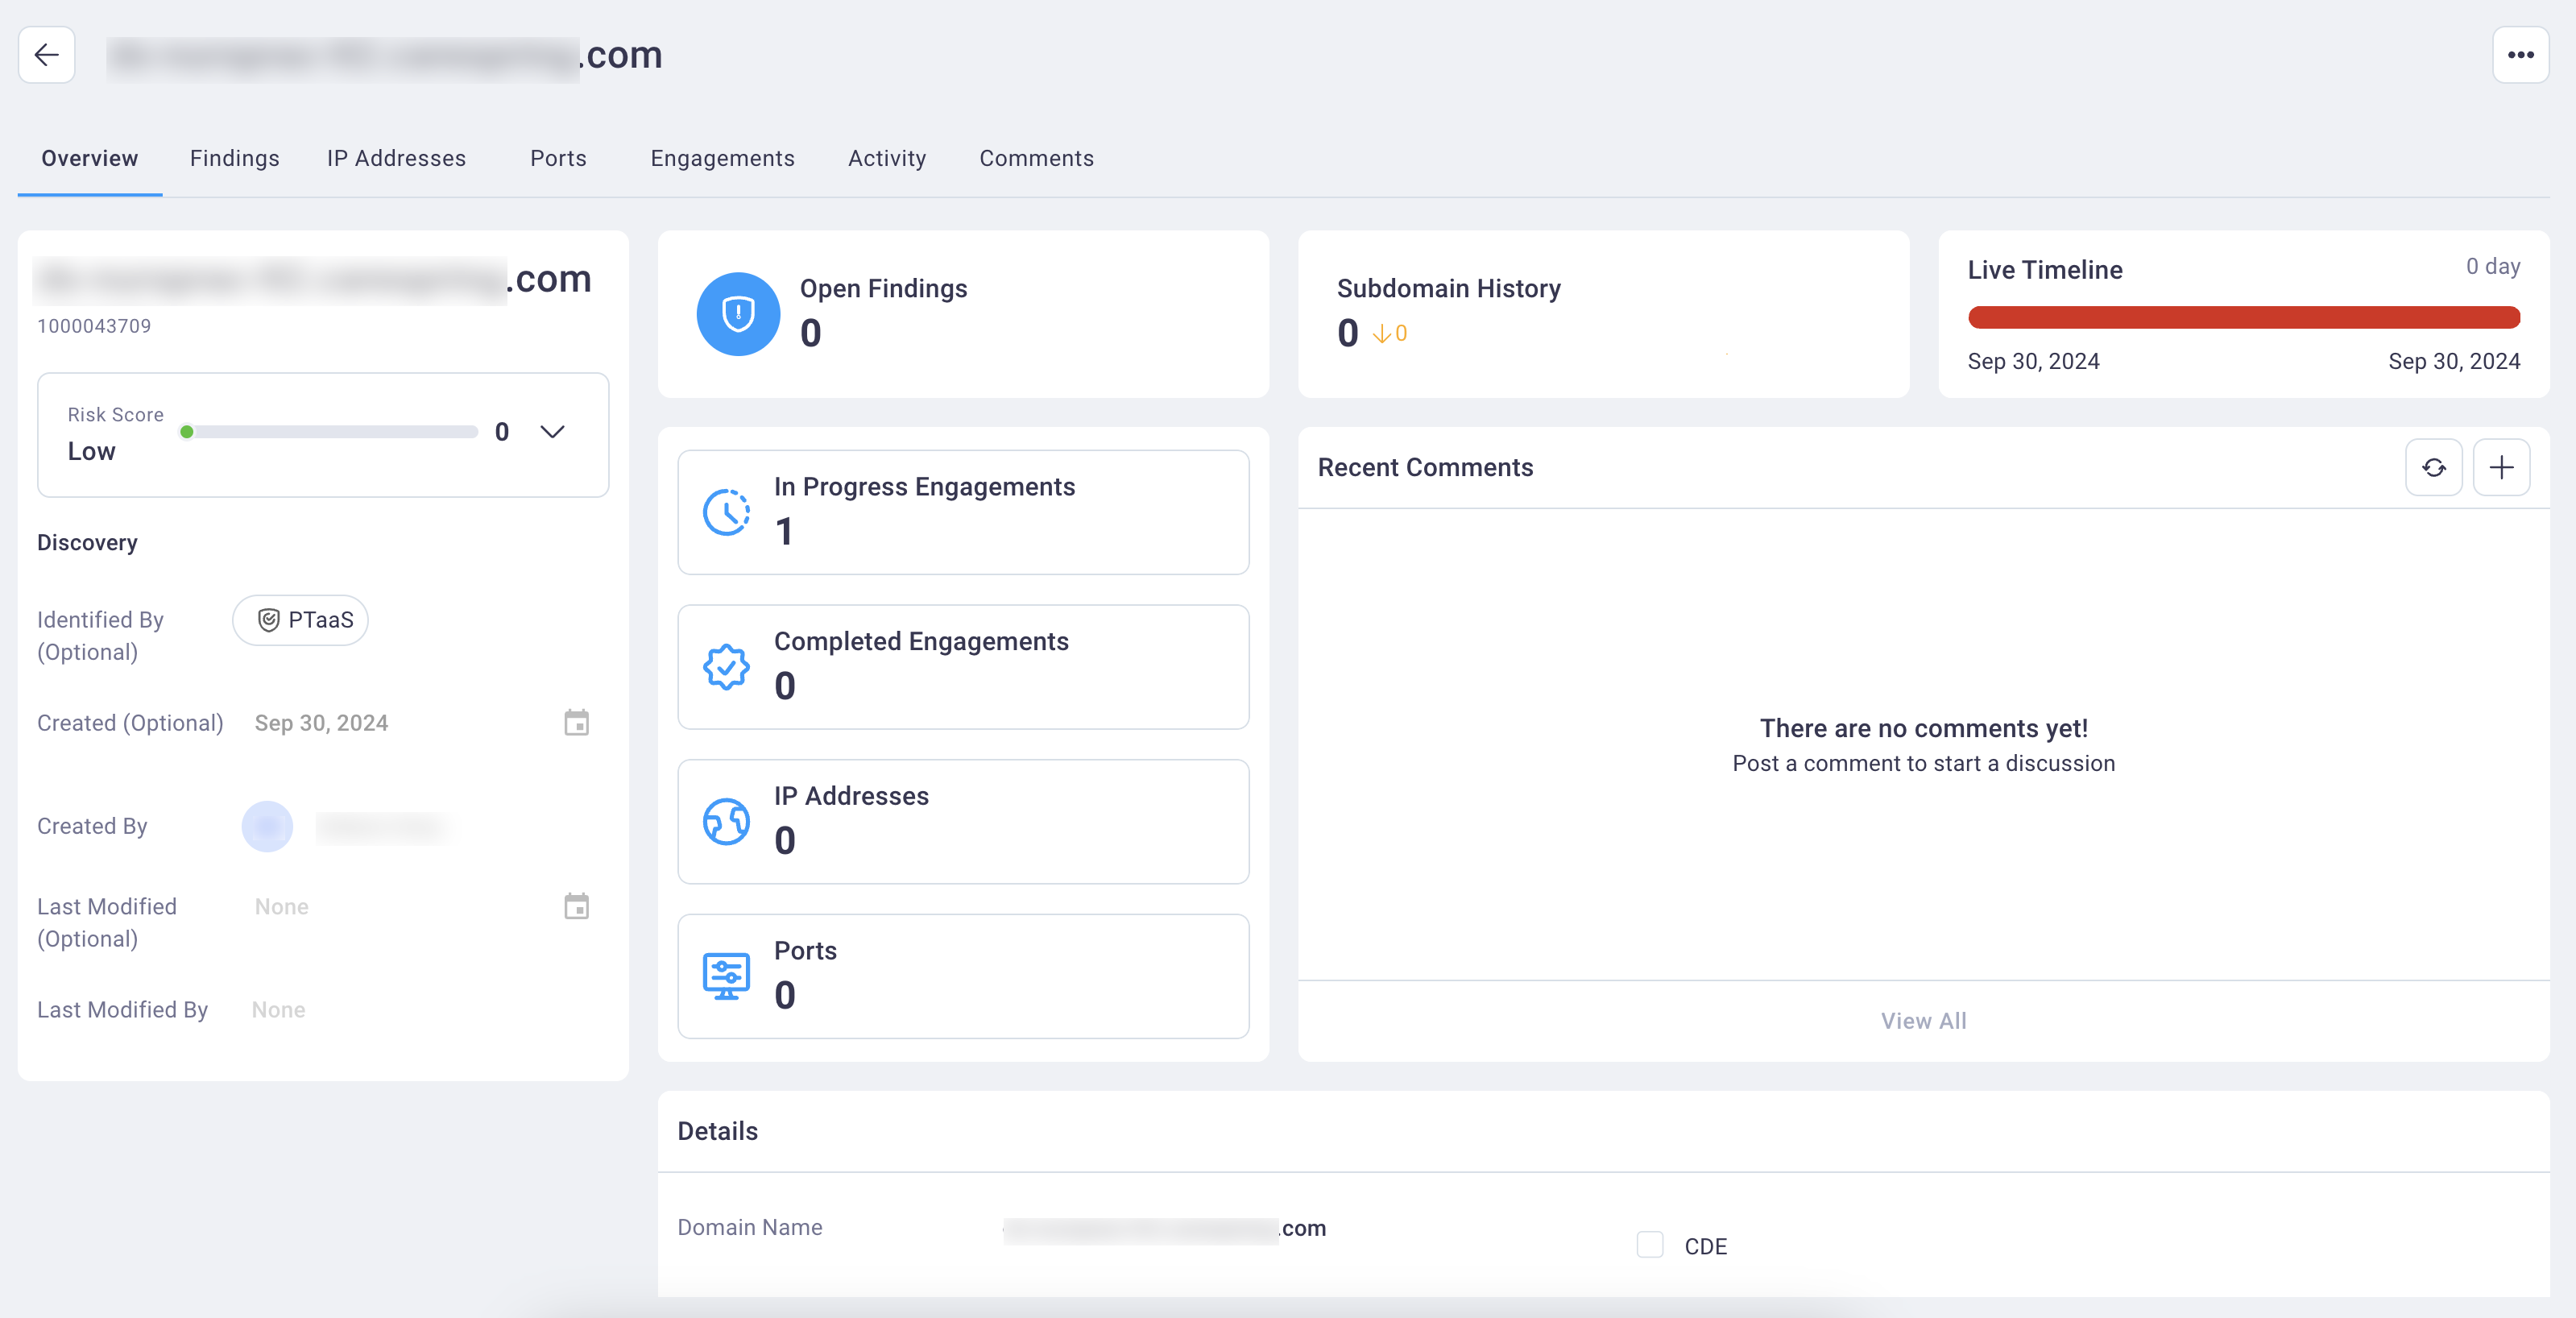 The Related Assets tab displays assets related to the selected asset. See the |
#
Filtering assets
There are three ways to filter assets on the Asset Inventory page:
- Using the top-level asset cards
- Using the asset table's Filter icon
- Using the left-navigation fast filter for filtering domain assets
#
Filtering assets using the top-level asset cards
The top row of the Assets page displays cards for assets assocIated with IP addresses, open findings, without open findings, and with entry points. Note that the IP Addresses card name and count change based on the asset type you select from the asset buttons to the left of the Assets table.
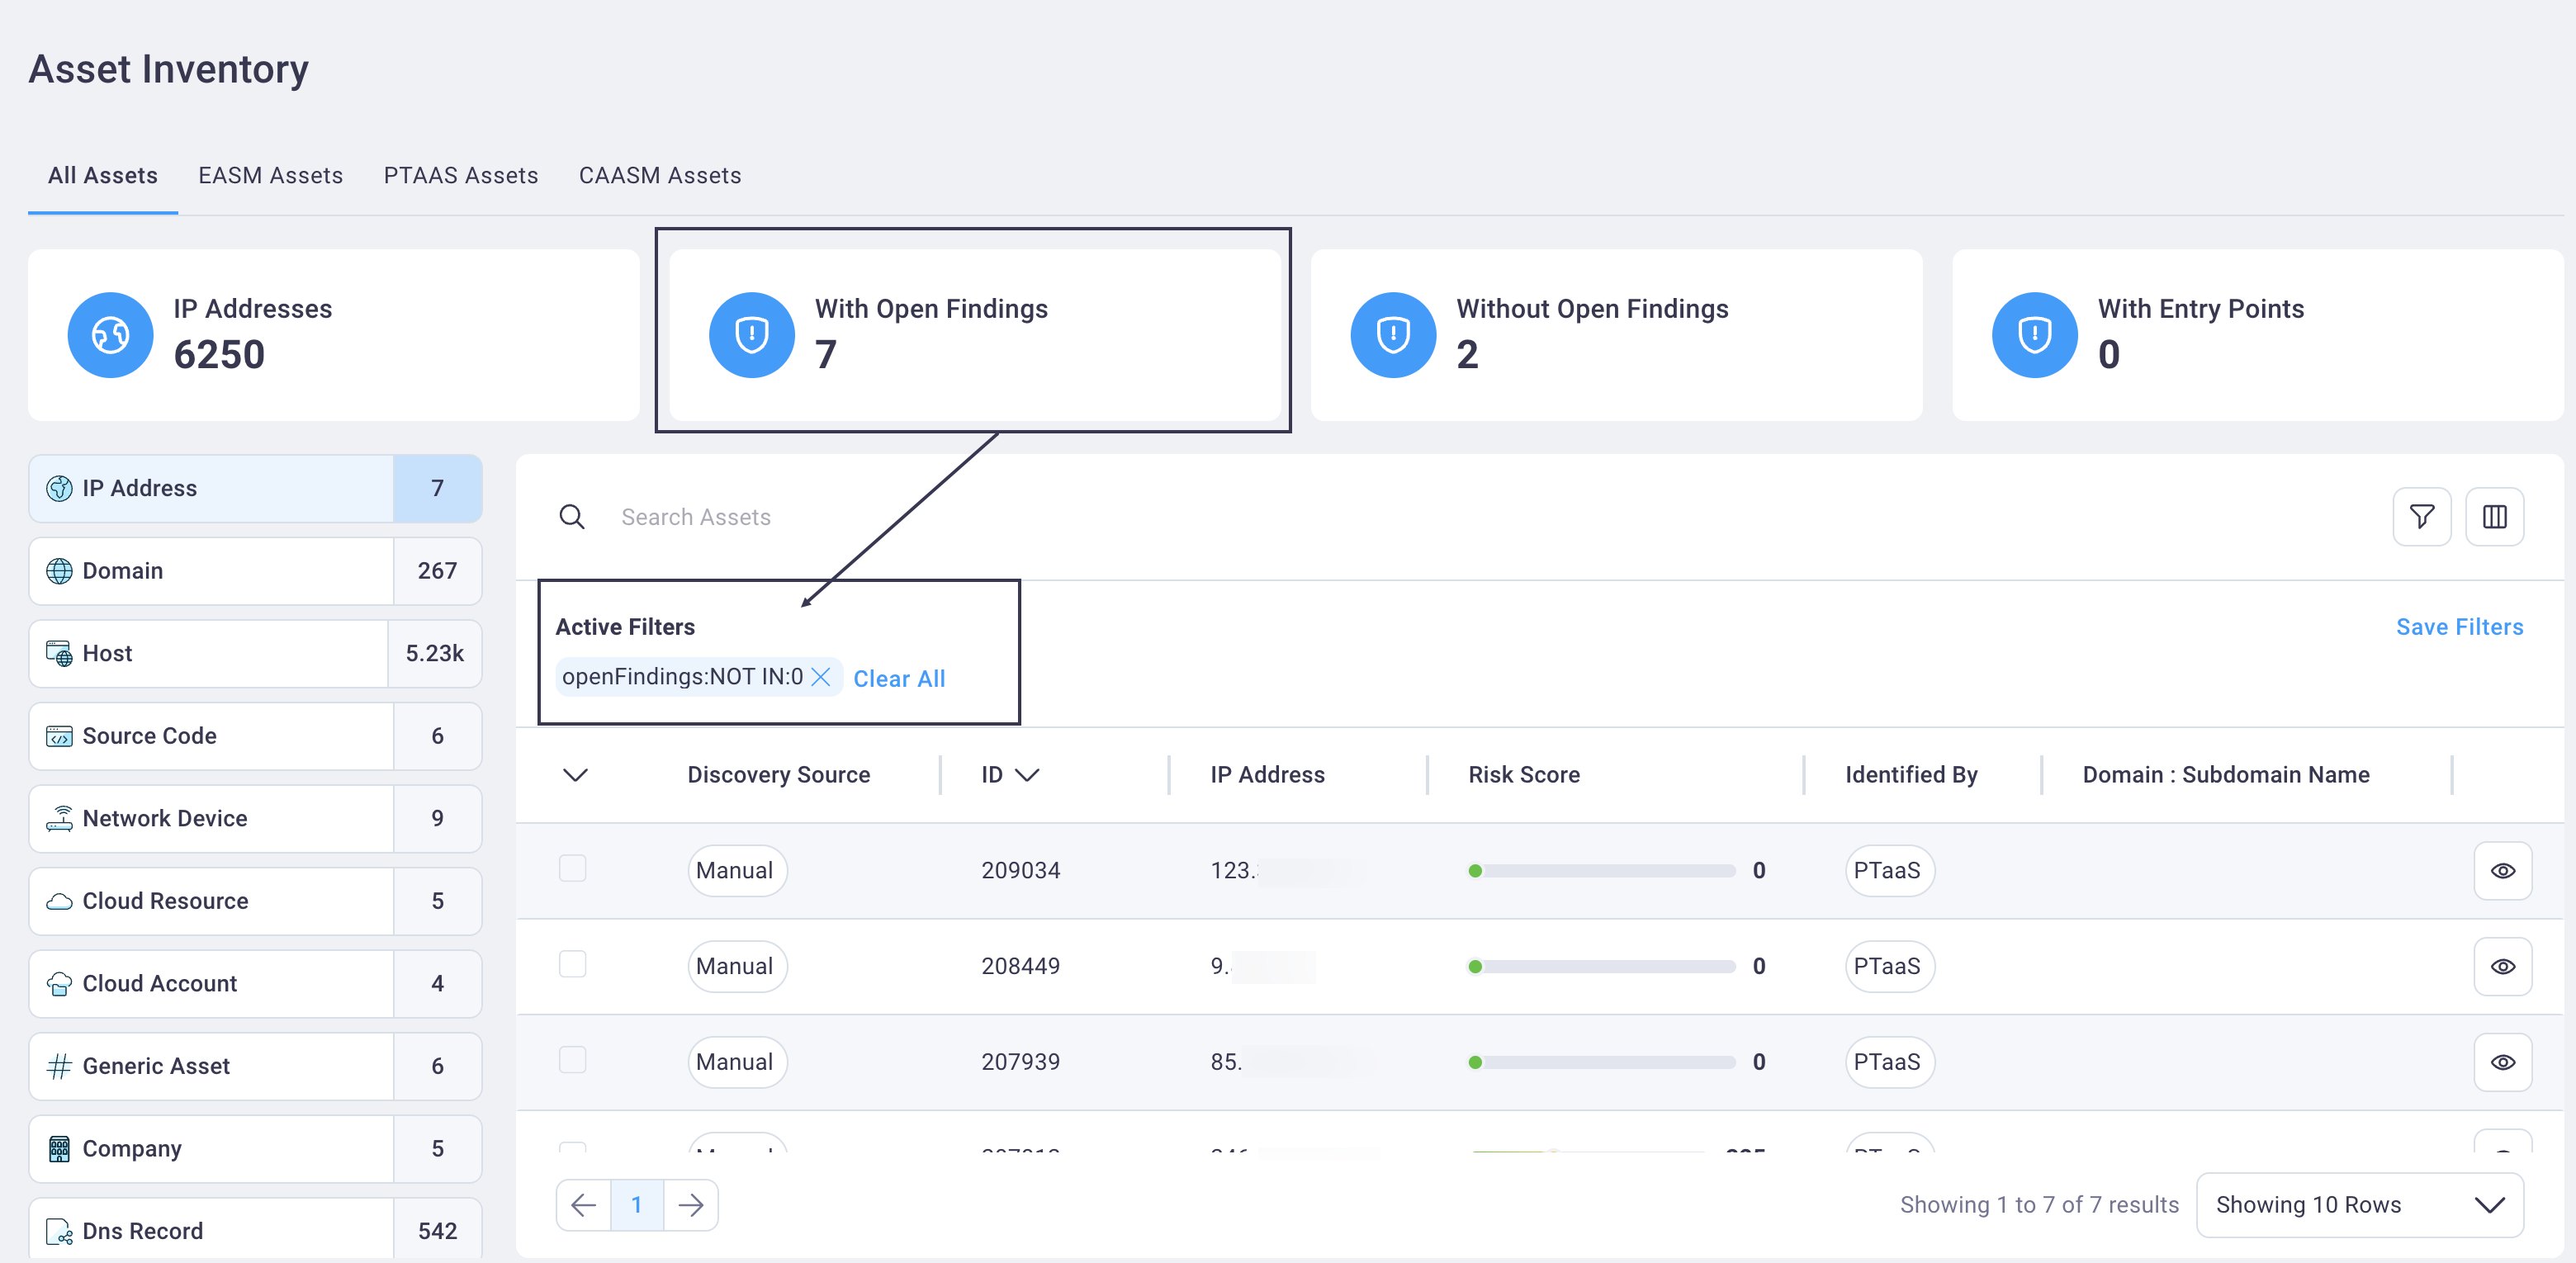
Select each of the Assets cards to filter the Assets table for that category. The Active Filters row displays at the top of the table for each selected card so that you can see which asset criteria is included/excluded in the filtered list.
Select the Clear All link in the Active Filters field to remove all filter criteria.
To perform a custom filter use the following steps:
Select the Filter icon to display the Saved Filters/Filters dialog box.
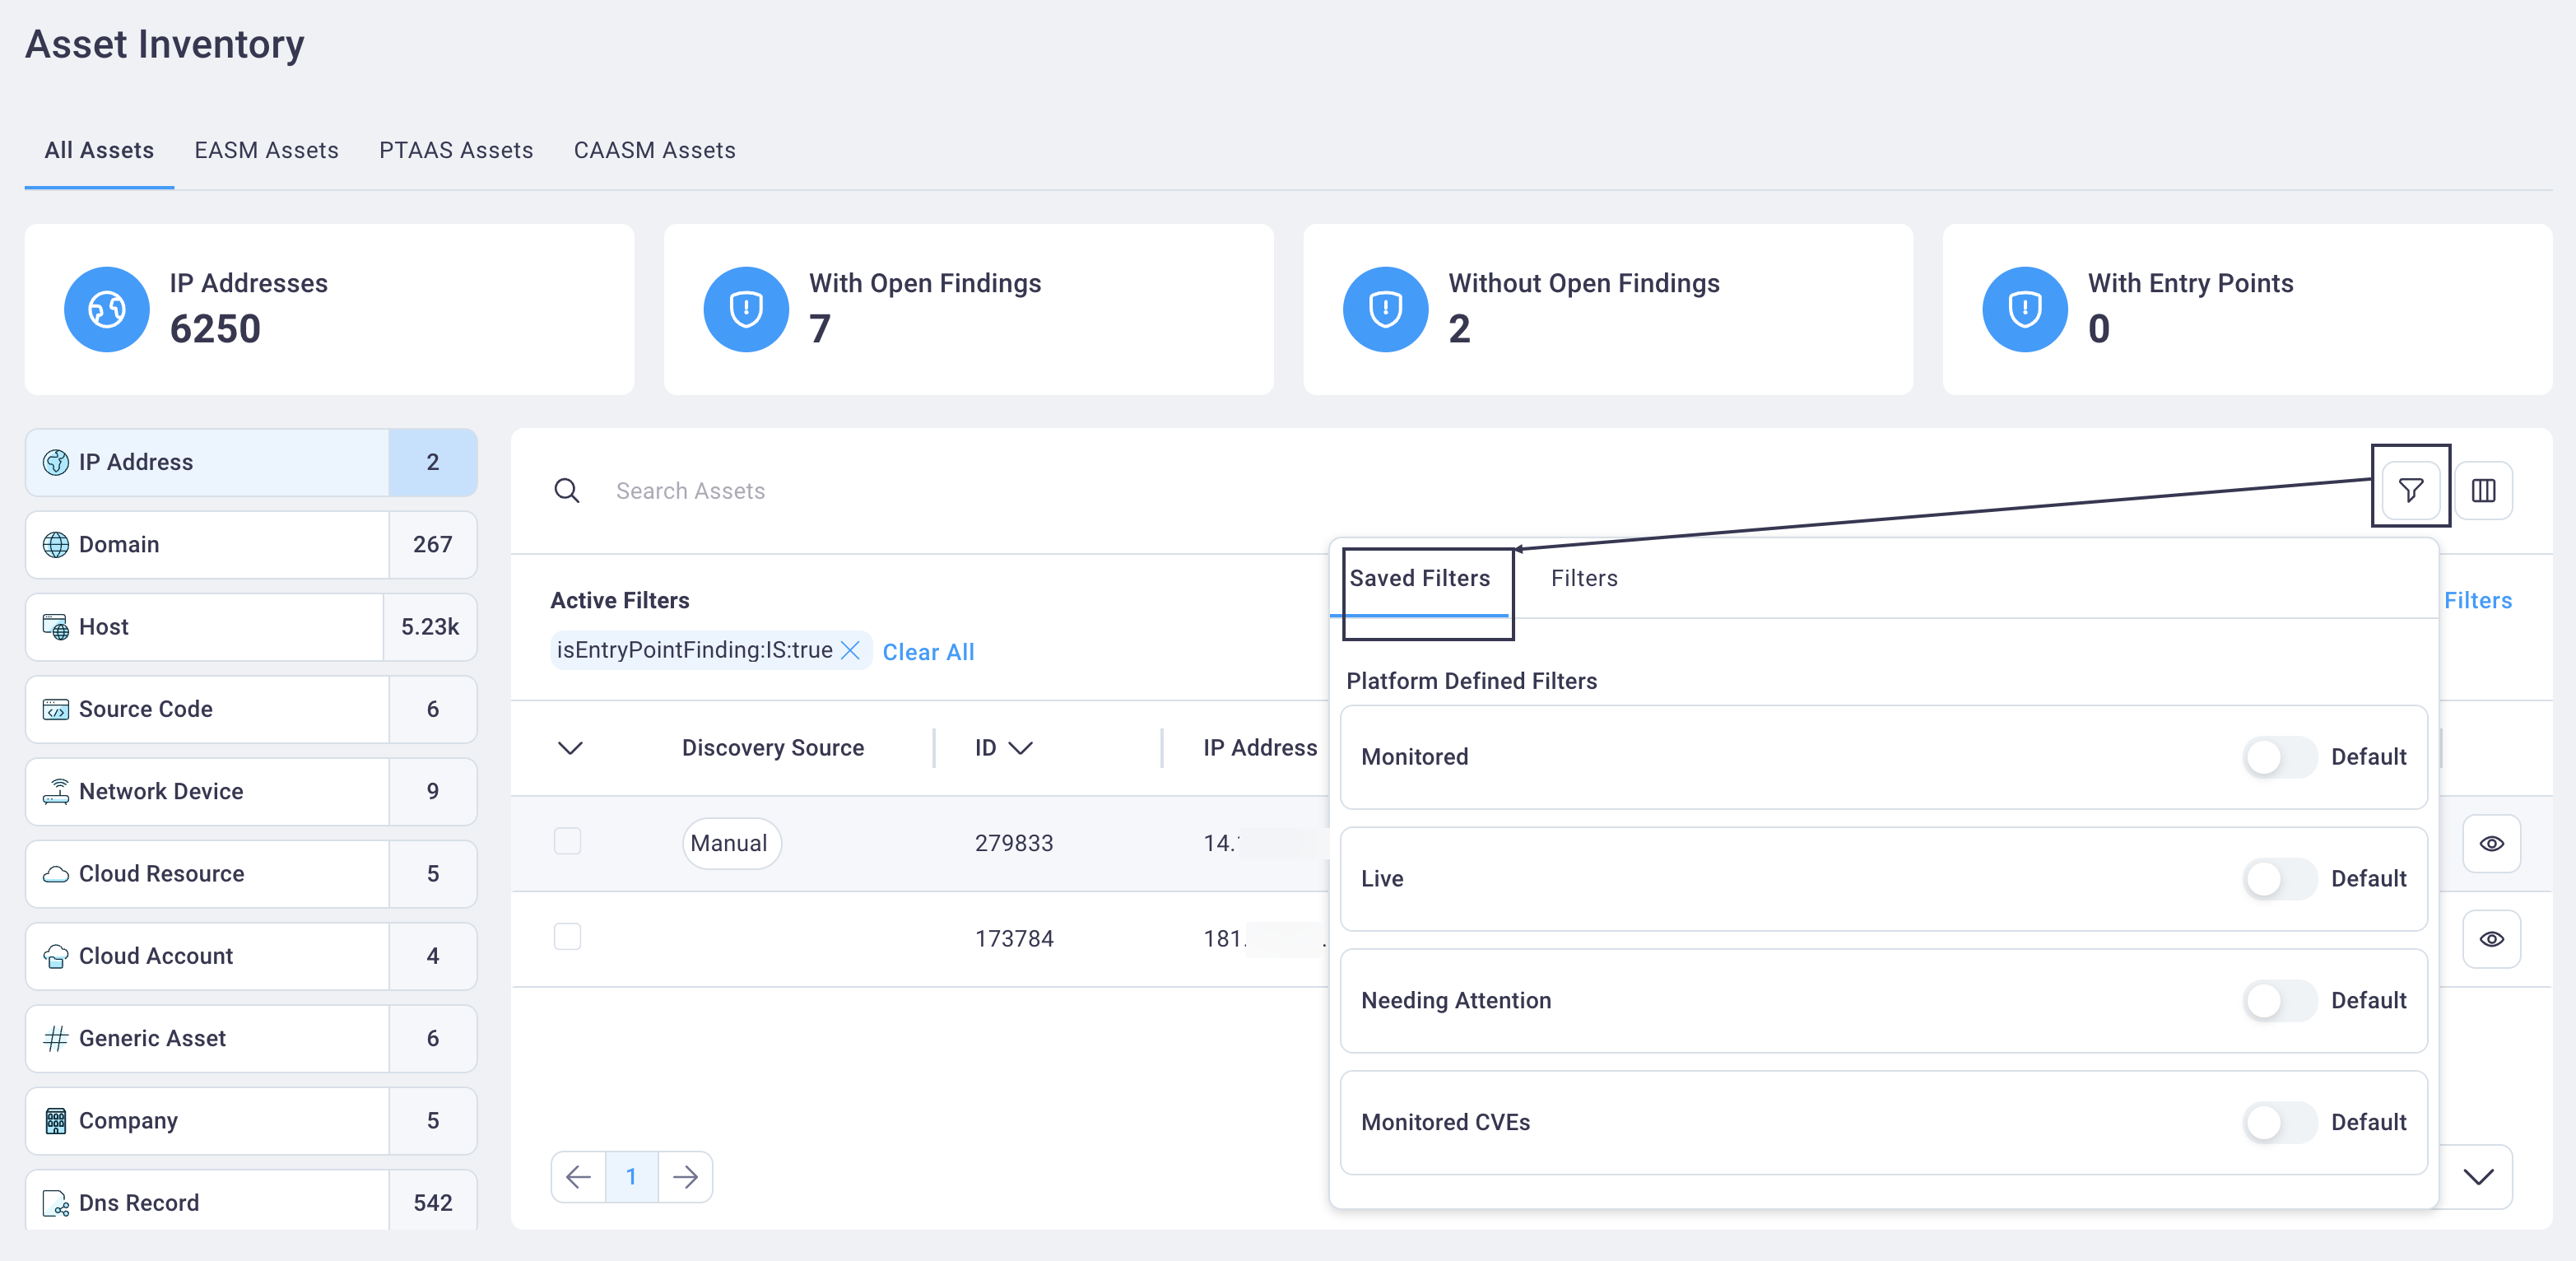
Select the Filters tab to display the freeform filter fields where you can select values and logic to build your own filter.
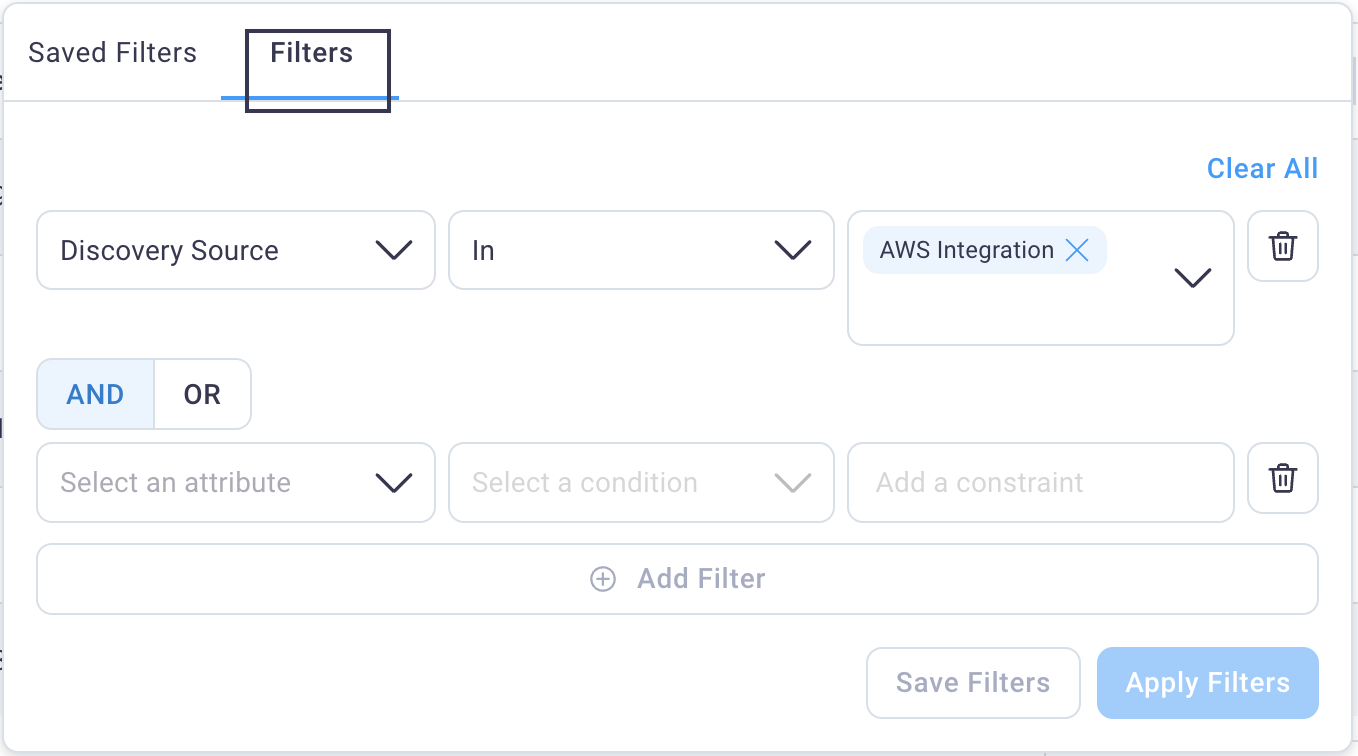
Select the Apply Filters button to display the Asset table with values that meet your applied filter criteria.
#
Filtering the Assets table using the Filter icon
See Apply a new filter in the Navigation section of this guide.
#
Filtering domain assets with the fast filter
The fast filter functionality is located in the side navigation when you select Domain. It provides a quick way to filter on items that are likely to be the most important to you for all modules.

To apply the fast filter, select checkboxes for as many of the fast filter criteria as you need, scrolling down to view more items. As you select or clear checkboxes, the table dynamically changes to display domain results matching your selections.
Use the image and text below for more details on the Domain page fast filter functions.

There are multiple fast filters for different aspects of the Domain page (Subdomains, CVE, etc.).
The Domain page's fast filter items include:
- Subdomains
- CVE
- Product
- IP Address
- Country
- Services
A sort icon toggles from highest to lowest count and back for each fast filter option.
Checkboxes filter the table to the right, displaying all records that match the selected criteria.
A total count displays for each fast filter option.
#
Searching assets
Use the following steps to search assets.
Enter search criteria in the Search Assets field.
Select the asset type you want to search for from the asset buttons to the left of the table.
Press Enter to perform the search and see the results.
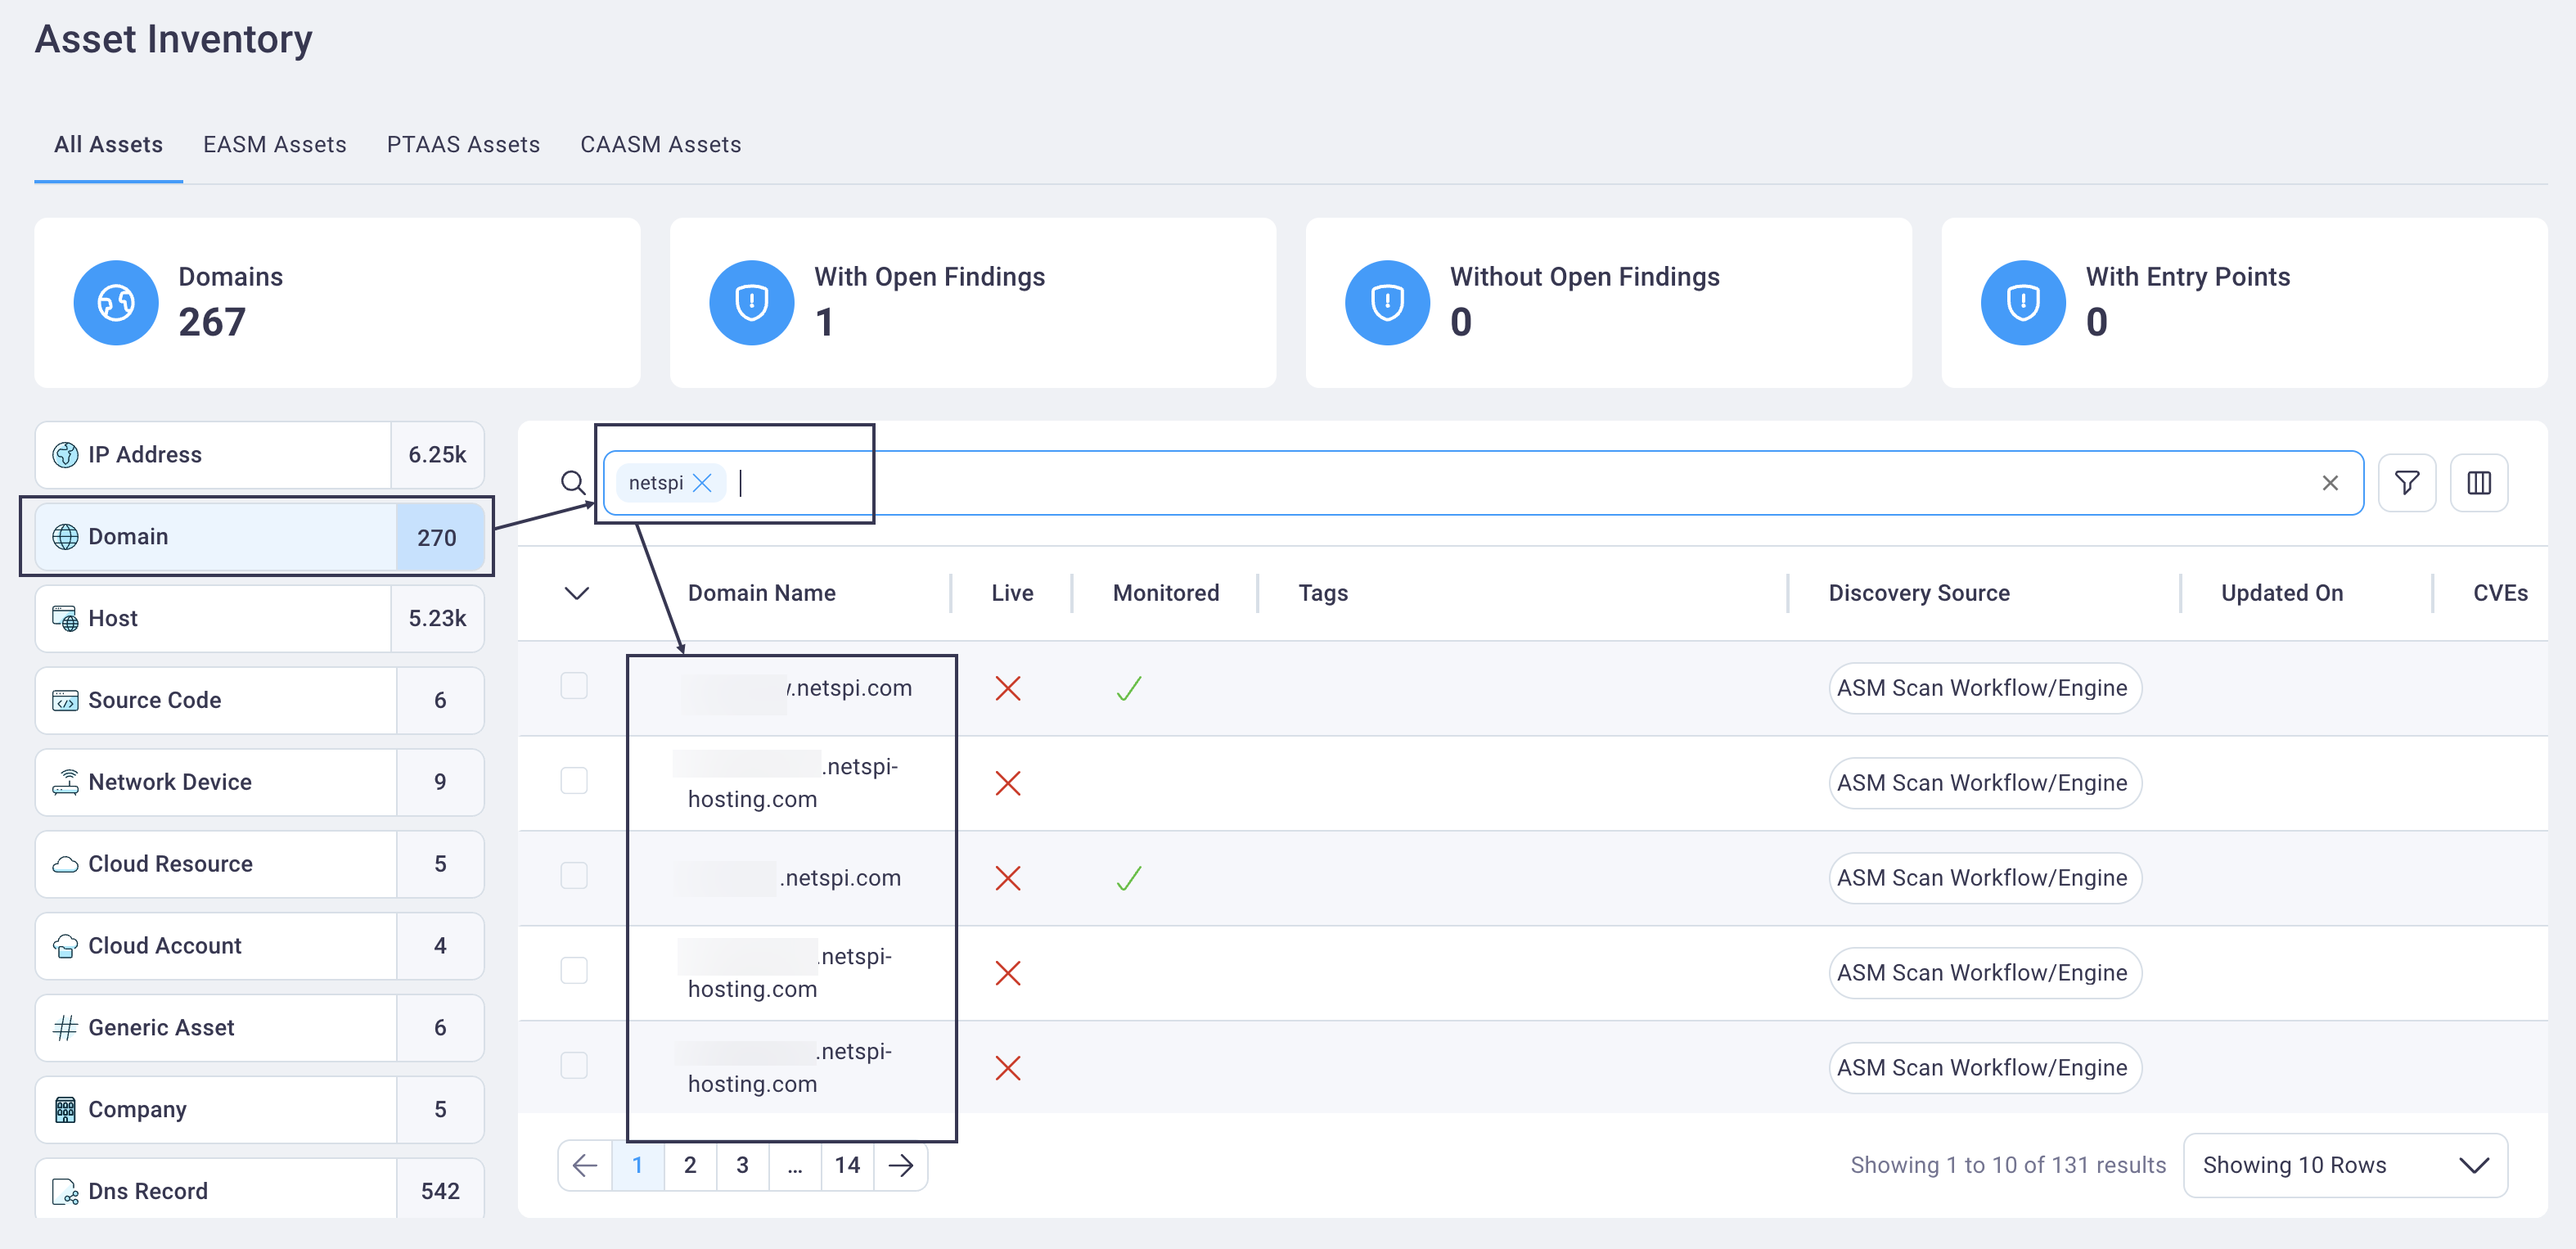
Select the 'X' next to your search text or at the far right of the search field to clear the results and return to the default table display.
See also Search, Sort, and Filter Tables
#
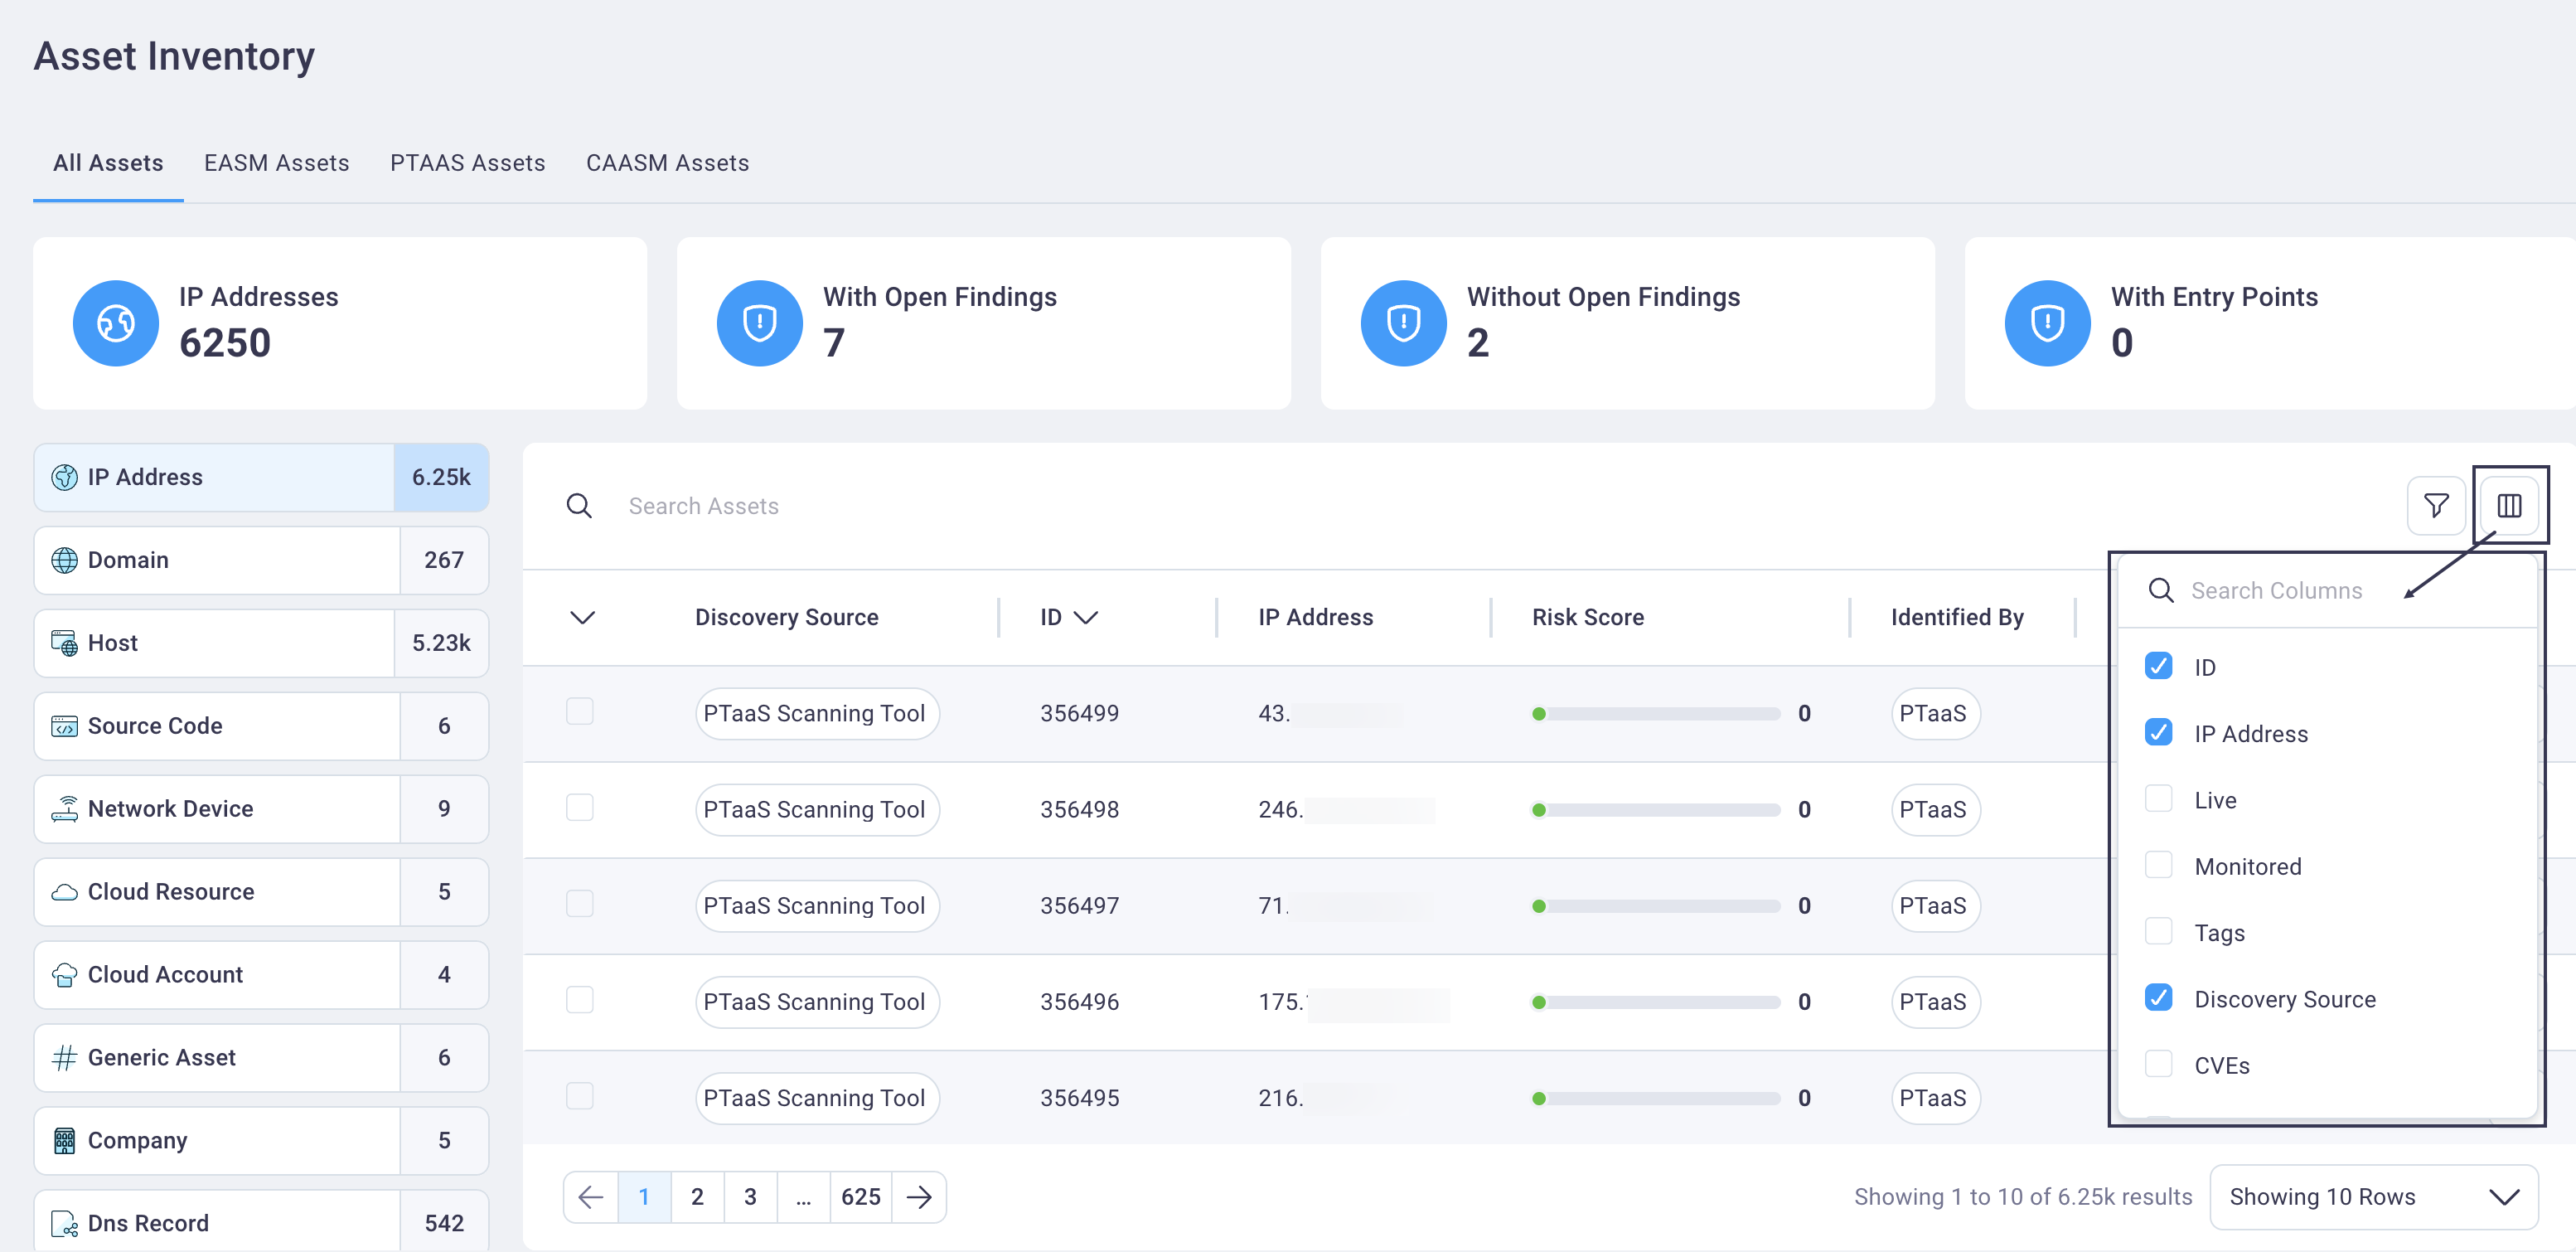
Configure the assets table display
Configure the columns that display in the Assets table by selecting the Table icon and selecting or clearing checkboxes for columns you want to display/hide.
See also Search, Sort, and Filter Tables
#
Sorting the assets table
Use the following steps to sort the findings table based on a single column.
Select any table column header to sort the Asset data by the selected column.
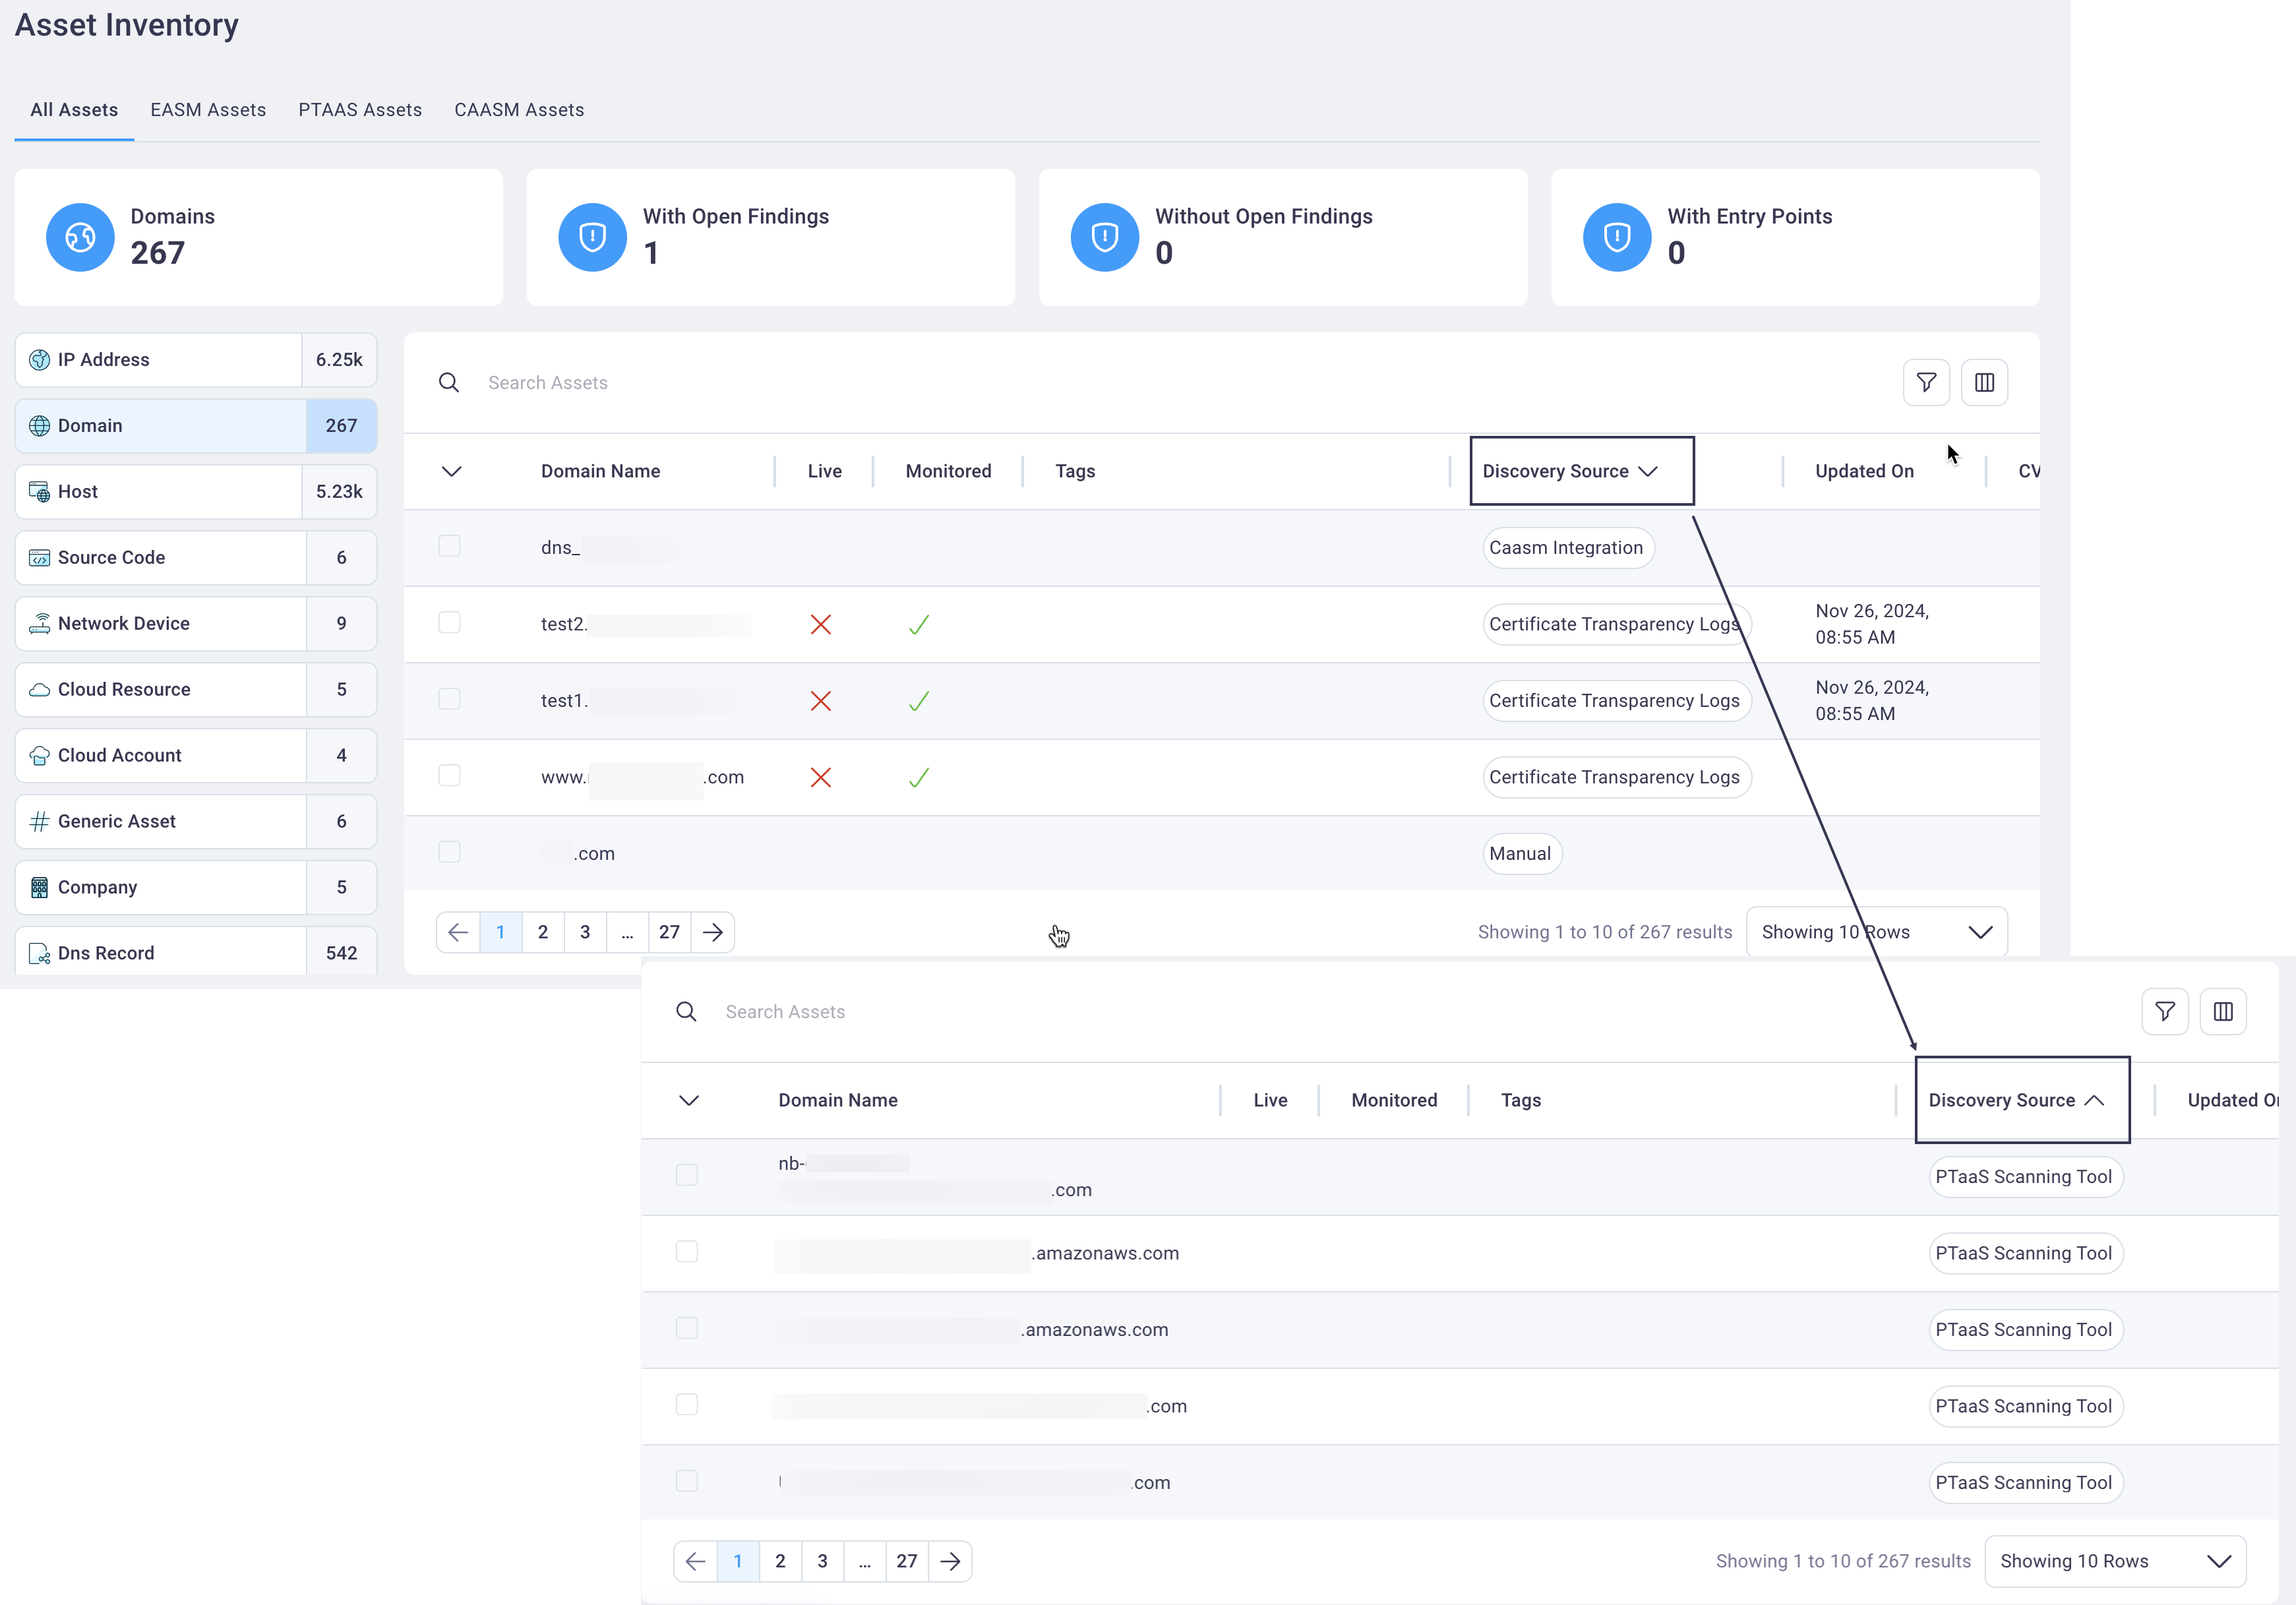
Select the table column header again to toggle the data for that column from ascending to descending and back again.
Tip
If you've customized your table such that the display is wider than the screen display, you may need to scroll right on the page to see all the table headings.
#
Asset Details page
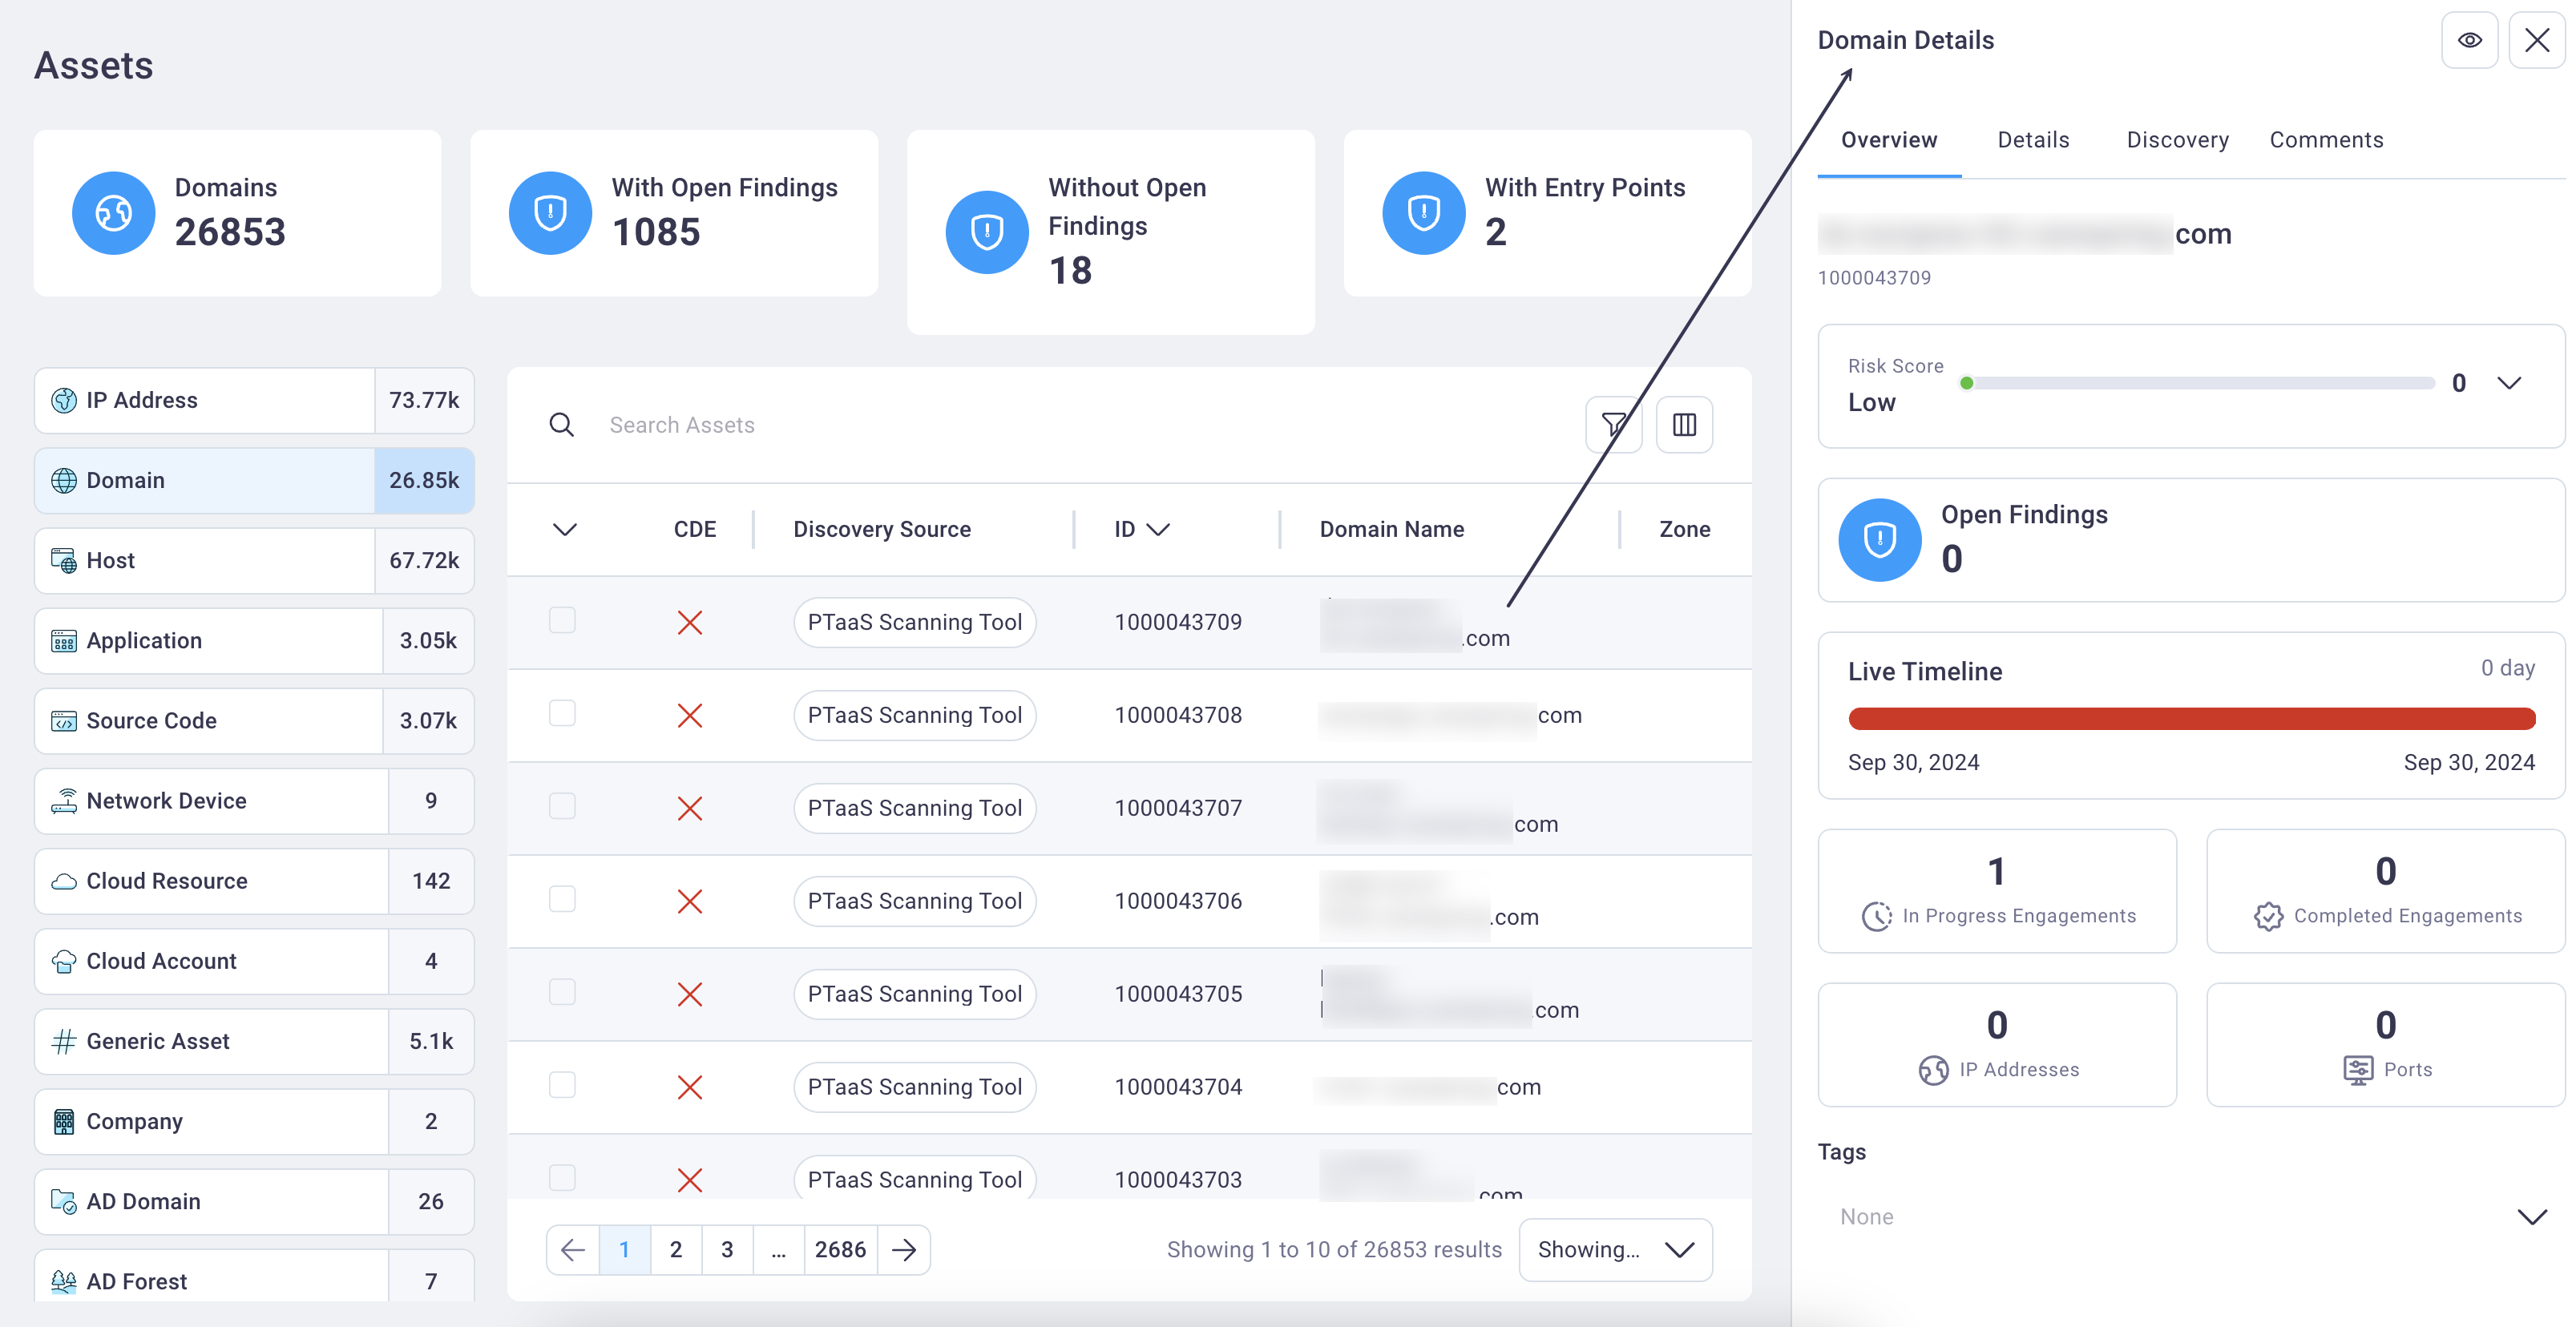
Use the steps below to display the details page for any asset in the Asset table.
Select the Details icon
 at the far right of any row to display the
Asset details page for the selected asset in a full page display with the Overview tab in focus.
at the far right of any row to display the
Asset details page for the selected asset in a full page display with the Overview tab in focus.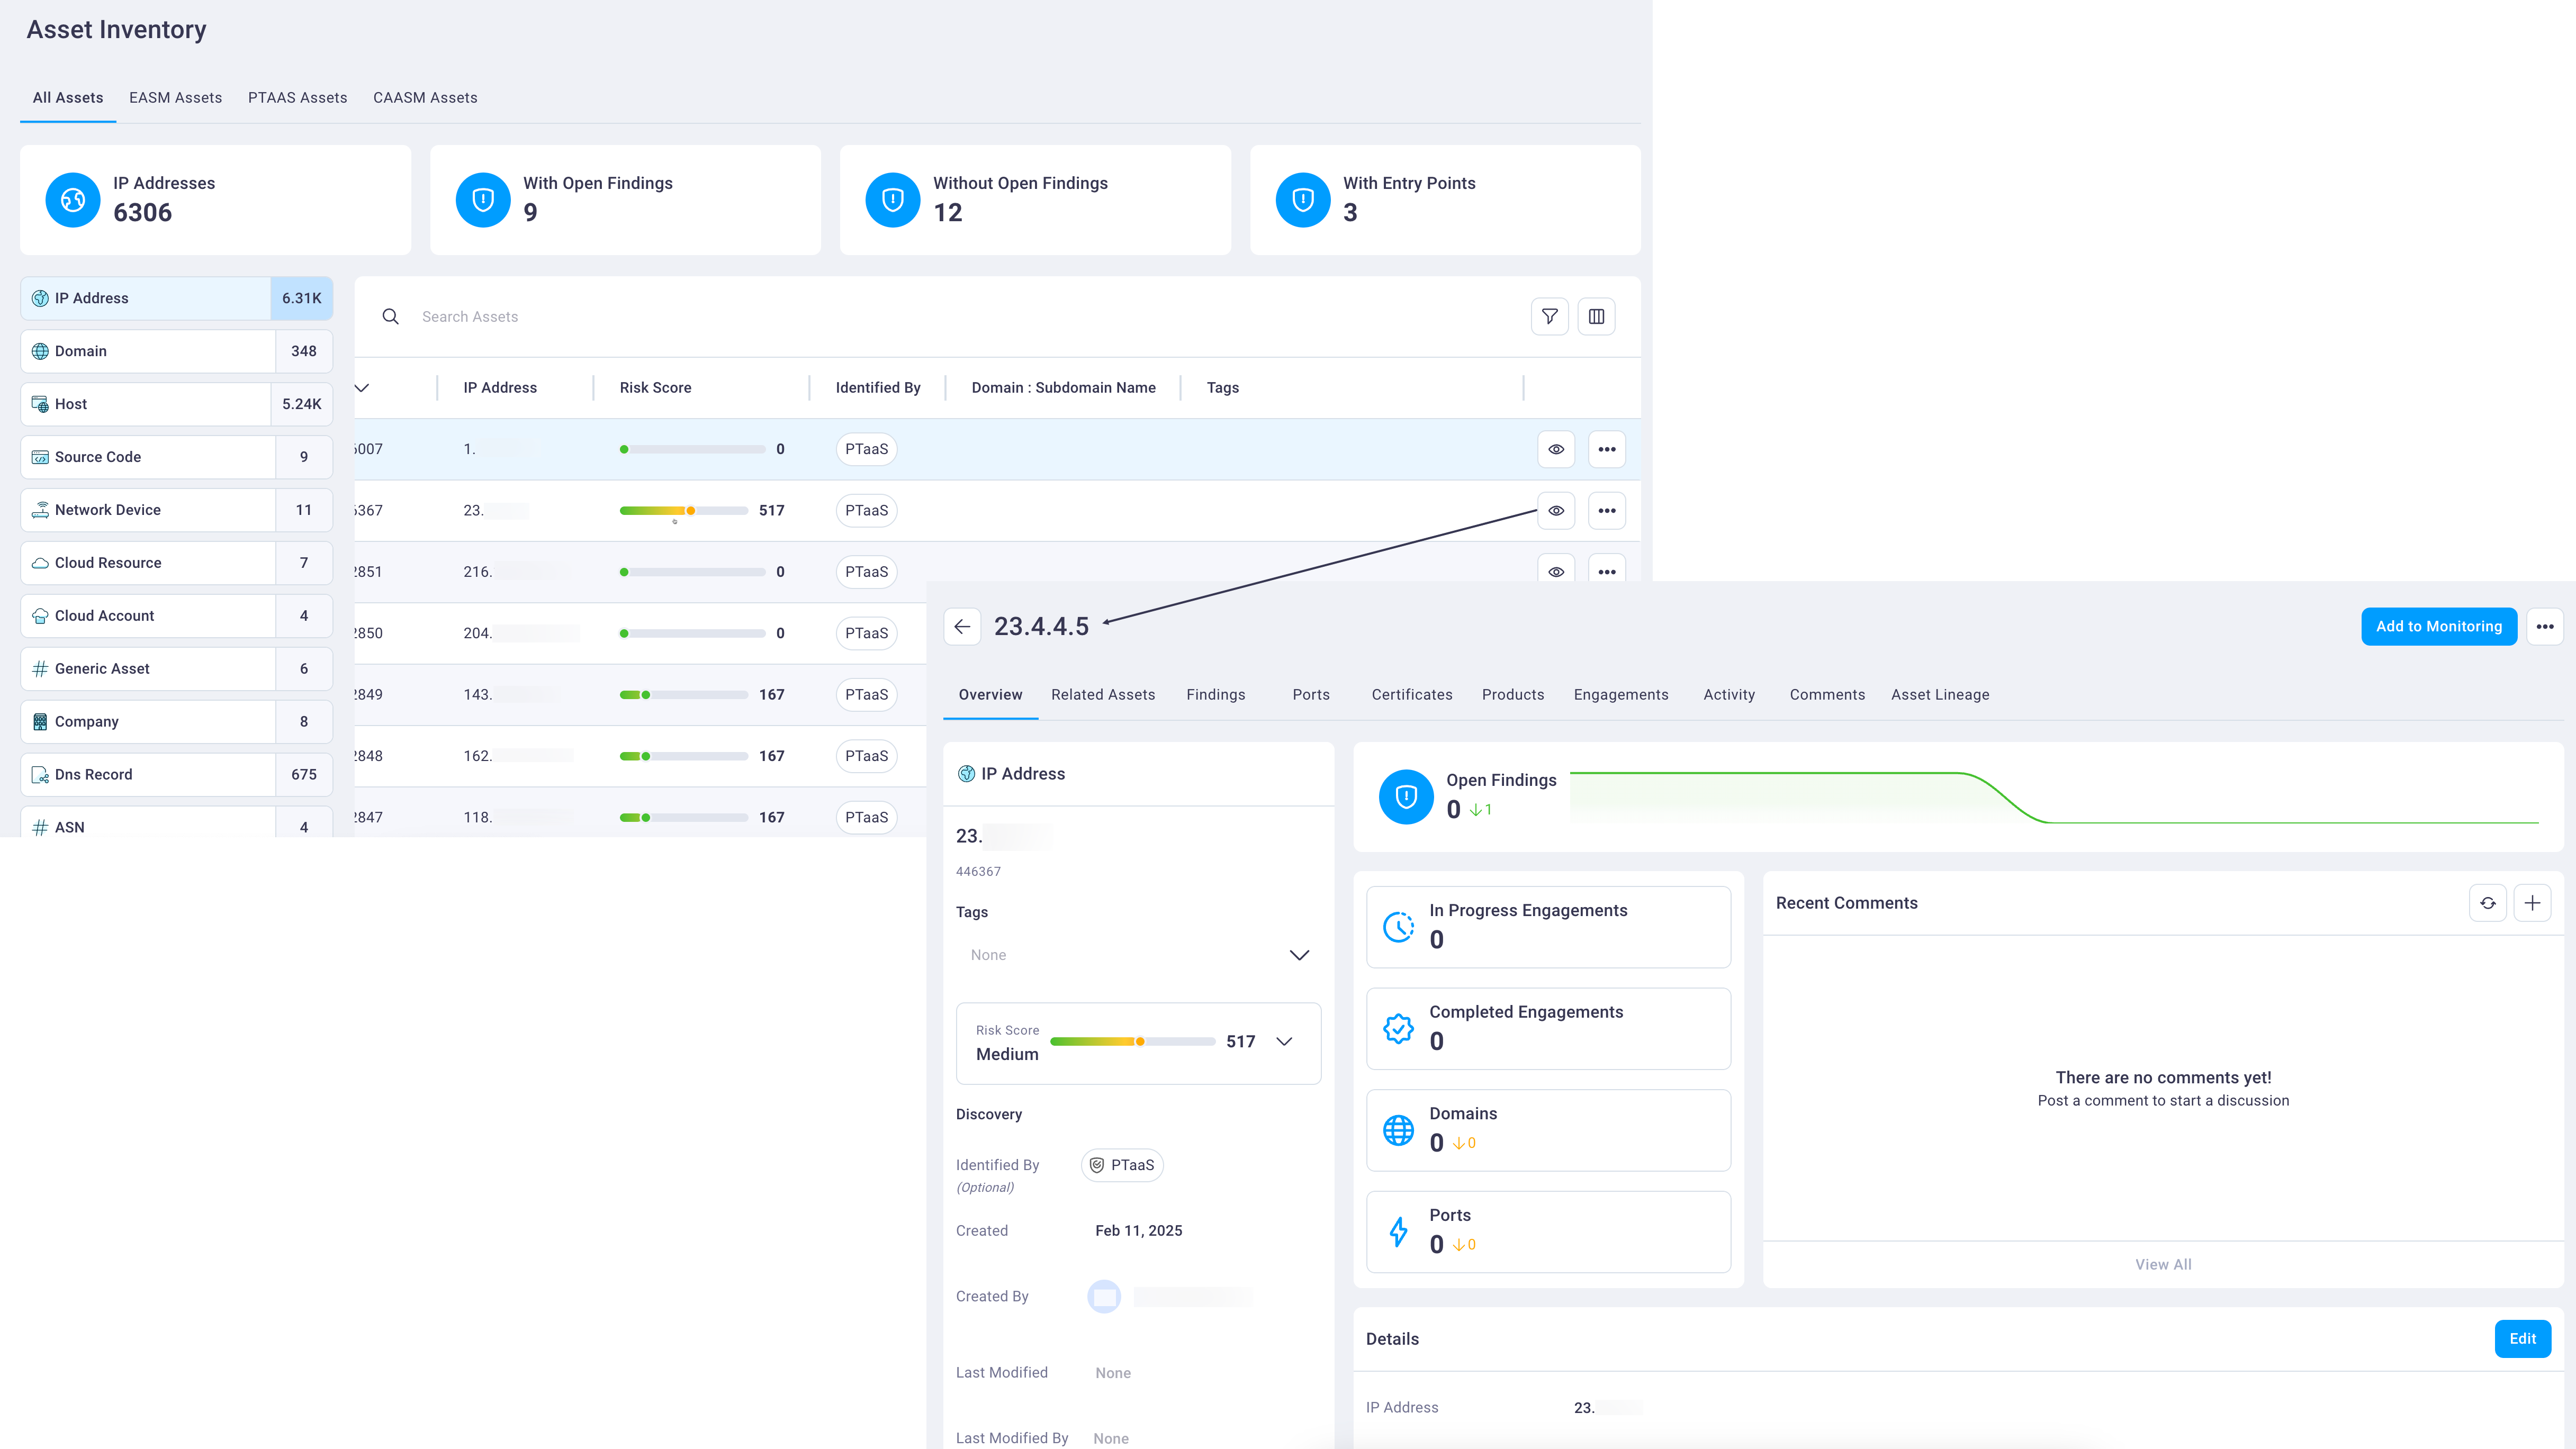
Note: If you select anywhere in an asset table row, a condensed view of that asset's details displays in a side panel to the right. You can also select the Details icon here to move from the condensed view to the full page view as displayed above.
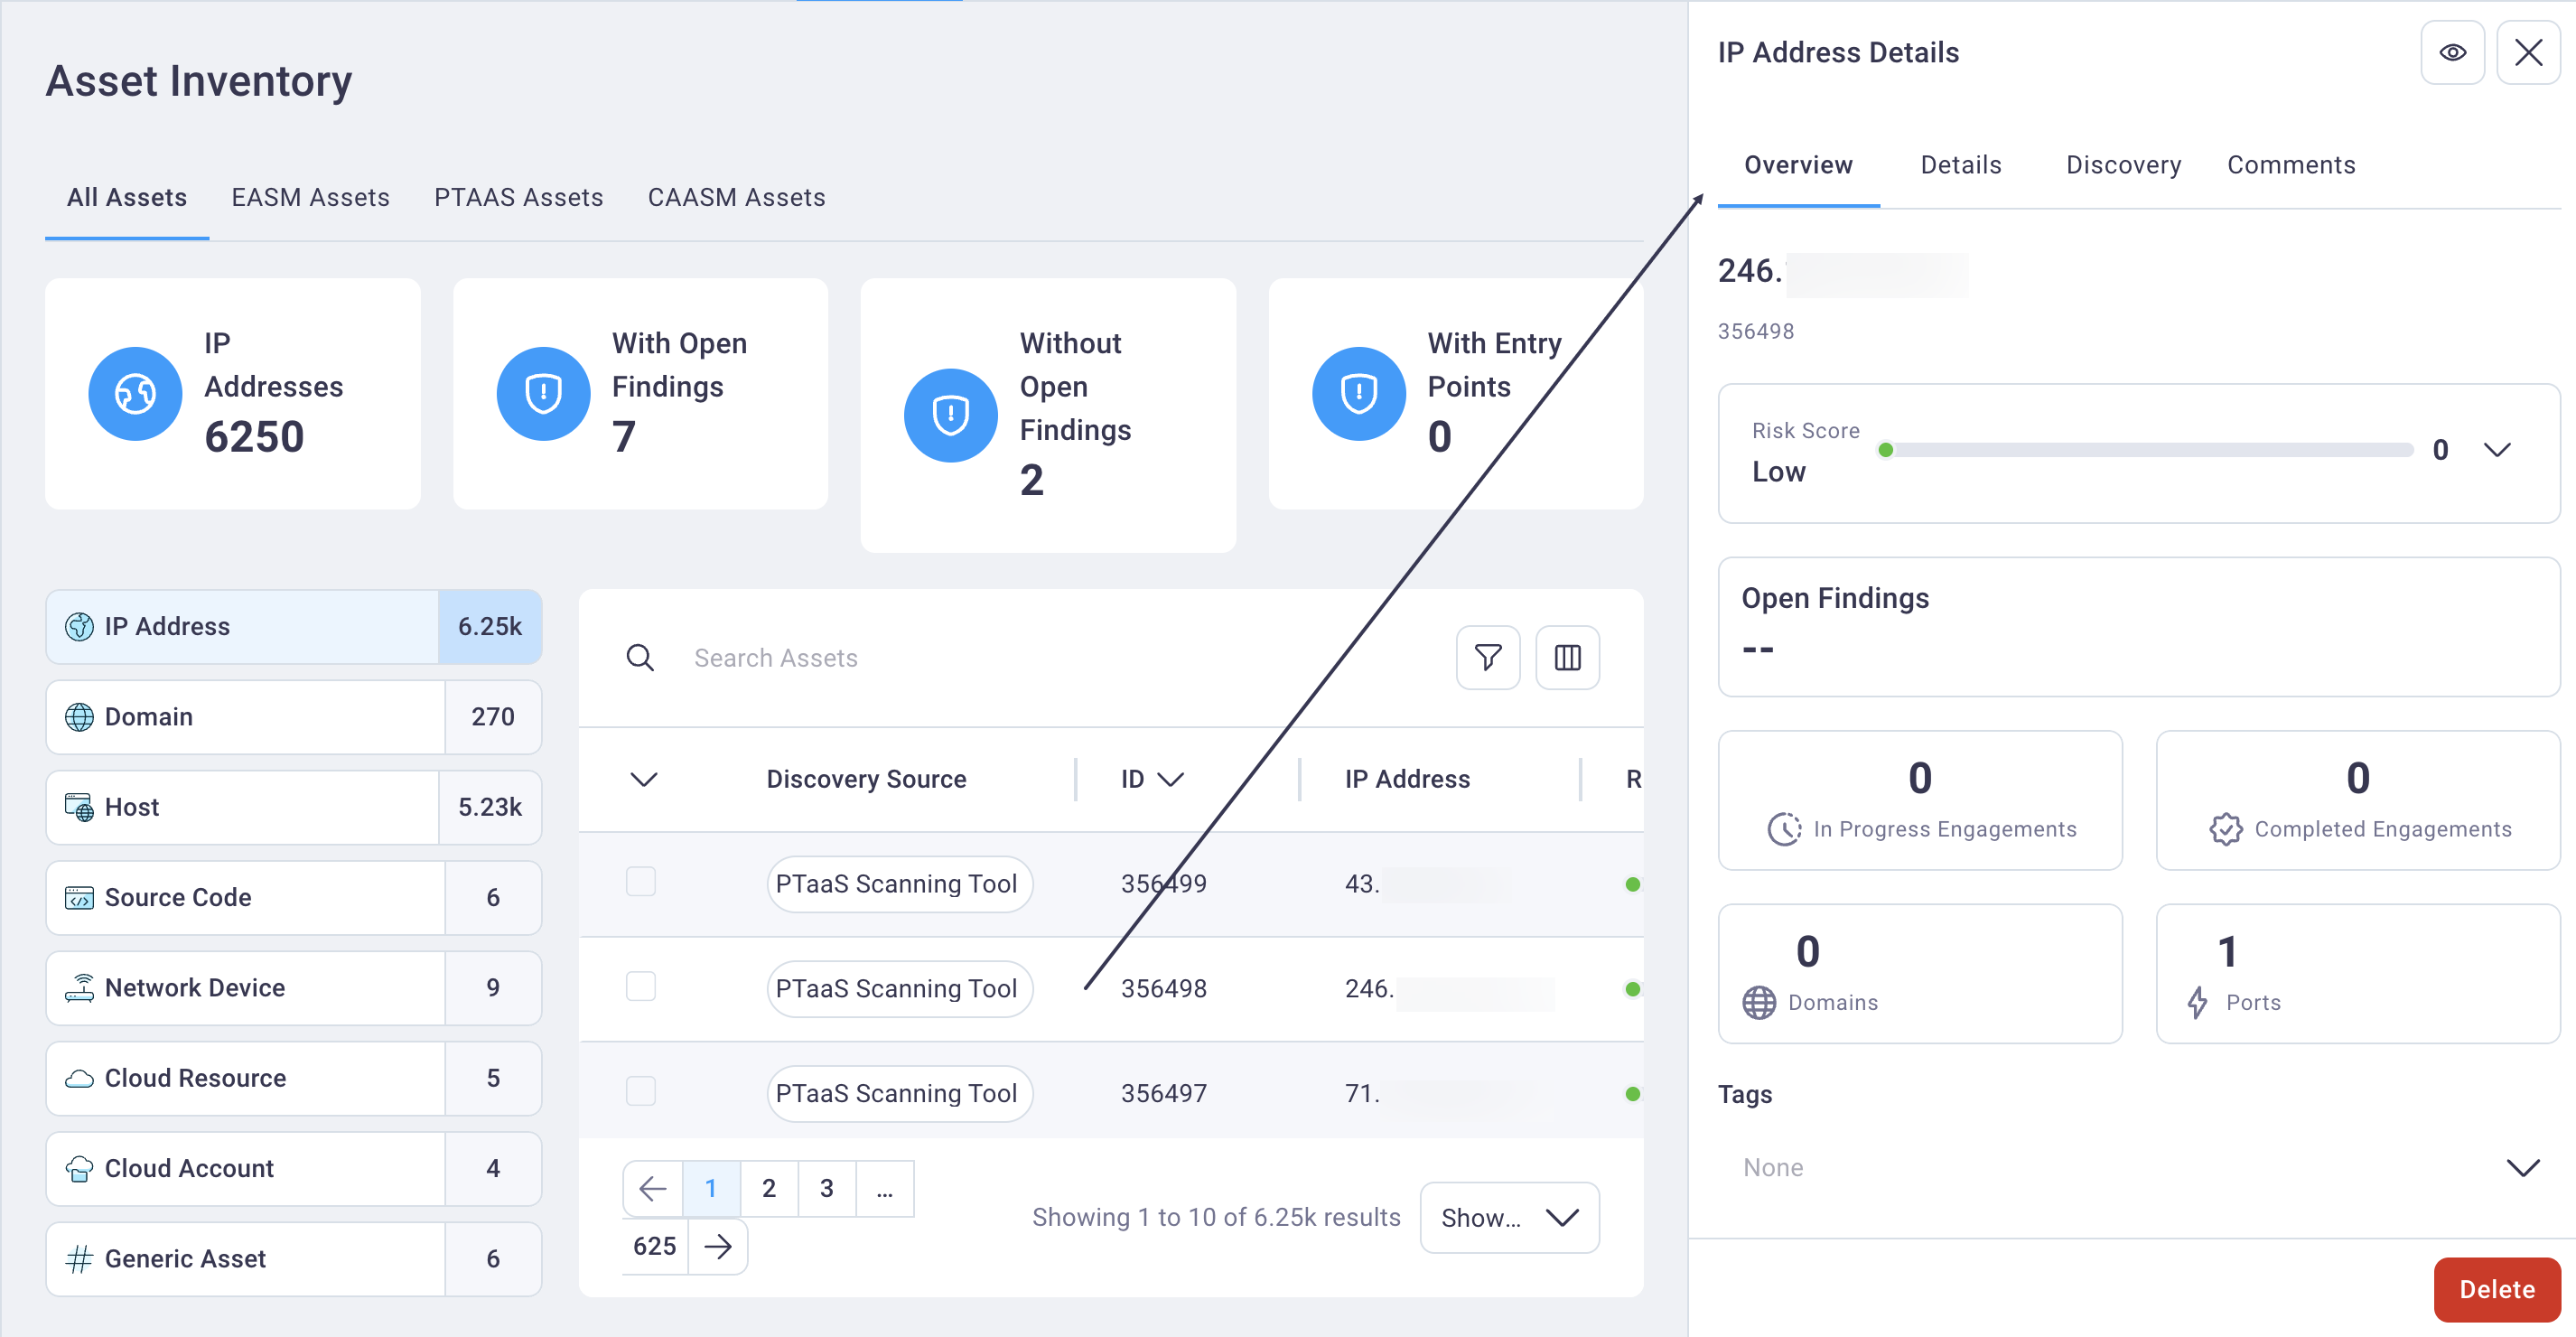
The top of the Asset details page displays the asset’s name followed by tabbed menu links beneath it with the Overview tab in focus.
Use the sections below to help you navigate the Asset details page's tabs.
#
Tabs on the Asset Details page
This section provides information on each of tabs in the Asset details view for any asset. The default initial display when select the Asset details icon is the Overview tab with the selected asset's category/name displayed as a view-only title at the top of the page.
Note that some modules include some fields and tabs that are unique to that module and not the others. For example, EASM-discovered assets include a Live Timeline display on the overview tab. PTaaS-discovered assets include an Engagement's tab and CAASM-discovered assets include an Integrations tab.
#
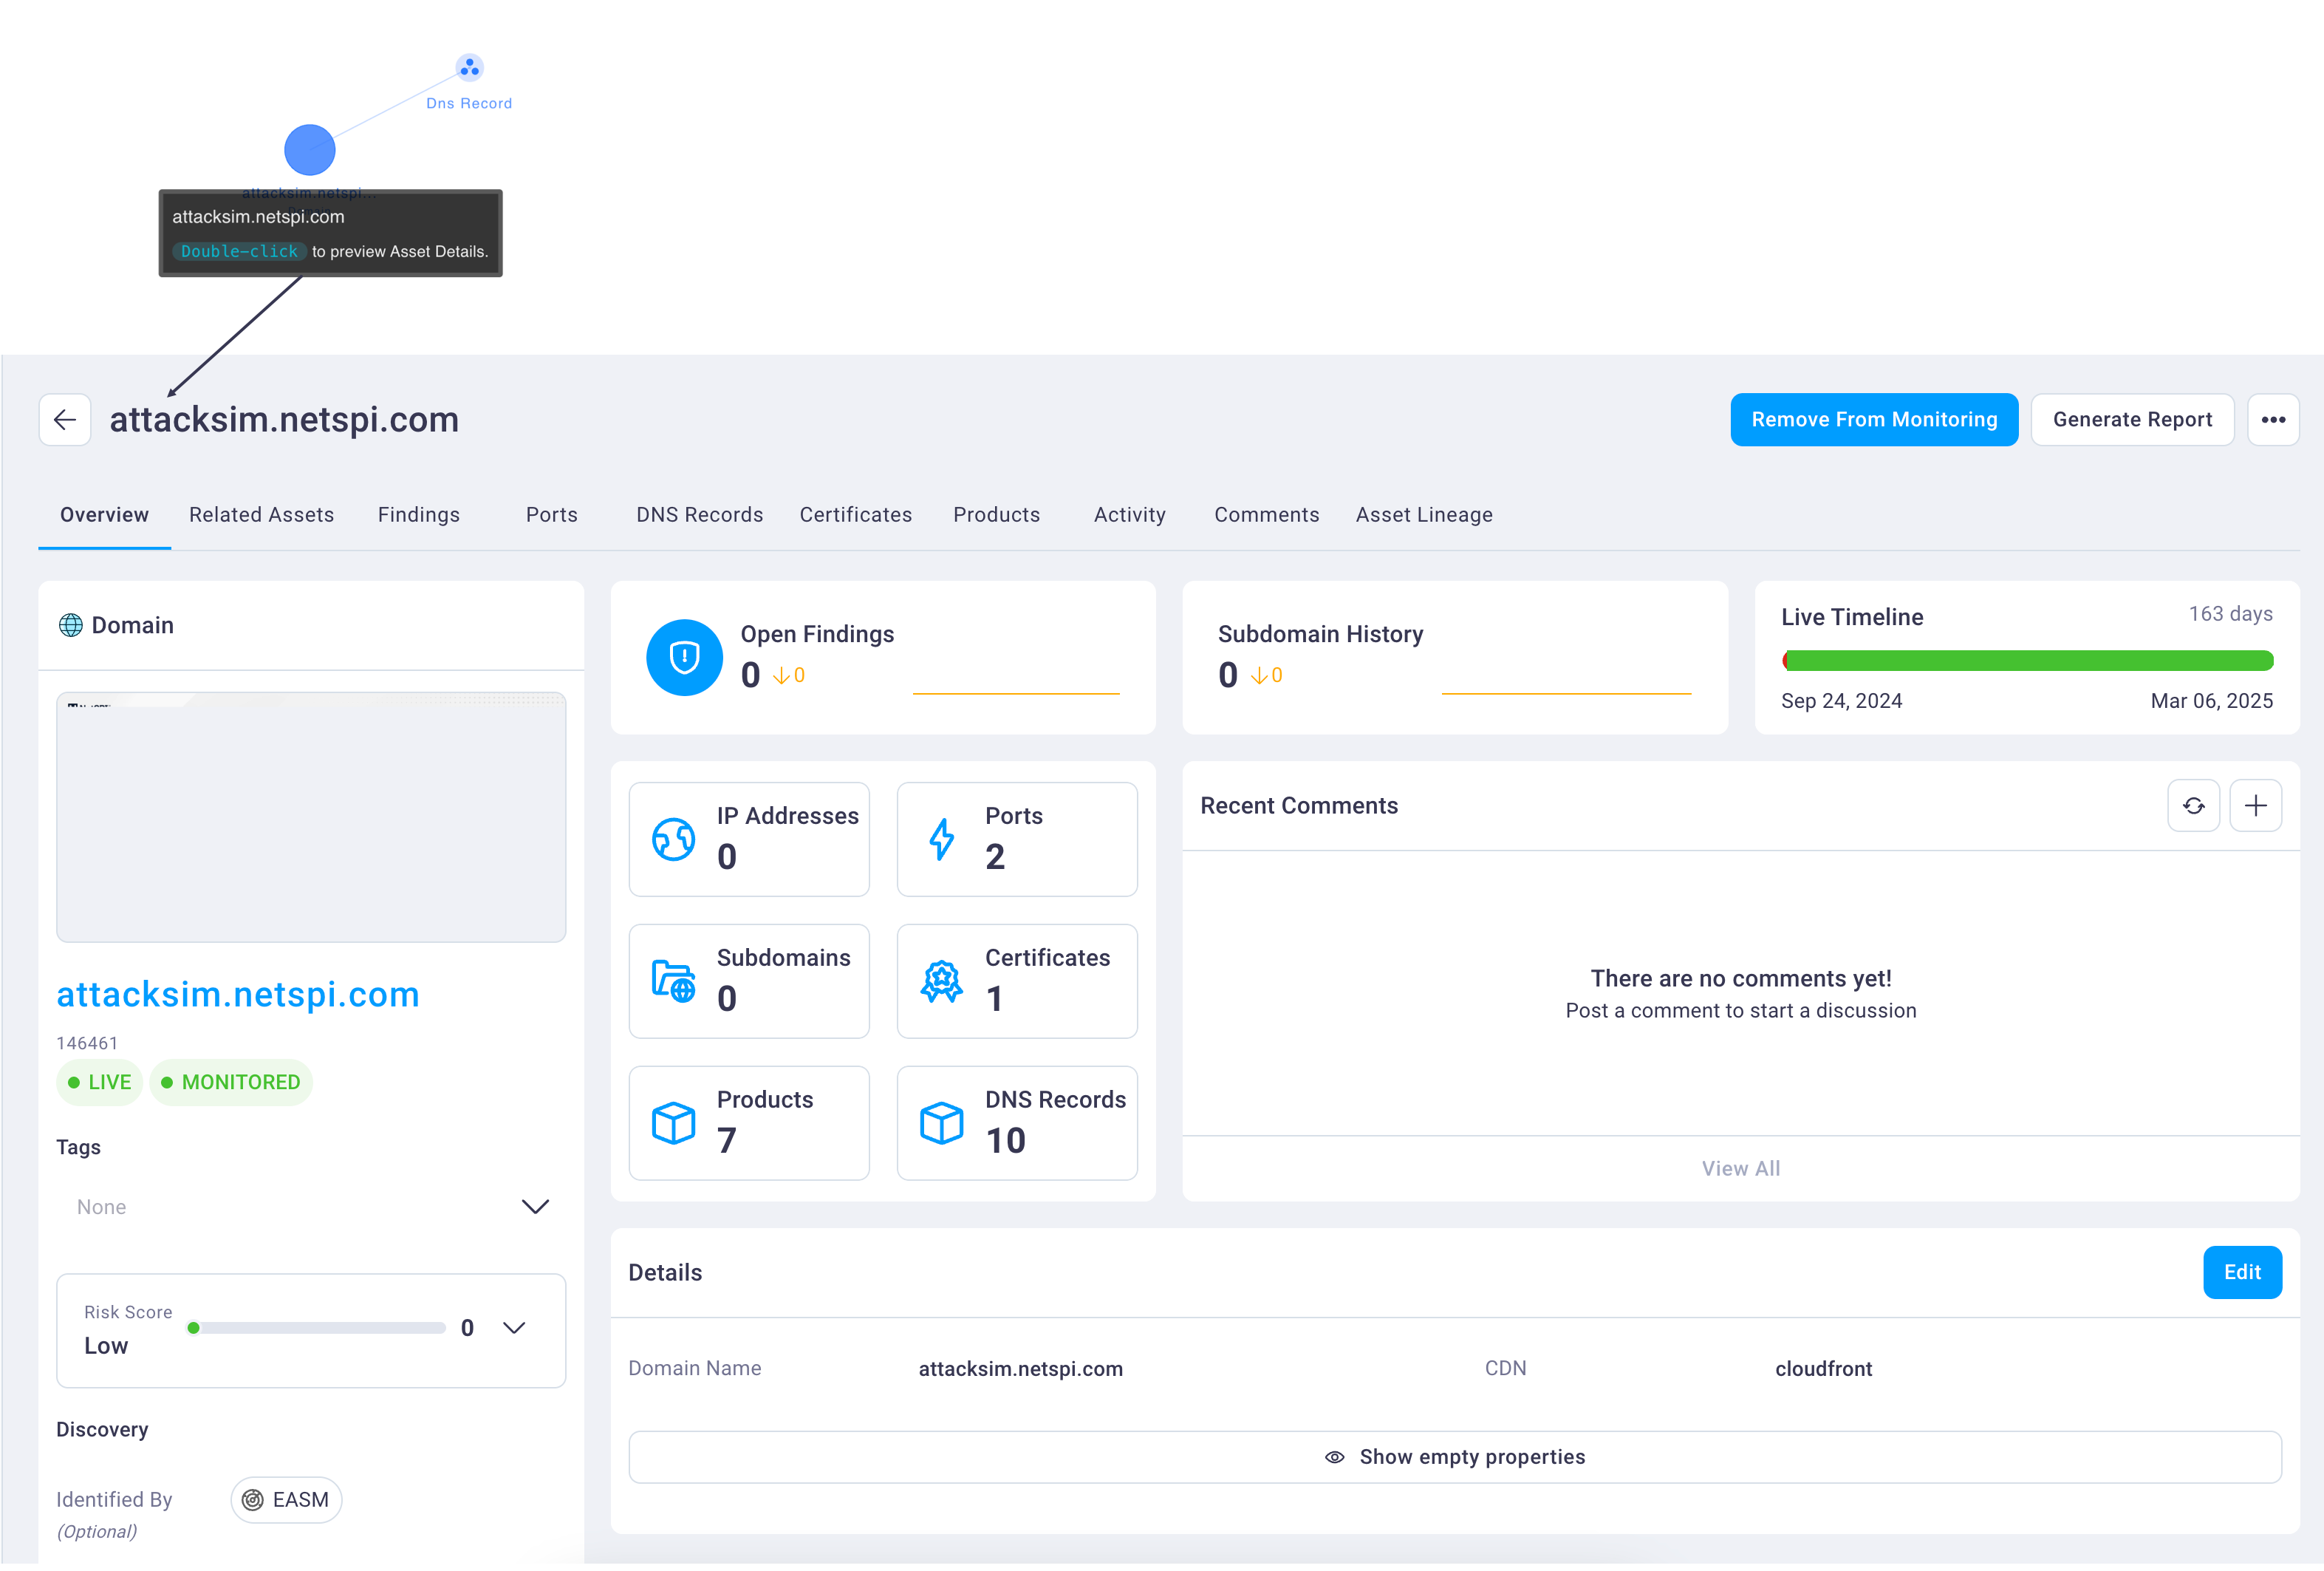
Overview tab
The Overview tab displays high-level information about the selected asset and includes links that allow you to examine items in more detail, such as selecting the Ports card, which puts the Ports tab in focus where you'll see information such as protocol, CVEs, and IP address, etc.

Use the image above and the corresponding table with callouts below for more details on the Overview tab's functions.
#
Related Assets tab
The Related Assets tab displays a table of other assets related to the one selected.

#
Findings tab
The Findings tab displays a table of findings associated with the selected asset.

#
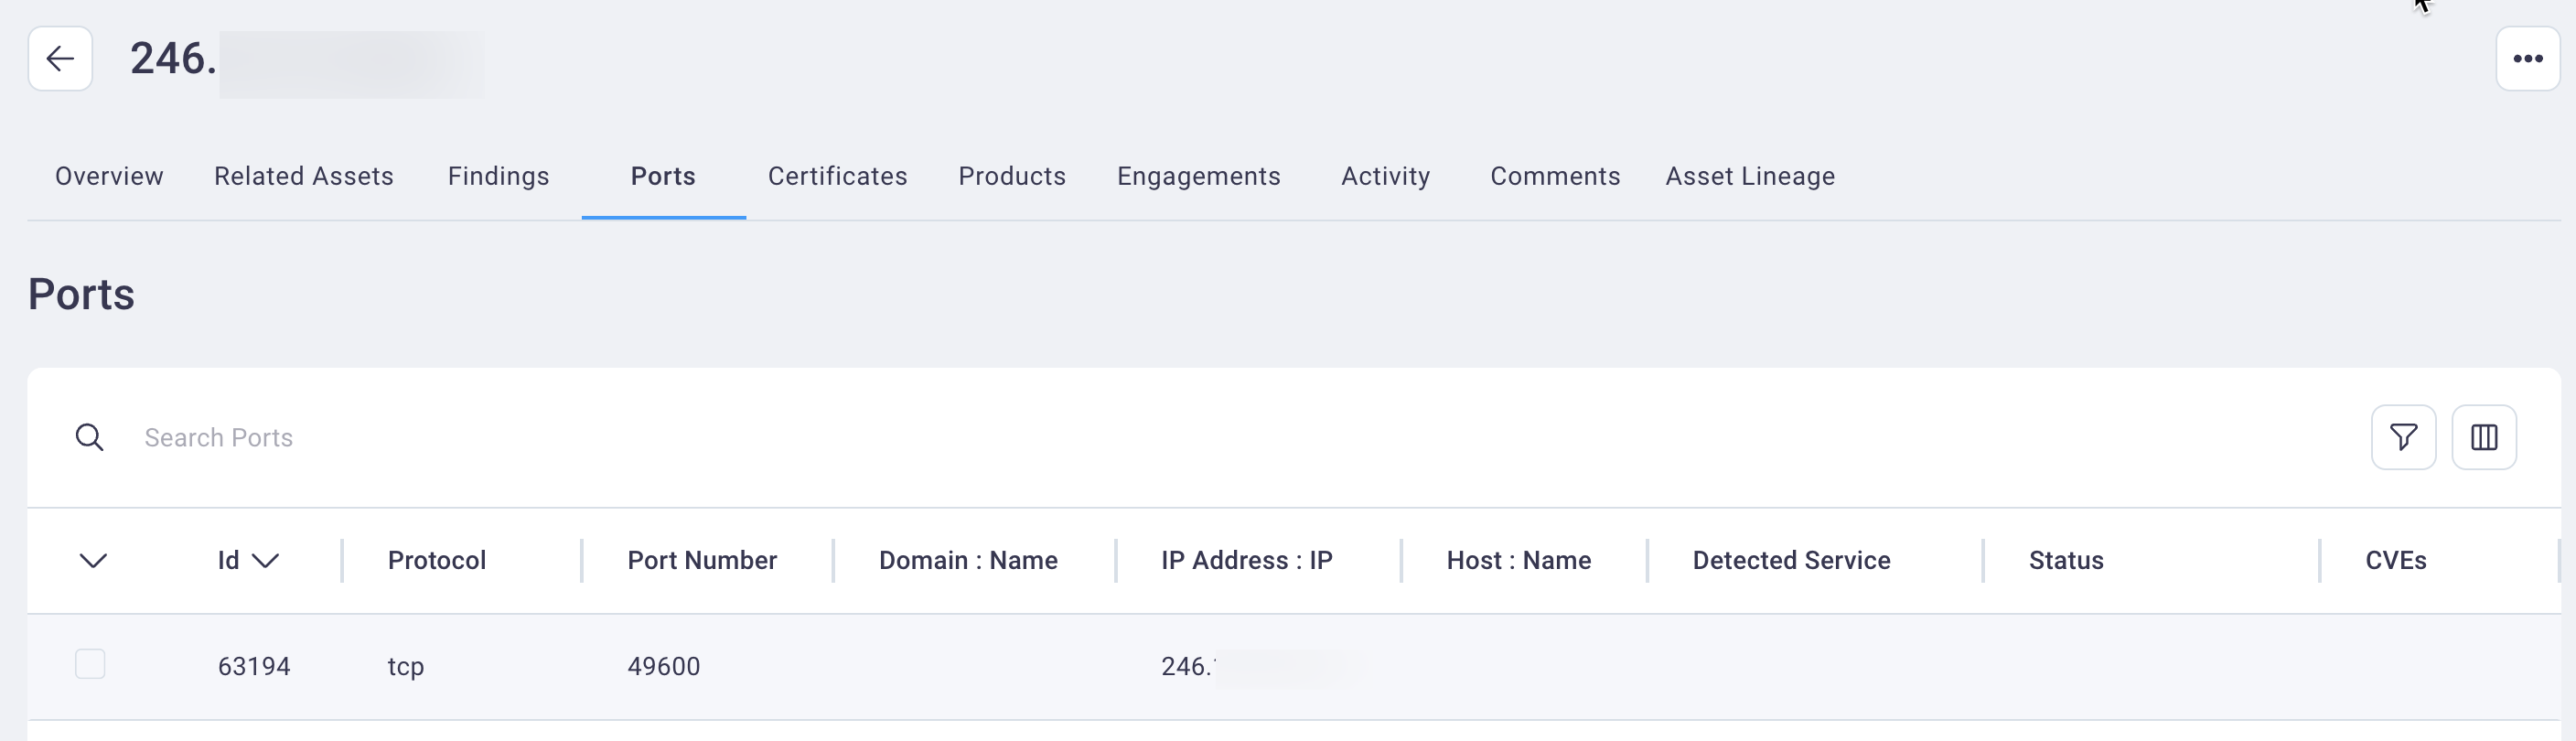
Ports tab
The Port tab displays information about ports related to the selected asset.
#
Certificates tab
The Certificates tab displays a table of certificates related to the selected asset.

#
Products tab
The Products tab displays a table of products related to the selected asset.

#
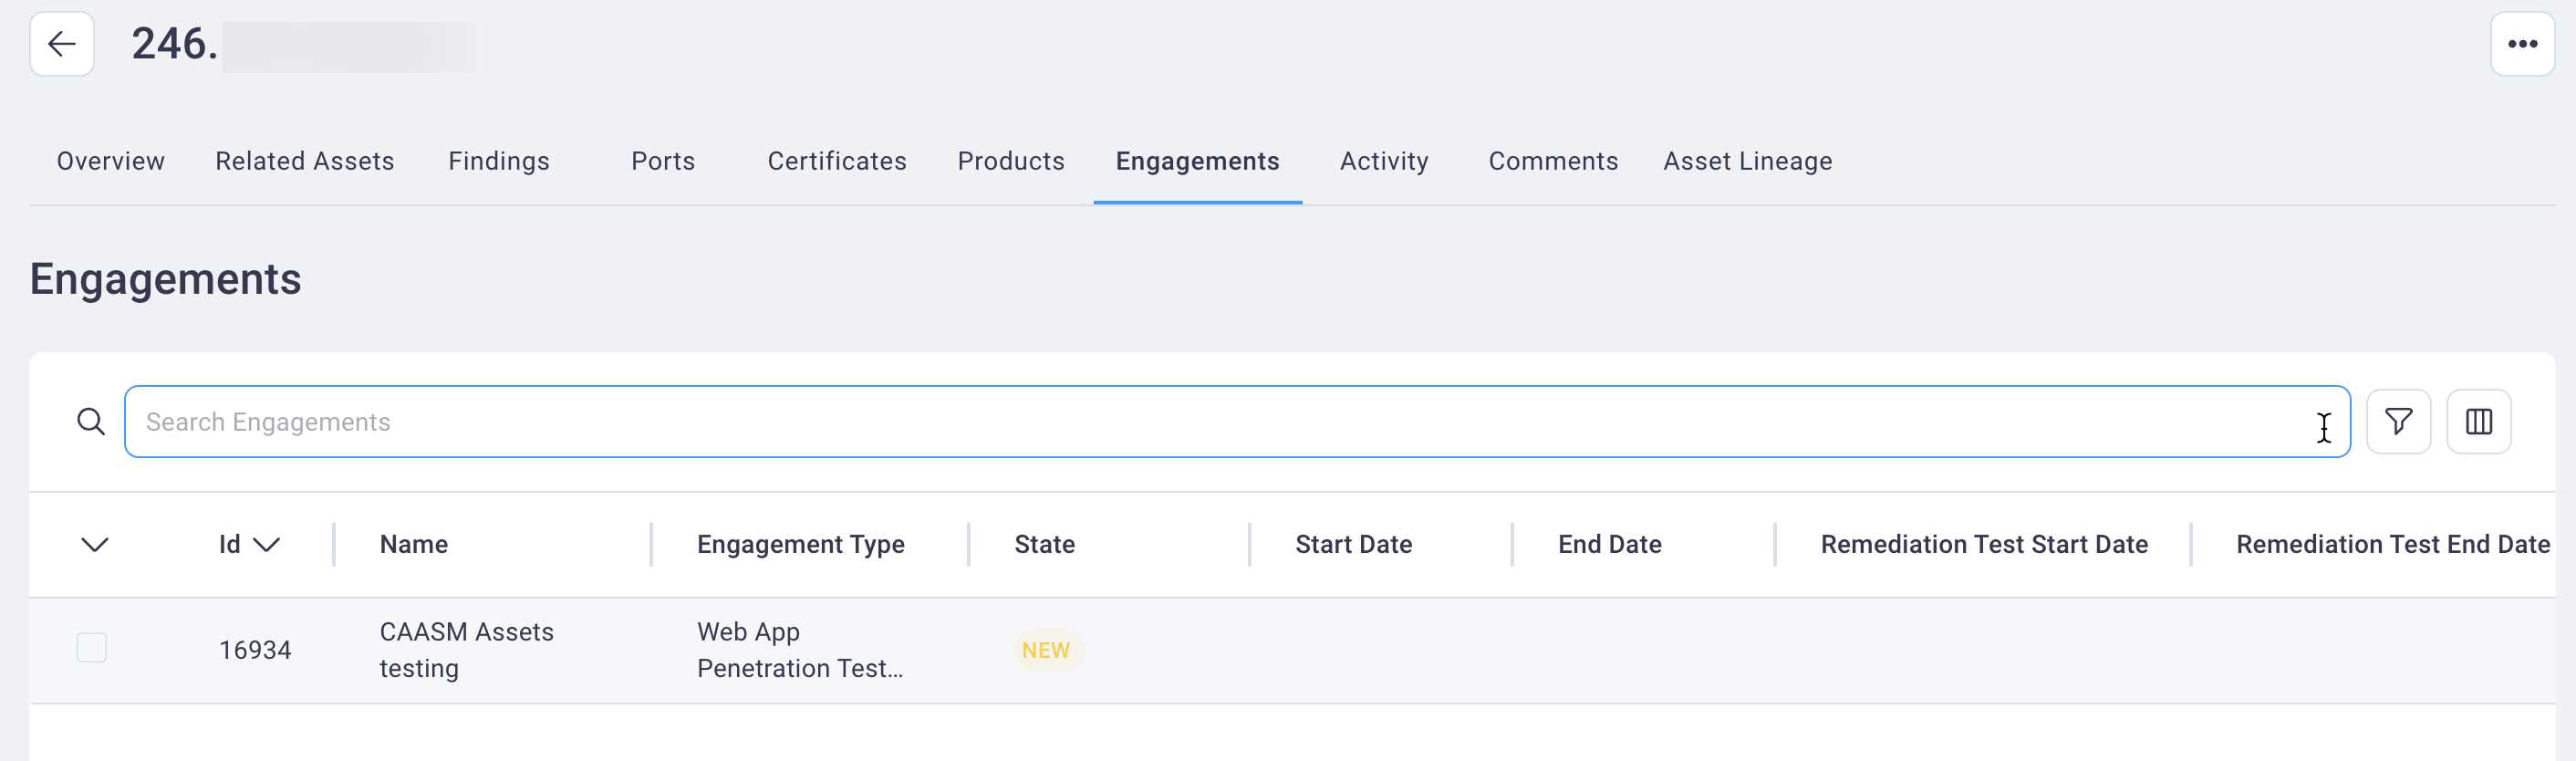
Engagements tab
The Engagements tab appears for PTaaS-discovered assets and displays all or your organization’s engagements that contain the selected asset. Selecting a row will take you to the Engagement Details page for the selected engagement.
#
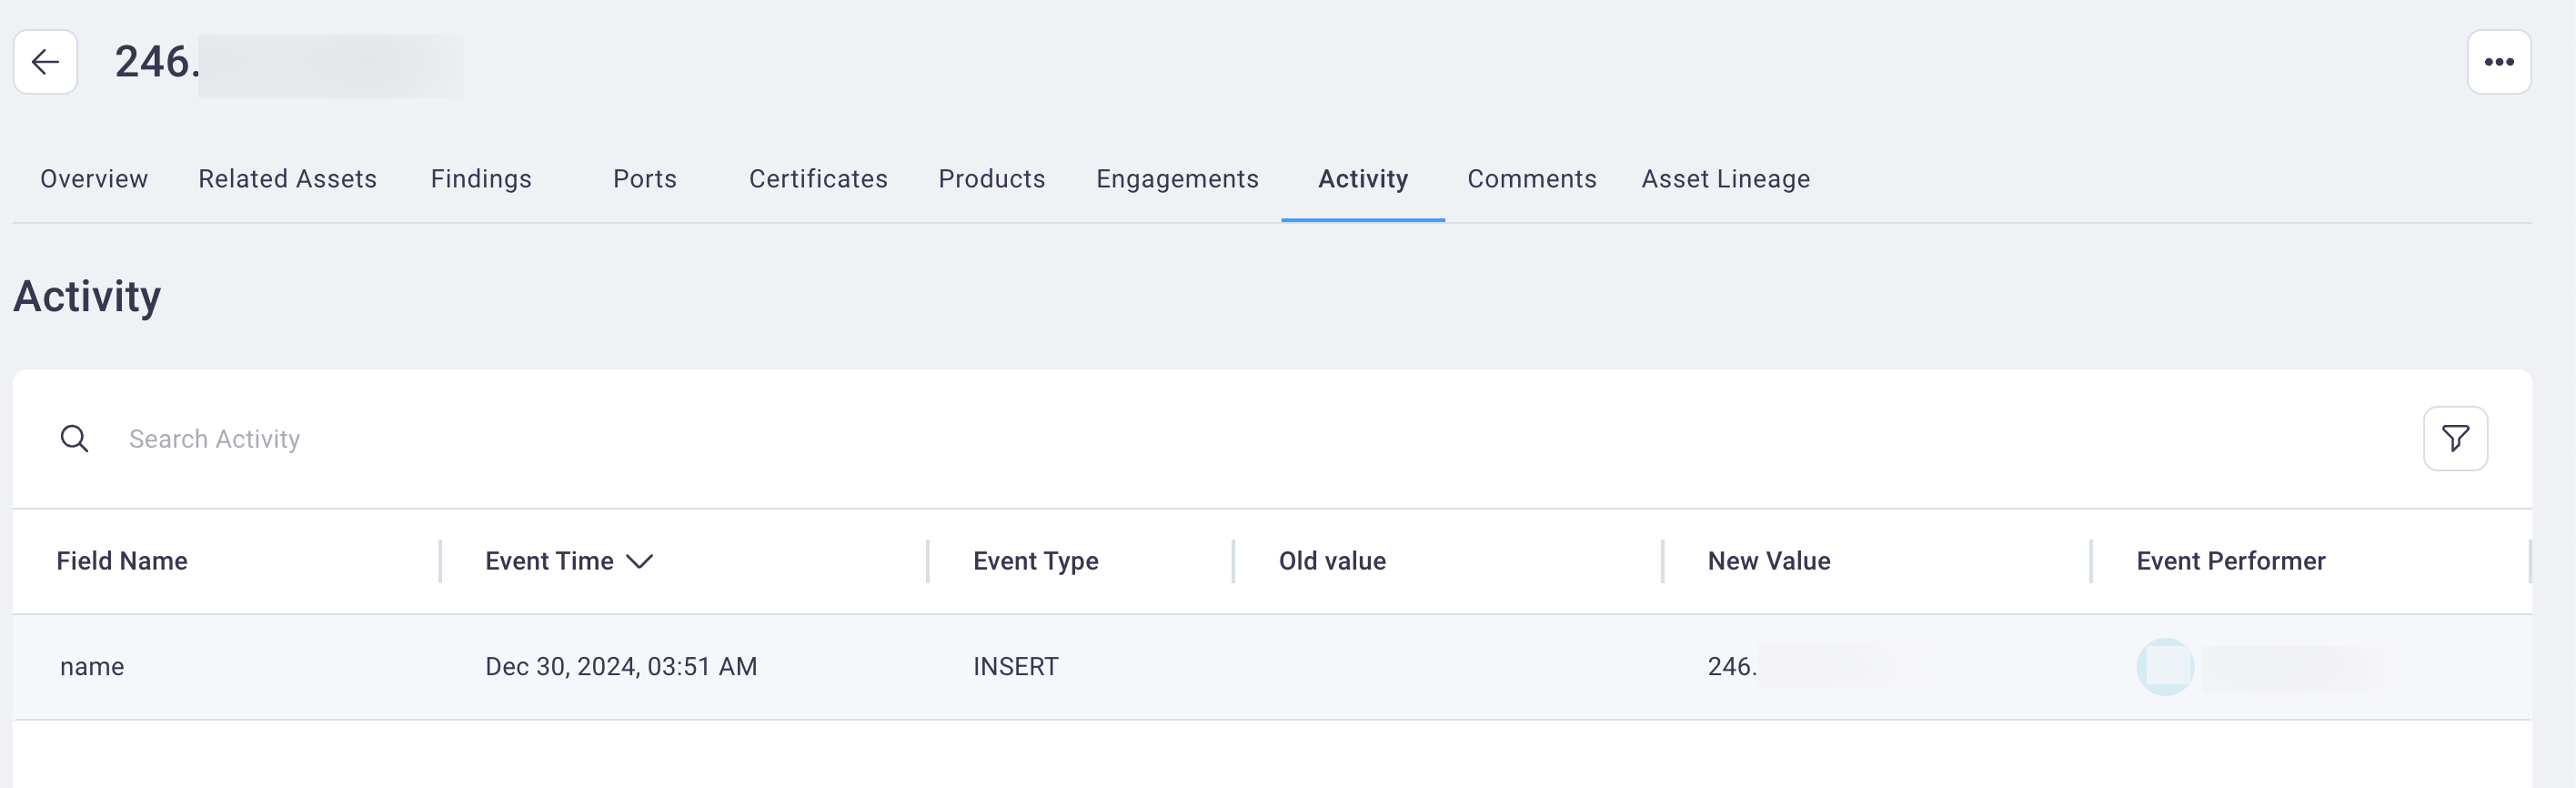
Activity tab
The Activity tab displays a historical log of activity related to the asset.
#
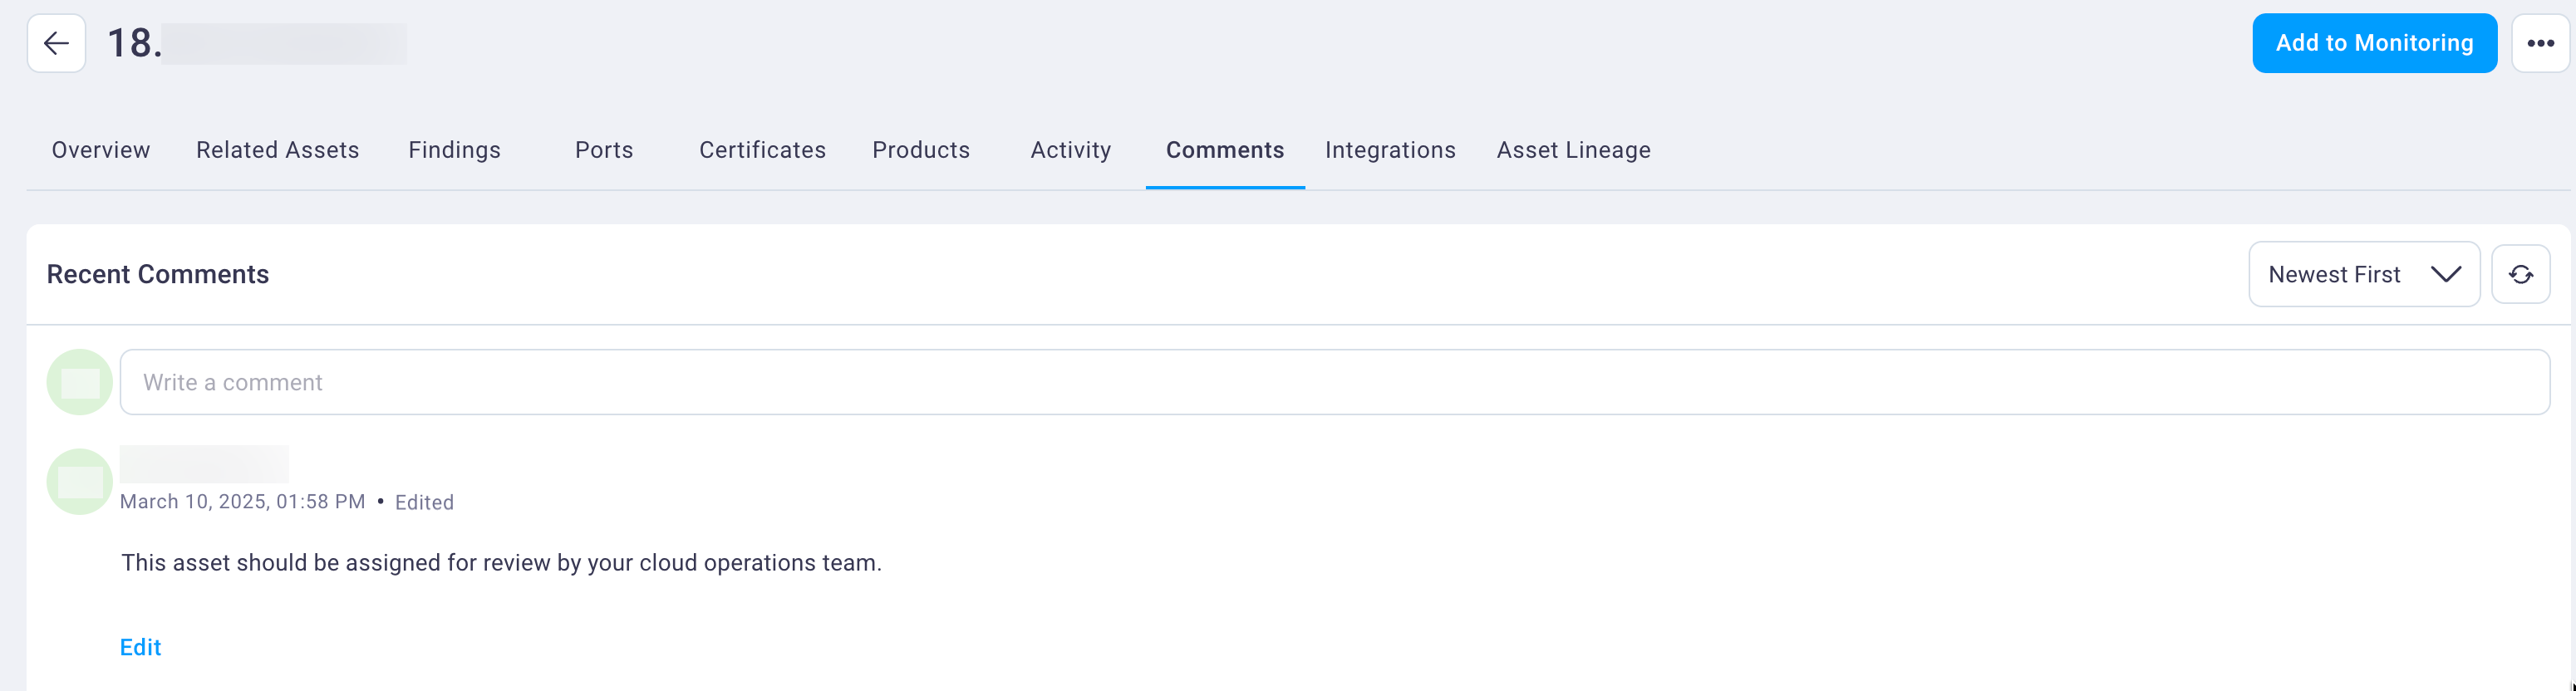
Comments tab
The Comments tab displays a table of comments made by NetSPI staff or your organization's NetSPI Platform users for the asset.
#
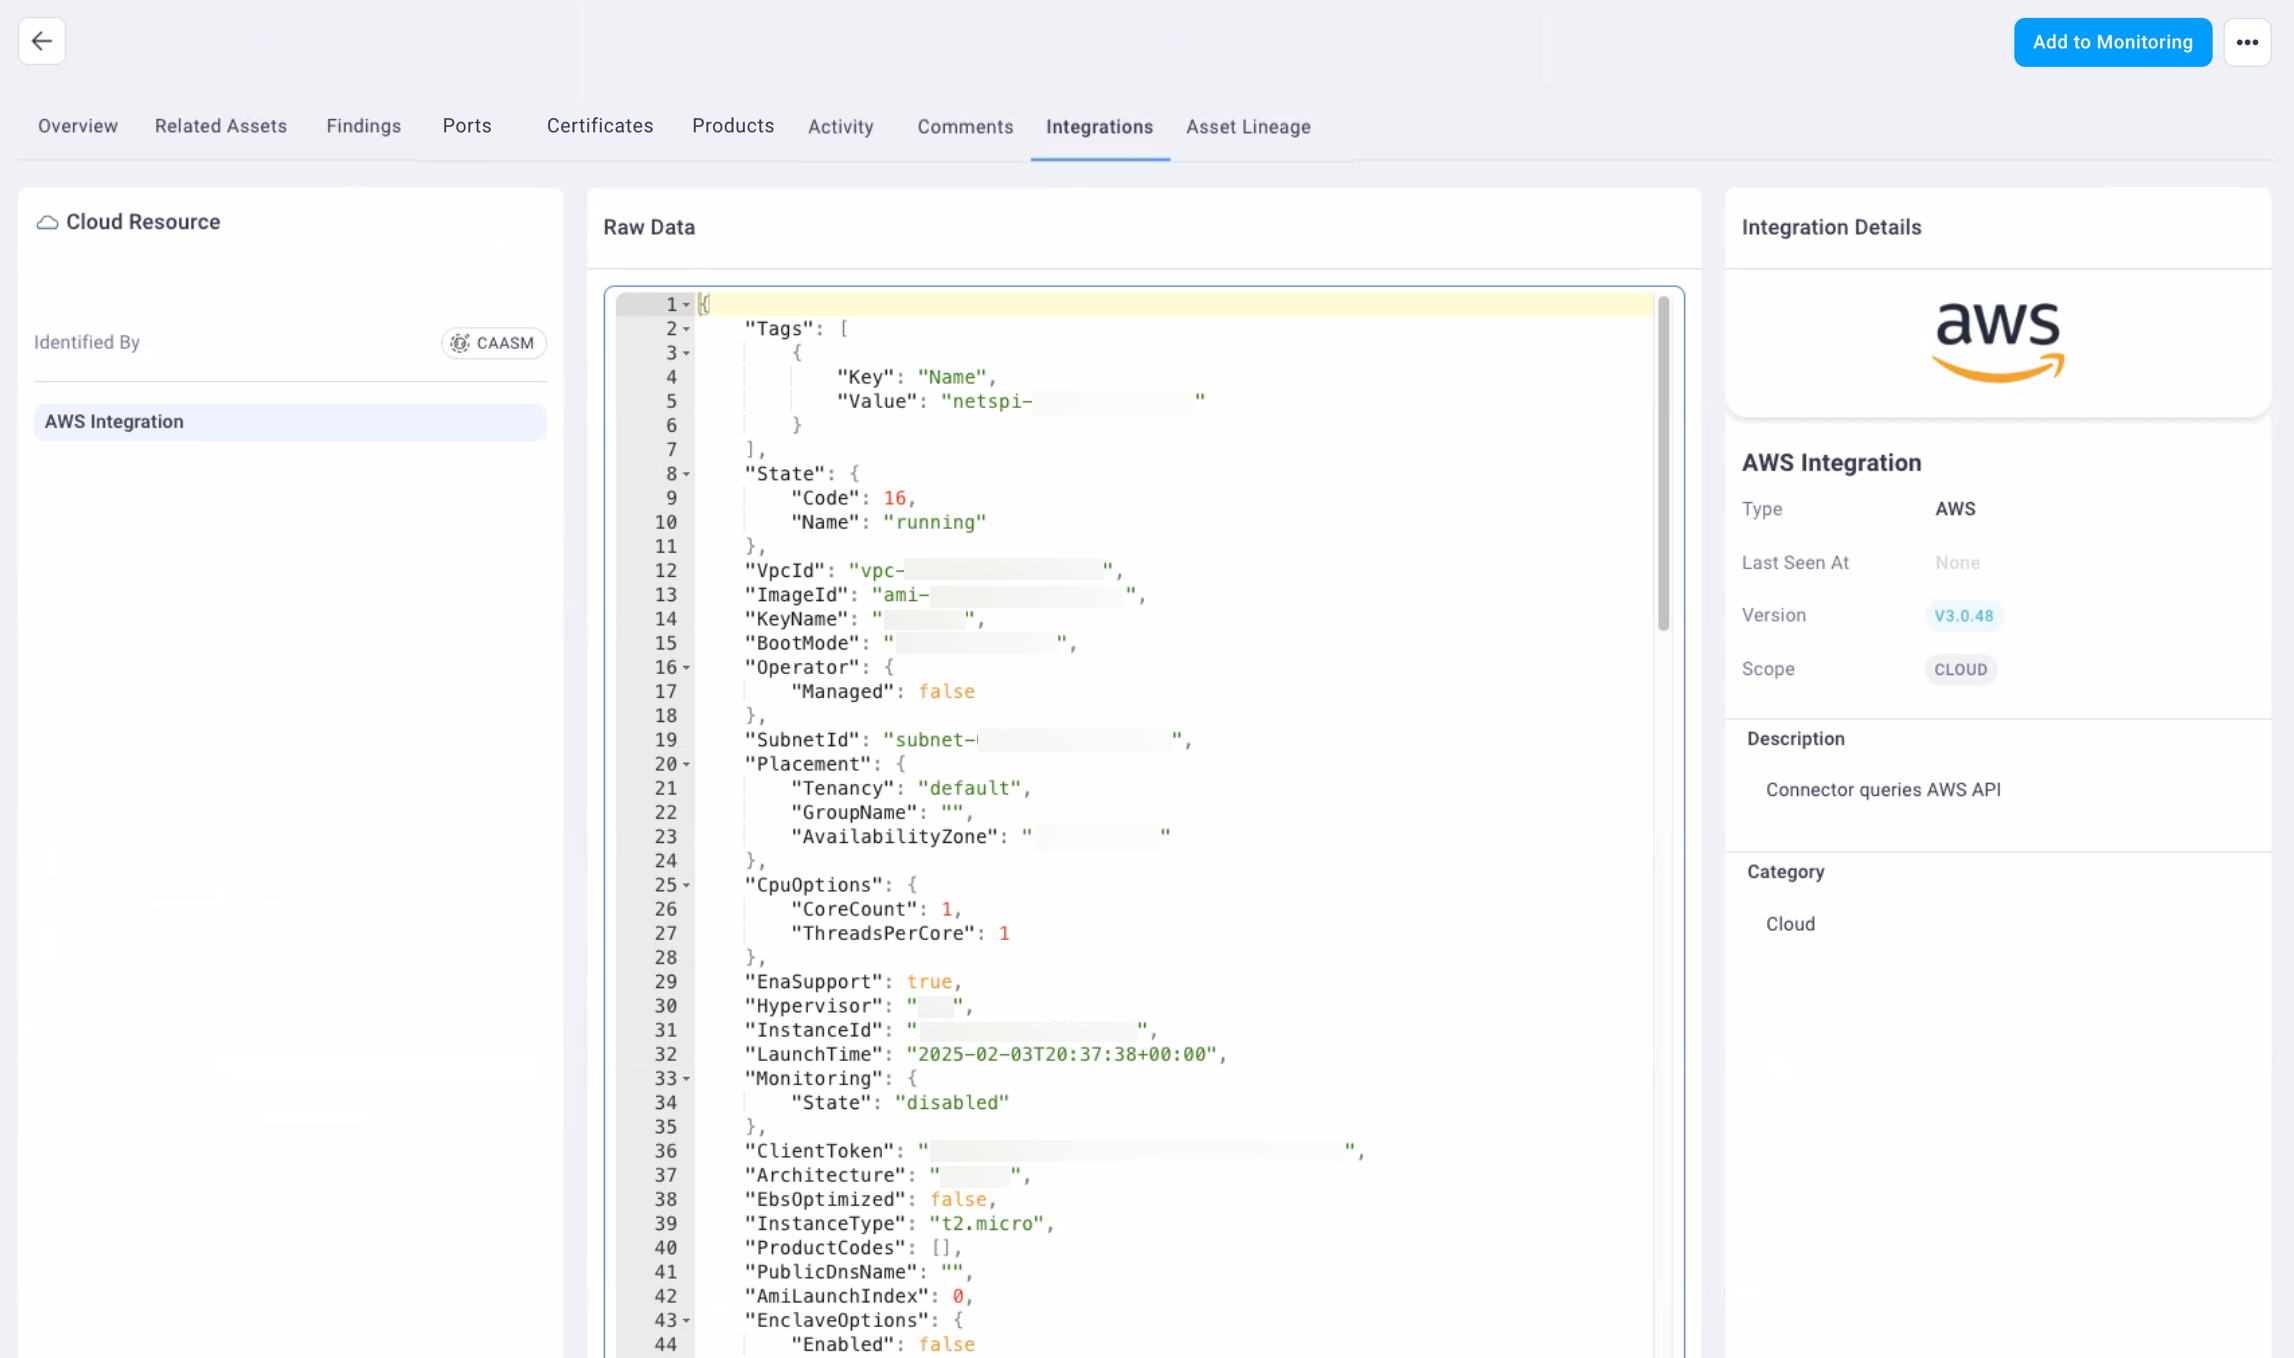
Integrations tab
The Integrations tab appears for CAASM-discovered assets and displays information about all of your CAASM integrations that have identified this asset along with a Raw Data section outlining what kind of data is being brought in.
#
Asset Linage tab
The Asset lineage tab displays an interactive visual representation of assets related to the one you selected. You can expand and add more information as needed.
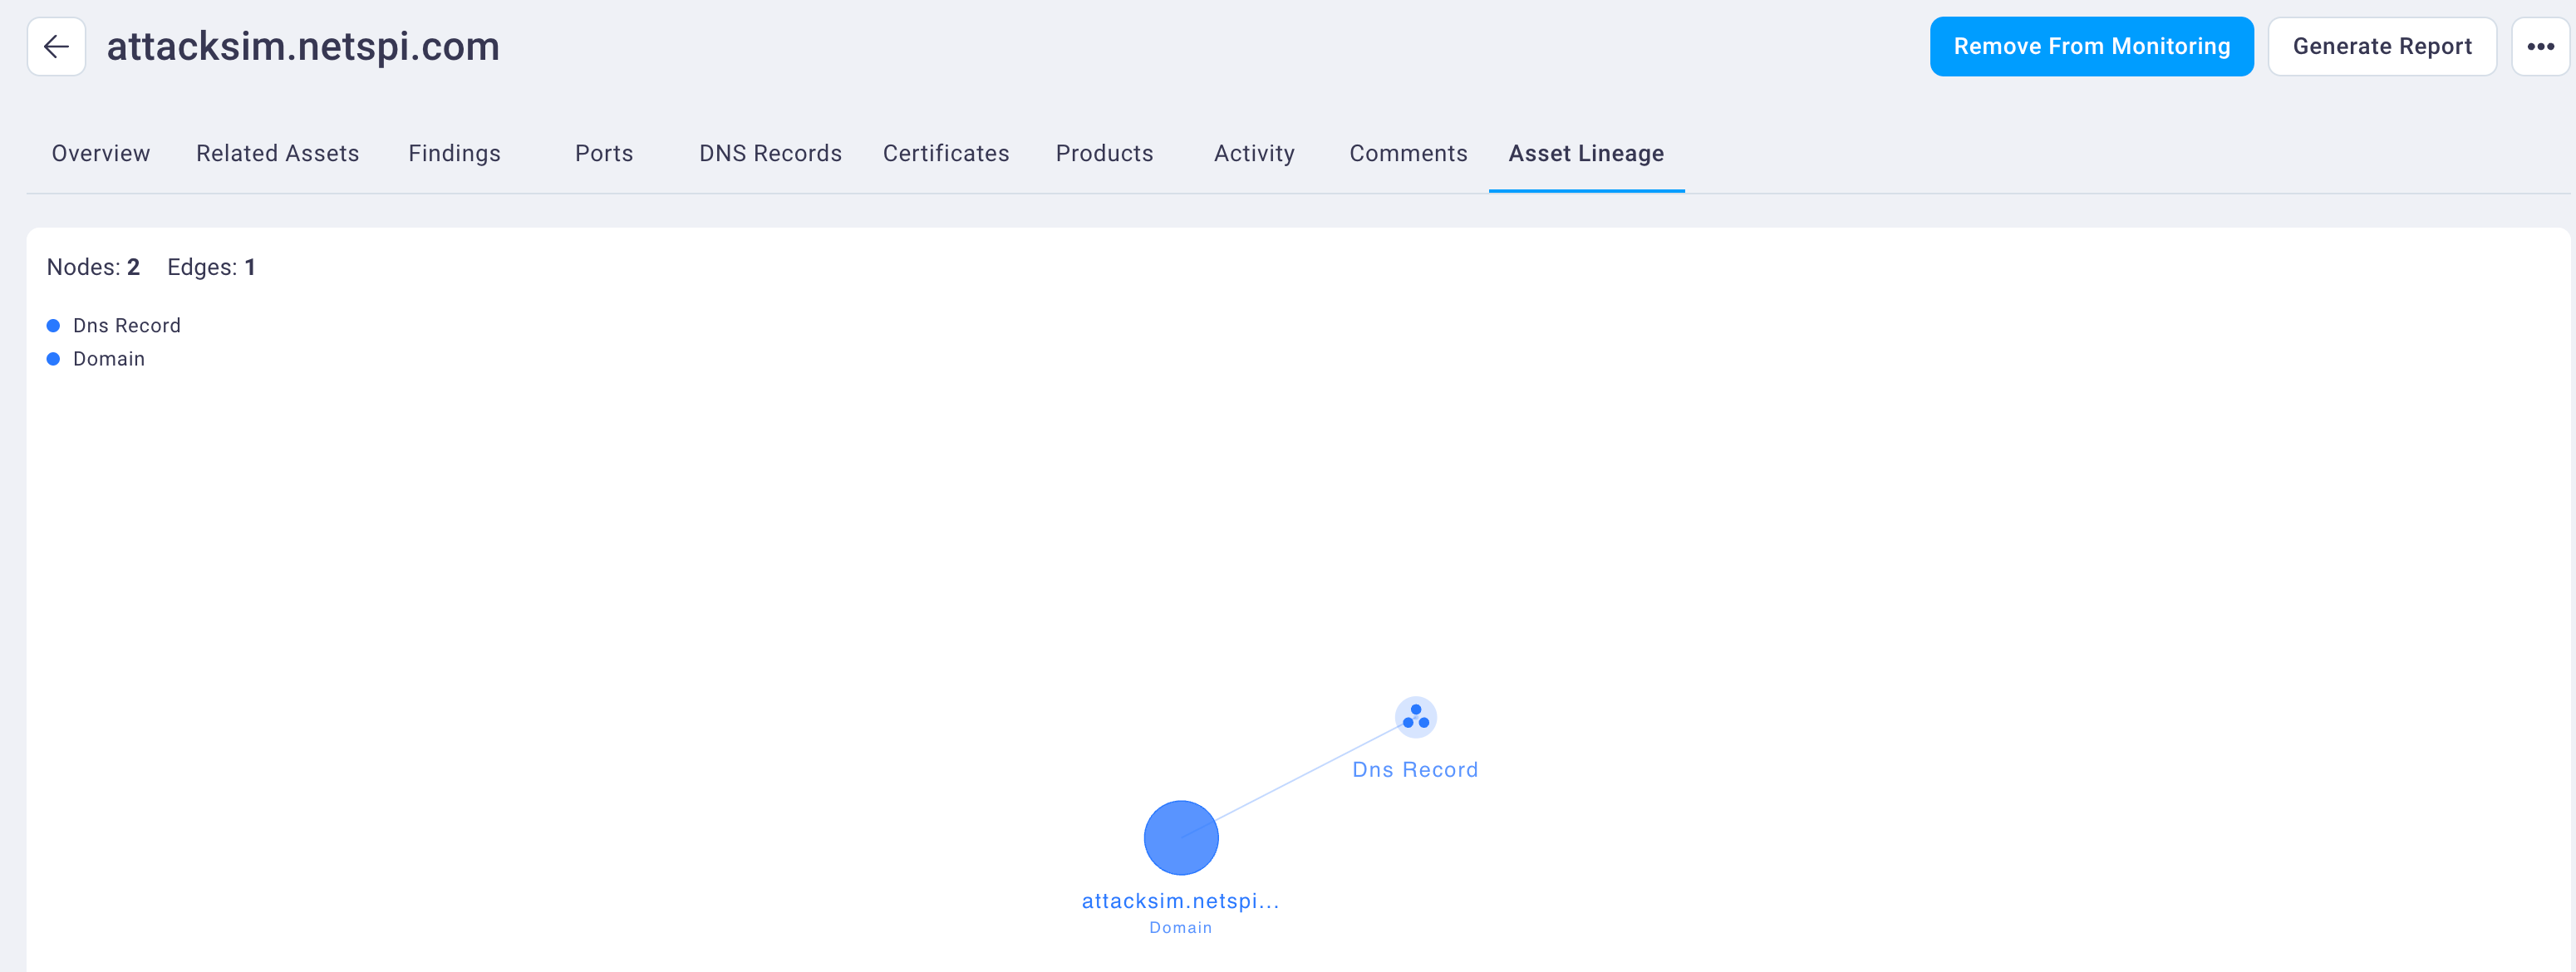
Note that the nodes and edges, along with asset types represented, appear in text in the upper left of the asset lineage display.
Click and drag the components of the asset lineage graphic to change its display.
Hover over an element to display instructions to double-click it. Doing so displays the details for that asset.
Single-click an element of the asset lineage to see its expanded list of associated assets.

#
Social engineering assets
Social engineering assets included in the assets list are those assets that could lend themselves to vulnerability for the purposes of deception.
You can add additional table data to display by selecting the table icon and selecting columns from the colum picker.