#
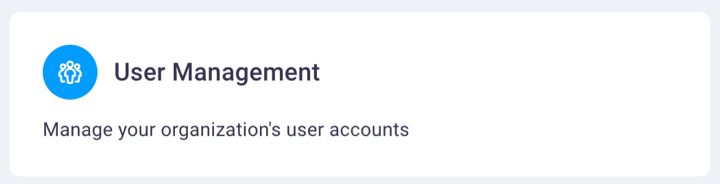
User Management
The User Management page allows you to manage your organization's users in the following ways:
Add a new user - Set a user to
Active or Inactive status - Edit a user's
personal information and/or location - Require
multifactor authentication (MFA) - Configure Platform Integrations for PTaaS and platform system integrations with your commonly-used apps, like Jira, Slack, etc.
- Generate an
API token for the user
All user management starts by selecting the Settings (gear) icon and then selecting the User Management card.
Use the Filter ![]() or Search Columns
or Search Columns
![]() icons to quickly locate a specific user in your organization, or
filter by first name, last name, or email.
icons to quickly locate a specific user in your organization, or
filter by first name, last name, or email.
#
Add a new user
Use the following steps to add a new NetSPI Platform user from your organization.
Select the Settings icon
 to display the Settings page.
Then select the User Management card to display the Users page.
From the Users page, select the blue Add User icon (+) to display the New User page and enter the required information (first name, last name, and email).
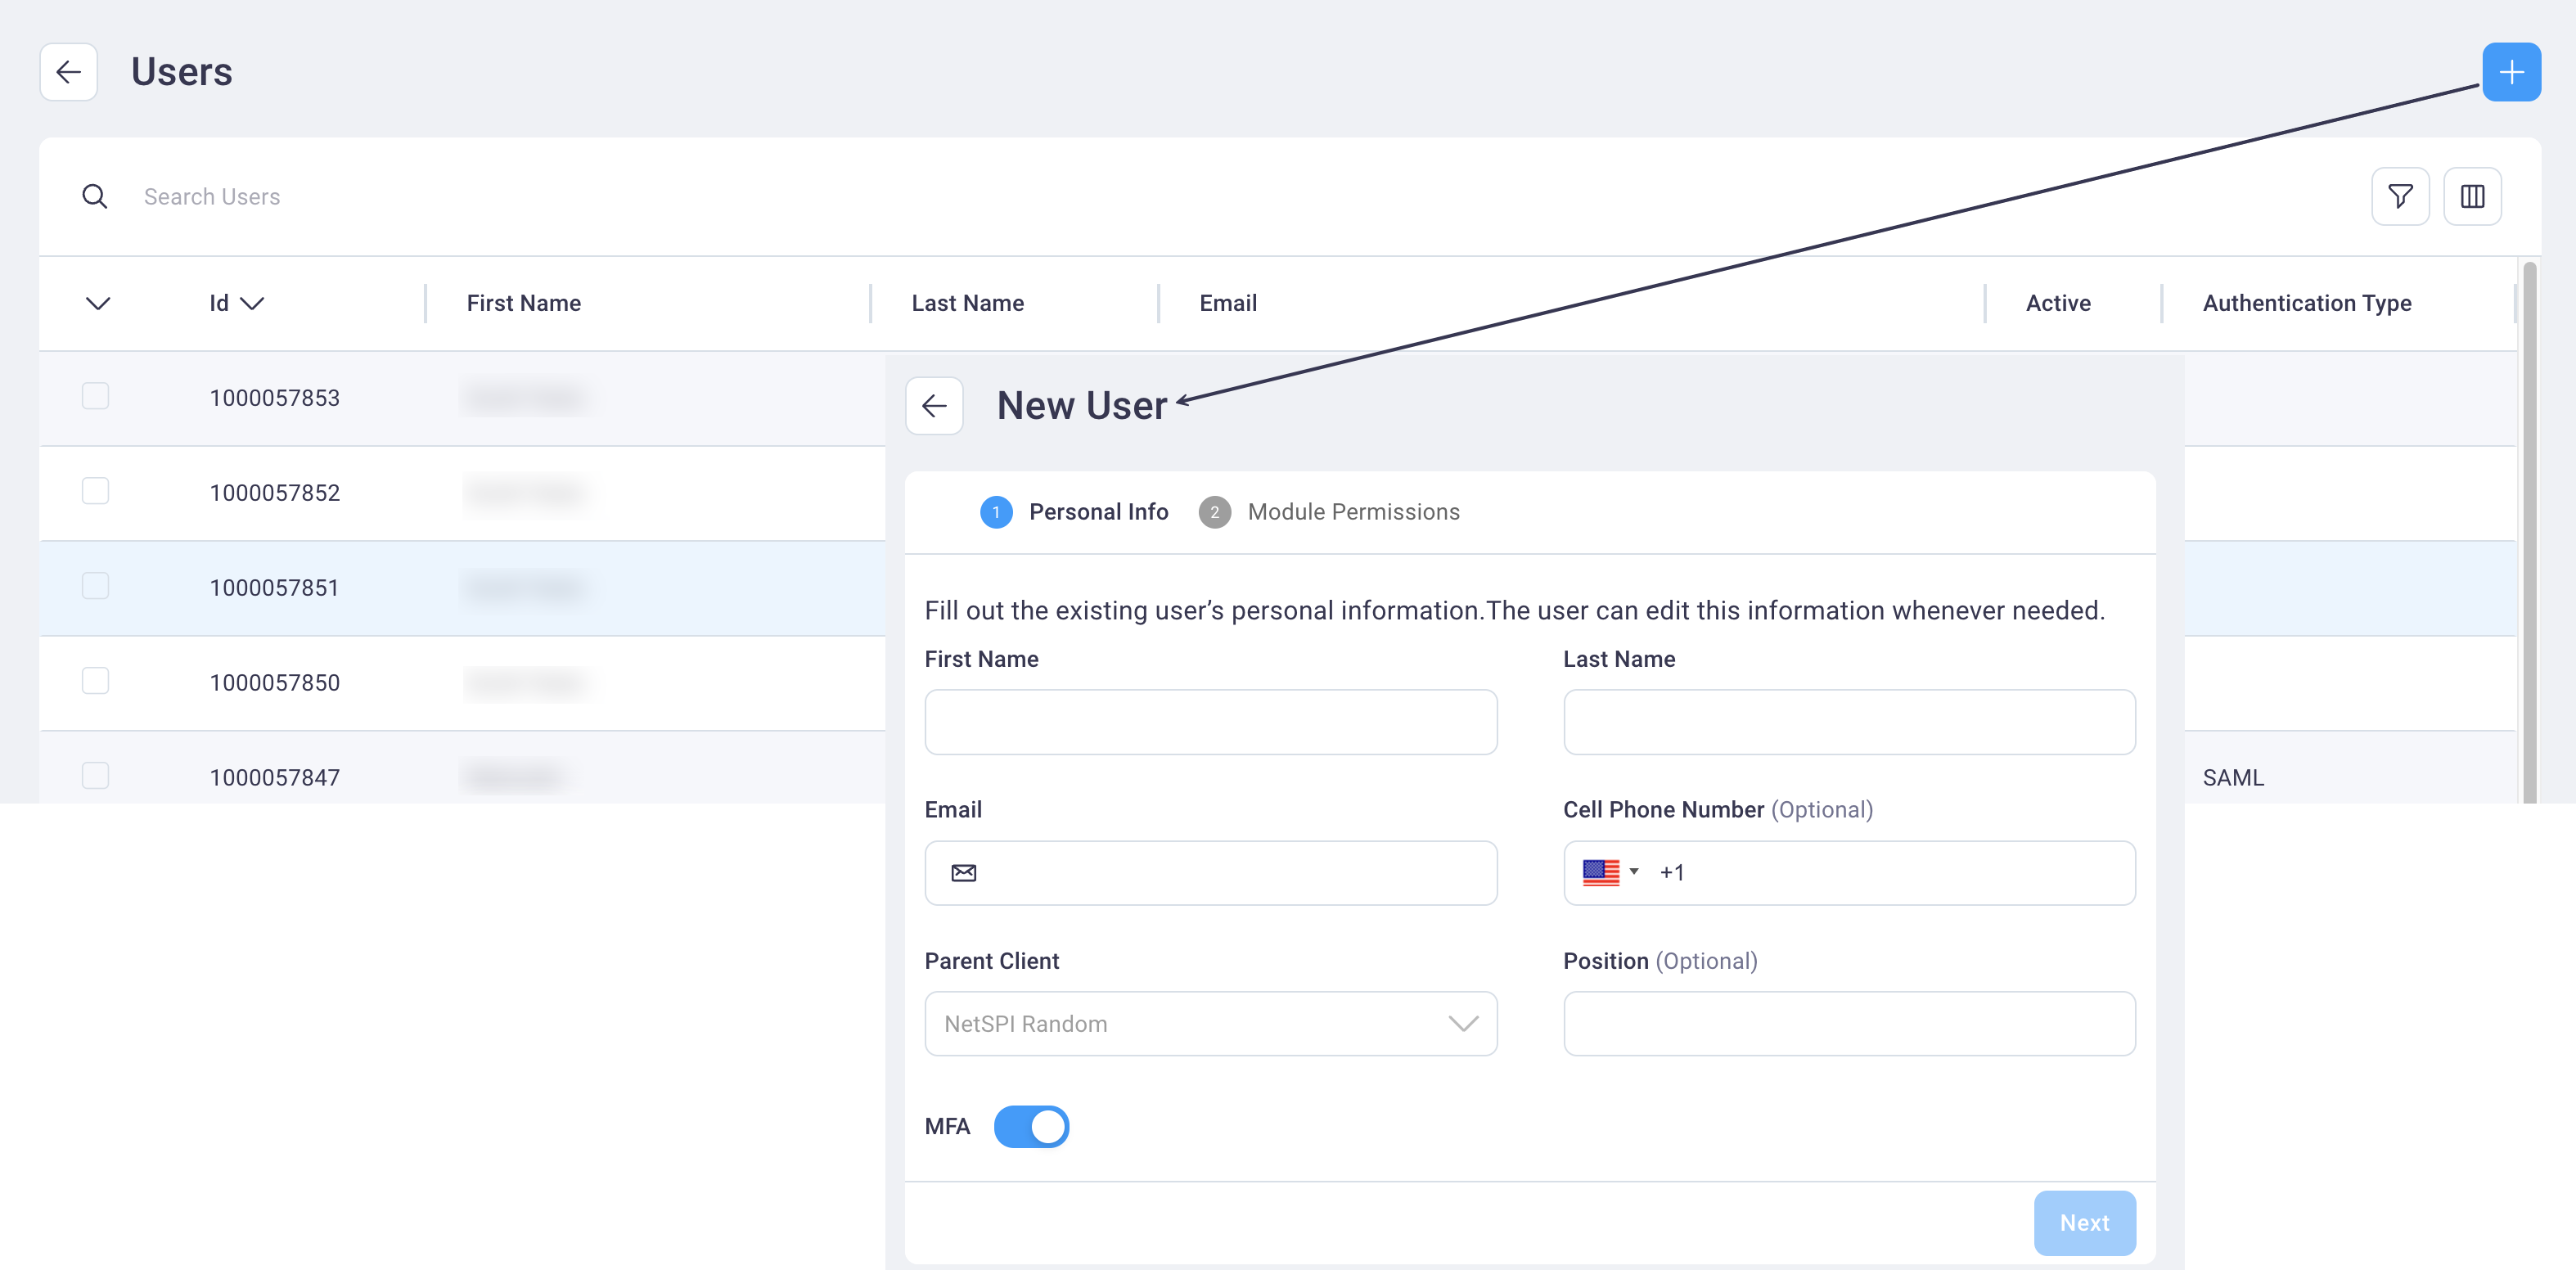
Select Next to display the module access page.
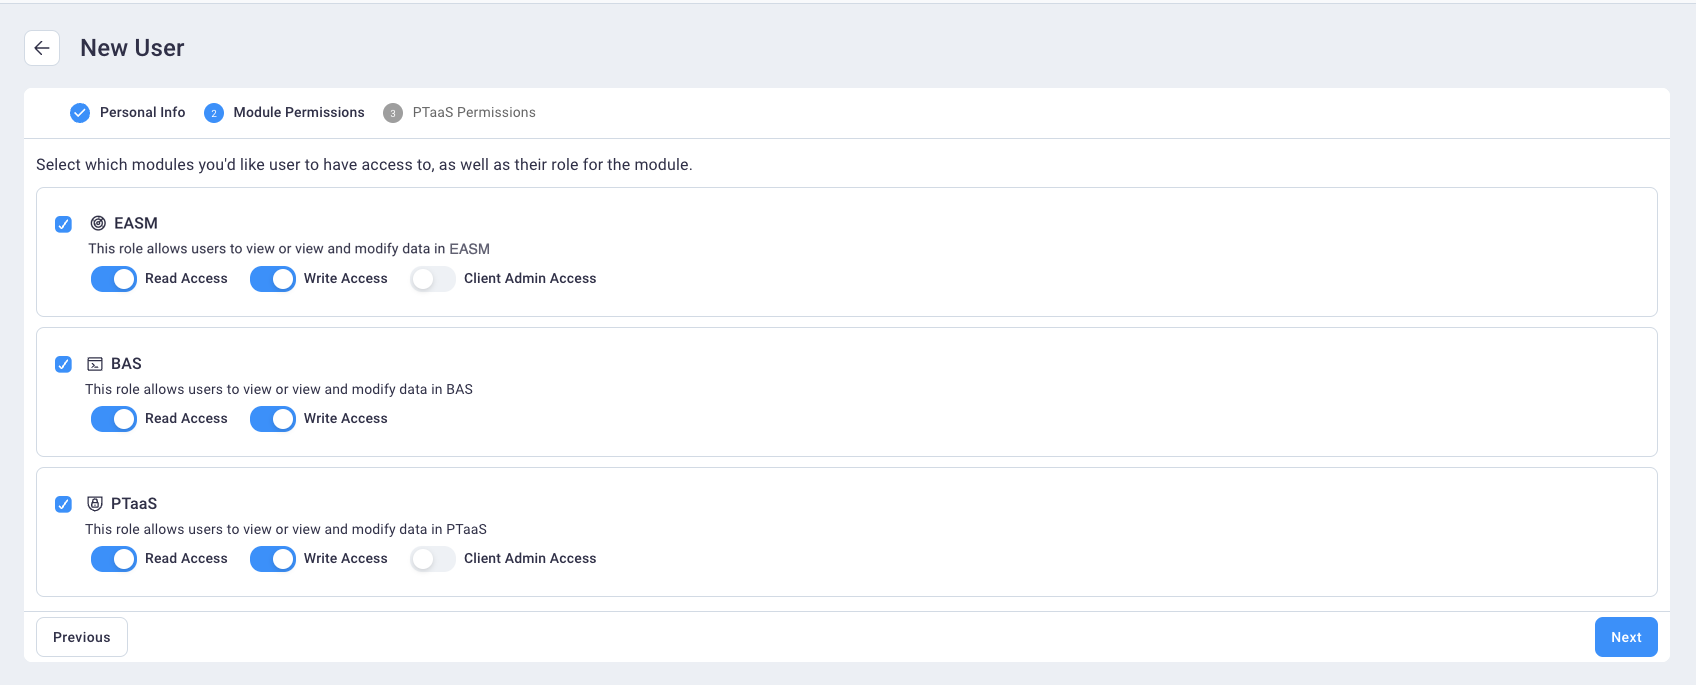
Select the module for the user's access and add Read Access, Write Access, and/or Client Admin Access as needed. Module options include BAS, CAASM, EASM, and PTaaS, but are selectable only if you have subscribed to each service.
If you need to return to the previous page to update what you've entered, select the Previous button so you don't lose any information you entered there. If you select the back arrow (next to the New User page title) you will be presented with a message asking if you are sure you want to go back to the Users table, and that affirming so will remove all data entered for the user on the previous page.
The Next button displays as enabled once you've made at least one module selection.
Select Next to display the PTaaS engagements to which the new user should have access.
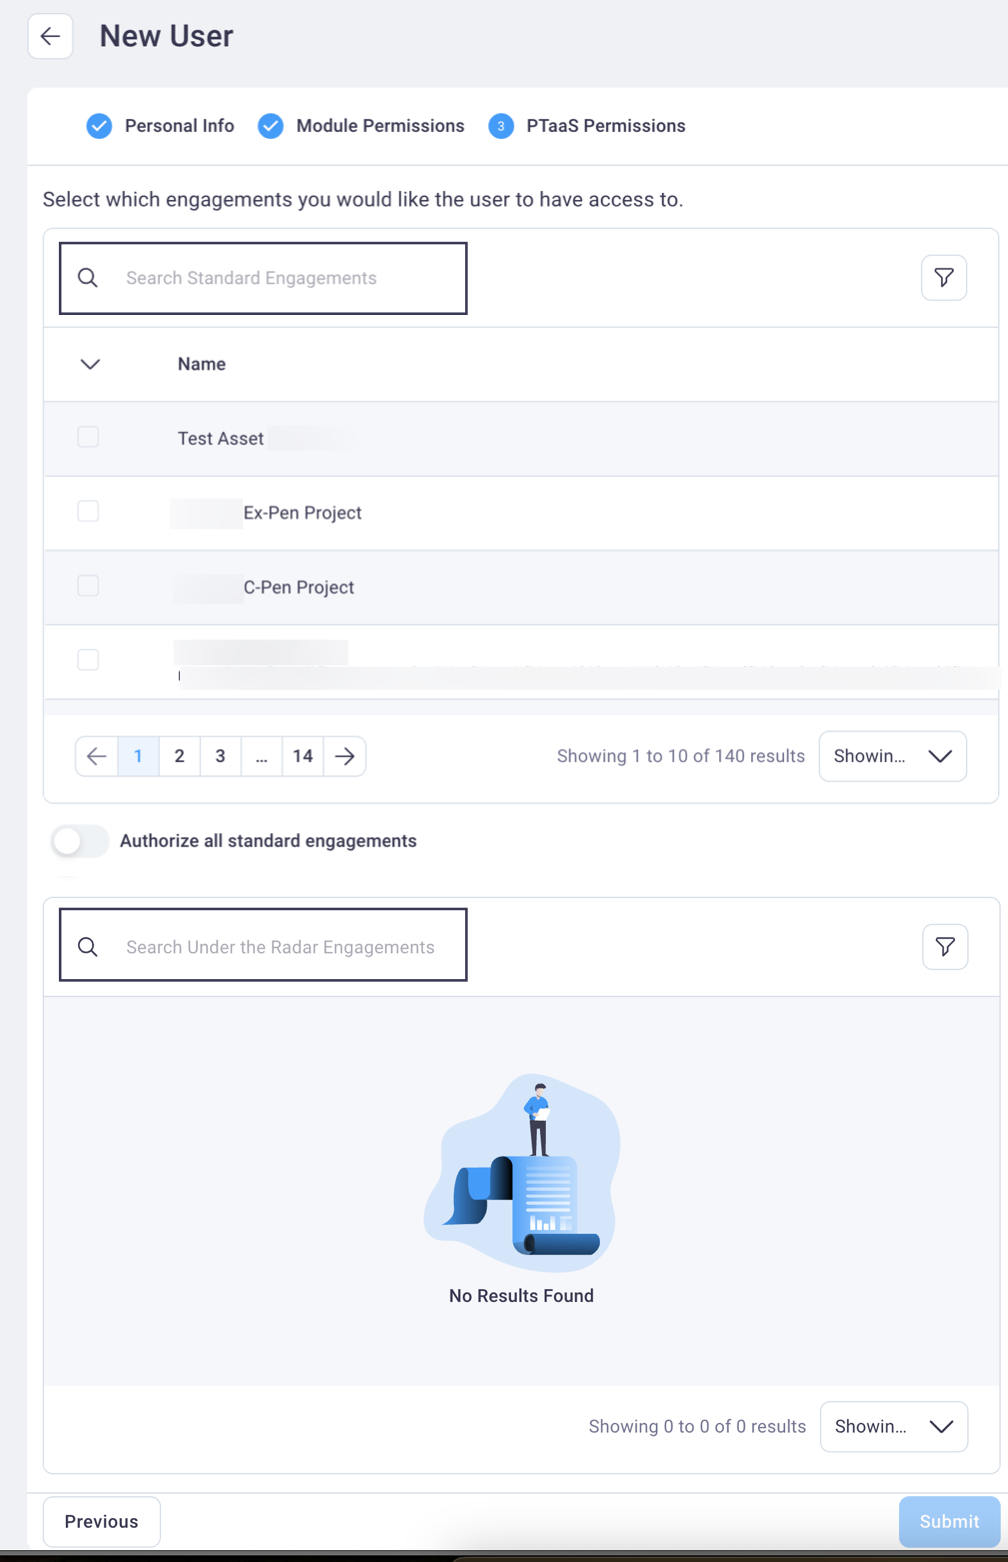
Tip: Select the Showing Rows drop-down list to display more rows at once to ease your selection process. Or, if you now the engagement name, enter it in the Search field near the top of the New User page and hit enter to display matching results.
Under the Radar Engagements
The most common user setup will involve standard engagements, and there is an option to configure user access to all of your organization's standard engagements per user.
Below these setup fields is an option to search for, and assign access to, under the radar engagements. Access to assigning these privileges are restricted to the Client Admin user at your organization who has access to at least one such engagement of this type.
Users with access to All Engagements will not be able to view Under the Radar engagements or their data unless access is provided specifically. All tables and dashboards will only display data from Under the Radar engagements if the user has been granted access to them. The Under the Radar checkbox displays as clear (not selected) by default.
When you’re done selecting all the engagements for the new user, select Submit to complete the new user account’s creation and view the "User Successfully Updated" message at the lower right corner of the page.

#
Set a user account to an inactive or active status
Select the Settings icon
to display the Settings page.Then select the User Management card to display the Users page.
Select any user row on the Users page to display a single user's NetSPI Platform settings.
On the Personal Info tab, select the Active checkbox to clear it.
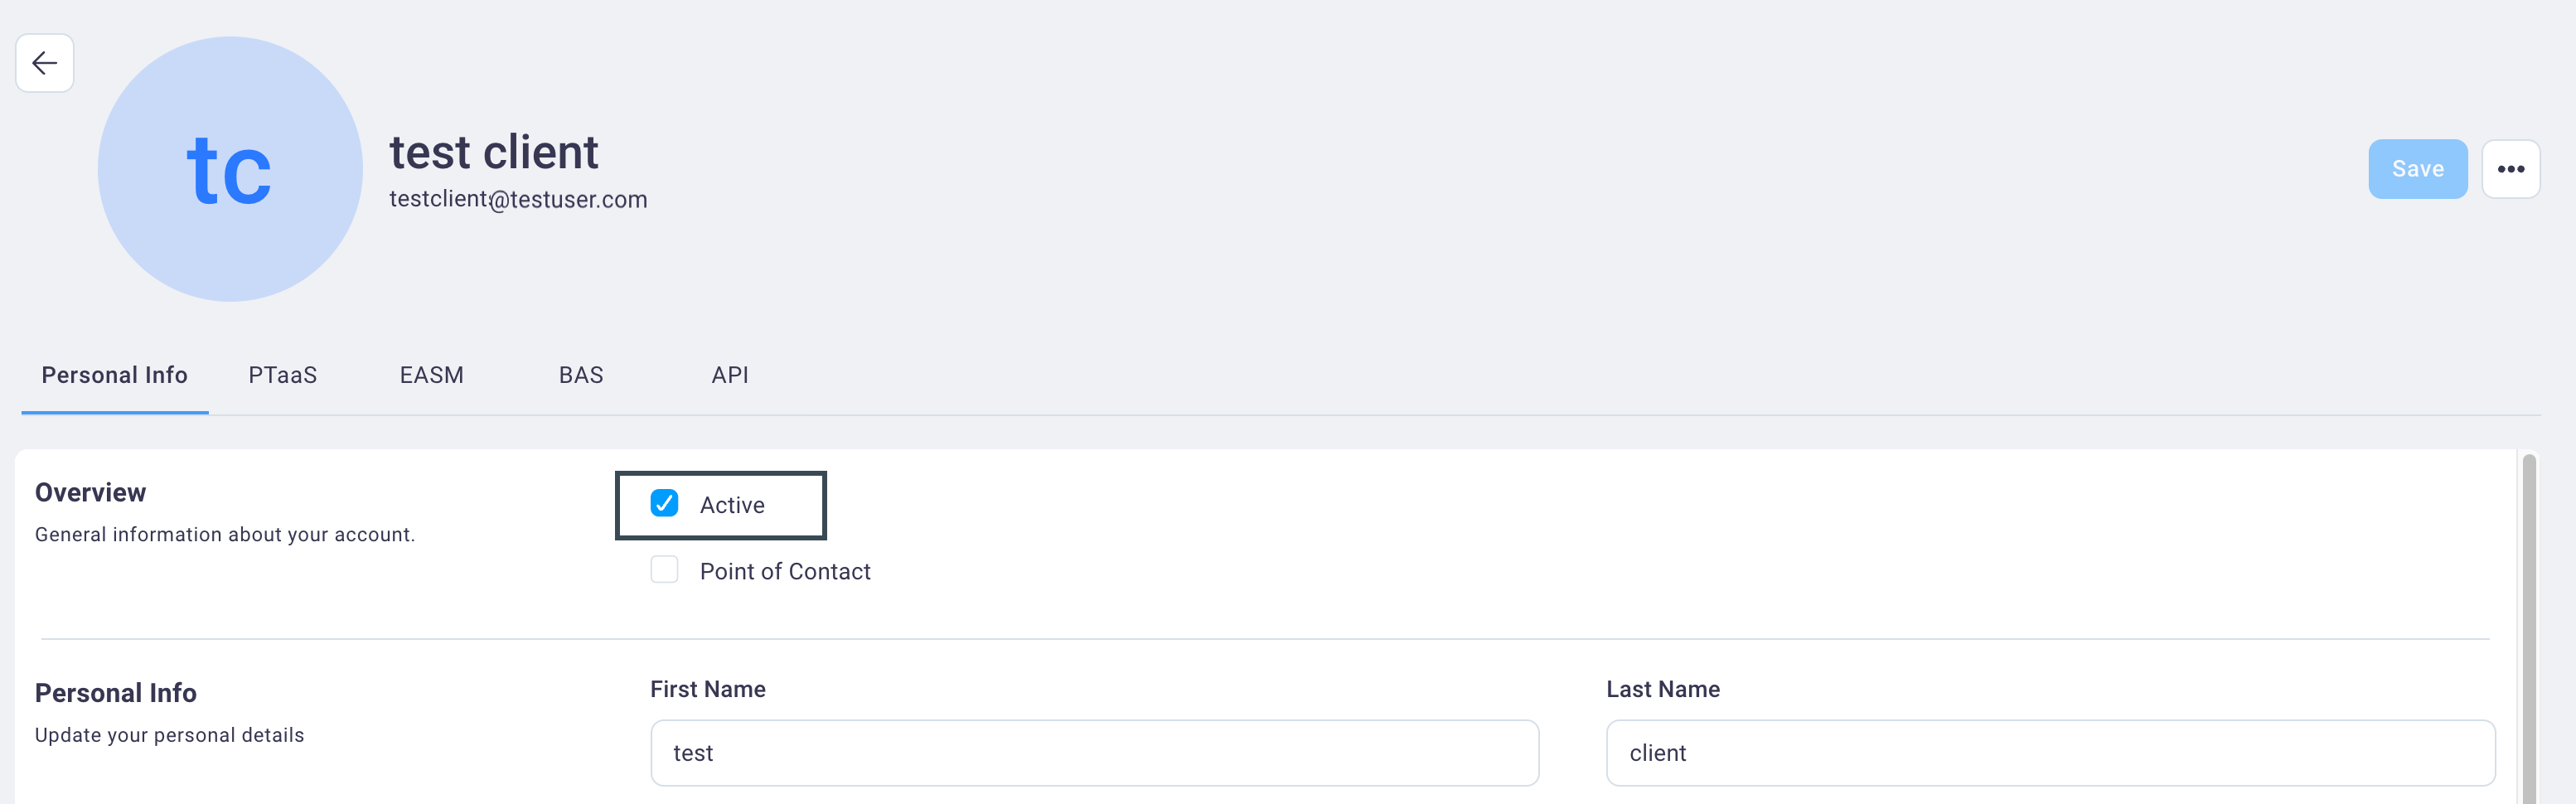
Select Save to save your changes. The user is immediately recognized as inactive by the NetSPI Platform and they will be unable to login or access the application.
To set an inactive user to an active status, you would perform the same steps above but select the Active checkbox and select Save.
#
Edit a user's personal information (and reset their password)
Select the Settings icon
to display the Settings page.Then select the User Management card to display the Users page.
From the Users page, select any user row to display their user information with the Personal Info tab in focus.
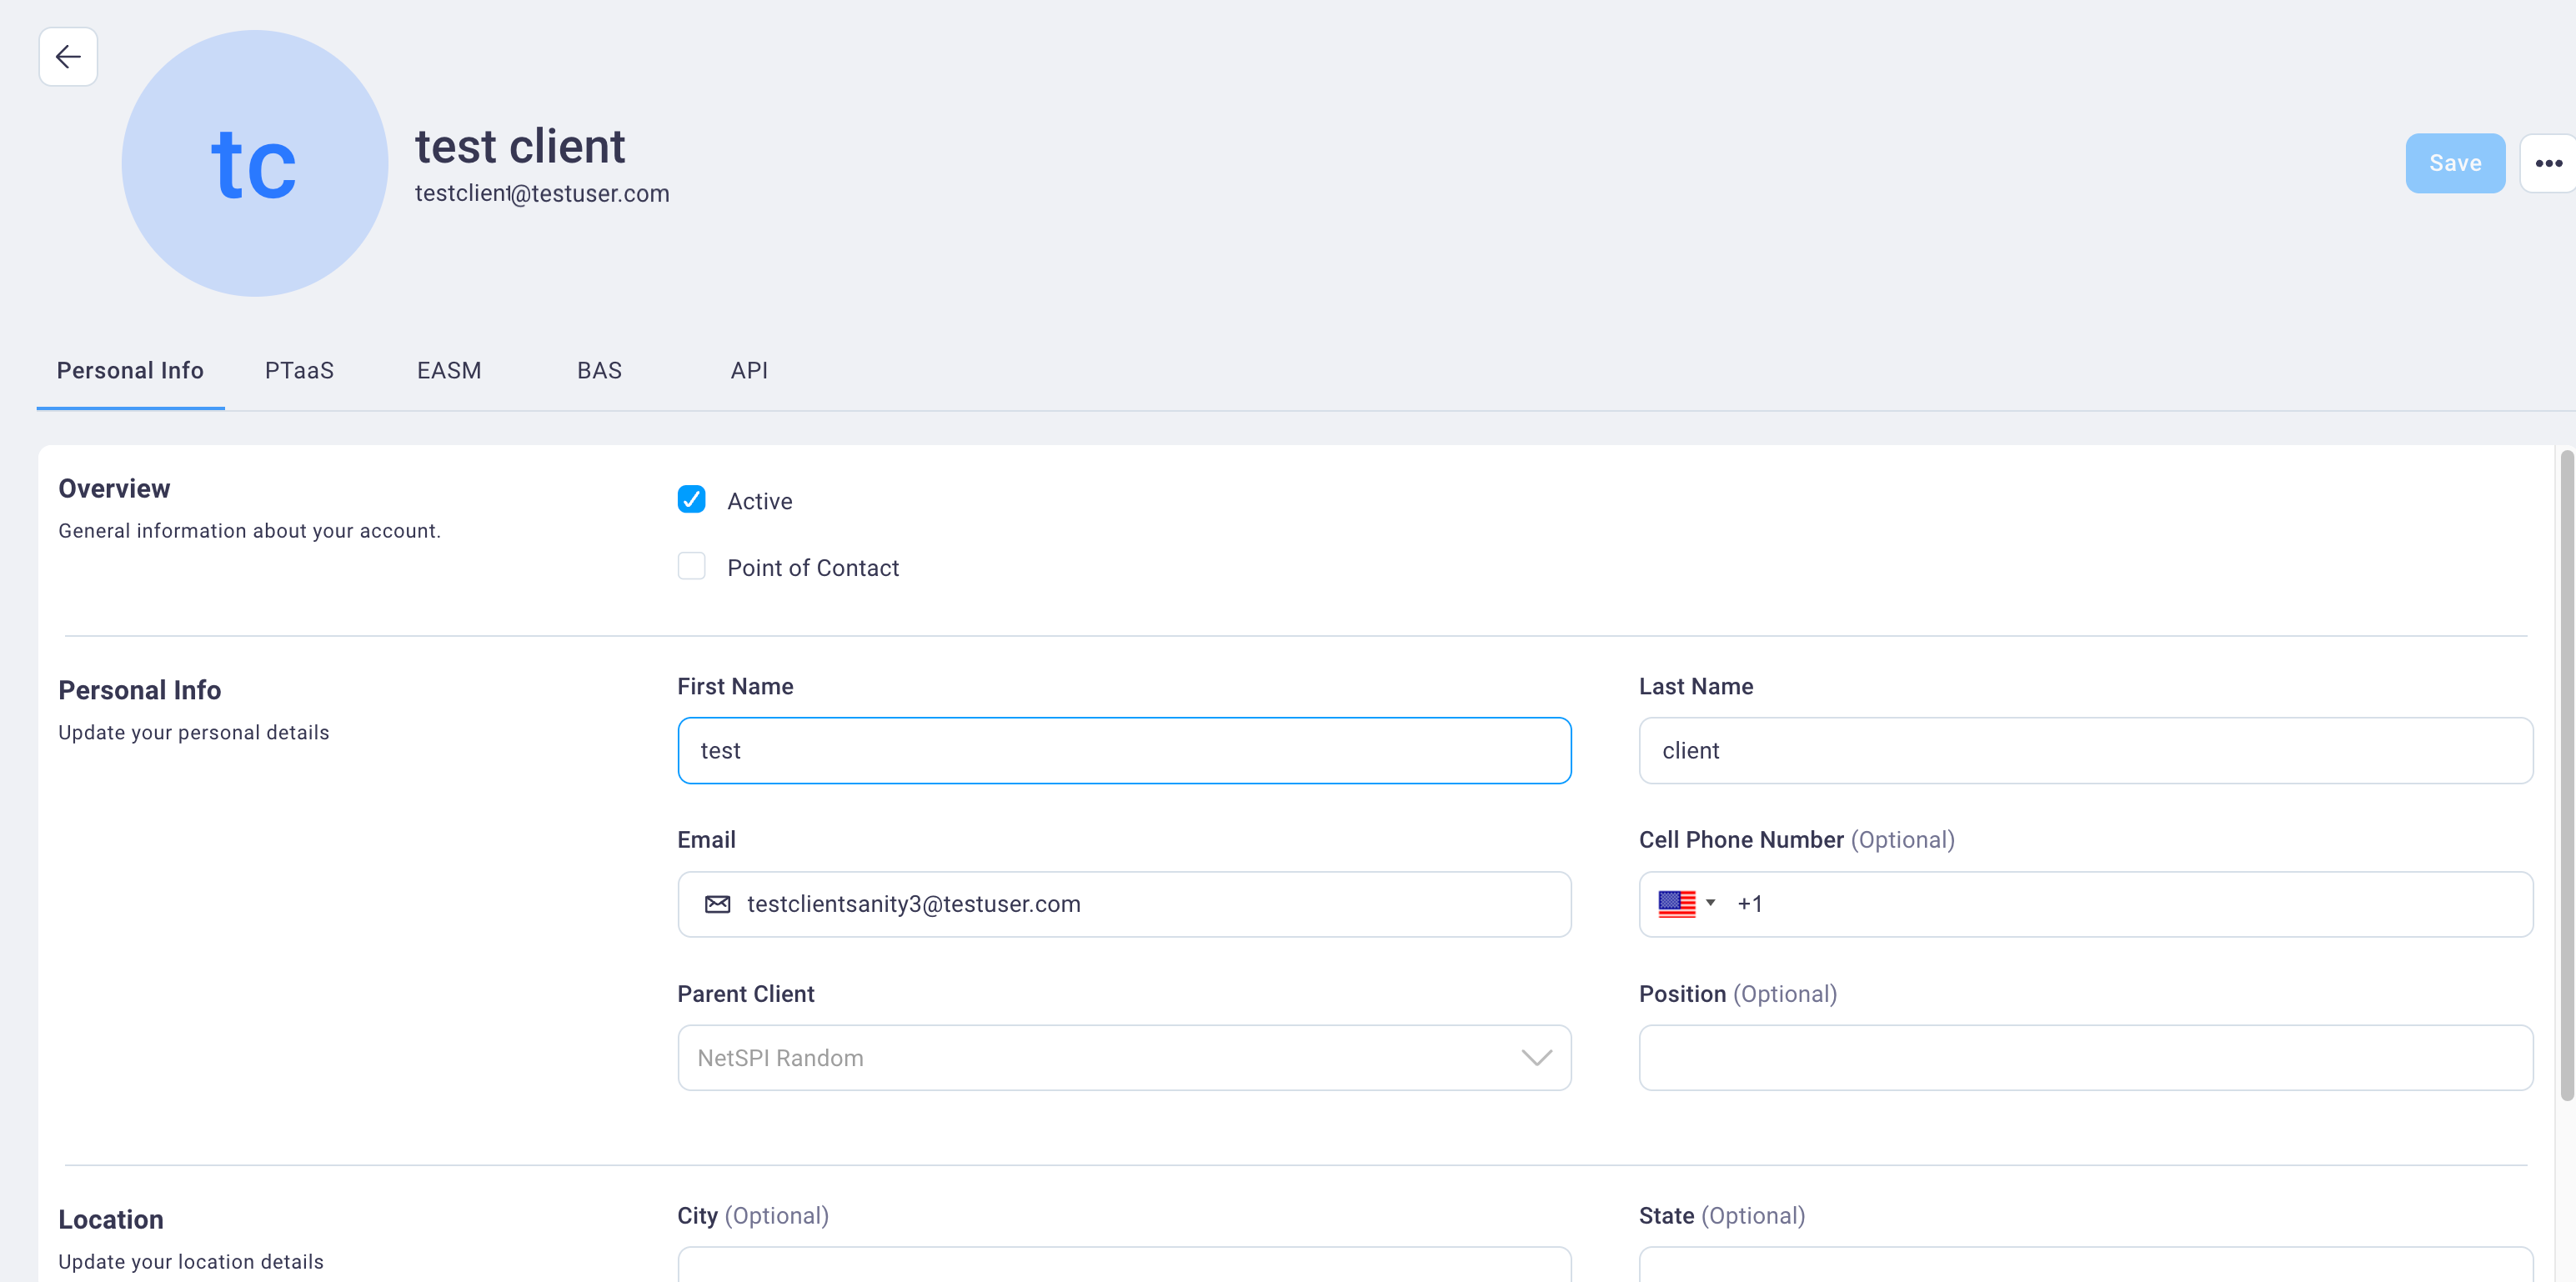
Make changes as necessary and select Save when finished to save the changes.
To reset a user's password, select the kebab menu at the upper right of the page and select Reset Password.
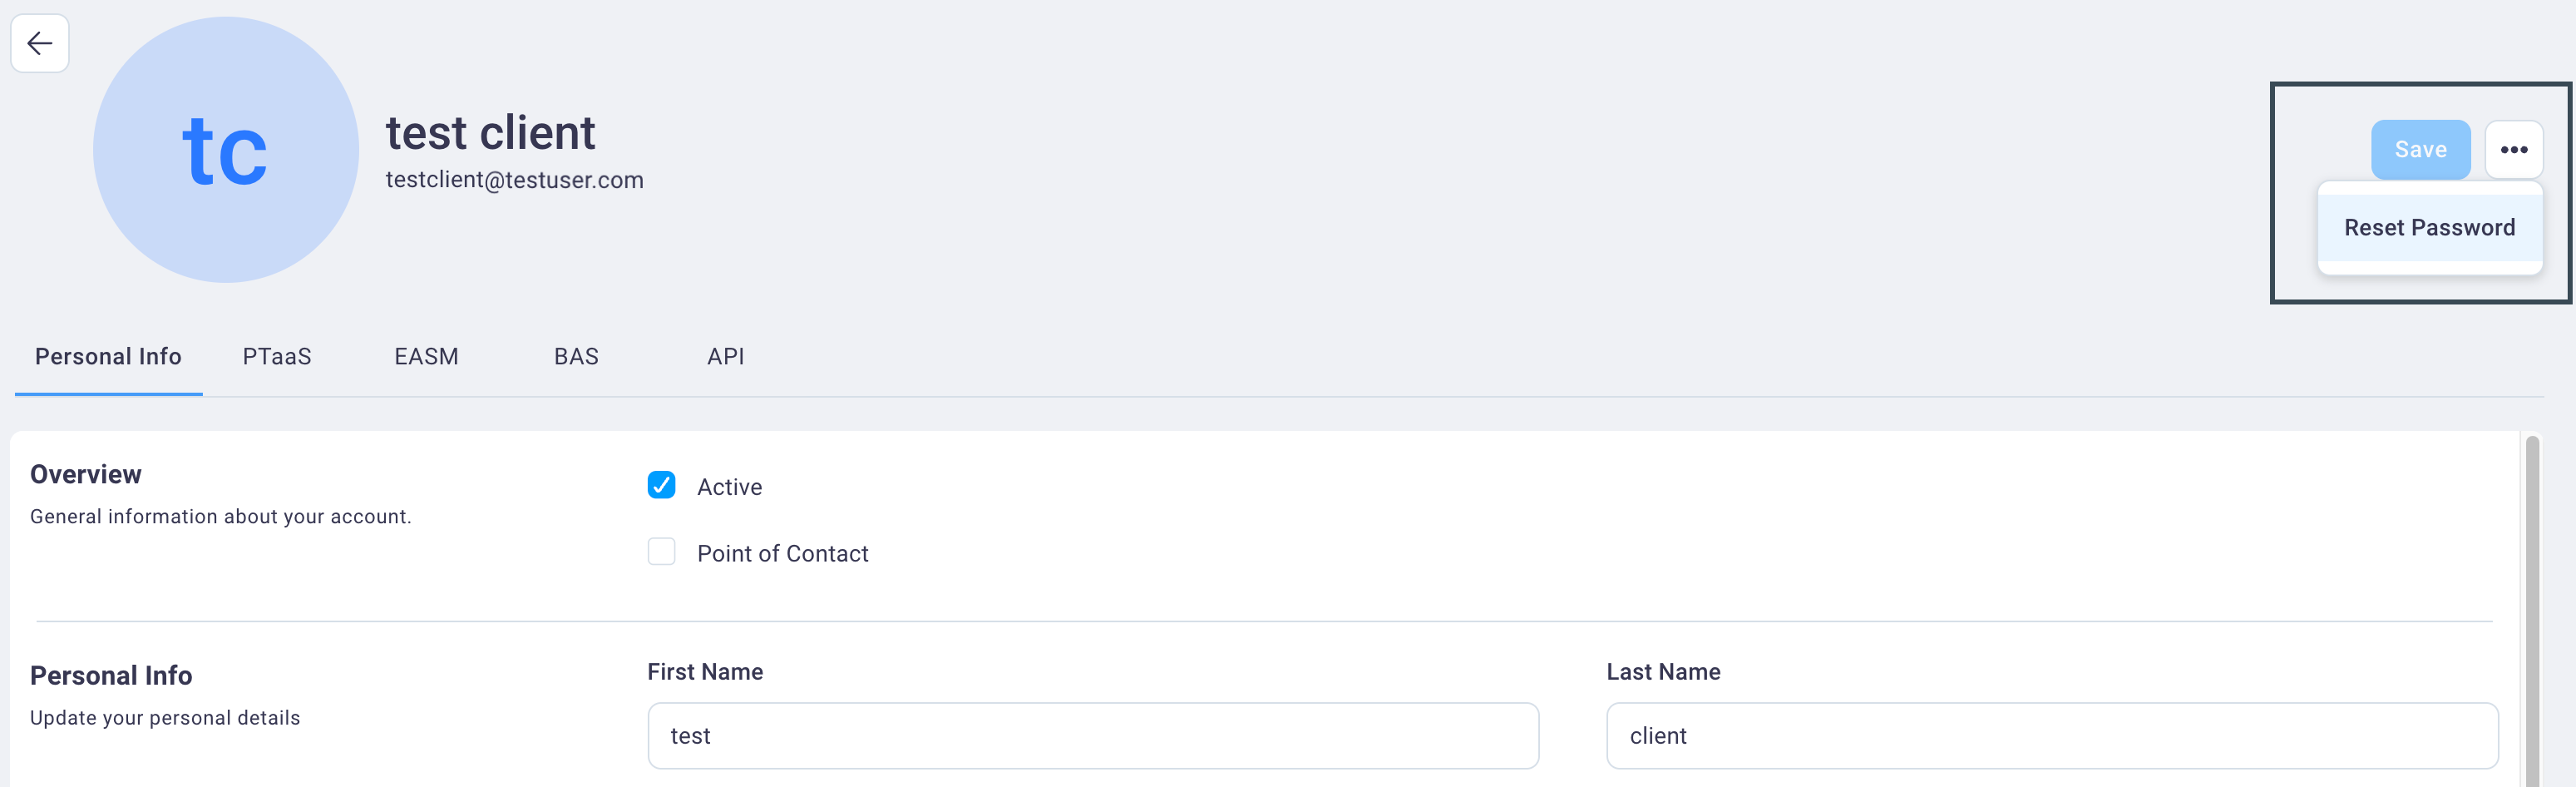
The user will be prompted to log out and then log back in, where they will be prompted to create a new password.
#
Require multifactor authentication (MFA)
Select the Settings icon
to display the Settings page.Then select the User Management card to display the Users page.
From the Users page, select any user row to display their user information and select the MFA tab.
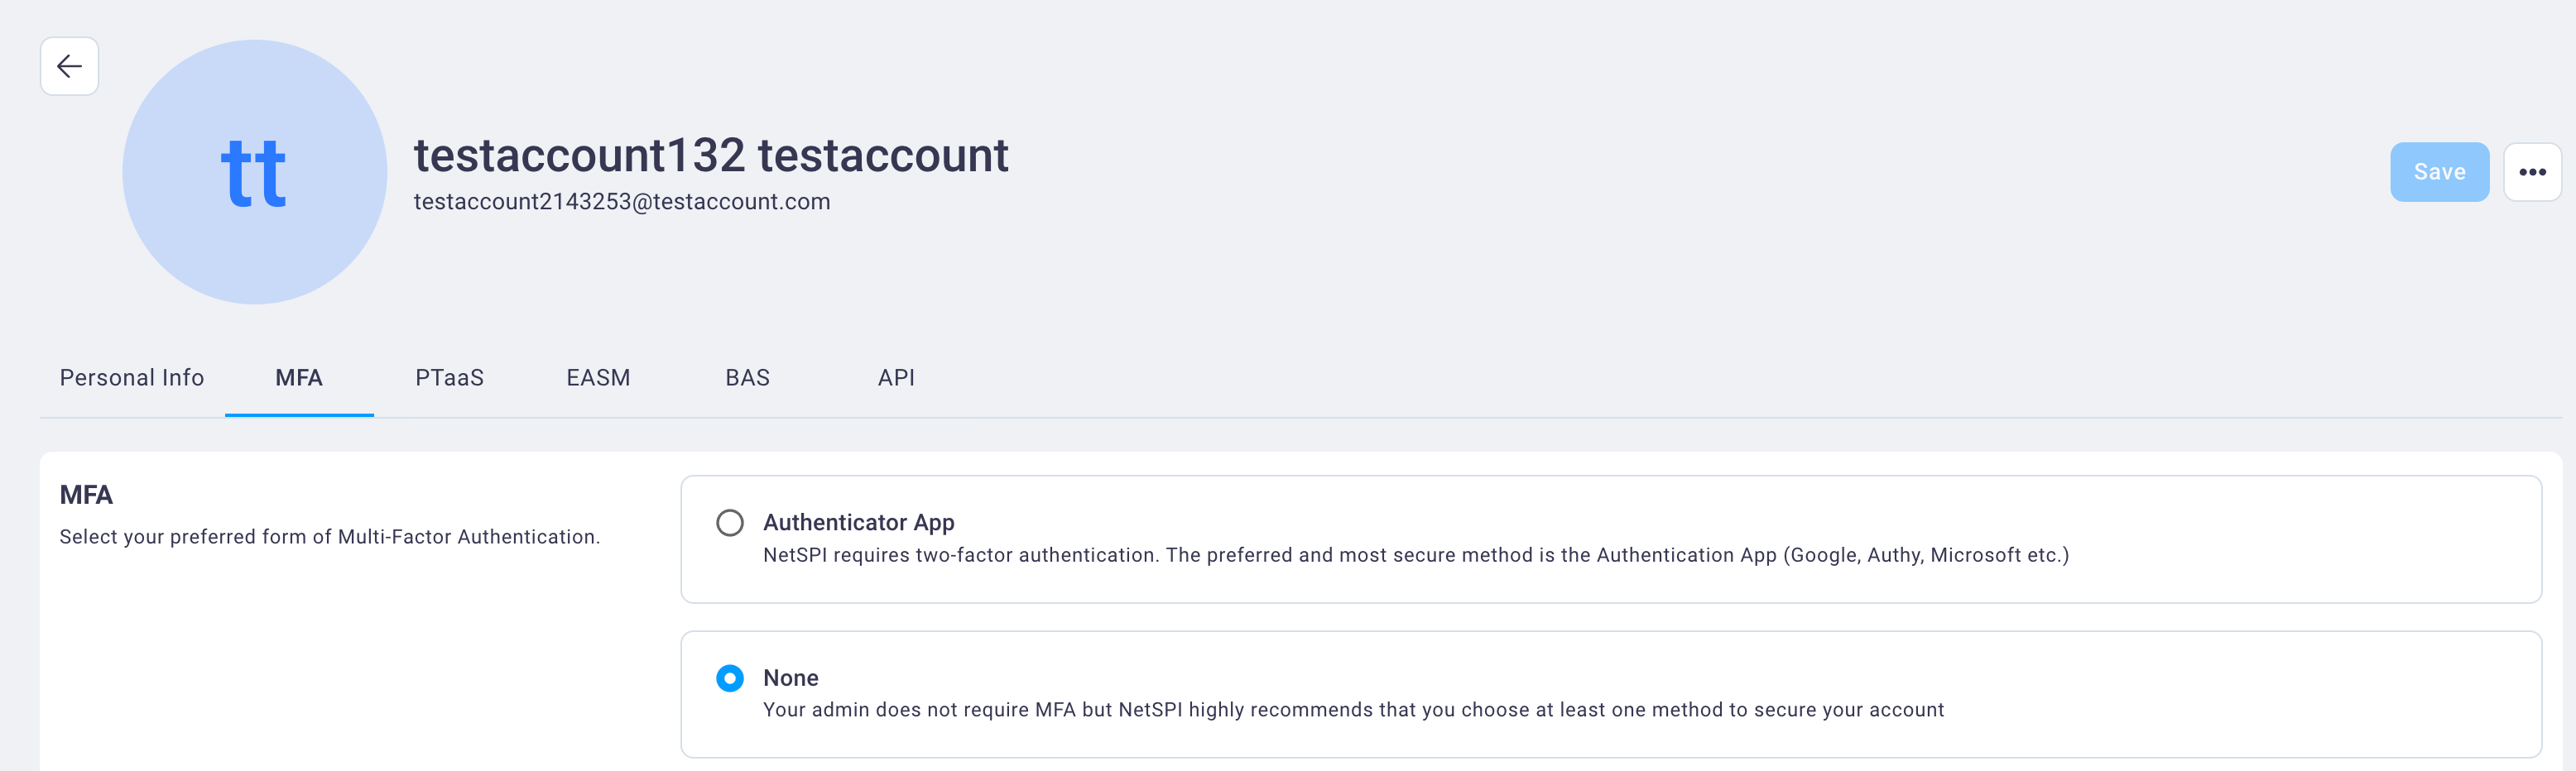
Select the Authenticator App option and select Update. The next time the user attempts to log into the NetSPI Platform they will be prompted to setup MFA.
Selecting Regenerate for the Authenticator App option will reset the user's MFA so that they will be prompted to set up MFA again upon their next login attempt.
#
Create an API token for your users
If you have Admin permissions, you can generate API tokens for your organization's users. Only a NetSPI Admin or a Client Admin can generate API tokens. Once a token is generated for a user, that user can copy/revoke/rotate the API token from their user profile. For now, the API tokens do not expire.
Select the Settings icon
to display the Settings page.Then select the User Management card to display the Users page.
From the Users page, select any user row to display that user's information and select the API tab.
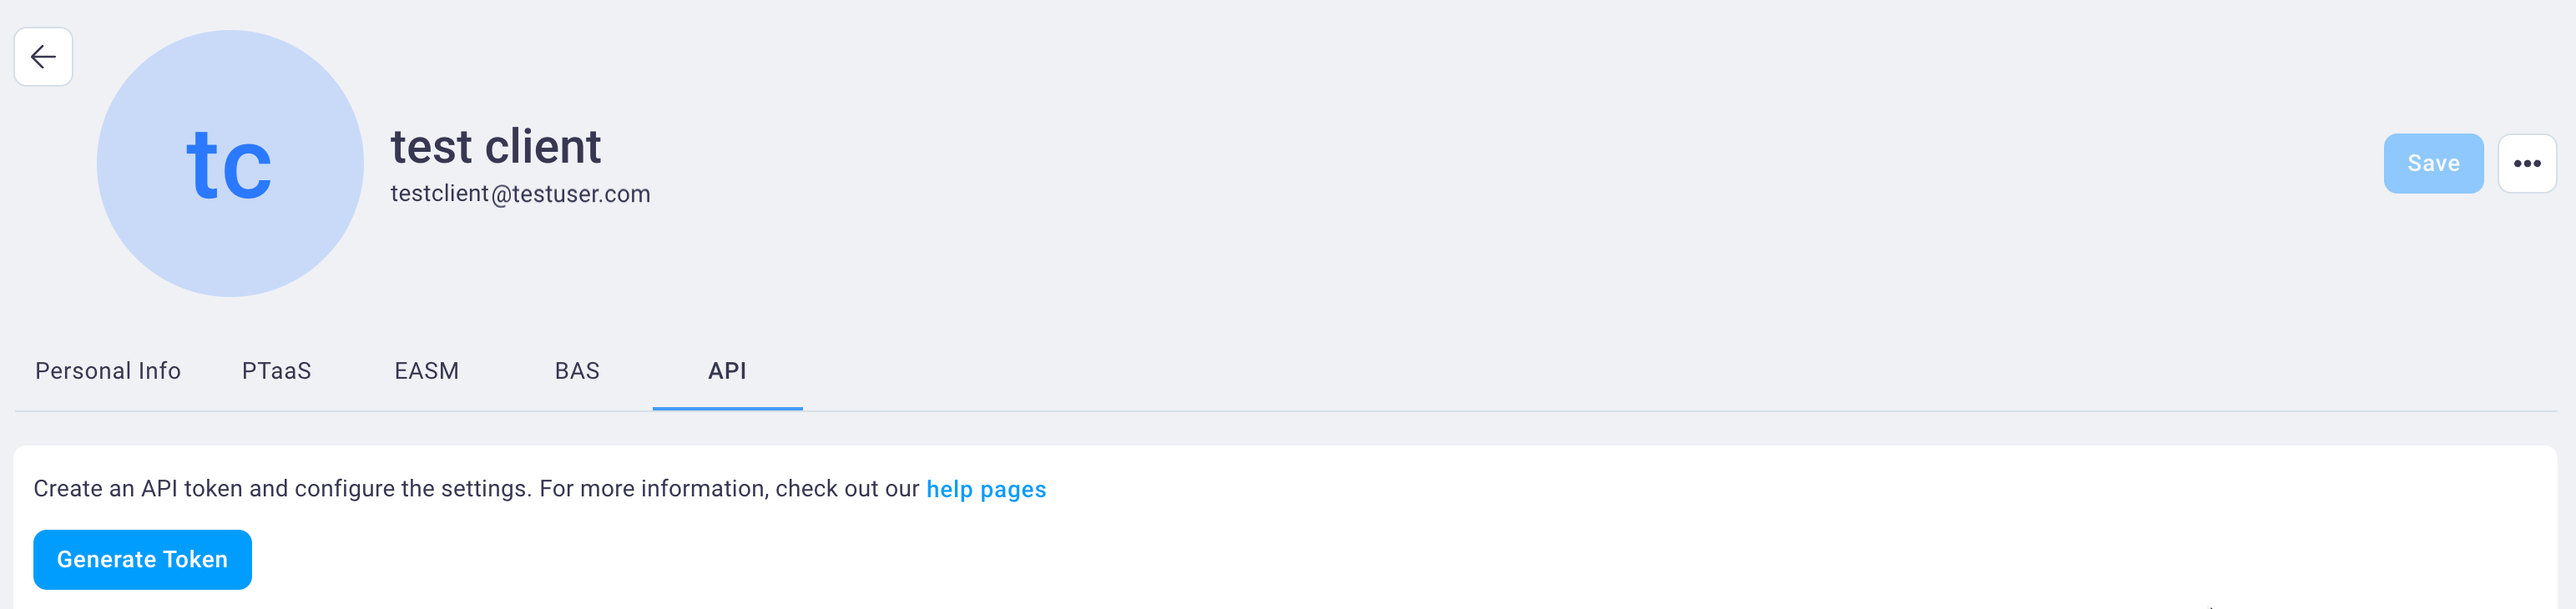
Select Generate Token to display the Generate API Token dialog box.
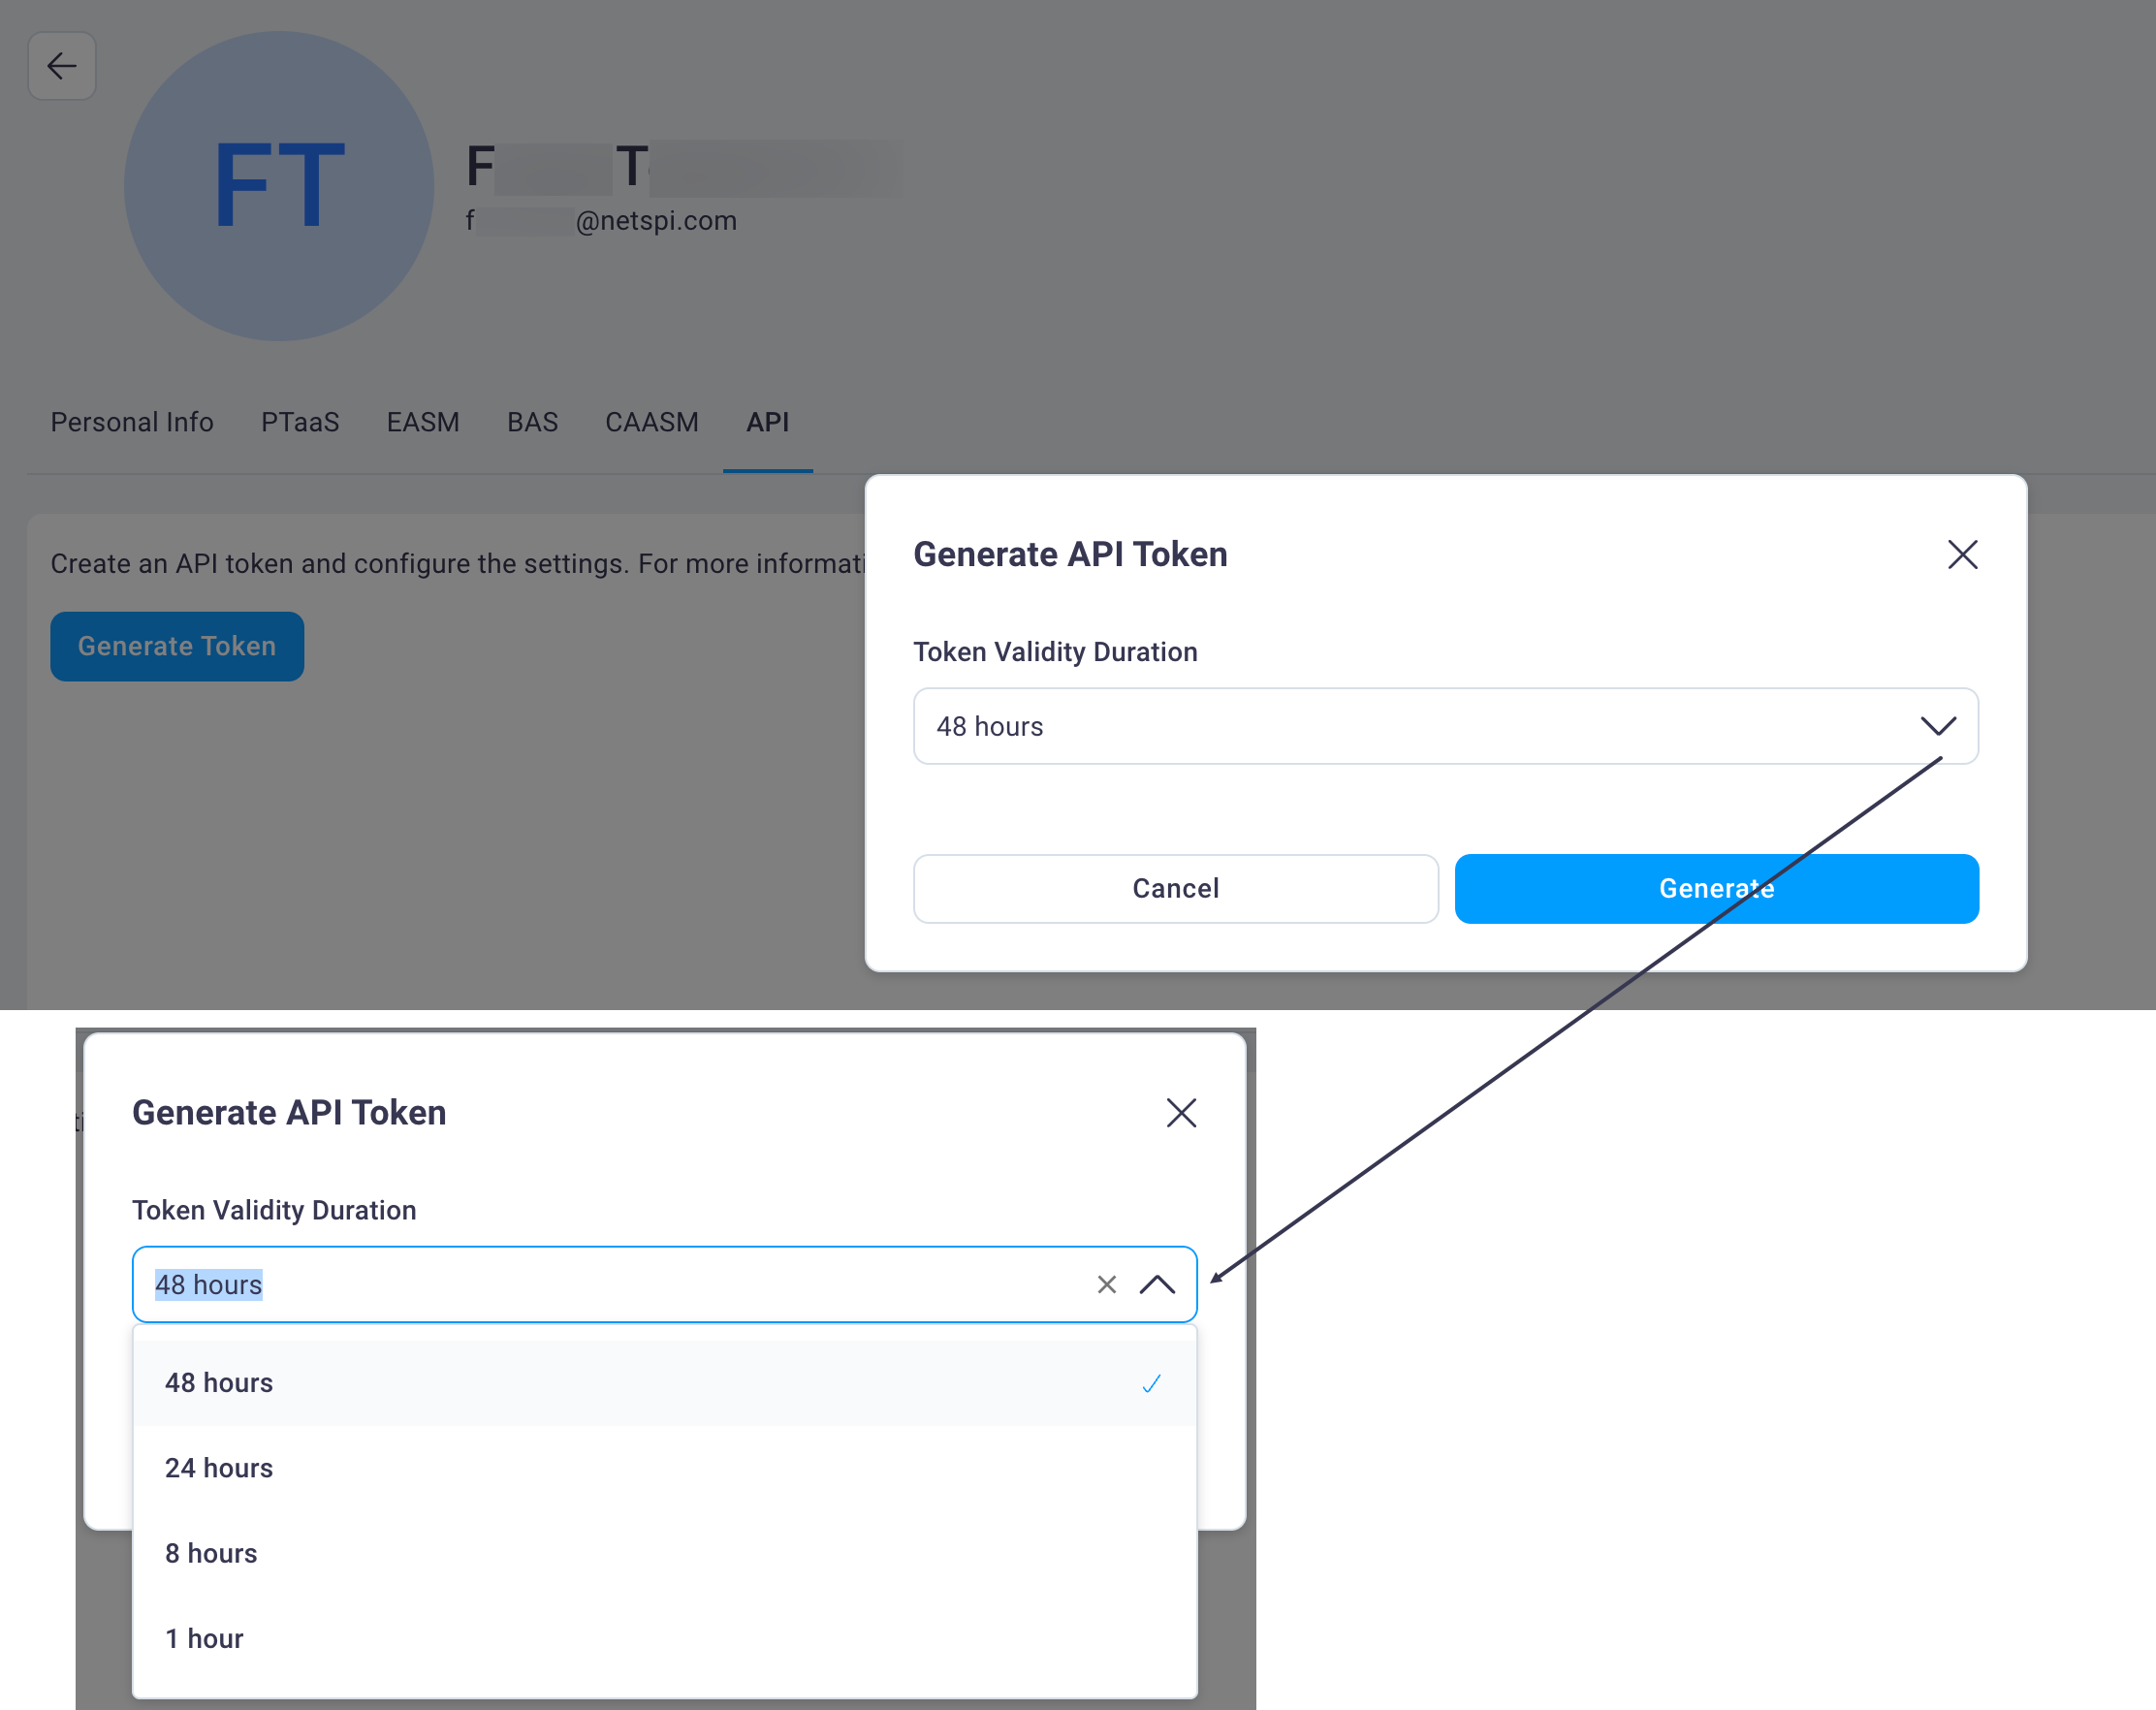
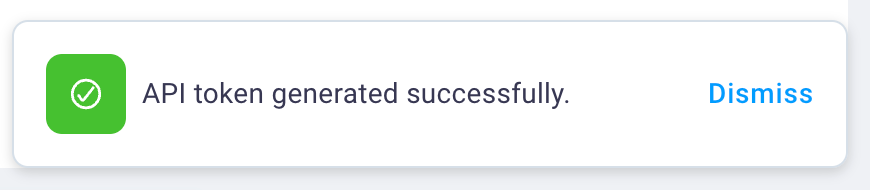
Select the Token Validity Duration from the drop-down list and then select Generate to generate the token.
If the user already had an API token, a message displays announcing this, and you have the option to rotate the API token on their behalf.

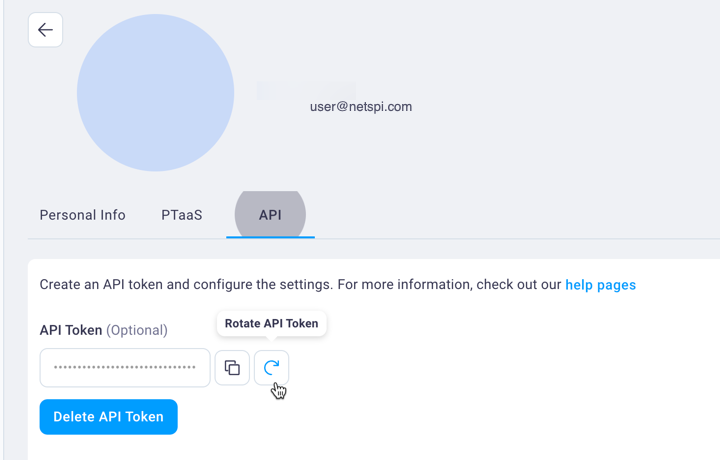
The user's profile page will display that API token on the API tab where they can copy it, delete it, or rotate it.
API documentation is located here: https://platform.netspi.ai/ and is also available from the help pages link on the API tab.
Please allow a small amount of time for the API documentation pages to display.
Rate limiting allows 10 API requests per minute.
#
Add/edit module permissions for your users
If you have Client Admin permissions, you can configure your users' access to the NetSPI Platform modules to which you have subscribed.
Select the Settings icon
to display the Settings page.Then select the User Management card to display the Users page.
From the Users page, select any user row to display that user's information and select the tab for the module that you want to configure user permissions for: PTaaS, EASM, or BAS.
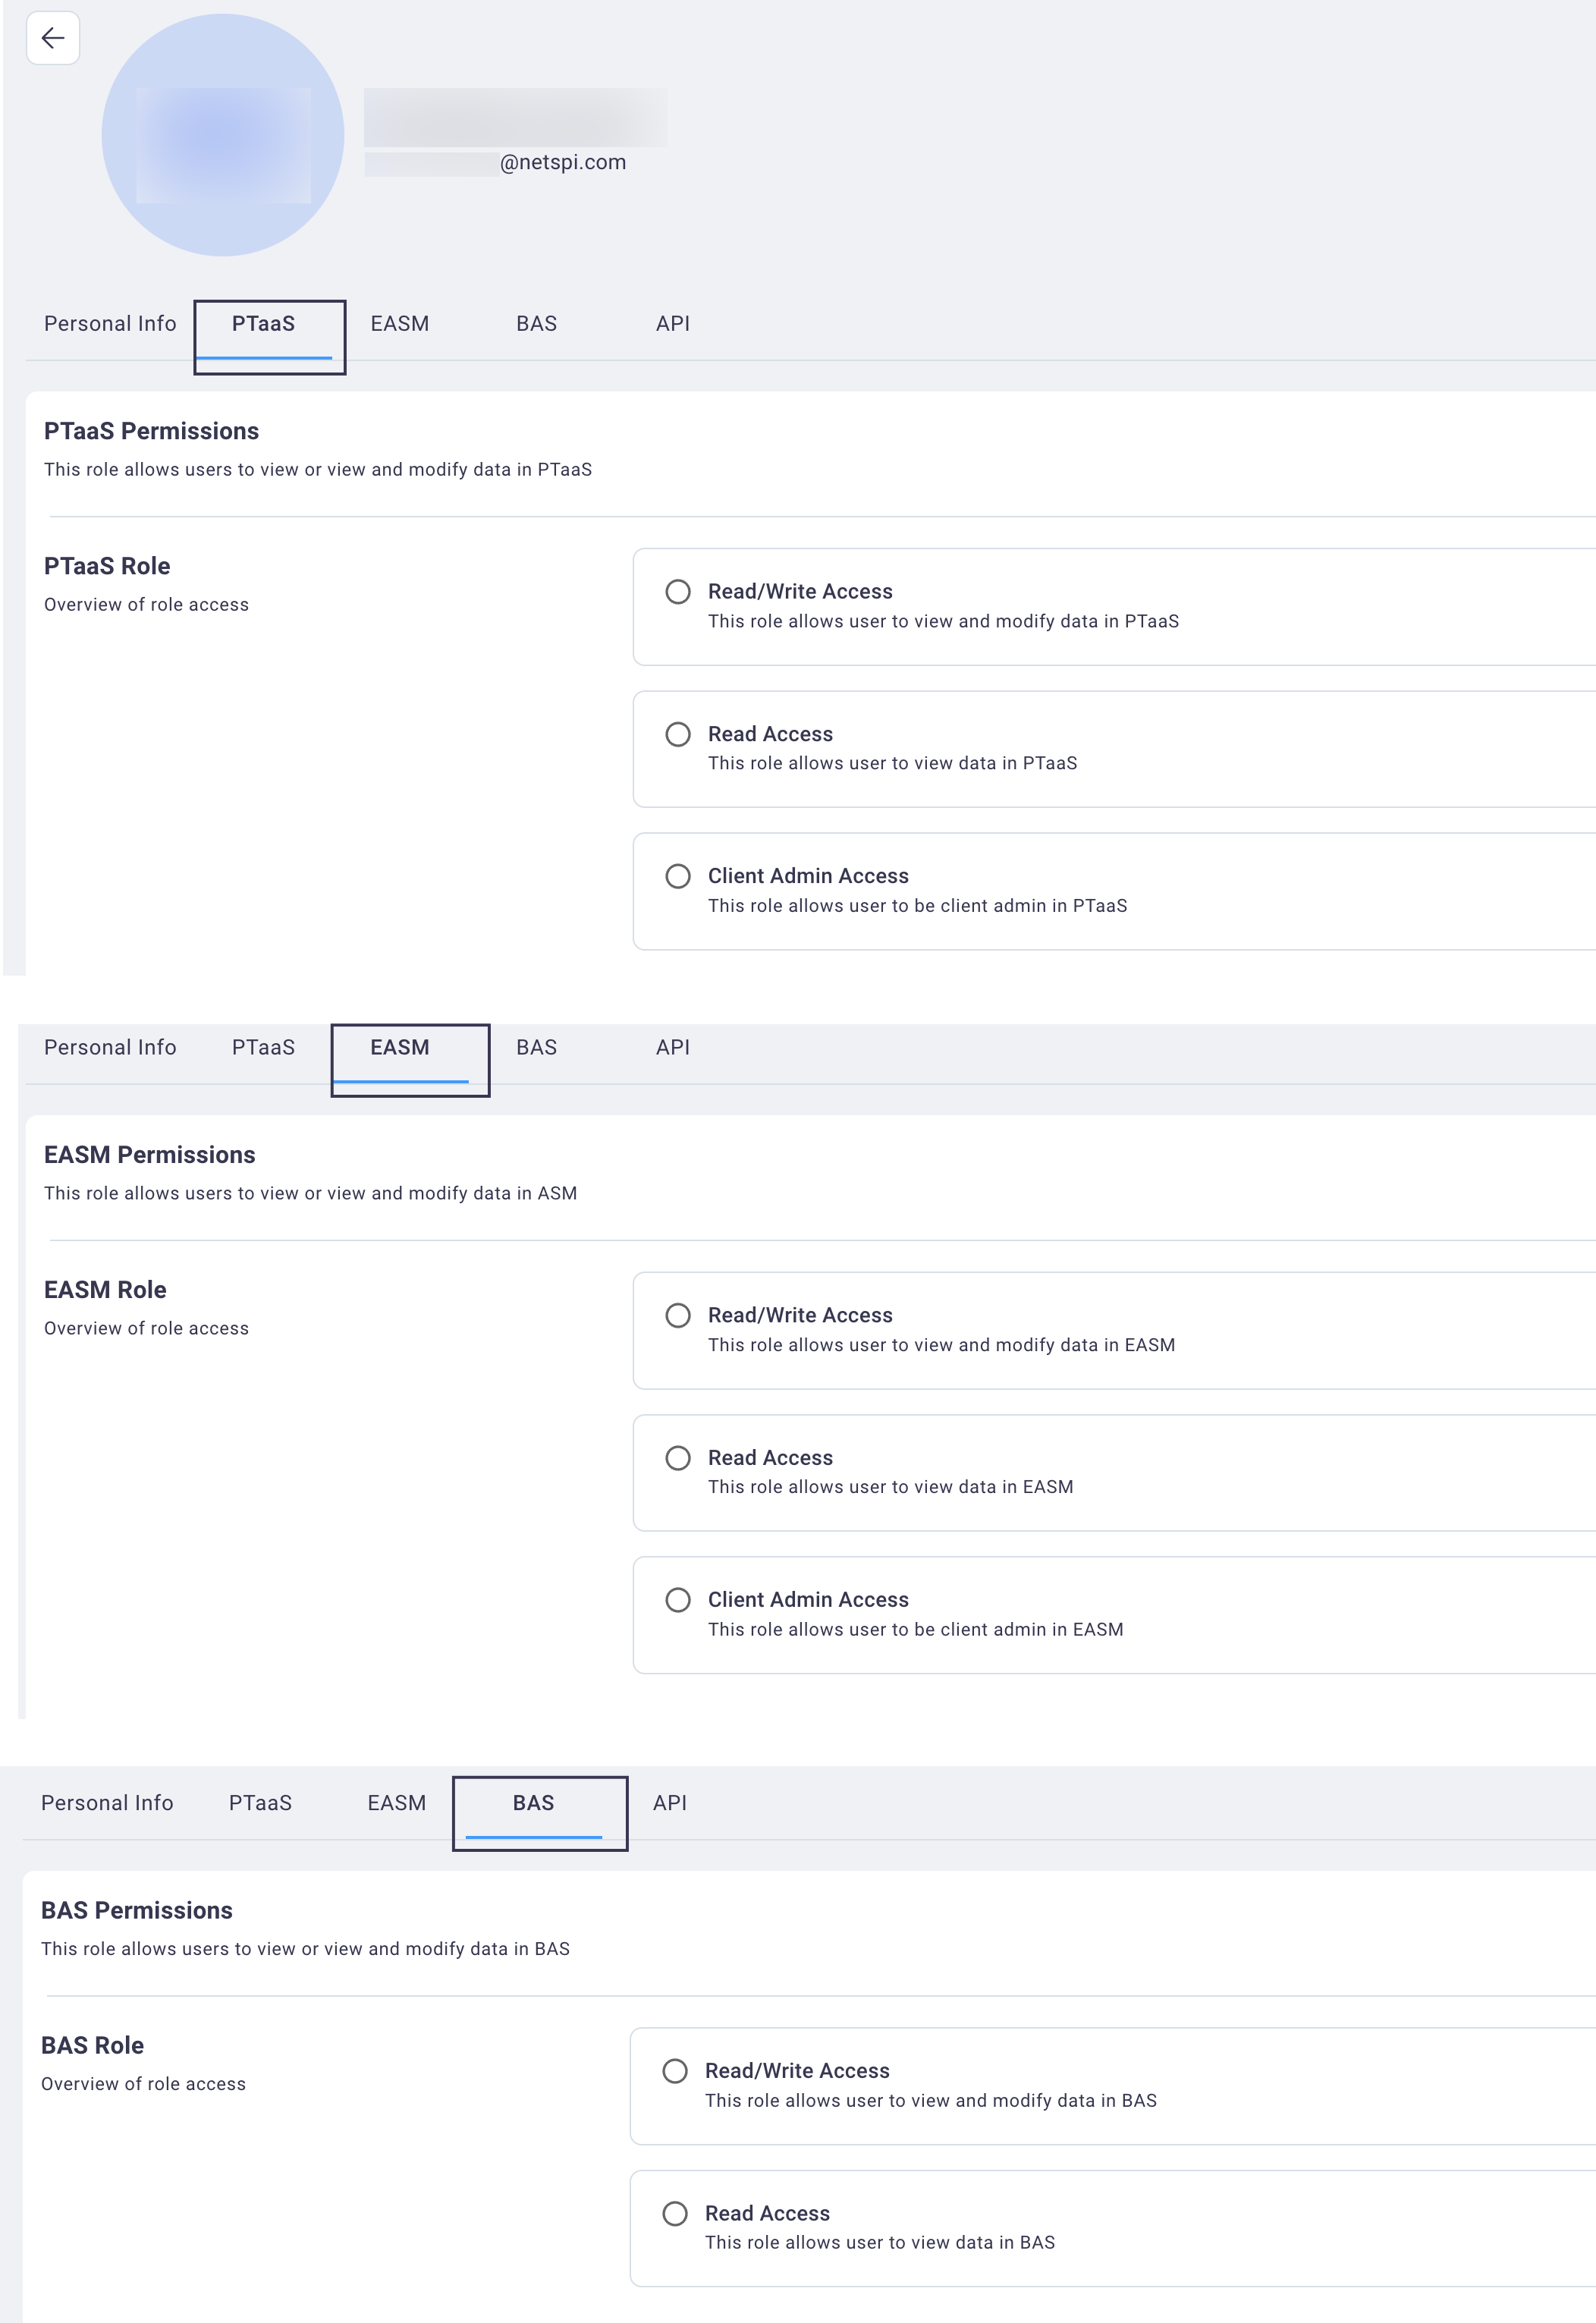
You can select different permissions for the user for the different modules to which you've subscribed.

Select Save after making your changes to have them take effect immediately.