
Engagement Details Page
The NetSPI Platform is designed to make your penetration testing engagement clear, collaborative, and easy to track—from kickoff and requirements through vulnerabilities, remediation, and final reporting. If you have any questions along the way, use the Comments tab to reach NetSPI or your Client Delivery Manager directly.
Click on any engagement card to open the engagement details page. Here you can review the engagement status, view communications between your team and NetSPI, confirm key dates, and access recently uploaded documents and reports.
On the Engagements > Details page, you can easily see where the engagement is in the flow based on the state.

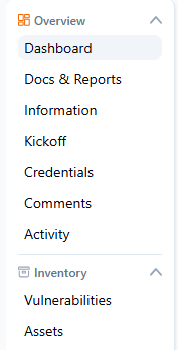
A side menu is available to quickly access key areas pertinent to the engagement.
Engagement details pages
Dashboard
The dashboard serves as your engagement landing page, accessed from the Engagements card view.
It surfaces the most critical and most frequently used features, giving you a complete picture of your engagement at a glance.
- Progress is shown at the top, so you can track where your engagement stands.
- What's Happening provides relevant updates on your engagement's status and flags any action required on your part.
- Vulnerabilities by Severity break down your vulnerabilities by severity level.
The Vulnerabilities by Severity section is hidden until vulnerabilities are discovered during the engagement.
- Comments and Activity is where you communicate with the NetSPI team and track activity throughout the engagement.
- Overview contains all relevant dates, labels, team members, and scope.
- Documents & Reports gives you a quick view of your four most recent files, with the option to upload a document directly from the dashboard for easy access.
Docs & Reports
This is where all engagement related materials can be uploaded and accessed. The section surfaces all files uploaded by both your team and the NetSPI team, and any report deliverables associated with the engagement will appear in the Reports section, provided by NetSPI. Select Upload Document to securely share files with NetSPI.
Any standard file type is supported (.doc, .docx, .pdf, .txt, image files), with a 200 MB size limit per file.
Use the Select feature to bulk export (download) or delete multiple documents and reports at once. Individual entries can also be edited, deleted, or downloaded on their own.
To edit a previously uploaded document:
- Select the previously uploaded document to edit and click the Edit icon.
- Enter your document updates in the editor, including any special font style or text effects.
- Click the Save icon.
Information
Information contains key details, dates, and scope for the engagement, as well as people connected to the team.
Kickoff
Before testing begins, the NetSPI team will schedule a Kickoff call to review the Kickoff documentation with you and your team. This page outlines key information such as project scope, rules of engagement, project timeline, and requirements needed to keep the engagement on schedule. You'll also find your action items here, detailing each deliverable and its due date to ensure your engagement starts on time.
Credentials
Provide credentials to NetSPI in a safe and secure manner using the Credentials page. Any credentials needed for testing, such as application logins, can be added here and are encrypted to keep your information protected throughout the engagement.
Activity
The Activity page shows all activities related to your engagement. You can select and export activity at any time and use search and filters just as you would on other pages.
Vulnerabilities
The Vulnerabilities page shows all vulnerabilities discovered specifically within this engagement. You can view them in two ways: Tree or Table.
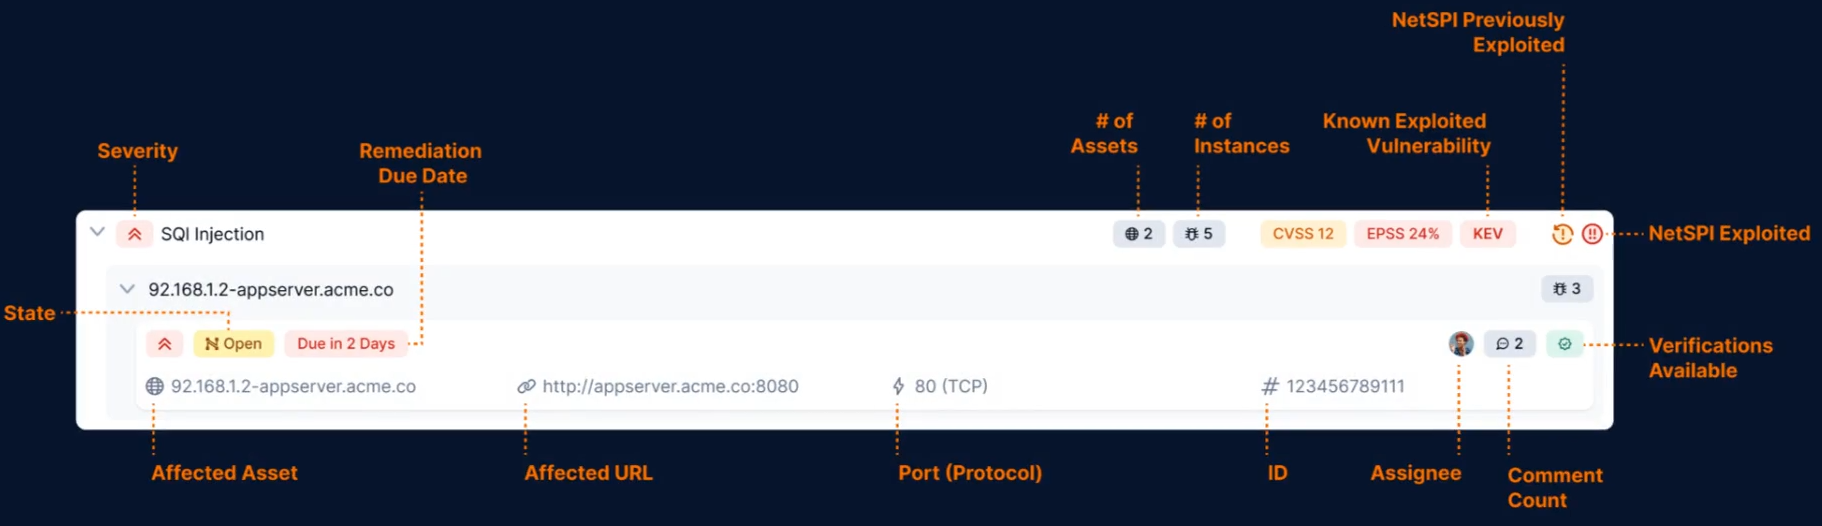
The Tree view groups vulnerabilities by Severity, Vulnerability, Asset, and Instance by default, giving you at a glance context to help prioritize where to investigate. Each level surfaces key details, such as CVSS, EPSS, and Known Exploited Vulnerability status at the Vulnerability level, and severity, state, remediation due date, and assignee at the Instance level.
If the default layout doesn't fit your workflow, select the Settings icon to reorder or hide levels, customize sorting, and group by a different category. Select Reset Configuration to return to the original layout at any time.
Selecting an individual instance opens a side panel with a full overview of the issue, including affected assets, URLs, and ports, along with verification steps and evidence to help your team reproduce, remediate, and confirm fixes. You can also assign a client severity, update the state, and explore supporting tabs like Details, Classifications, Discovery, CVEs, Comments, and Activity.
Use Select to export vulnerabilities to CSV or JSON, or to perform bulk actions like updating state or adding tags. In Table view, use the Settings button to customize which columns are displayed.
Assets
The Assets tab shows all assets discovered during your engagement. Select any row to open the side panel and view more details about that asset.
As with other pages, you can search, filter, and use Select to export assets or perform bulk actions.
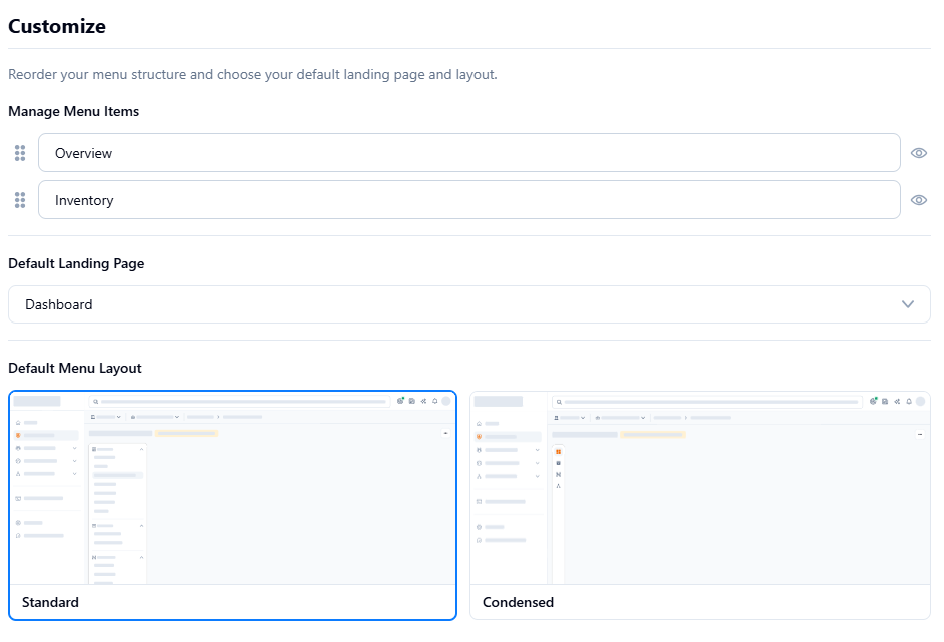
Customize the menu
You can reorder the menu structure and choose your default landing page and layout.
At the bottom of the Menu section, click Customize.
As you select a different configuration, the page automatically updates and saves.
- The Default Landing Page is highlighted with a blue checkmark.
- Hover and drag a Menu Item to change the listing order.
- Click the View icon to either display or hide the menu item.